| Oracle® Database Express Edition 2 Day Plus .NET Developer Guide 10g Release 2 (10.2) Part Number B25312-01 |
|
|
View PDF |
| Oracle® Database Express Edition 2 Day Plus .NET Developer Guide 10g Release 2 (10.2) Part Number B25312-01 |
|
|
View PDF |
This chapter explains how to use Oracle Data Provider for .NET.
This chapter contains the following sections:
For this chapter, you need to use the application developed in Chapter 3, "Connecting to the Database". Follow these steps to copy the project to a new directory.
Complete all steps in Chapter 3, "Connecting to the Database".
Using the Windows Explorer, navigate to the directory C:\HR\Visual Studio Projects. Make a copy of the entire folder HR_Connect_CS (HR_Connect_VB for Visual Basic), and rename the new folder HR_ODP_CS (HR_ODP_VB for Visual Basic).
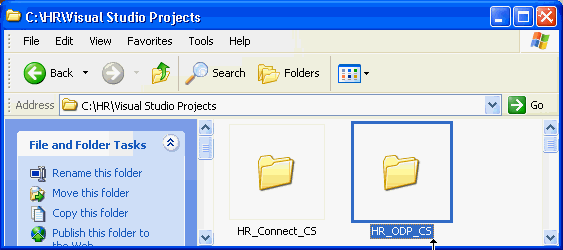
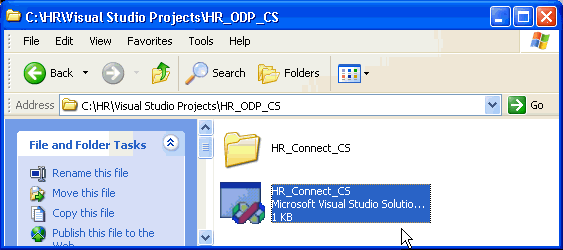
Open the folder HR_ODP_CS. Launch the solution HR_Connect_CS by double clicking on that icon.
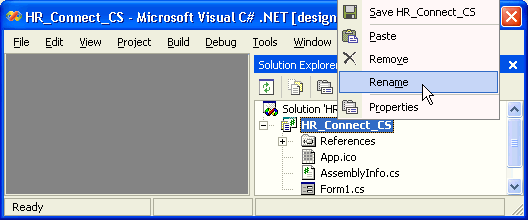
In the Solution Explorer, right-click HR_Connect_CS(HR_Connect_VB for Visual Basic), and select Rename. Change the name to HR_ODP_CS(HR_ODP_VB for Visual Basic).
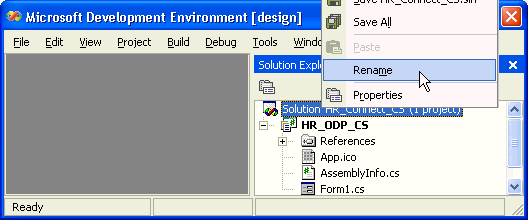
In the Solution Explorer, right-click Solution 'HR_Connect_CS' (Solution 'HR_Connect_VB' for Visual Basic), and select Rename. Change the name to HR_ODP_CS (HR_ODP_VB for Visual Basic).
Close the window. When prompted whether you want to save changes, click Yes.
The OracleCommand class specifies a SQL command, stored procedure, or table name. It creates a database request, sends the request to the database, and returns the result.
Create a string that represents the SQL query, as shown in Example 4-1 and Example 4-2. Add this code to the body of the try statement.
Example 4-1 Creating a SQL Statement String: C#
string sql = "select department_name from departments where department_id = 10";
Example 4-2 Creating a SQL Statement String: VB
Dim sql As String = "select department_name from departments where department_id = 10"
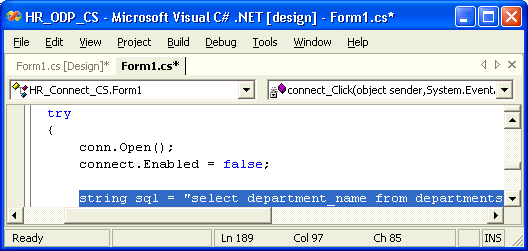
Use the new sql variable to create the OracleCommand object, and set the its CommandType property to run a text command.
Example 4-3 Using a Command to Query the Database: C#
OracleCommand cmd = new OracleCommand(sql, conn);
cmd.CommandType = CommandType.Text;
Example 4-4 Using a Command to Query the Database: VB
Dim cmd As New OracleCommand(sql, conn)
cmd.CommandType = CommandType.Text
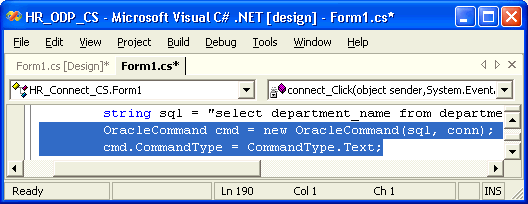
To retrieve data from the database, follow these steps:
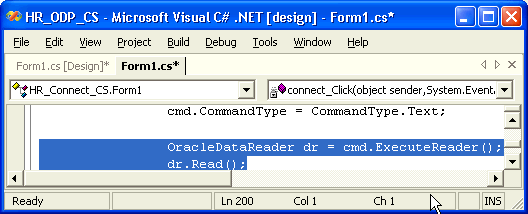
Run the statement using the ExecuteReader() method of the OracleCommand to return an OracleDataReader object, as shown in Example 4-5 and Example 4-6.
Example 4-6 Starting the OracleDataReader: VB
Dim dr As OracleDataReader = cmd.ExecuteReader()
dr.Read()
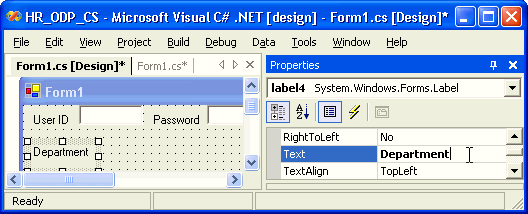
From the Toolbox, under Window forms, select a Label and drag it onto Form1.
In the Properties window, change its Text to Department.
From the Toolbox, under Window forms, select a ListBox and drag it onto Form 1.
In the Properties window, under Design, change the (Name) to departments.
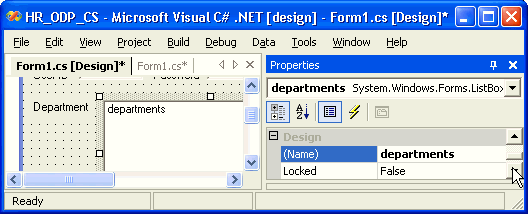
Example 4-7 and Example 4-8 show accessor type methods for retrieving data from the query result. There are typed accessors for returning .NET native data types, and others for returning native Oracle data types. Zero-based ordinals are passed to the accessors to specify which table column should be returned.
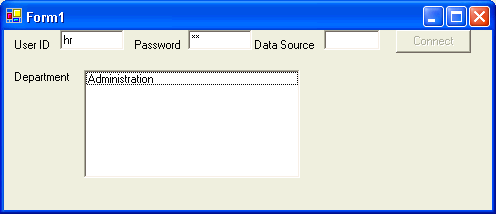
Run the application. After you connect, the departments list box shows Administration, which is the correct name for department number 10.
Bind variables are essentially placeholders in a SQL statement. When a database receives a SQL statement, it checks if the statement has already been executed and stored in memory. If the statement exists in memory, Oracle Database can reuse it and skip the task of parsing and optimizing the statement. When using bind variables, you make the statement reusable with different input values, improve query performance in the server, eliminate the need for special handling of literal quotation marks in the input, and protect against SQL injection attacks.
Example 4-9 shows a typical SELECT statement that does not use bind variables, with the value 10 specified in the WHERE clause of the statement.
Example 4-10 replaces the numerical value with a bind variable :department_id. The bind variable identifier always begins with a single colon, :, in SQL statements.
Use the OracleParameter class to represent each bind variable in your .NET code. The OracleParameterCollection class contains the OracleParameter objects associated with the OracleCommand object for each statement. The OracleCommand class passes your SQL statement to the database and returns the results to your application.
You can bind variables by position or by name. The OracleCommand property BindByName (which defaults to false) sets the mode.
When binding by position, you must use the Add() method to add the parameters to the OracleParameterCollection in the same order as they appear in the SQL statement or stored procedure.
If you want to bind by name, you may add the parameters to the collection in any order; however, you must set the ParameterName property for the parameter object to the same name as the bind variable identifier in the stored procedure declaration.
In addition to the binding mode (by position or by name), the following properties are typically set for each parameter object: Direction, OracleDbType, Size, and Value.
Direction Bind variables may be used as output, input, or input/output parameters. The Direction property indicates the direction of each parameter. The default value of the Direction property is Input.
OracleDbType property indicates whether the parameter is a number, a date, a VARCHAR2, and so on.
Size indicates the maximum size of the data that the parameter will hold for parameters with a variable length data type, like VARCHAR2.
Value contains the parameter value either before statement execution (for input parameters), after execution (for output parameters), or both before and after (for input/output parameters).
Example 4-11 and Example 4-12 tie together these concepts and use a bind variable in a SELECT statement. Note that Direction property uses the default value Input, and the Size property is not set. Since the object is an input parameter, you don't need to set the Size property because the data provider can determine the size from the value. The changed code is in bold typeface.
Example 4-11 Using a Bind Variable: C#
string sql = "select department_name from departments where department_id = " +
  ":department_id";
OracleCommand cmd = new OracleCommand(sql, conn);
cmd.CommandType = CommandType.Text;
OracleParameter p_department_id = new OracleParameter();
p_department_id.OracleDbType = OracleDbType.Decimal;
p_department_id.Value = 20;
cmd.Parameters.Add(p_department_id);

OracleDataReader dr = cmd.ExecuteReader();
dr.Read();

departments.Items.Add(dr.GetString(0));
Example 4-12 Using a Bind Variable: VB
string sql = "select department_name from departments where department_id=" + _ &
  ":department_id"
Dim cmd As OracleCommand = New OracleCommand(sql, conn)
cmd.CommandType = CommandType.Text
Dim p_department_id as OracleParameter = new OracleParameter()
p_department_id.OracleDbType = OracleDbType.Decimal
p_department_id.Value = 20
cmd.Parameters.Add(p_department_id)

Dim dr As OracleDataReader = cmd.ExecuteReader()
dr.Read()

departments.Items.Add(dr.GetString(0))
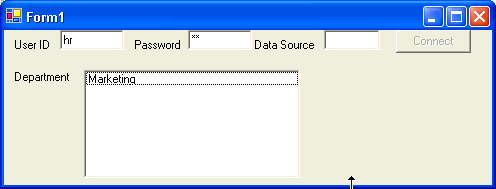
Run the application. After you connect, the departments list box shows Marketing, which is the correct name for department number 20.
Note that bind variables can also be used with UPDATE, INSERT, and DELETE statements, and also with stored procedures. Example 4-13 shows how to use bind variables in an UPDATE statement; "Inserting, Deleting and Updating Data" provides more details.
A DataReader object can retrieve values for multiple columns and multiple rows. Consider a multiple column, multiple row query in Example 4-14:
A looping construct is needed to process multiple rows from the DataReader object. Also, a control that can display multiple rows is very useful. Because OracleDataReader is a forward-only, read-only cursor, it cannot be bound to an updatable or backward scrollable control such as Windows Forms DataGrid control. A DataReader is, however, compatible with a ListBox control, as shown in Example 4-15 and Example 4-16. The original code is from earlier examples in this chapter, and the changed code is in bold typeface.
Example 4-15 Looping Through a Multi-Row Query Result: C#
string sql = "select department_name from departments where department_id < 100";
OracleCommand cmd = new OracleCommand(sql, conn);
cmd.CommandType = CommandType.Text;

OracleDataReader dr = cmd.ExecuteReader();

while (dr.Read())
{
  departments.Items.Add(dr.GetString(0));
}
Example 4-16 Looping Through a Multi-Row Query Result: VB
string sql = "select department_name from departments where department_id < 100"
Dim cmd As OracleCommand = New OracleCommand(sql, conn)
cmd.CommandType = CommandType.Text
Dim dr As OracleDataReader = cmd.ExecuteReader()

While (dr.Read())
  departments.Items.Add(dr.GetString(0))
End While
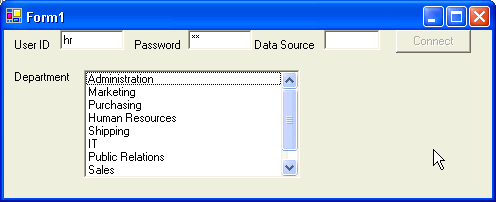
Run the application. After you connect, the departments list box shows Administration, Marketing, Purchasing, and so on, which is the correct list of department names where department number is less than 100.
The DataSet class encapsulates a memory-resident representation of data that provides a consistent relational programming model for multiple data sources. It consists of one or more tables that store relational or XML data. Unlike OracleDataReader, a DataSet is updatable and backward scrollable.
Follow the steps in section "Copying a Project" to create a new copy of the HR_Connect_CS project (HR_Connect_VB for Visual Basic). Name the new project HR_DataSet_ODP_CS (HR_DataSet_ODP_VB for Visual Basic).
From the Toolbox, under Windows Forms, select a Data Grid and drag it onto Form1.
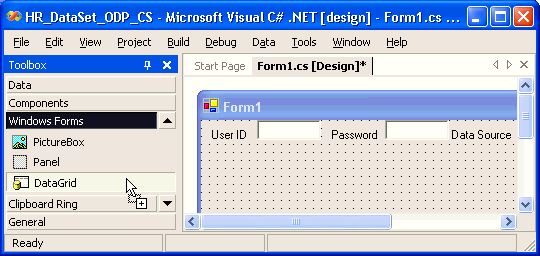
A data grid appears. Expand the data grid, and close the Toolbox.
Right-click the data grid graphical element, and select Properties. In the properties list, under Design, change (Name) to departments.
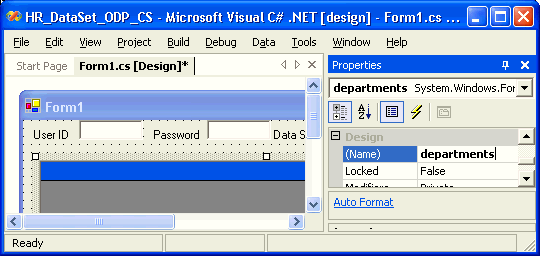
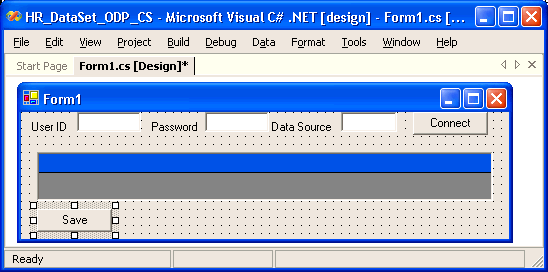
From the Toolbox, under Windows Forms, drag and drop a Button onto Form1.
In the Properties window, under Appearance, change Text to Save.
Under Design, change (Name) to save.
Click the lightning icon (events), and then click the highlighted Click event. From the drop-down window, select save_Click.
Close the Properties window. Switch to code view using the F7 keyboard shortcut.
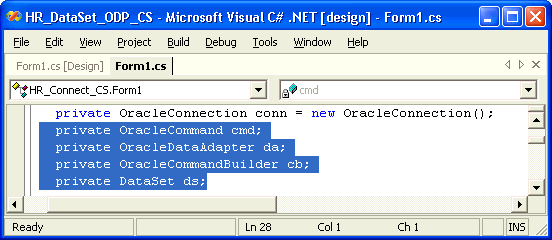
Add variable declarations in Example 4-17 and Example 4-18 to the class variables.
Example 4-17 Using DataSet Class: Declaring Variables: C#
private OracleCommand cmd;
private OracleDataAdapter da;
private OracleCommandBuilder cb;
private DataSet ds;
Example 4-18 Using DataSet Class: Declaring Variables: VB
Private cmd As OracleCommand
Private da As OracleDataAdapter
Private cb As OracleCommandBuilder
Private ds As DataSet
Within the Form() method, add the code shown in Example 4-19 and Example 4-20.
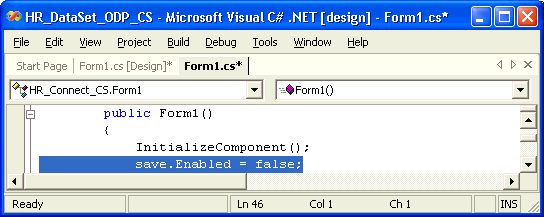
Within the connect_Click() method try block, as shown in Example 4-21 and Example 4-22,
query the database
enable the Save button
The changed code is in bold typeface.
Example 4-21 Binding Data to the Grid: C#
conn.Open();
connect.Enabled = false;

string sql = "select * from departments where department_id < 60";
cmd = new OracleCommand(sql, conn);
cmd.CommandType = CommandType.Text;

da = new OracleDataAdapter(cmd);
cb = new OracleCommandBuilder(da);
ds = new DataSet();

da.Fill(ds);

departments.DataSource = ds.Tables[0];

save.Enabled = true;
Example 4-22 Binding Data to the Grid: VB
conn.Open()
connect.Enabled = false

string sql = "select * from departments where department_id < 60"
cmd = new OracleCommand(sql, conn)
cmd.CommandType = CommandType.Text;

da = new OracleDataAdapter(cmd)
cb = new OracleCommandBuilder(da)
ds = new DataSet()

da.Fill(ds)

departments.DataSource = ds.Tables[0]

save.Enabled = true
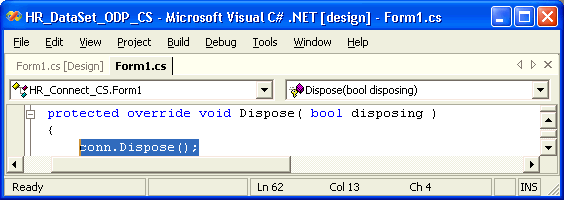
The finally block in the connect_Click() method contains code for disposing the connection, a conn.Dispose() call. Move this call to the top of the general Dispose() method. This is necessary to keep the connection open after the query result returns, so that data changes made by the end user are propagated to the database.
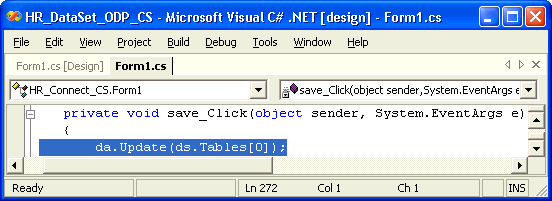
Your code also contains a new save_Click() method created in Step 9. Add there the code for updating the data, shown in Example 4-23 and Example 4-24.
Save Form1 using Ctr+S keyboard shortcut.
After you successfully connect to the database, the data grid is populated with the results of the query.
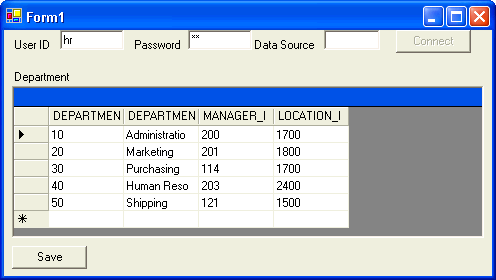
At the bottom of the data grid, enter a new record at the * prompt:
For DEPARTMENT_ID, enter 5
For DEPARTMENT_NAME, enter Community Outreach
Leave MANAGER_ID as null
For LOCATION_ID, enter 1700
Click the Save button.
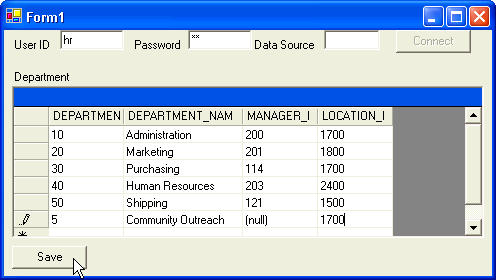
To check if the new record is saved, close the application, and start it again using the F5 keyboard shortcut.
Connect to the database, and note that the new department is now part of the DEPARTMENTS table.
Change the name of the department to Community Volunteers, and click the Save button.
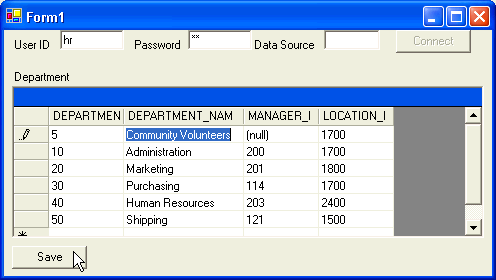
Repeat Step 2, connect to the database, and note that the name of the department is changed.
Select the entire record you just changed (click the cursor icon before it), and delete it using the Delete key. Click the Save button.
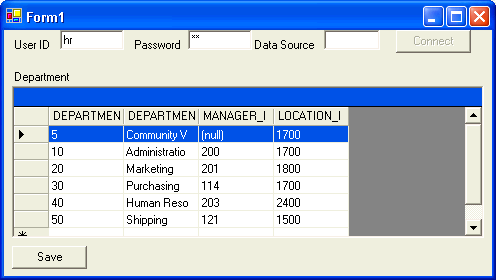
Repeat Step 2, connect to the database, and note that the name of the new record is no longer part of the DEPARTMENTS table.
Close the application.