D Setting Up SSH Connectivity
This appendix explains how you can set up SSH connectivity before installing Oracle Management Agent (Management Agent) on Microsoft Windows operating systems. In particular, this appendix covers the following:
Note:
This chapter is applicable only for the following cases:-
When the destination host on which you are installing a Management Agent is running on Microsoft Windows.
-
When the OMS host from where you are accessing the Agent Deployment Wizard is running on Microsoft Windows.
Overview
SSH (Secure Shell) Setup is the connectivity that is established between the host running Oracle Management Service (OMS) and the host where the Management Agent needs to be installed. This is primarily required for the Agent Deployment Wizard to install Management Agents over HTTP on remote hosts.
The Agent Deployment Wizard is an application that is part of the Enterprise Manager Grid Control console. It is used for deploying Management Agents in your environment using an interactive user interface. The installation of a Management Agent from the source host to the remote destination host happens using SSH protocol, and for this communication to happen over SSH, an SSH setup is required between the two hosts. This also helps to avoid SSH authentication calls during future Agent Deploy operations.
Caution:
The SSH Setup must always be set between the destination hosts and the OMS, and never among the destination hosts.In Enterprise Manager 11g Grid Control Release 1 (11.1.0.1.0), the Agent Deployment Wizard sets up and drops the SSH connectivity automatically, but if the Management Agent is going to be on a Microsoft Windows operating systems, then you need to manually install and configure Cygwin on that host.
Note:
The Agent Deployment Wizard is certified and supported with Cygwin 1.5.Setting Up SSH Server (SSHD) on Microsoft Windows
Before You Begin
Before starting with the SSHD setup, ensure you are not using OpenSSH and MKSNT when using the Agent Deploy application. To do so, perform the following checks:
-
Ensure
OpenSSH\binandmksntare not in your PATH environment variable. If they are, remove them by doing the following:-
Right-click on My Computer and go to Properties.
-
In the System Properties window that appears, click Advanced.
-
In this tab, click Environment Variables.
-
Here, search for the Path system variable, select it, and if the
OpenSSH\binandmksntare present in the PATH, click Edit. -
In the Edit System Variable dialog box that appears, delete these two values from the PATH, and click OK.
-
-
Stop the SSH Daemon if it is running from
OpenSSH,MKSor any other vendor. If the SSH Daemon is running, stop it by doing the following:-
Right-click on My Computer, and select Manage.
-
In the Computer Management window, in the left pane, expand Services and Applications, and select Services.
-
In the right-pane, right click the SSH Daemon/MKS Secure Shell service and click Stop.
-
Installing Cygwin
To install Cygwin and start the SSH daemon on Microsoft Windows hosts, follow these steps:
-
Download the setup-legacy.exe file corresponding to Cygwin 1.5 from the following Website, and install the Cygwin software in the
C:\cygwindirectory:If you go directly to
http://cygwin.comand download the setup.exe file, it will install Cygwin 1.7 which is not supported on this version.Note:
If you install Cygwin in a different directory than what has been previously mentioned, ensure you update the$OMS_INSTANCE_HOME/sysman/prov/resources/ssPaths_msplats.propertiesfile with the proper Cygwin binary values after installing Oracle Enterprise Manager Grid Control.Caution:
If you are installing Cygwin at a directory that is other thanC:\cygwinon a remote machine, you must also ensure that Cygwin is installed on the OMS machine at the exact same location.The Cygwin installation directory should not contain any spaces.
-
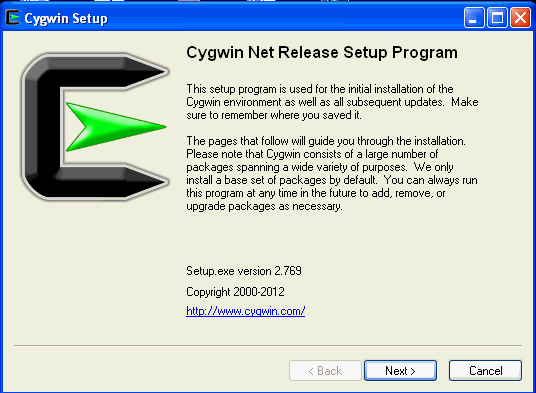
Invoke Cygwin setup, and click Next to proceed.
-
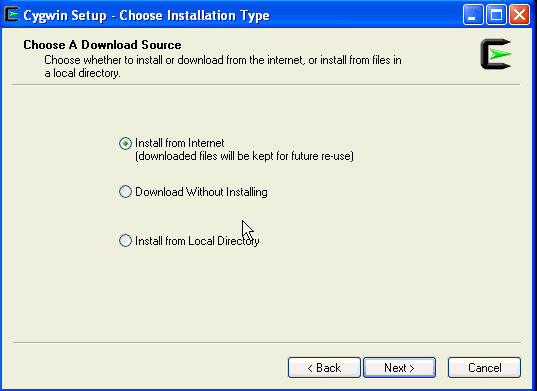
On the Choose Installation Type screen, select Install from Internet, and click Next.
-
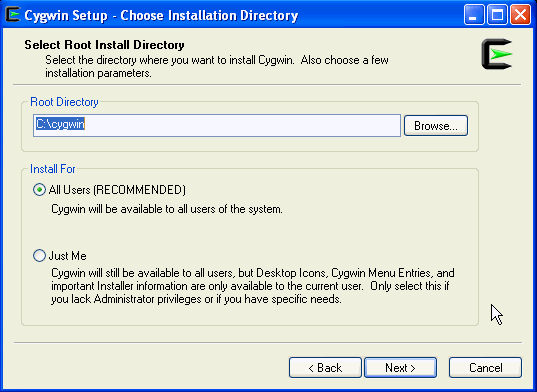
On the Choose Installation Directory screen, enter C:\cygwin as the Root Directory, and click Next.
-
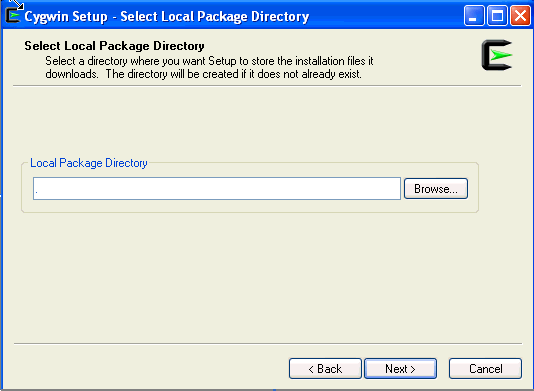
On the Select Local Package Directory screen, select a directory on your local machine where you want the Setup to store the installation files it downloads, and click Next.
-
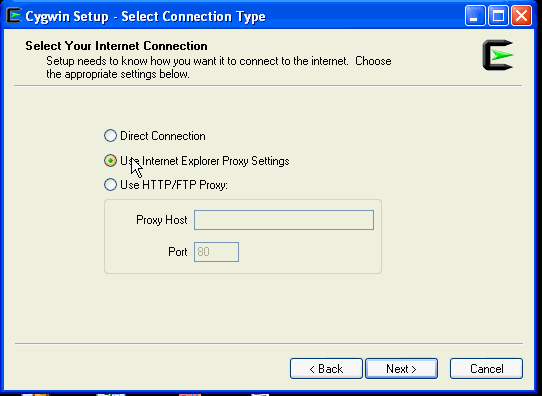
On the Select Connection Type screen, select appropriate settings to connect to the internet, and click Next.
-
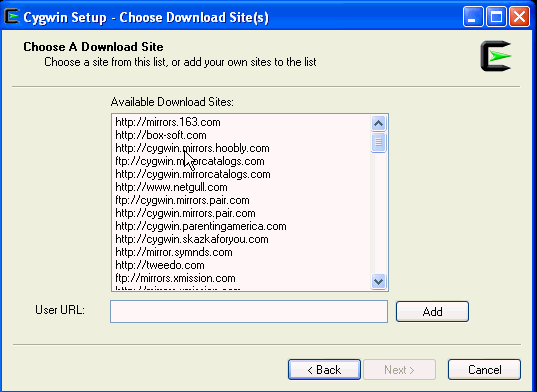
On the Choose Download Site(s) screen, select any site from the available list, and click Next.
-
On the select packages screen, ensure that you select the following packages, and click Next:
From the Archive category, select
unzipandzipas follows:
From the Net category, select
opensshas follows:
After selecting the packages, a Resolving Dependencies screen is displayed. Click Next to proceed.
-
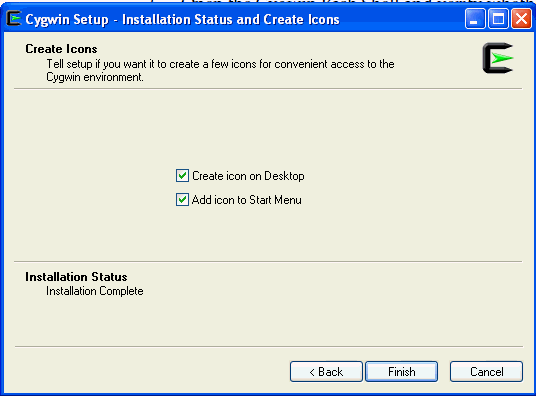
On the Installation Status and Create Icons screen, do not make any changes. Click Finish to complete the installation process.
-
-
After you install Cygwin, navigate to the
C:\cygwindirectory, open theCygwin.batfile in edit mode, and add the following line before invoking the bash shell.set CYGWIN=binmode tty ntsec -
To verify if Cygwin (
cygrunsrv)is installed properly, runC:\cygwin\Cygwin.bat, and execute the following command:cygrunsrv -h
If Cygwin is installed properly, then all the Cygwin help options are displayed on the screen. However, if this returns an error message, then it means you are not on the right track, and might have to reinstall Cygwin.
Note:
If you are prompted to provide a Cygwin value, enterbinmode tty ntsec. If this returns an error message stating "service does not exist", you are on the right track, and can proceed to the next step. -
To install SSHD service, run
C:\cygwin\Cygwin.bat, and execute the following command:ssh-host-config
Note:
Enter "no" when prompted to create sshd user account (message reads "sshd user account needs to be created").Enter "yes" at all other prompts.
When prompted to answer the question "Which value should the environment variable
CYGWINhave when sshd starts?", Oracle recommends that you set the value to at least "ntsec" as shown in the following example. This will enable you to change the user context without having to specify the password.As an answer to the previously mentioned question, specify a value that is similar to the following and press Enter:
CYGWIN="binmode tty ntsec"
-
Backup the
/etc/passwdfile and then use a vim or vi editor to open it in edit mode. Remove only those entries of the user that you will use to connect to the destination host on which you want to install the Management Agent. Ask the user to make a backup of the/etc/passwdfile before editing.-
If the user that you are employing to connect to the destination host on which you want to install the Management Agent is a local user, run
C:\cygwin\Cygwin.batand execute the following:/bin/mkpasswd -l –u <USER> >> /etc/passwd
-
If the user you are employing to connect to the destination host on which you want to install the Management Agent running is a domain user, run
C:\cygwin\Cygwin.batand execute the following:/bin/mkpasswd -d -u <USER> >> /etc/passwd /bin/mkgroup -d >> /etc/group mkdir -p /home/<USER> (for example, mkdir -p /home/pjohn) chown <USER> /home/<USER> (for example, chown pjohn /home/pjohn)
-
-
(domain user only) If the user you are employing to connect to the destination host on which you want to install the Management Agent is a domain user, do the following to start the SSH daemon:
-
Right-click on My Computer, and select Manage.
-
In the Computer Management dialog box that appears, go to Services and Applications, and select CYGWIN sshd.
-
Right-click CYGWIN sshd and select Properties.
-
In the Properties dialog box, go to the Log On tab.
-
Here, specify the domain/username and password. Click Apply.
-
Run
C:\cygwin\Cygwin.bat, and execute the following:chown <USERNAME> /var/log/sshd.log chown -R <USERNAME> /var/empty chown <USERNAME> /etc/ssh* chmod 755 /var/empty chmod 644 /var/log/sshd.log
Note:
If/var/log/sshd.logdoes not exist, you do not have to execute the following commands:chown <USERNAME> /var/log/sshd.log chmod 644 /var/log/sshd.log
-
-
Perform one of the following steps to start the SSH daemon:
Run
C:/cygwin/Cygwin.batand execute the following command:/usr/sbin/sshdOR
Run
C:/cygwin/Cygwin.batand execute the following command:cygrunsrv -S sshdNote:
Usecygrunsrv -E sshdto stop the SSH daemon. -
You can now test your
cygwinsetup.To do this, go to a different machine (that has the
sshclient running), and execute the following command:ssh -l <USERNAME> <localhost> 'date' OR ssh -l <USERNAME> <this node> 'date'
For example,
ssh -l pjohn egal07.db.funds.com 'date'
This command will prompt you to specify the password. When you specify the correct password, the command should return the accurate date.
Setting Up SSH on Microsoft Windows Using sshUserSetupNT.sh
Note:
Before executing thesshUserSetupNT.sh script, execute the following commands to ensure the home directory has been correctly set:
-
Execute
echo $HOMEEnsure this displays the home directory of the current user.
-
If it points to the home directory of another user, execute the following command:
export HOME=<Windows style absolute path of homedir>
-
Now, execute
echo$HOMEagain, to verify the home directory. The$HOMEvalue must be the same as that passed to-homeDir
This is the script that should be executed to set up SSH on Microsoft Windows operating systems. The usage of the script is as follows:
./sshUserSetupNT.sh -user -asUser -asUserGrp -sshLocalDir -homeDir -hosts -hostfile
Note:
After theSSHUserSetupNT.sh script has been executed, you must verify the successful SSH user setup on all the hosts, individually.
That is, if you have run the script to set up SSH on two hosts (host1, and host2), you must run the following command on each host to verify successful SSH setup:
ssh -l <username> host1 'date'

and then run:

ssh -l <username> host2 'date'
Caution:
You must execute thesshUserSetupNT.sh script on the local OMS machine from within the cygwin (BASH) shell only. The script will fail to execute if done from outside this location.All the previously mentioned options are mandatory, and should be passed while executing the script.
Note:
It is assumed thatC:\cygwin is the default installation directory for the Cygwin binaries.
If you install cygwin at a location other than c:\cygwin (default location), it can cause the SSH setup to fail, and in turn, the agent installation will fail.
To work around this issue, you must either install cygwin in the default directory (c:\cygwin), or update the ssPaths_msplats.properties file with the correct path to the cygwin binaries. The ssPaths_msplats.properties is available in <OMS_INSTANCE_HOME>/sysman/prov/resources/.
This script is used on Microsoft Windows operating systems to set up SSH from the host on which it is run to the specified remote hosts. After this script is run, you can use SSH to execute commands on the remote hosts, or copy files between the local host and the remote hosts without being prompted for passwords or confirmations.
The list of remote hosts and their user names are specified as command-line parameters to the script.
-
-asUserThis is the user of the local machine on which the setup must be performed. For example, SYSTEM.
-
-asuserGrpThis is the group to which the specified
asUserbelongs. -
-sshLocalDirThis is the full path to the directory where the keys should be generated for the
asUseron the local machine. -
-homeDirThis is the full path to the home directory of the current user.
If the
/homekey (inregedit) is seen as a subkey under the Cygnus Solutions key, then the value of the/homekey must have/<username>as a suffix and then be used as-homeDirm value.If the
/homekey is not found, go to the Cygwin BASH prompt and check the value of$HOME. You can now use the same value of$HOMEas the value for-homeDir.If
$HOMEdoes not have any value (is empty), then you must update the/etc/passwdfile.Identifying the Correct Entry in the /etc/passwd File
If the
/etc/passwdfile has only one entry for the user, you can simply modify that value. In the event that there are multiple entries in this file, you must first identify the correct entry and then modify it.To identify the correct entry:
-
Execute the following command if you have specified a local user during SSH setup:
/bin/mkpasswd -l -u <username>
-
Execute the following command if you have specified a domain user during SSH setup:
/bin/mkpasswd -d -u <username>
Now, match the output with the corresponding entry in the
/etc/passwdfile. This is the entry that you must modify.Updating the -homeDir value
All values for all users are listed as colon (:) separated entries (or fields). To update the user entry that you have identified previously, go to the penultimate value (or field) of that user entry, and modify the value of the home directory for that user.
Always specify the absolute path needed by Cygwin as value for the home directory. For example, if the path is
C:\Documents and Settings\pjohn, modify it to:/cygdrive/c/Documents and Settings/pjohn
Or, if the path reads
C:\cygwin\pjohn, modify this to:/cygdrive/c/cygwin/pjohn
Now, save the password file and reenter the BASH shell.
-
Note:
If you have used spaces in the$HOME value (for example, /cygdrive/c/Documents and Settings/pjohn), specify the $HOME value in Microsoft Windows style and within double quotation marks (for example, "C:\ Documents and Settings\pjohn").Note:
Specify the full path within double quotation marks (" ").Caution:
You must execute thesshUserSetupNT.sh script on the local OMS machine from within the cygwin (BASH) shell only. The script will fail to execute if done from outside this location.Setting Up the Timezone Variable on Remote Hosts
This section lists the steps you must follow to set up the timezone environment variable on remote hosts.
To verify if the timezone environment variable (TZ) is accessible by the SSH server on the remote hosts, execute the following command from the OMS host:
ssh -l <user_name> -n <remote_node> 'echo $TZ'
If this command does not return the TZ environment variable value, you must set the TZ variable and ensure this is accessible by the SSH server. You can set the TZ environment variable on remote hosts in the following sections:
Set the TZ variable and Restart the SSH Daemon
If the shell being used is BASH, add the following line to the .bashrc file in the home directory of the user (being used) for ssh access:
export TZ=<your machine's timezone>
If you are using a CSH shell, then add the following line to the .cshrc file in that directory:
setenv TZ <your machine's timezone>
-
Depending on the shell that is present on the host, set the TZ variable by executing the following command:
For a CSH Shell, specify:
setenv TZ PST8PDT
-
Restart the SSH daemon by executing:
sudo /etc/init.d/sshd restart
-
Now, execute the following command from the OMS home to verify if the SSH server can access the TZ variable.
ssh -l <user_name> -n <node_name> 'echo $TZ'
Set the TZ Variable in the "Shell rc" File
The timezone variable must be set in the rc file of the shell that the host is using.
For example, if the host is using a BASH shell, go to the user's home directory ($HOME) and add the following to the ~/.bashrc file to set the TZ variable:
TZ=PST8PDT; export TZ
If the host is using a CSH shell, go to $HOME and add the following to the ~/.cshrc file:
setenv TZ PST8PDT
Now, execute the following command from the OMS home to verify if the SSH server can access the TZ variable.
ssh -l <user_name> -n <node_name> 'echo $TZ'