| Bookshelf Home | Contents | Index | Search | PDF | |
Siebel Analytics Server Administration Guide > Creating and Administering the Business Model and Mapping Layer in a Repository > Process of Creating and Administering Dimensions >
Creating Dimension Levels and Keys
A dimension contains two or more levels. The recommended sequence for creating levels is to create a grand total level and then create child levels, working down the to the lowest level. The following are the parts of a dimension:
- Grand total level. A special level representing the grand total for a dimension. Each dimension can have just one Grand Total level. A grand total level does not contain dimensional attributes and does not have a level key. However, you can associate measures with a grand total level. The aggregation level for those measures will always be the grand total for the dimension.
- Level. All levels, except the Grand Total level, need to have at least one column. However, it is not necessary to explicitly associate all of the columns from a table with levels. Any column that you do not associate with a level will be automatically associated with the lowest level in the dimension that corresponds to that dimension table. All logical columns in the same dimension table have to be associated with the same dimension.
- Hierarchy. In each business model, in the logical levels, you need to establish the hierarchy (parent-child levels). One model might be set up so that weeks roll up into a year. Another model might be set up so that weeks do not roll up. For example, in a model where weeks roll up into a year, it is implied that each week has exactly one year associated with it. This may not hold true for calendar weeks, where the same week could span two years. Some hierarchies might require multiple elements to roll up, as when the combination of month and year roll up into exactly one quarter. You define the hierarchical levels for your particular business so that results from analyses conform to your business needs and requirements.
- Level keys. Each level (except the topmost level defined as a Grand Total level) needs to have one or more attributes that compose a level key. The level key defines the unique elements in each level. The dimension table logical key has to be associated with the lowest level of a dimension and has to be the level key for that level.
A level may have more than one level key. When that is the case, specify which key is the primary key of that level. All dimension sources which have an aggregate content at a specified level need to contain the column that is the primary key of that level. Each level should have one level key that will be displayed when a Siebel Answers or dashboard user clicks to drill down. This may or may not be the primary key of the level. To set the level key to display, select the Use for drill down check box on the Level Key dialog box.
Be careful using level keys such as Month whose domain includes values January, February, and so on—values which are not unique to a particular month, repeating every year. To define Month as a level key, you also need to include an attribute from a higher level, for example, Year. To add Year, click the Add button in this dialog and select the logical column from the dialog that is presented. To create and administer dimension hierarchy levels, perform the following tasks:
To create dimension levels, perform the following tasks:
- Creating a Logical Level in a Dimension
- Associating a Logical Column and Its Table With a Dimension Level
- Identifying the Primary Key for a Dimension Level
- Adding a Dimension Level to the Preferred Drill Path
- Level-Based Measure Calculations Example
- Grand Total Dimension Hierarchy Example
Creating a Logical Level in a Dimension
When creating a logical level in a dimension, you also create the hierarchy by identifying the type of level and defining child levels.
To define general properties for the dimension level
- Specify a name for the level, or accept the default.
- Specify the number of elements that exist at this level. If this level will be the Grand Total level, leave this field blank. The system will set to a value of 1 by default.
This number is used by the Analytics Server when picking aggregate sources. The number does not have to be exact, but ratios of numbers from one level to another should be accurate.
- If this level:
- To define child levels, click Add and perform the following steps:
- (Optional) Type a description of the level.
Associating a Logical Column and Its Table With a Dimension Level
After you create all levels within a dimension, you need to drag and drop one or more columns from the dimension table to each level except the Grand Total level. The first time you drag a column to a dimension it associates the logical table to the dimension. It also associates the logical column with that level of the dimension. To change the level to be associated with that logical column, you can drag a column from one level to another.
After you associate a logical column with a dimension level, the tables in which these columns exist appear in the Tables tab of the Dimensions dialog box.
To verify tables that are associated with a dimension
- In the Business Model and Mapping layer, double-click a dimension.
- In the Dimensions dialog box, click the Tables tab.
The tables list contains tables that you associated with that dimension. This list of tables includes only one logical dimension table and one or more logical fact tables (if you created level-based measures).
- Click OK or Cancel to close the Dimensions dialog box.
Identifying the Primary Key for a Dimension Level
Use the Keys tab to identify the primary key for a level.
To specify a primary key for a dimension level
- Open the Logical Level dialog box and click the Keys tab.
- In the Keys tab, from the Primary key drop-down list, select a named level key.
NOTE: If only one level key exists, it will be the primary key by default.
- Click OK.
Adding a Dimension Level to the Preferred Drill Path
You can use the Preferred Drill Path tab to identify the drill path to use when Siebel Analytics Web users drill down in their data requests. You should use this feature only to specify a drill path that is outside the normal drill path defined by the dimensional level hierarchy. This feature is most commonly used to drill from one dimension to another. You can delete a level from a drill path or reorder a level in the drill path.
To add a level to the preferred drill path
- Click the Add button to open the Browse dialog box, where you can select the levels to include in the drill path. You can select levels from the current dimension or from other dimensions.
- Click OK to return to the Level dialog box. The names of the levels are added to the Names pane.
Level-Based Measure Calculations Example
A level-based measure is a column whose values are always calculated to a specific level of aggregation. For example, a company might want to measure its revenue based on the country, based on the region, and based on the city. You can set up columns to measure CountryRevenue, RegionRevenue, and CityRevenue. The measure AllProductRevenue is an example of a level-based measure at the Grand Total level.
Level-based measures allow a single query to return data at multiple levels of aggregation. They are also useful in creating share measures, which are calculated by taking some measure and dividing it by a level-based measure to calculate a percentage. For example, you can divide salesperson revenue by regional revenue to calculate the share of the regional revenue each salesperson generates.
To set up these calculations, you need to build a dimensional hierarchy in your repository that contains the levels Grandtotal, Country, Region, and City. This hierarchy will contain the metadata that defines a one-to-many relationship between Country and Region and a one-to-many relationship between Region and City. For each country, there are many regions but each region is in only one country. Similarly, for each region, there are many cities but each city is in only one region.
Next, you need to create three logical columns (CountryRevenue, RegionRevenue, and CityRevenue). Each of these columns uses the logical column Revenue as its source. The Revenue column has a default aggregation rule of SUM and has sources in the underlying databases.
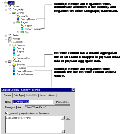
You then drag the CountryRevenue, RegionRevenue, and CityRevenue columns into the Country, Region, and City levels, respectively. Each query that requests one of these columns will return the revenue aggregated to its associated level. Figure 13 shows what the business model in the Business Model and Mapping layer would look like for this example.
Grand Total Dimension Hierarchy Example
You might have a product dimensional hierarchy with levels TotalProducts (grand total level), Brands, and Products. Additionally, there might be a column called Revenue which is defined with a default aggregation rule of Sum. You can then create a logical column, AllProductRevenue, which uses Revenue as its source (as specified in the General tab of the Logical Column dialog). Now drag AllProductRevenue to the grand total level. Each query that includes this column will return the total revenue for all products. The value is returned regardless of any constraints on Brands or Products. If you have constraints on columns in other tables, the grand total is limited to the scope of the query. For example, if the scope of the query asks for data from 1999 and 2000, the grand total product revenue is for all products sold in 1999 and 2000.
If you have three products, A, B, and C with total revenues of 100, 200, and 300 respectively, then the grand total product revenue is 600 (the sum of each product's revenue). If you have set up a repository as described in this example, the following query produces the results listed:
select product, productrevenue, allproductrevenue
PRODUCT PRODUCTREVENUE ALLPRODUCTREVENUE
In this example, the AllProductRevenue column will always return a value of 600, regardless of the products the query constrains on.
| Bookshelf Home | Contents | Index | Search | PDF | |
Siebel Analytics Server Administration Guide Published: 11 March 2004 |