| Oracle® Retail Trade Management User Guide Release 14.1 E56591-01 |
|

 Previous |
 Next |
The movement of goods through customs in the import country can be tracked through the customs entry module.
You can track the following information in the customs entry module:
Forms
Protests
Timelines
Shipments, orders, and items
Departure, arrival, export, and import dates
Missing documents
Bills of lading and containers
Charges and assessments
Licenses and visas
A customs entry batch program transmits data to brokers so they can prepare the necessary documentation. When you finalize transportation records in the transportation module, the customs entries are created automatically. As additional information is acquired, it can be entered manually.
When the charges and assessments are complete, you can choose to allocate the costs to the actual landed cost module. When the customs entry is complete, you can confirm the record. If you have access to the Oracle Retail Invoice Matching product, non-merchandise invoices are created automatically from confirmed customs entries.
The following sections describe the features associated with the customs entry module.
Navigate: From the main menu, select Inventory > Customs Entry. The Customs Entry Search window opens.
In the Action field, select New. Click OK. The Customs Entry Header window opens.
|
Note: When transportation records are finalized in the transportation module, the customs entries are created automatically. However, an entry can also be created manually. |
Provide any available information in the enabled fields.
Click OK to save your changes and close the window.
Navigate: From the main menu, select Inventory > Customs Entry. The Customs Entry Search window opens.
Search for and retrieve a customs entry in View mode. The Customs Entry Header window opens.
Click OK to close the window.
Navigate: From the main menu, select Inventory > Customs Entry. The Customs Entry Search window opens.
Search for and retrieve a customs entry in Edit mode. The Customs Entry Header window opens.
From the Options menu, select Forms. The Customs Entry Forms window opens.
Click Add. The next available line is enabled.
In the Form Type field, select the type of form.
In the OGA field, enter the ID of the other government agency, or click the LOV button and select the other government agency.
In the Form Issue field, enter the issue raised by the government agency, or click the comment button and enter the issue in the Form Issue window.
In the Notice Date, Due Date, and Responded Date fields, enter the appropriate dates, or click the calendar buttons and select the dates.
Click OK to save your changes and close the window.
Navigate: From the main menu, select Inventory > Customs Entry. The Customs Entry Search window opens.
Search for and retrieve a customs entry in View mode. The Customs Entry Header window opens.
From the Options menu, select Forms. The Customs Entry Forms window opens.
Click OK to close the window.
Navigate: From the main menu, select Inventory > Customs Entry. The Customs Entry Search window opens.
Search for and retrieve a customs entry in View mode. The Customs Entry Header window opens.
Click Shipment. The Customs Entry Shipment window opens.
Select a shipment and click Order/Item. The Customs Entry Items window opens.
Select an order/item combination and click Charges. The Customs Entry Charges window opens.
Click OK to close the window.
Navigate: From the main menu, select Inventory > Customs Entry. The Customs Entry Search window opens.
Search for and retrieve a customs entry in View mode. The Customs Entry Header window opens.
Click Shipment. The Customs Entry Shipment window opens.
Select a shipment and click Order/Item. The Customs Entry Items window opens.
Select an order/item combination and click License/Visa. The Customs Entry License/Visa window opens.
Click OK to close the window.
Navigate: From the main menu, select Inventory > Customs Entry. The Customs Entry Search window opens.
Search for and retrieve a customs entry in View mode. The Customs Entry Header window opens.
From the Options menu, select Protests. The Customs Entry Protest window opens.
Click OK to close the window.
Navigate: From the main menu, select Inventory > Customs Entry. The Customs Entry Search window opens.
Search for and retrieve a customs entry in Edit mode. The Customs Entry Header window opens.
Click Shipment. The Customs Entry Shipment window opens.
Select a shipment and click Order/Item. The Customs Entry Items window opens.
Select an order/item combination and click License/Visa. The Customs Entry License/Visa window opens.
Click Add. The next available line is enabled.
In the License/Visa Type field, select the type of document.
In the License/Visa field, enter the ID of the license or visa.
In the Holder ID field, enter the ID of the person or organization that holds the license or visa.
In the Quota Category field, enter the ID of the quota category, or click the LOV button and select the quota category.
In the License/Visa Qty field, enter the number of units included on the license or visa.
In the next field, enter the code for the unit of measure, or click the LOV button and select the unit of measure.
In the Net Wt field, enter the net weight.
In the next field, enter the code for the unit of measure, or click the LOV button and select the unit of measure.
In the Comments field, enter a comment as necessary, or click the comments button and enter the comment in the Comments window.
Click Apply. The license or visa is added to the customs entry details.
Click OK to save your changes and close the window.
Navigate: From the main menu, select Inventory > Customs Entry. The Customs Entry Search window opens.
Search for and retrieve a customs entry in Edit mode. The Customs Entry Header window opens.
Click Shipment. The Customs Entry Shipment window opens.
Select a shipment and click Order/Item. The Customs Entry Items window opens.
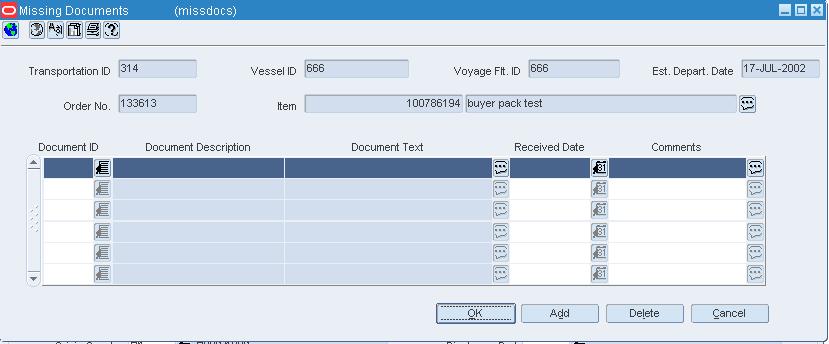
Select an order/item combination, then select Missing Documents from the Options menu. The Missing Documents window opens.
Click Add. The next available line is enabled.
In the Document ID field, enter the ID of the missing document, or click the LOV button and select the document.
In the Received Date field, enter the date received if applicable, or click the LOV button and select the date.
In the Comments field, enter a comment as necessary, or click the comments button and enter the comment.
Click OK to save your changes and close the window.
Navigate: From the main menu, select Inventory > Customs Entry. The Customs Entry Search window opens.
Search for and retrieve a customs entry in Edit mode. The Customs Entry Header window opens.
From the Options menu, select Protests. The Customs Entry Protest window opens.
Click Add. The next available line is enabled.
In the Protest No field, enter the number of the protest.
In the Protest Code field, enter the code for the protest, or click the LOV button and select the protest.
In the Protest Date field, enter the date of the protest, or click the calendar button and select the date.
In the Comments field, enter a comment as necessary. For an extended comment, click the comments button and enter the comment in the Comments window.
Click OK to save your changes and close the window.
Navigate: From the main menu, select Inventory > Customs Entry. The Customs Entry Search window opens.
Search for and retrieve a customs entry in Edit mode. The Customs Entry Header window opens.
Click Shipment. The Customs Entry Shipment window opens.
Click Add. The next available line is enabled.
In the Vessel field, enter the ID of the vessel, or click the LOV button and select the vessel.
In the Voyage/Flt field, enter the voyage or flight number, or click the LOV button and select the voyage or flight.
In the Est Depart Date field, enter the estimated departure date of the shipment, or click the LOV button and select the estimated departure date.
Enter any additional information that is available.
Click Apply. The shipment details are added to the table.
Click OK to save your changes and close the window.
Navigate: From the main menu, select Inventory > Customs Entry. The Customs Entry Search window opens.
Search for and retrieve a customs entry in Edit mode. The Customs Entry Header window opens.
Click Shipment. The Customs Entry Shipment window opens.
Select a shipment and click Order/Item. The Customs Entry Items window opens.
Click Add. The next available line is enabled.
In the Order No field, enter the number of the purchase order, or click the LOV button and select the purchase order.
In the Item field, enter the item number of the item, or enter a partial description and click the LOV button to select an item.
In the Invoice ID field, enter the number of the invoice, or click the LOV button and select the invoice.
In the Tariff Treatment field, enter the code for the tariff treatment, or click the LOV button and select the tariff treatment.
Provide any available information in the enabled fields.
Click Apply. The purchase order and item information is added to the details.
Click OK to save your changes and close the window.
Navigate: From the main menu, select Inventory > Customs Entry. The Customs Entry Search window opens.
Search for and retrieve a customs entry in Edit mode. The Customs Entry Header window opens.
Click Shipment. The Customs Entry Shipment window opens.
Select a shipment and click Order/Item. The Customs Entry Items window opens.
Select an order/item combination and click Charges. The Customs Entry Charges window opens.
Click Add. The next available line is enabled.
In the Apply Method field, select:
Single Assessment: To add one cost component, enter the code for the cost component in the Component field, or click the LOV button and select the cost component.
All HTS Components: To add all cost components that are associated with an HTS classification, enter the number of the HTS classification, or click the LOV button and select the HTS classification.
Enter the rate, unit of measure, value, and computation value basis as necessary.
Click Apply. The assessments are added to the customs entry details.
Click OK to save your changes and close the window.
Navigate: From the main menu, select Inventory > Customs Entry. The Customs Entry Search window opens.
Search for and retrieve a customs entry in Edit mode. The Customs Entry Header window opens.
Click Allocate ALC. The costs are allocated to the actual landed costs module.
Click OK to save your changes and close the window.
Navigate: From the main menu, select Inventory > Customs Entry. The Customs Entry Search window opens.
Search for and retrieve a customs entry in Edit mode. The Customs Entry Header window opens.
|
Note: If you have access to Oracle Retail Invoice Matching, a non-merchandise invoice for duty is created in Approved status after you confirm a customs entry. |
In the CE Ref Status field, select Confirmed.
Click OK to save your changes and close the window.