| Oracle® Retail Warehouse Management System UI User Guide Release 15.0 E66766-01 |
|


 Previous |
 Next |
| Oracle® Retail Warehouse Management System UI User Guide Release 15.0 E66766-01 |
|
Previous |
Next |
This chapter describes the security and logon features of Oracle Retail Warehouse Management System (RWMS).
RWMS features two security measures: passwords and privilege levels.
A password is required to access RWMS.
|
Note: When you login to the RWMS application for the first time, you are asked to change your default password. Refer to Change a Password section for instructions. |
Logon standards require that you change passwords after a predefined number of days have passed. The system administrator sets this parameter. The password expiry is controlled by the following two System Control Parameters (SCP):
password_old: This is the number of days since the last password change; suggests that users change their password.
password_expire: This is the number of days since the last password change; forces users to change their passwords.
Passwords must be:
unique
at least seven characters in length
|
Note: The minimum length of the password is controlled by the SCP min_password_length. |
have a minimum of one alphabet and one numeric character
|
Note: This is controlled by the SCP password_complexity. Set to
ANX is the suggested and the strongest setting. Any other setting leaves RWMS prone to attacks. |
different from the user name
Passwords are case-sensitive.
|
Note: Due to RWMS 14 installation, the passwords are reset to the respective User IDs. Change this password to a password of your choice. |
If an invalid password is used during login, the account gets locked after a few attempts. The number of attempts after which an account gets locked is set by the SCP max_invld_login_cnt. The account can be reset by the system administrator. If the account of the system administrator gets locked, it can be reset using a script rwms_reset_app_user_pwd.sh or using the User Interface. Refer to for more information.
Each user is assigned a privilege level by the system administrator. Not all menu options and windows in RWMS are accessible to users with lower privilege levels. RWMS recognizes each user's privilege level and allows menu or window entry accordingly.
RWMS privileges are allocated through two windows: User Editor and Menu Editor.
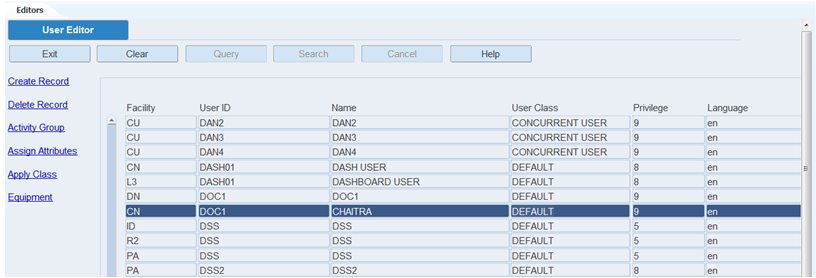
RWMS provides an internal User ID creation and maintenance user interface called the User Editor. The access to the User Editor window is limited to a few users by setting the user privileges level higher than the typical RWMS users.
To access this window, select Setup - User > User Editor.
For security purposes, this window can be used to create or update new users, set privilege levels, and reset passwords. The logged on user can create users with a privilege less than or equal to the logged on user's privilege. This means an administrator with privilege 9 can create other administrators, and users with privilege 8 can create other users with a maximum privilege of 8.
When the reset password functionality is used on this window, the password is set to equal the value of the user ID and the value in the user_logdate column is removed. Due to this the user is able to log into the application using the user ID as the password at which point the user is forced to create a new password. This mechanism also provides the functionality of administrators being able to log into the application as the user, set the password as desired, and then give the password to the end user.
From the menu bar, select Setup - User > User Editor. The User Editor tab opens.
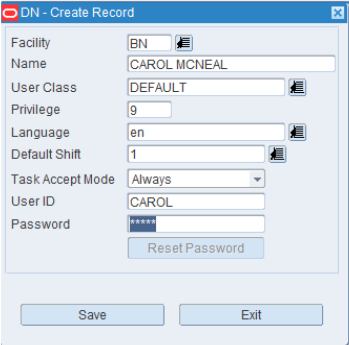
Click the Create Record link. The Create Record window opens.
Enter the required details:
Facility
Name
User Class
Privilege: You can enter 9 for Super Users or Administrators with all privileges, 8 for users with maximum privileges but less than administrator privileges, and 5 for default users with minimum privileges
Language
Default Shift
Task Acceptance Mode: You can select between Always, Change, or Never
User ID
Password
Click Save. The record is saved and displayed in the User Editor table.
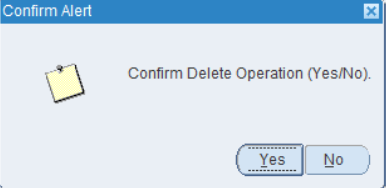
To delete a record, click the Delete Record link. A confirmation alert appears. Click Yes to delete the record.
The following editors in the Setup User module are used in the configuration of Task Management but are not needed for system access:
User Activity Group Editor
User Attribute Editor
User Class Editor
User Equipment Class Editor
User Message Editor
For more information on these editors, refer to .
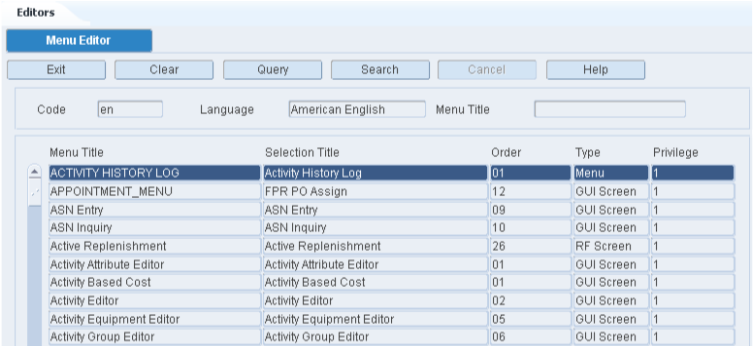
RWMS also restricts the number of menu options that should be available to users based on the user privileges. The configuration of the user privilege setting is based on business needs to determine which users should be able to perform certain activities in a distribution center. The general recommendation for the menu privilege settings is that the administrative windows for setting up the DC would be set higher than the windows used during day-to-day operations. The user privileges are configured through the Menu Editor window to determine what menu options should be available to a user.
To navigate to the Menu Editor window, select Setup - Administration Setup > Menu Editor. The menu options appear in the Menu Editor form.
If any menu options are currently displayed, click Clear.
Click Query. An LOV button displays next to the Code and Menu Title fields respectively.
In the Code field, enter the code for the language, or click the LOV button and select the language.
In the Menu Item field, enter the menu item, or click the LOV button and select a menu item.
Click Search. The menu options associated with the selected criteria appear.
Edit a Translation
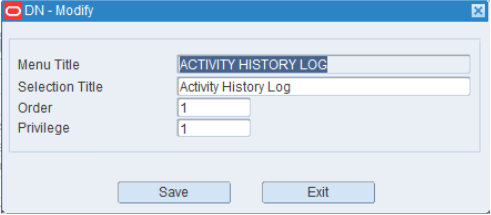
On the Menu Editor form, double-click the menu option that you want to edit. The Modify window opens.
Edit the title, its order on the menu, and its user privilege level as necessary.
Click Save to save any changes and close the Modify window.
Exit the Menu Editor
Click Exit to close the form.