| Oracle® Retail Predictive Application Server Installation Guide Release 14.1.2 E70811-01 |
|

 Previous |
 Next |
| Oracle® Retail Predictive Application Server Installation Guide Release 14.1.2 E70811-01 |
|
Previous |
Next |
This chapter describes how to install RPAS on a Windows environment.
|
Note: You must install the RPAS Server on Windows to use the RPAS Configuration Tools on Windows. The RPAS Configuration Tools application is supported on Windows 7 and 8.1. |
For the purposes of this section, a slash ”/” is used to delineate directories and files in paths. Users in a Windows Command Prompt environment need to either use a backslash ”\” as the delineation character or use double quotes around paths.
|
Note: Paths on Windows are case-sensitive when using Cygwin. |
Unzip the RPAS-14.1.2-windows.zip to a newly created directory on the Windows machine. The RPAS-14.1.2-windows.zip contains all the RPAS components.
Once extracted, the following directories appear:
| Directory | Description |
|---|---|
| ClassicClient | This directory contains the setup.exe used to install the RPAS Classic Client. |
| Curve | This directory contains the Curve base configuration file provided with RPAS. |
| Grade | This directory contains the Grade base configuration file provided with RPAS. |
| ODBC | This directory contains the JDBC and ODBC client drivers. |
| RPAS | This directory will be referred to later in this document as RPAS_HOME. |
| Tools | This directory will be referred to later in this document as RIDE_HOME. |
| Translations | This folder contains the files for the various languages supported by RPAS. |
| Web | This directory contains the files required for an RPAS Web deployment. |
During the Java installation, a directory is created to store the Java software. This directory is referred to later in this document as JAVA_HOME.
Cygwin is required if the RPAS Server is to be installed on Windows operating systems. You can find more information about downloading this product at:
For installation guidance, refer to the following note on My Oracle Support (https://support.oracle.com):
Cygwin Setup Guide for RPAS (Note 1333398.1)
This document details necessary options you should select when installing Cygwin to make it function properly with RPAS.
To export PATH through Cygwin, use colons (:) and to export RPAS_JAVA_CLASSPATH through Cygwin, use semicolons (;). If you are using Java in Cygwin, use semi-colons to seperate Java class paths. Do not use colons because Java.exe runs on Windows and it expects a semi-colon. For this instance, using a colon is incorrect as it is already used in the Windows file paths. Cygwin is a UNIX like environment and as the command line interface for Windows it expects colons for path settings.
Perform the following procedure to determine the path for the domains.
Determine the locations of the domains to be installed.
|
Note: Domain paths cannot contain spaces. In addition, symbolic links cannot be used for domain paths. |
Create a directory at the root of the domain to be installed.
The following procedures provide information about creating the necessary folders on your Windows PC and copying the RPAS Server components to them.
On your C drive, create a folder named Oracle.
Open the Oracle folder and create a folder named RPAS14.1.2.
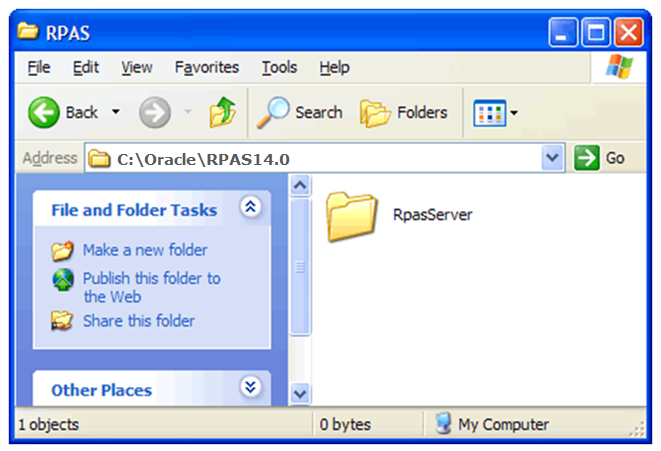
Open the RPAS14.1.2 folder and create a folder named RpasServer.
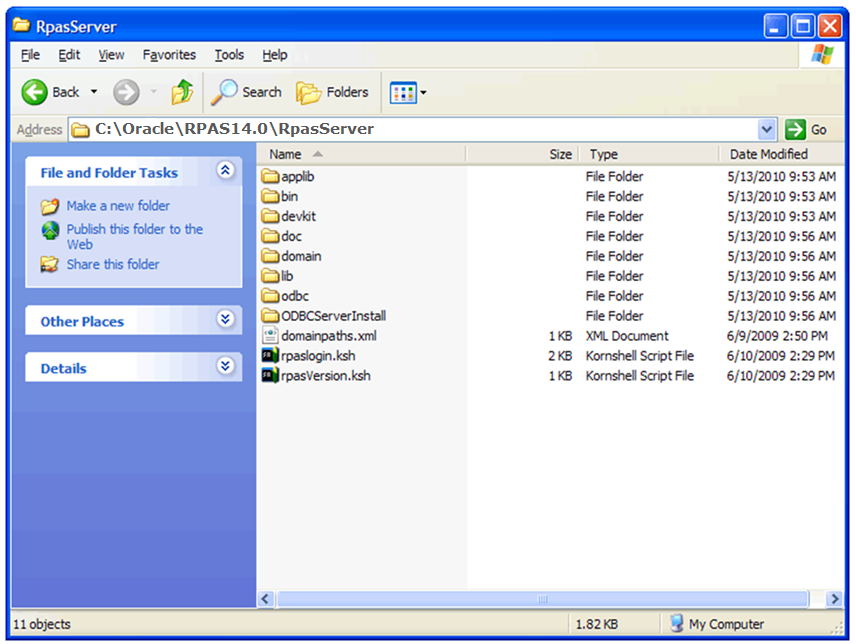
Copy all files and folders from the RPAS folder where you extracted the Media Pack to the C:\Oracle\RPAS14.1.2\RpasServer folder.
This location is referred to as RPAS_HOME. An environment variable is defined on your Windows PC to point to this location so that RPAS will function correctly. Refer to Creating the Required Environment Variables for information on creating the necessary RPAS variables.
|
Note: When installing on Windows 7, update the permissions for $RPAS_HOME/bin directory to include run permissions.In a Cygwin session, enter the following commands:
Where |
Ensure that these Microsoft 2010 Runtime Libraries are installed to enable RPAS Configuration Tools and other RPAS utilities:
MSVCR100.dll
MSVCP100.dll
Download these libraries from this link:
http://www.microsoft.com/en-us/download/details.aspx?id=5555
The following procedures provide information about creating the necessary folders on your Windows PC and copying the Configuration Tools components to them.
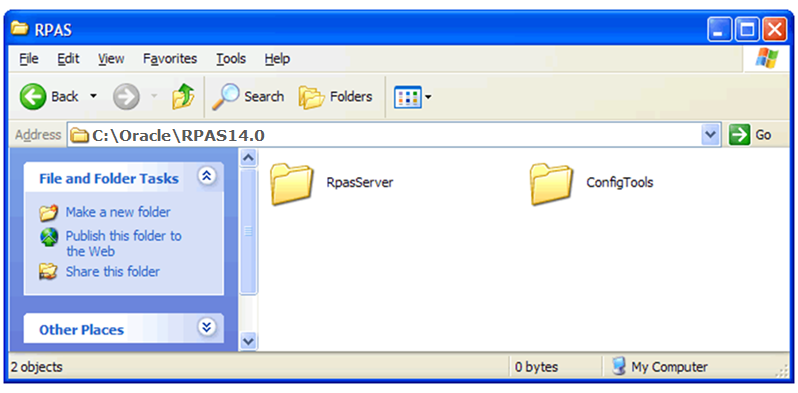
Using Windows Explorer, navigate to your C drive, create a folder named Oracle\RPAS14.1.2, which you created in the Installing the RPAS Server section.
Create a folder named ConfigTools.
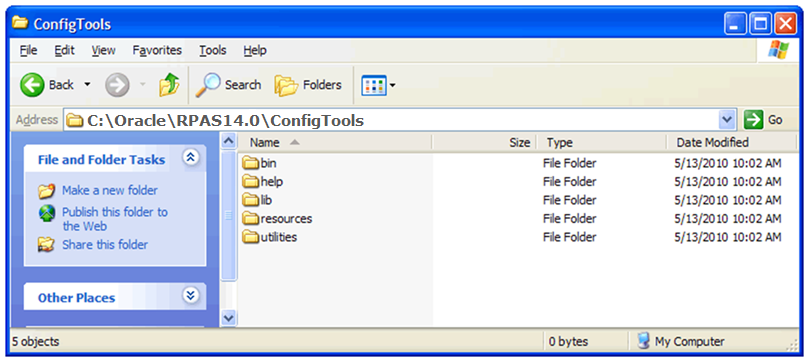
Copy all files and folders from the CDROM\Tools folder where you extracted the Media Pack to the C:\Oracle\RPAS14.1.2\ConfigTools folder.
This location is referred to as RIDE_HOME. An environment variable will be defined on your Windows PC to point to this location so that RPAS will function correctly. Refer to the Creating the Required Environment Variables section for information on creating the necessary RPAS variables.
|
Note: If you plan to use the Curve or Grade functionality, ensure that you copy the plugin folders to the ConfigTools folder. For instructions, refer to the section, Building the Domain on your Windows PC. |
ODBC Client Driver
Perform the following procedure to install the ODBC client driver.
To install the ODBC client software, run setup.exe from the ODBC\ODBCClient directory where you extracted the RPAS-14.1.2-windows.zip file.
Follow the installation wizard to proceed to the Oracle RPAS ODBC Driver Setup window. Enter the destination folder if the default values need to be modified.
Click Next. The Data Source Configuration window opens. If the default values need to be modified, enter the data source name, description, service host name, service port, and service data source name.
Follow the rest of the installation wizard to finish the installation process.
JDBC Client Driver
Perform the following procedure to install the JDBC client driver.
Unzip and untar the jdbcclient.tar.zip from the ODBC/JDBC Client directory where you extracted the RPAS-14.1.2-windows.zip file to a target destination directory.
For additional information on the ODBC Server, refer to either the Classic Client or Fusion Client version of the Oracle Retail Predictive Application Server Administration Guide.
Perform the following procedure to install the ODBC server:
Run setup.exe from Rpas/ODBCServerInstall/iwinnt folder where you extracted the RPAS-14.1.2-windows.zip file.
Follow the installation wizard to proceed to the Server Setup window. In this window, enter the destination folder path.
The Server Configuration window opens. If the default values need to be modified, enter the agent service name, agent service port, and the Windows username used to administer this installation of the server.
Proceed to the next window, Service Configuration. In this window, enter the service name and service port if the default values need to be modified.
Follow the rest of the installation wizard to finish the installation process.
|
Note: If the installation fails on Windows 7, try installing again in compatibility mode. To do this, perform the following steps:Right-click the |
For additional information on the ODBC Server, refer to either the Classic Client or Fusion Client version of the Oracle Retail Predictive Application Server Administration Guide.
This section provides information on creating shortcuts to these applications:
Configuration Tools
Configuration Converter
Procedure to Create Start Menu Shortcuts to RPAS Applications and Utilities
Perform the following procedure to create start menu shortcuts to RPAS applications and utilities
Open Windows Explorer and navigate to the appropriate path for your operating system.
| Operating System | Path |
|---|---|
| Windows 7 | C:\ProgramData\Microsoft\Windows\Start Menu\Programs |
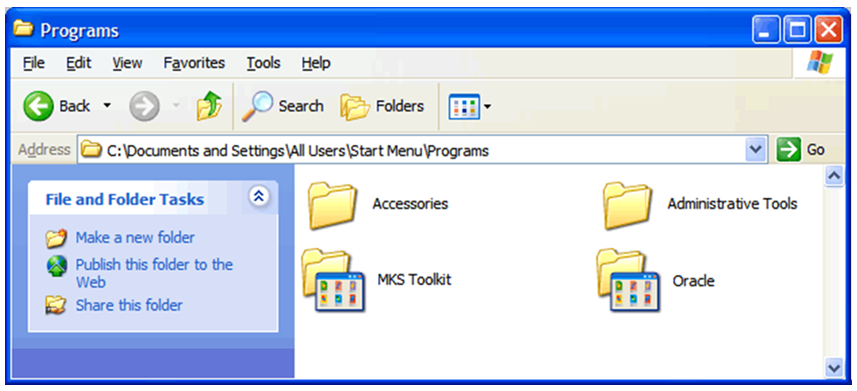
The Programs window displays all applications and shortcuts available to all users accessing the PC.
Right-click the window and select New – Folder. Name this folder Oracle.
Double-click the Oracle folder. The folder opens in Windows Explorer.
Right-click the Oracle window and select New – Folder. Name the folder RPAS 14.1.2.
Create a shortcut to Configuration Tools:
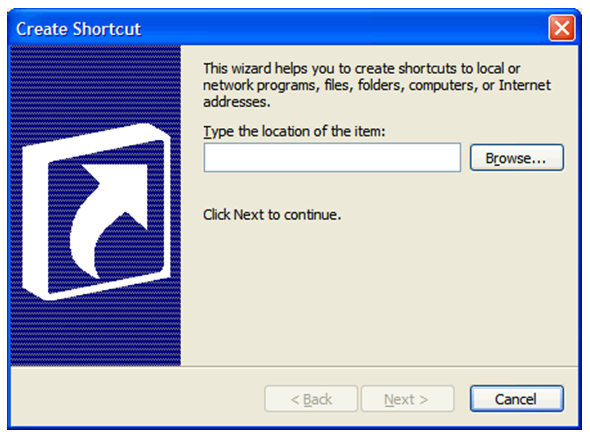
Double-click the RPAS 14.1.2 folder, right-click in the folder window, and select Shortcut. The Create Shortcut Wizard Dialog Box opens.
Click Browse and navigate to the Oracle\RPAS14.1.2\ConfigTools\bin folder on your C drive.
Select ConfigTools.exe and click OK. The selected path appears in the Create Shortcut wizard.
Click Next. The Select a Title for the Program wizard window opens. By default, this window displays the file name and extension selected.
In the text field, enter Configuration Tools as the shortcut name and click Finish. The shortcut wizard closes and the Oracle window displays the shortcut to the Configuration Tools.
Create a Utilities folder in the Oracle window. Right-click the window and select New – Folder. Name this folder Utilities.
Double-click the Utilities folder. The folder opens in Windows Explorer.
Create a shortcut for the Configuration Converter:
Right-click the Utilities folder window and select Shortcut. The Create Shortcut wizard dialog box opens.
Click Browse and navigate to the Oracle\RPAS14.1.2\ConfigTools\utilities folder on your C drive.
Select RpasConverter.exe and click OK. The selected path appears in the Create Shortcut wizard.
Click Next. The Select a Title for the Program wizard window opens.
In the text field, enter Configuration Converter – g as the shortcut name and click Finish. The –g after the name is required to display the Windows interface for the converter. The shortcut wizard closes and the Oracle window displays the shortcut to the Installer.
Verify your shortcuts appear in the Start menu. From the Start menu, select All Programs – Oracle – RPAS 14.1.2. The Configuration Tools and Installer shortcuts should appear. Select the Utilities folder and verify that the Configuration Converter shortcut appears.
Now that the necessary files and shortcuts are defined, you need to create the necessary environment variables in order to open the applications
The following steps outline the process to follow and environment variables required to support the RPAS installation and domain install.
From the Control Panel, open the System window.
If your system is using Category view, from the Windows 7 Start menu, go to Control Panel, select System and Security, select System, and then select Advanced System Settings.
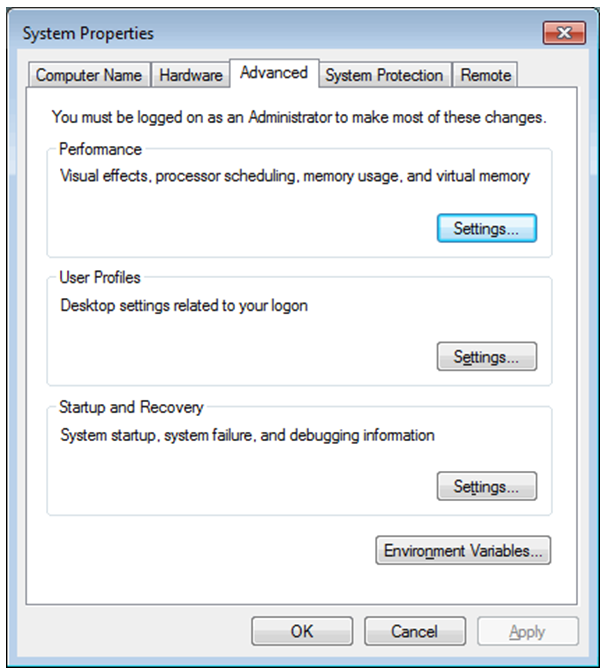
The System Properties window opens on the Advanced tab.
Select the Advanced tab.
At the bottom of the window, click Environment Variables.
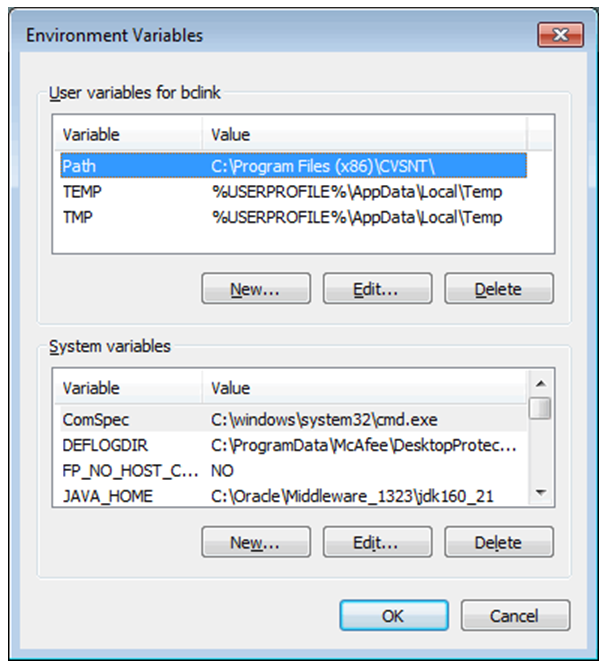
The Environment Variables window opens.
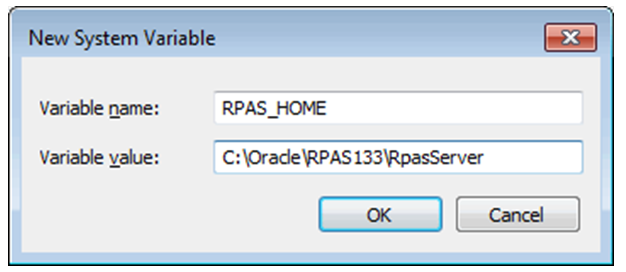
Create the RPAS_HOME environment variable.
Under the System variables box, click New. The New System Variable dialog box opens.
Enter RPAS_HOME in the Variable name field.
Enter the path the RPAS Server folder in the Variable value field.
Click OK. RPAS_HOME now appears in the Variable name box.
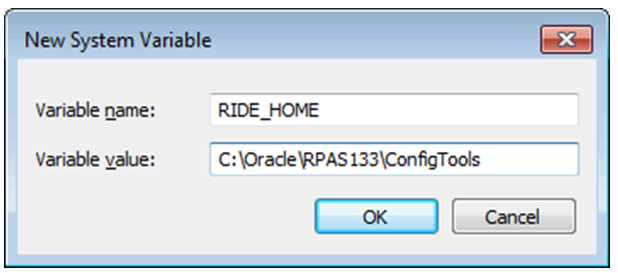
Create the RIDE_HOME environment variable.
Under the System variables box, click New. The New System Variable dialog box opens.
Enter RIDE_HOME in the Variable name field.
Enter the path the ConfigTools folder in the Variable value field.
Click OK. RIDE_HOME now appears in the Variable name box.
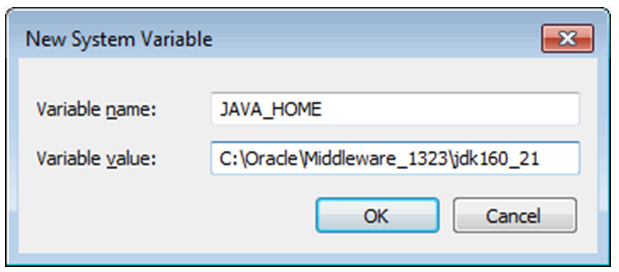
Create the JAVA_HOME environment variable.
Under the System variables box, click New. The New System Variable dialog box opens.
Enter JAVA_HOME in the Variable name field.
Enter the path the Java folder under Program Files in the Variable value field.
Click OK. JAVA_HOME now appears in the Variable name box.
Update the Path variable.
Under the System variables section, select the Path environment variable and click Edit.
Insert the complete paths for RPAS_HOME, RIDE_HOME, and JAVA_HOME as shown:
%RPAS_HOME%\bin;%RPAS_HOME%\applib;%RPAS_HOME%\lib;
%RIDE_HOME%\bin;%RIDE_HOME%\lib;
%JAVA_HOME%\bin;%JAVA_HOME%\bin\client;%JAVA_HOME%\lib;
%JAVA_HOME%\jre\bin\client
|
Note: Remember to separate all path statements with semicolons (;). |
Select OK to save your changes.
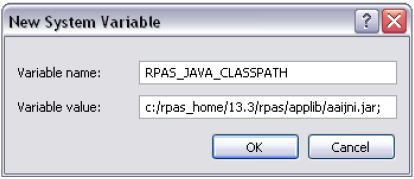
Update the RPAS_JAVA_CLASSPATH environment variable.
|
Note: Not all RPAS solutions make use of the RPAS_JAVA_CLASSPATH. Refer to the specific product implementation guide for information on whether that solution requires the RPAS_JAVA_CLASSPATH variable and what value should be provided. |
Under the System variables box, click New. The New System Variable dialog box opens.
Enter RPAS_JAVA_CLASSPATH in the Variable name field.
Enter the path the Java folder under Program Files in the Variable value field.
Click OK. RPAS_JAVA_CLASSPATH now appears in the Variable name box.
Close all open windows.
If installing a Global Domain environment, an xml file may be created to determine how the domains will be partitioned and the label of each domain. The following is an example of the structure of the globaldomainconfig.xml file. The items in Example 4-2 are as follows:
| Item | Description |
|---|---|
| Path | The location of the root of the domain. |
| Partitiondim | The partition dimension. Using the following example, pgrp (Group) is the dimension in which the local domains are partitioned. There can only be one partition dimension. |
| Subpath | The path and name of the local (sub-domain) that contains a specific partition position. ldom+# is the default name given by RPAS to local domains. |
| Subposition | The position from the partition dimension that is located in the local domain. For example, ldom0 includes all product positions at or below pgrp 1100. |
Example 4-2 File Structure
<?xml version="1.0" encoding="UTF-8" standalone="yes" ?><rpas> <globaldomain> <path>/Domains/RDF133/D01</path> <partitiondim>pgrp</partitiondim> <subdomain> <subpath>/Domains/RDF133/ldom0</subpath> <subpositions>1100</subpositions> </subdomain> <subdomain> <subpath>/Domains/RDF133/ldom1</subpath> <subpositions>1300</subpositions> </subdomain> <subdomain> <subpath>/Domains/RDF133/ldom2</subpath> <subpositions>2500</subpositions> </subdomain> </globaldomain></rpas>
The RPAS Clients must be configured to point to the newly created domains.For instructions on how to configure the RPAS Clients, refer to either the Classic Client or Fusion Client version of the Oracle Retail Predictive Application Server Administration Guide.
If you have multiple versions of RPAS installed on your PC, it is important to note that the environment variables will reference RPAS 14.1.2 after the installation process is complete.
|
Note: Previously set environment variables for other versions or installations of RPAS will still exist in the Path System variable, but Windows uses the first set of variables defined in the path, which is where the installation process places them. |
To switch to a different version of RPAS that is installed on your machine, you will need to manually update the environment variables each time you want to switch. You can either insert the path to the version you want to use and leave the path to 14.1.2, or delete the path and either reinstall the 14.1.2 components or manually reinsert the paths when you want to revert to 14.1.2.
There are two base configurations available with the RPAS archive that can be used to build a domain. These configurations are initially stored in the following folders that were created in the CDROM folder when you extracted the RPAS-14.1.2-windows.zip file in the location where you downloaded the RPAS Media Pack.
Grade – A clustering tool that provides insight into how various parts of a retailer's operations can be grouped together.
Curve – A profile generation tool used to produce ratios (profiles) from historical data at user-specified intersections.
The following section describes how to use these configurations to build a domain.
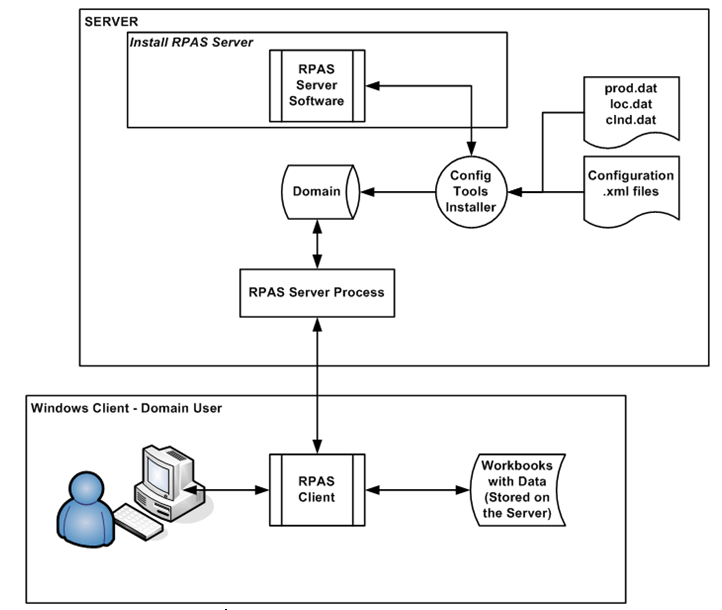
Figure 4-13 shows an overview of the steps involved in using a configuration to build and an RPAS domain.
This section describes the steps illustrated in Figure 4-13:
Prior to beginning the domain build process you should have installed RPAS and the Configuration Tools on your server. During that process, you should have set up the necessary environment variables for RPAS and the Configuration Tools.
Perform the following steps to verify that environment variables have been successfully configured.
Open a Cygwin zsh window. Use the following commands to verify your environment settings:
echo $RPAS_HOME
echo $RIDE_HOME
echo $JAVA_HOME
echo $PATH
|
Note: The path for the RPAS_HOME variable may change from release to release. |
If you make any changes to the environment variable settings, remember to exit and restart your UNIX session in order to run your.profile and make the changes effective. This step is very important before you continue to the remaining steps.
|
Note: The paths for your RIDE_HOME and RPAS_HOME variables cannot have spaces in them, unless short file naming conventions are utilized. Given this restriction, do not place your Tools build, Tool Configurations or RPAS installation under Program Files or My Documents. If you do, define all RPAS related environment variables using short (8dot3) file names. |
Locate and copy/move the desired configuration zip file to a location on your machine. For the purposes of these instructions assume that location is called:
C:/root/testenv/<Configuration>
The following subfolders will be created in: C:/root/testenv/<Configuration>:
| Subfolder | Description |
|---|---|
| data/ – hierarchy and sample data files | This path is used in conjunction with the –in [input] option of the rpasInstall command. |
| configuration/<Configuration_Name> | Configuration files for use in building the domains where <Configuration_Name> will be Sample_Configuration, Grade, or Curve.
Do not change the directory name for the configuration or alter the contents in any way. |
| scripts | Scripts used to complete the domain build process. |
| resources | Contains the plug-ins for the Configuration Tools. When this resource directory is supplied, it must be copied in its entirety to the RIDE_HOME location. This must be done in order for the Configuration Tools to build domains. |
This section provides instructions for how to create a domain from the base configurations.
Because building an RPAS domain on Windows is currently a manual process, the person building the domain should be skilled in administering UNIX or Windows servers and should have scripting skills.
|
Note: The Configuration Tools are supported on all platforms (HP-UX, AIX, and Windows); however, they require Java 1.7. Make sure that the server you will be using has this version of Java. |
Create a testenv (test environment) folder on your C drive.
Copy the Curve and Grade plugin folders to the ConfigTools\resources\plugins folder. These Curve and Grade plugin folders are located in the folder where you extracted the RPAS-14.1.2-windows.zip file to the testenv folder:
testenv\Curve\resources\plugins
testenv\Grade\resources\plugins
The domain build process requires the following data files to be available:
prod.dat
loc.dat
clnd.dat
input data files for measures (<measure>.ovr)
These files should be located in the C:/root/testenv/<Configuration>/data directory. This directory path will be used during the domain build process as the input directory.
The path that the domain will be created must exist prior to running the domain build process.
For the domain, manually create the directory structure:
C:/root/testenv/domain
The name of the domain will automatically be created under the domain path based on the configuration name. So, for the previously listed domain path, the full path to the domain will be as follows once the domain build process is completed.
C:/root/testenv/domain/<Configuration>
Use the Tools Installer, the rpasInstall script, to build the domain. This executable is located in bin directory of your Tools installation. There are different scripts to run based on which configuration is being used to build a domain.
For more information on the Tools Installer and the specific options available when using the rpasInstall command, refer to the Oracle Retail Predictive Application Server Configuration Tools User Guide.
|
Note: TherpasInstall script only loads the hierarchy files and builds the domain. It does not load any measure data. The hierarchy files are copied to the /input/processed directory of the domain and appended with a time-date stamp. |
Perform this procedure to build the domain for Grade.
Copy the plugins folder from the Grade/resources directory and paste it in the RIDE_HOME/resources directory.
Run execPluginTask.sh for Grade, which creates the cluster hierarchy files (clsh.dat and grch.dat) in the directory <path to the data files>:
execPluginTask.sh Grade:com.retek.labs.grade.plugin.GradeDataGenerator <path to the configuration>/Grade/Grade.xml <path to the data files>
|
Note: The <path to the data files> is the argument for-in of rpasInstall. |
|
Note: To build a Grade workbook, a junk position is required in the cluster hierarchy. Therefore, a junk position must exist in theclsh.dat. as shown in the following example:1 1 Cluster01 2 2 Cluster02 3 3 Cluster03 4 4 Cluster04 5 5 Cluster05 Junk Junk Cluster |
If performing a full installation, omit this step and continue to Step 4
When performing a patch installation, manually copy the cluster hierarchy files (clsh.dat and grch.dat - generated in Step 2), from directory <path to the data files> to directory <path to the domain>/Grade/input:
for PatchFile in \
          clsh.dat \
        grch.dat
do
  orgFile=<path to the data files>/${PatchFile}
  destFile=<path to the domain>/Grade/input/${PatchFile}

  if [[ -f "${orgFile}" ]]; then
    cp -f "${orgFile}" "${destFile}"
  fi
done
Enter the following command to build a domain for the Grade configuration:
rpasInstall -fullinstall -dh <path to the domain> -cn Grade -ch <path to the configuration> -in <path to the data files> -log <path to the location and name of the installation log> -rf AppFunctions –rf ClusterEngine –p pgrp
After the domain installation has completed, the sales data must be loaded into the domain using the loadmeasure utility. Open a command prompt from the master domain (/Grade) and type the following commands:
loadmeasure -d . -measure dpos
loadmeasure -d . -measure rsal
loadmeasure -d . -measure csal
loadmeasure -d . -measure psal
Open a command prompt from the local domain (/Grade/ldom0) and type the following command:
mace -d . -run -group common_batch
Repeat this step for each of the remaining local domains (/Grade/ldom1, /Grade/ldom2).
Perform this procedure to build the domain for Curve.
Copy the plugins folder from the Curve/resources directory and paste it in the RIDE_HOME/resources directory.
Run execPluginTask.sh for Curve, which creates Curve data files in the directory <path to the data files>
execPluginTask.sh Curve:com.retek.labs.curve.plugin.installer.InstallParameterDataGeneration <path to the configuration>/Curve/Curve.xml <path to the data files>
|
Note: The <path to the data files> is the argument for-in of rpasInstall. |
|
Note: The data files generated in this step include:dataintxl.ovr flprofxl.ovr pgdatatmp.ovr pgdefapmthtmp.ovr pgdefmasktmp.ovr pgmthtwtmp.ovr pgnvtmp.ovr prfaggintxl.ovr prfaprvintxl.ovr prfintxl.ovr proftypexl.ovr slprofxl.ovr strintxl.ovr. |
If performing a full installation, omit this step and continue to Step 4
When performing a patch installation, manually copy the data files generated in Step 2), from directory <path to the data files> to directory <path to the domain>/Curve/input:
for PatchFile in \
        dataintxl.ovr \
          flprofxl.ovr \
          pgdatatmp.ovr \
        pgdefapmthtmp.ovr \
        pgdefmasktmp.ovr \
        pgmthtwtmp.ovr \
        pgnvtmp.ovr \
        prfaggintxl.ovr \
        prfaprvintxl.ovr \
        prfintxl.ovr \
        proftypexl.ovr \
        slprofxl.ovr \
        strintxl.ovr
do
  orgFile=<path to the data files>/${PatchFile}
  destFile=<path to the domain>/Curve/input/${PatchFile}

  if [[ -f "${orgFile}" ]]; then
    cp -f "${orgFile}" "${destFile}"
  fi
done
Enter the following command to build a domain for the Curve configuration:
rpasInstall -fullinstall -dh <path to the domain> -cn Curve -ch <path to the configuration> -in <path to the data files> -log <path to the location and name of the installation log> -rf AppFunctions –rf ClusterEngine –p pgrp
After the domain installation has completed the sales data must be loaded into the domain using the loadmeasure utility. Open a command prompt from the master domain (/Curve) and type the following commands:
loadmeasure -d . -measure dpos
loadmeasure -d . -measure rsal
loadmeasure -d . -measure csal
loadmeasure -d . -measure psal
Open a command prompt from the local domain (/Curve/ldom0) and type the following command:
mace -d . -run -group common_batch
Repeat this step for each of the remaining local domains (/Curve/ldom1, /Curve/ldom2).
In order to use the domains built from the sample configurations, the RPAS Server must be running on the server/machine where the domain is located.
The RPAS Server is started by running the RPAS DomainDaemon executable, which provides a centralized process for managing domain connections between the client and the server.
Following is an example of running the DomainDaemon, which allows you to connect to the RPAS Server and a domain using the RPAS Clients. When running the DomainDaemon, RPAS requires the SSL settings to be defined. Different settings are required depending on the client being used. This example is a simple case of using the Classic Client with no-SSL. Complete information about the Domain Daemon and the different SSL options is located in the Classic Client and Fusion Client versions of the Oracle Retail Predictive Application Server Administration Guide.
Run the following command from a UNIX command line (or using Cygwin on Windows). If the environment variables paths have been properly set, this command can be run from any directory.
Example 4-3 Running the DomainDaemon
DomainDaemon -port <port_number> -start –ssl <option> [-wallet <path_to_wallet>]
Where <port_number> is an integer between 1025 and 65535.
Where <option> is the type of SSL you are using.
Where <path_to_wallet> is the path to the Oracle Wallet containing the server side SSL certificates. This is optional depending on which SSL option you are using.
This port number is used when configuring the client connection. Refer to the "Installing and Configuring the RPAS Classic Client" and "Installing the RPAS Fusion Client" chapters for additional information.
For additional information about setting up SSL wallets, refer to Setup SSL
DomainDaemon lets you set up SSL with these options:
Table 4-1 SSL Option Values and Recommendations
| Value | Description | Application | Usage | Recommendation |
|---|---|---|---|---|
|
1 |
One-way SSL with server authentication. |
Classic Client |
One-way authentication and encrypted data transfer. |
Most secure -recommended. |
|
2 |
Two-way SSL with client and server authentication. |
Fusion Client |
Two-way authentication and encrypted data transfer. |
Most secure -recommended. |
|
3 |
SSL without authentication. |
Classic Client |
Encrypted data transfer without authentication. |
Vulnerable to man in the middle attacks - not recommended. |
|
4 |
Two-way SSL authentication only. |
Fusion Client |
Two-way authentication but unencrypted date transfer. |
Least secure - not recommended except for users that deploy everything behind a firewall. |