| Oracle® Retail Item Planning User Guide for the RPAS Classic Client Release 14.1 E55314-01 |
|

 Previous |
 Next |
| Oracle® Retail Item Planning User Guide for the RPAS Classic Client Release 14.1 E55314-01 |
|
Previous |
Next |
During the preseason planning period, the Item Planning workbook allows you to create item plans at the style/color level. During the in-season planning period, you can use this workbook to adjust the item plan.
This workbook has six tabs:
|
Note: The Dashboard tab is only used for in-season planning. |
Below is the general process of creating an item plan:
Optional: Consult the assortment plan created in the Assortment Planning application in the Assortment Plan Tab.
Create a sales and markdown plan in the Item Planning Parameters Tab
Assign promotions to style/colors and review their promotional impact in the Pricing Tab.
Seed the plan in the Item Planning Parameters Tab.
Review the sales and markdowns plan in the Item Plan Tab.
Create a receipts and inventory plan and calculate the receipt flow in the Item Plan Parameters Tab: Receipt and Inventory Plan.
Review the receipts and inventory plan in the Item Plan Tab: Receipt and Inventory Plan.
Review the entire plan for all key items in the class. Compare it to the MFP targets, and then approve the plan in the Review and Approval Tab.
This process is described in detail throughout this chapter.
To build the Item Planning workbook, perform the following steps:
Click the New icon in the toolbar.
The New Workbook dialog box appears. On the Item Planning tab, select Item Planning and click OK.
The workbook wizard opens at the Calendar Selection step. Select the weeks that you want to plan. Click Next.
|
Note: When choosing the weeks to include in the workbook, ensure that you accommodate for the receipt arrival week, not just the start sell week. For instance, if the start sell week is 1/15/2011, and the receipt time is two weeks, the workbook should start from 1/1/2011. |
The Product Selection step of the workbook wizard appears. Select the styles you want to plan. Click Next.
The Location Selection workbook of the workbook wizard appears. Select the channels you want to plan. Click Finish.
The Item Planning workbook is built. Begin at the Assortment Plan Tab.
Review the worksheets in the Assortment Plan tab if you have loaded data from the Assortment Planning application. If you do not use Assortment Planning, continue to the Item Planning Parameters Tab.
Use the Review Assortment Plan Parameters worksheet to reference the parameters that the Assortment Planning user set for the same style/color you are planning. When seeding your working plan in the Item Plan Parameters Worksheet, you can choose to seed with this Assortment Plan data.
Table 6-1 Assortment Plan Parameters Worksheet Measures
| Measure | Description |
|---|---|
|
Start Sales Date |
The date the product is expected to start selling. |
|
Number of weeks at Clearance Price |
Number of weeks the item is expected to sell at Clearance Price. |
|
Number of Weeks at Regular Price |
Number of weeks the item is expected to sell at Regular Price. |
|
Product Cost |
The cost of the product. |
|
Product Original Ticket Price |
Initial retail of product. |
|
Exit Date |
The date that the product should be removed from the sales floor. |
|
Ap Cp Clearance Price Retail |
The clearance price set up in Assortment Planning. |
|
Ap Cp Clearance Cost |
The clearance cost set up in Assortment Planning. |
Use the Review Assortment Plan Details worksheet to see the plan that was created in the Assortment Planning application for the same style/color you are planning.
Table 6-2 lists the measures available on this worksheet.
Table 6-2 Assortment Plan Details Worksheet Measures
| Measure | Description |
|---|---|
|
Ap Cp Store Count |
The number of stores for which this style/color is planned for in the approved plan from the Assortment Planning application. |
|
Ap Cp Clearance Sales Units |
Assortment Planning Current Plan Clearance Sales Units. |
|
Ap Cp Clearance Sales Retail |
Assortment Planning Current Plan Clearance Sales Retail. |
|
Ap Cp Ttl Sls U |
Assortment Planning Current Plan Total Sales Units. |
|
Ap Cp Ttl Sls R |
Assortment Planning Current Plan Total Sales Retail. |
|
AP Cp Gross Margin |
Assortment Planning Current Plan Gross Margin. |
|
Ap Cp GM R% |
Assortment Planning Current Plan Gross Margin Rate. |
|
Ap Cp First Markdown % Off |
Initial Markdown Taken expressed as a rate. |
|
Ap Cp Promo Price Change % |
Assortment Planning Current Plan Promotional Price Change %. |
|
Ap Cp Perm Price Change % |
Permanent Price Change expressed as a rate. |
|
Ap Cp Clearance Price Retail |
Assortment Planning Current Plan Clearance Price Change %. |
|
Ap Cp Receipts Units |
Receipts expressed as Units. |
|
Ap Cp Receipts Retail |
Assortment Planning Current Plan Receipts Retail. |
|
AP Cp Average Recpts Per Str |
Assortment Planning Current Plan Average Receipts per store. |
|
AP Cp Receipts AUR |
Assortment Planning Current Plan Receipts Average Unit Retail. |
|
Ap Cp BOP Inv Units |
The Beginning of Period inventory units from Assortment Planning's current plan. |
|
Ap Cp BOP Inv Retail |
The Beginning of Period inventory retail from Assortment Planning's current plan. |
|
Ap Cp EOP Inv Retail |
The End of Period inventory retail. |
|
Ap Cp EOP Inv Units |
The End of Period inventory units. |
|
AP Cp EopPerStr U% |
Assortment Planning Current Plan End of Period Per Store Unit %. |
After you have reviewed the parameters from the Assortment Planning application, continue to the Item Plan Parameters Worksheet to set your own parameters.
Use the worksheets in the Item Planning Parameters tab to create a weekly plan for the style/colors. This tab has three worksheets:
Use this worksheet to review the reference curves you created in the Reference Curves workbook. This worksheet is for reference only. It is provided to help you assign these curves to the style/colors being planned. To edit the curves, return to the Maintain Curve Profiles Worksheet.
|
Note: To view the data in the Sales Curve Label and Sales Curve (Default) % measures, ensure that the calendar hierarchy includes the all[Calendar] dimension and that the location hierarchy displays only the all[Location] dimension. |
Table 6-3 lists the measures available on this worksheet.
Table 6-3 Reference Curves Worksheet Measures
| Measure | Description |
|---|---|
|
Sales Curve Label |
Displays the label for the lifecycle curve. This label is created in the Reference Curves workbook. |
|
Sales Curve (Default)% |
Displays percent-to-total sales percentage in the weeks of the curve. This is set in the Reference Curves workbook. |
|
Item Lifecycle Curve |
Displays the sales curve for the item. |
Next, continue to the Item Plan Parameters Worksheet.
Use this worksheet to set the parameters of the item plan. This creates the weekly sales unit plan.
To set the item plan parameters, perform the following steps for each channel:
Ensure that the following measures are shown in the worksheet:
Wp BOS C
Wp BOS R
Wp BOS U
Wp Sales Net VAT R
Set the Wp BOS C, Wp BOS R, and WP BOS U measures with the beginning of season inventory cost, retail, and units data. (Perform this step only if the style/color is a carryover item or one that is planned to be received before the start of the planning period).
In the # Stores measure, enter the number of stores.
Define the start sell and out of stock weeks in the Start Sell Week and Out of Stock Week measures.
In the Clearance Cadence measure, select the cadence to be applied to the style/color. These cadences are created in the Markdown Parameters workbook.
In the Rate of Sale measure, enter the average units of the style/color that are sold per store, per week. (This is used for baseline sales calculation. It is useful when seeding dales to weeks).
Click Calculate. The Baseline Sales U measure is calculated. This measure displays the baseline sales units for the regular and promotional period.
In the Baseline Sales Curve Selection measure, select the reference curve to apply to the style/color. These reference curves are created in the Reference Curves workbook.
In the Shrink Target %, enter the planned shrink for the style/color. Each week is a planned shrink that is based on a certain percentage of sales for the week.
In the Regular Price, Regular Cost, and Clearance Cost measures, enter the price, cost, and clearance cost of the style/color.
Click Calculate.
In the Salvage Value measure, enter the amount that the style/color is worth in the last week of the salvage period. The salvage period is when the style/color has reached the end of its life. Therefore, the salvage value is the price you can recover by selling this item to a clearance channel.
If you are computing value added tax, edit the Wp Sales Net VAT R measure if needed.
After you have set the parameters, continue to the Seed Worksheet to seed these parameters into the item plan for the style/color.
|
Note: If the style/color belongs to a promotion, you should map the promotions to the style/color in the Pricing Tab before seeding. |
Use this worksheet to seed the item plan with data. This creates a demand curve on which to spread the initial targets of the item plan. You can seed with any of the following options:
LY: Last year's data.
Adj LY: Adjusted last year's data.
AP: Data from the Assortment Planning (AP) application. If you use AP and you have loaded the AP data into Item Planning, you can review this data in the Assortment Plan Tab.
Parameters: The parameters that you have created in the Item Plan Parameters Worksheet.
Accepted Price Plan: This option is used only in the Item Planning Configured for COE application.
Or, you can instead choose to not seed the plan, which allows you to create a plan manually by keying in sales at a weekly level.
Table 6-4 lists the measures available on this worksheet.
Table 6-4 Seed Worksheet Measures
| Measure | Description |
|---|---|
|
Ly Sls Reg U |
The regular units from last year's sales. |
|
Adj Ly Sls Reg U |
The adjusted regular units from last year's sales. |
|
Like Item |
The style/color that you mapped the current style/color to in the Item and Store Maintenance workbook. |
|
Use History Map |
Select this option to use the history of the style that you mapped the current style to in the Item and Store Maintenance workbook. |
|
Mapped Ly Sls Reg U |
The regular units from last year's sales of the like item. |
|
Mapped Adj Ly Sls Reg U |
The adjusted regular units from last year's sales of the like item. |
|
Wp BOS U |
The planned Beginning of Season total units. |
|
Wp Seed |
The source used to seed the working plan. Use the dropdown to select the source to use for seeding. |
Perform the following steps to seed the plan.
Roll the calendar hierarchy up to a year.
Select the style/color you want to seed in the product hierarchy.
In the Wp Seed measure, choose the seed option.
Select Use Hist Map if you want to use the data of the like item shown in the Like Item measure.
When you have selected all the data you want to seed, click Seed in the Planning Actions menu.
A confirmation message appears, stating that the data has been successfully seeded. Click OK.
After you have seeded, continue to the Plan Approval Worksheet to approve the plan.
The Pricing tab contains four worksheets that help you map style/colors to promotions:
Use the Promo Mapping Worksheet to map the style/colors and promotions. Use the other worksheets as references about the promotions and markdown cadences.
Use this workbook to review the lift and the lift override for the promotions. This worksheet is read-only.
Table 6-5 lists the measures available on this worksheet.
Table 6-5 Promotions Definition Worksheet Measures
| Measure | Description |
|---|---|
|
Sls Promo Lift U% |
The promotional lift. This is the percent of increased sales that must occur to overcome the decrease in price to sell the same dollar amount. |
|
Sls Promo Lift U% Override |
The lift entered in this measure overrides the lift calculated in the Sls Promo Lift U% measure. |
Use this worksheet to review the promotion periods. This worksheet is read-only.
Use this worksheet to map the style/color to the promotions it belongs to. Style/colors belongs to more than one promotion, even if the promotions overlap.
To map a style/color to a promotion, click the check box. You may select more than one promotion for a style/color.
Use this worksheet to review the markdown cadences you created in the Markdown Parameters workbook. This worksheet is read-only.
|
Note: To see the Basis (Year/Item) measure data, ensure that all[Calendar] is displayed in the calendar hierarchy. |
Table 6-6 lists the measures available on this worksheet.
The worksheets in this tab display the weekly plan for the sales and markdowns that was created by the parameters you have set so far. Use these worksheets to review the plan.
Use this worksheet to review the weekly plan for the sales and markdowns that has been created by all of the parameters and promotions you have created so far. If you need to adjust the plan, return to the Item Plan Parameters Worksheet to adjust the parameters, seed from parameters in the Seed Worksheet worksheet, and then return to this worksheet to review the results. Continue this process until you are satisfied with the sales and markdown plan.
This worksheet displays the baseline sales and promotional lift units for the style/color. The baseline sales units measure, Wp Baseline Sales U, displays the number of units that would be sold if no promotions existed. The promotional lift units measure, Wp Promo Lift U, displays the number of additional units that would be sold with the promotion. The Wp Sls Promo U measure is the total units that would be sold. It combines the baseline sales units and the promotional lift units.
Table 6-7 Promo Details Worksheet Measures
| Measure | Description |
|---|---|
|
Wp Sls Promo Eligibility |
By selecting this boolean, the promotion is being associated to the style/color. You must seed from parameters to apply the promotional details to their style/color plan after selecting this boolean. |
|
Wp Promo Lift U |
Displays the number of additional units sold with the promotion. |
|
Wp Baseline Sales U |
Displays the number of units sold if no promotions existed. |
|
Wp Sls Promo U |
Displays the total units sold. This measure combines the baseline sales units and the promotional lift units. |
Once you are satisfied with the sales plan, return to the Item Plan Parameters Worksheet to create the receipt and inventory plan.
After you have developed the sales and inventory plan, use the Item Plan Parameters worksheet to create the receipt and inventory plan.
Use the receipt parameters measure profile in this worksheet to develop the receipt and inventory plan.
To create a receipt and inventory plan, perform the following steps:
Change the measure profile to Receipt Parameters.
In the Receipt Lead Time measure, enter the number of weeks before the start sell week that you want to schedule receipts.
In the Receipt Frequency measure, enter the number of weeks between each receipt. For example, 1 means that receipts arrive every week. 2 means that receipts arrive every other week.
In the Initial Receipt % measure, enter the percentage of total receipts to be included the first receipt drop.
In the Presentation Min measure, enter the minimum amount of inventory on the sales floor per store. This is used only in the initial receipt and can be thought of as a fixture fill.
In the Safety Stock (Weeks) measure, enter the number of weeks of sales in the future that each receipt drop can fulfill. This safety stock setting applies to all receipt drops except the initial receipt drop. It is based on a future week of sales, not an average week of sales.
In the Sell Thru Reg % measure, enter the target percentage of sales to be reached during the regular and promotional periods. This number is used as a guideline for calculating receipts. For instance, if set to 85%, this means that 85% of the style/color is sold during the regular and promotional periods, and 15% is left to be sold during the clearance period.
Select the Flow Receipts check box.
In the Planning Actions menu, click Calculate Receipt Flow.
The Wp Receipts U and Receipt Start Week measures are populated. After you have calculated the receipt flow, continue to the Item Plan Worksheet: Receipts and Inventory Measure Profile to view the receipt and inventory plan.
Table 6-8 Item Plan Parameters Worksheet - Receipt Parameters Measure Profile
| Measure | Description |
|---|---|
|
# Stores |
The number of stores that sell the style/color. |
|
Start Sell Week |
The first week that the style/color is sold. |
|
Wp Sls Reg + Pro U |
The combined total of the planned regular and promotional units. This is a calculated measure. |
|
Sell Thru Reg % |
The target percentage of sales to be reached during the regular and promotional periods. |
|
Wp BOS U |
The planned beginning of season units. |
|
Wp BOS R |
The planned beginning of season retail. |
|
Wp BOS C |
The planned beginning of season cost. |
|
Receipt Frequency |
The number of weeks between each receipt drop. |
|
Initial Receipt % |
The percentage of total receipts to be included in the first receipt drop. |
|
Presentation Min |
The minimum amount of inventory on the sales floor per store. This is used only in the initial receipt and can be thought of as a fixture fill. |
|
Safety Stock (weeks) |
The number of weeks of sales in the future that each receipt drop can fulfill. This applies to all receipt drops except the initial one. It is based on a future week of sales, not an average week of sales. |
|
Receipt Lead Time |
The number of weeks before the start sell week that the initial receipt drop arrives. |
|
Flow Receipts |
Check this measure to calculate the receipt flow based on the parameters in this worksheet. |
|
Wp Receipt Start Week |
The week that initial receipt drop occurs. |
|
Wp EOP U |
The planned end of period units. This is a calculated measure. |
|
Wp EOP R |
The planned end of period retail. This is a calculated measure. |
|
Wp EOP C |
The planned end of period cost. This is a calculated measure. |
|
Wp Cum Avg Inv U |
The planned cumulative average inventory units. This is a calculated measure. |
|
Wp Cum Avg Inv R |
The planned cumulative average inventory retail. This is a calculated measure. |
|
Wp Cum Avg Inv C |
The planned cumulative average inventory cost. This is a calculated measure. |
|
Wp Cum Turn U |
The planned cumulative turn units. This is a calculated measure. |
|
Wp Cum Turn R |
The planned cumulative turn retail. This is a calculated measure. |
|
Wp Cum Turn C |
The planned cumulative turn cost. This is a calculated measure. |
After you have developed the receipt flow, review the receipt and inventory plan in the Item Plan worksheet.
Use this worksheet to review the receipt and inventory plan you created in the Item Plan Parameters worksheet.
Change the measure profile of the Item Plan worksheet to Receipts and Inventory.
Review the receipt units in the Wp Receipt U measure.
Return to the Sales and Margin Plan measure profile.
Review the gross margin in the Sales and Margin Plan measure profile. The margin measures are populated now that the receipt markup has been planned.
If you are satisfied with the receipts and inventory plan, continue to the Review and Approval Tab. If not, return to the Item Plan Parameters Worksheet: Receipt Parameters Measure Profile to adjust the plan.
After you have developed the sales and margin and receipts and inventory plans, compare them to the plans created in the Merchandise Financial Planning (MFP) application. Once you have reviewed the plans, approve them in the Plan Approval worksheet.
This tab contains three worksheets: Plan Review Worksheet, All Measures, and Plan Approval Worksheet.
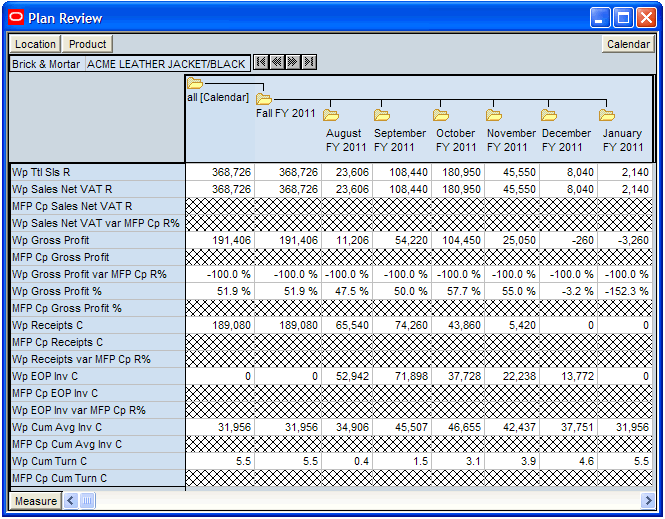
Use this worksheet to compare the plan to the plans created in MFP. Several measure profiles are available for comparison:
Compare to MFP Cost Cp Plan
Compare to MFP Cost Op Plan
Compare to MFP Retail Cp Plan
Compare to MFP Retail Op Plan
Compare to MFP Unit Plan
The All Measures worksheet contains all the measures in the workbook; however, only the Wp Ttl Sls U measure is visible in the default measure profile. The purpose of this worksheet allows to create a view of workbook measures that you may not be able to view all at once in other worksheets.
To see the other measures in this worksheet, perform the following steps:
Right-click the Measure dimension tile and click Select Display and Sort Attributes. The All Measures - Measure window appears.
The Tree Options window appears. Click the Show/Hide tab.
Move measures you want to see in the worksheet from the Hidden Measures box to the Visible Measures box.
When finished, click OK.
For more information about hidden and visible measures, see the Oracle Retail Predictive Application Server User Guide for the Classic Client.
After you have reviewed the plans, approve them in this worksheet.
The approval process is self-approved and executed by the item planner. The versions to be updated are determined during the approval process. During preseason, it is recommended that Op and Cp are updated together to ensure synchronization. When in-season planning begins, only the Cp version is updated. If for some reason the Op needs to be updated after in-season planning has begun, you have the option to approve to the Op version only. Note that in this case, only unelapsed time periods are approved from Wp to Op.
By default, all quarters are disabled for Op approval. If the administrator allows users to approve to Op, you can approve the Op.
To approve the plans, perform the following steps:
Use the Wp Approve measure to approve the plan. You can approve just the current plan, just the original plan, or both plans.
Optional: Enter comments in the Wp Approval Comments measure.
When ready to approve, click Approve Item Plans in the Planning Actions menu.
A success message appears, informing you that the plan was successfully approved. Click OK to close it.
The worksheet refreshes and the Wp Approve and Wp Approval Comments measures are cleared. The Wp Last Approval Action measure along with the associated Op and Cp measures are populated (Figure 6-27).
Table 6-9 lists the measures available on this worksheet.
Table 6-9 Approval Worksheet Measures
| Measure | Description |
|---|---|
|
Wp Approve |
Use this measure to approve the plan to the current plan, original plan, or both. |
|
Wp Last Approval Action |
Displays the last type of approval for the time period. The choices are Approve Op and Cp, Approve Op Only, and Approve Cp Only. |
|
Wp Approval Comments |
Use this measure to enter comments about the plan. |
|
Op Last Approved Date |
The date that the last original plan was approved. |
|
Op Last Approved By |
The username of the person who last approved the original plan. |
|
Op Last Approved Comments |
The comments about the original plan approval made by the user. |
|
Cp Last Approved Date |
The date that the last current plan was approved. |
|
Cp Last Approved By |
The username of the person who last approved the current plan. |
|
Cp Last Approved Comments |
The comments about the current plan approval made by the user. |
To commit your plan, perform the following steps:
Approve your plans using the instructions in Plan Approval Worksheet section.
In the workbook that you have approved the plans, click Commit Now or Commit ASAP in the File menu.
Once the commit has occurred, the commit status changes to Committed.
Once in-season planning begins, use the worksheets in this tab to review the overall status of each style/color. Until you create and submit an item plan, the dashboard worksheets are empty.
The Dashboard tab has two worksheets: Dashboard Worksheet and Bounds Worksheet.
Use the Dashboard worksheet for a quick overview of each style's data.
The exception measures in this worksheet highlight data that falls within or outside of the bounds set in the next worksheet.
Table 6-10 lists the measures available on this worksheet.
Table 6-10 Dashboard Worksheet Measures
| Measure | Description |
|---|---|
|
Sales Retail |
The Retail value of Sales. |
|
Sales Exception |
The Sales exception that is highlighted per the user-defined upper and lower bound limits. |
|
Markdown |
Total Markdowns Retail. |
|
Markdown Exception |
The Markdown exception that is highlighted per the user-defined upper and lower bound limits. |
|
Gross Profit |
Gross Profit Retail. |
|
Gross Profit Exception |
The Gross profit result that is highlighted per the user-defined upper and lower bound limits. |
|
Gross Profit % |
Gross Profit Rate. |
|
Gross Profit Exception |
The Gross profit % result that is highlighted per the user-defined upper and lower bound limits. |
|
Sell Thru % |
The rate at which sales units are moved through beginning of period inventory. |
|
Sell Thru % Exception |
The Sell through % exception that is highlighted per the user-defined upper and lower bound limits. |
|
Turn Retail |
Cumulative Turnover representing the frequency which Inventory is sold and replaced over a stated time period Retail. |
|
Turn Exception |
The turn exception that is highlighted per the user-defined upper and lower bound limits. |
After you have reviewed the dashboard, continue to the Bounds Worksheet.
The Bounds worksheet allows you to set the upper and lower bounds for sales, markdown, gross profit, sell through, and turn.
Table 6-11 lists the measures available on this worksheet.
Table 6-11 Bounds Worksheet Measures
| Measure | Description |
|---|---|
|
Sales Lower Bound |
User-defined sales lower limit. If the sales of any style/color is below this threshold, it is highlighted in the Dashboard worksheet as an exception. |
|
Sales Upper Bound |
User-defined sales upper limit. If the sales of any style/color is above this threshold, it is highlighted in the Dashboard worksheet as an exception. |
|
Markdown Lower Bound |
User-defined markdown lower limit. If the markdown of any style/color is below this threshold, it is highlighted in the Dashboard worksheet as an exception. |
|
Markdown Upper Bound |
User-defined markdown upper limit. If the markdown of any style/color is above this threshold, it is highlighted in the Dashboard worksheet as an exception. |
|
Gross Profit Lower Bound |
User-defined gross profit lower limit. If the gross profit of any style/color is below this threshold, it is highlighted in the Dashboard worksheet as an exception. |
|
Gross Profit Upper Bound |
User-defined gross profit upper limit. If the gross profit of any style/color is above this threshold, it is highlighted in the Dashboard worksheet as an exception. |
|
Gross Profit % Lower Bound |
User-defined gross profit percentage lower limit. If the gross profit percentage of any style/color is below this threshold, it is highlighted in the Dashboard worksheet as an exception. |
|
Gross Profit % Upper Bound |
User-defined gross profit percentage upper limit. If the gross profit percentage of any style/color is above this threshold, it is highlighted in the Dashboard worksheet as an exception. |
|
Sell Thru % Lower Bound |
User-defined sell through percentage percentage lower limit. If the sell through percentage of any style/color is below this threshold, it is highlighted in the Dashboard worksheet as an exception. |
|
Sell Thru % Upper Bound |
User-defined sell through percentage upper limit. If the sell through percentage of any style/color is above this threshold, it is highlighted in the Dashboard worksheet as an exception. |
|
Turn Lower Bound |
User-defined turn percentage lower limit. If the turn of any style/color is below this threshold, it is highlighted in the Dashboard worksheet as an exception. |
|
Turn Upper Bound |
User-defined turn percentage upper limit. If the turn of any style/color is above this threshold, it is highlighted in the Dashboard worksheet as an exception. |