| Oracle® WebCenter Framework Developer's Guide 10g (10.1.3.2.0) Part Number B31074-05 |
|
|
View PDF |
| Oracle® WebCenter Framework Developer's Guide 10g (10.1.3.2.0) Part Number B31074-05 |
|
|
View PDF |
This chapter describes the procedures to configure data controls based on Java Content Repository (JCR), such as Oracle Content Database (Oracle Content DB), Oracle Application Server Portal (OracleAS Portal), IBM Lotus Domino, Microsoft SharePoint, EMC Documentum, and other content systems such as Stellent Content Server and Business Intelligence (BI) Publisher. This chapter also discusses, through examples, how to use these data controls to integrate and publish decentralized content in your WebCenter application. Read the following sections to understand how you can use the content integration capabilities of your WebCenter application:
Section 5.1, "Introduction to Content Integration Capabilities of Oracle WebCenter Suite"
Section 5.2, "Configuring Content Data Controls for JCR Adapters"
Section 5.4, "Configuring Data Controls Based on Stellent Content Server"
Section 5.5, "Using Stellent Content Server-Based Data Controls: Examples"
Section 5.6, "Integrating Oracle Business Intelligence Publisher"
The content integration capabilities of Oracle WebCenter Suite enable you to integrate decentralized content located across multiple JCR 1.0 (JSR 170) Level 1-compliant repositories, JCR adapters, JCR APIs and other content systems, such as Stellent Content Server and BI Publisher.
Section 5.2, "Configuring Content Data Controls for JCR Adapters" provides an overview of content data controls that are based on JCR 1.0 repositories, such as OracleAS Portal, Oracle Content DB, IBM Lotus Domino, Microsoft SharePoint, EMC Documentum, and discusses the procedures to configure these data controls. Section 5.3, "Using JCR Data Controls: Examples" contains examples to show how to use JCR data controls.
Stellent Content Server is a scalable, secure, and centralized Web-based repository that enables you to manage all phases of the content life cycle: from creation and approval to publishing, searching, expiration, and archival or disposition. Stellent Content Server lets everyone in your organization contribute content using desktop applications. It enables you to efficiently manage business content through its rich library services. You can access Stellent Content Server securely through a Web browser. See Section 5.4, "Configuring Data Controls Based on Stellent Content Server" for procedures to configure Stellent-based data controls and examples on how to use these data controls.
Oracle BI Publisher offers efficient and scalable reporting solutions for complex, distributed environments. Oracle BI Publisher enables you to assimilate data from multiple data sources into a single output document. It lets you generate and deliver information in suitable formats for different business groups. Oracle BI Publisher report formats can be designed using widely-used tools, such as Microsoft Word or Adobe Acrobat. The BI Publisher reports can be delivered through printer, e-mail, fax, or WebDav. See Section 5.6, "Integrating Oracle Business Intelligence Publisher" for procedures to integrate and store BI Publisher reports in WebCenter application.
The JCR data controls enable you to connect to and read from the file system, OracleAS Portal, Oracle Content DB, Microsoft SharePoint, and EMC Documentum as well as JCR 1.0 repositories. The JCR data controls enable you to publish content from any JCR 1.0 repository.
The JCR data controls discussed in the following sections provide you with easy-to-use methods that you can drag and drop onto JSF JSP pages to publish content as URLs, files, and folders:
Section 5.2.2, "Configuring a Content Data Control Based on the File System Adapter"
Section 5.2.3, "Configuring a Content Data Control Based on the OracleAS Portal Adapter"
Section 5.2.4, "Configuring a Content Data Control Based on the Oracle Content DB Adapter"
Section 5.2.5, "Configuring a Content Data Control Based on Oracle Content DB Version 10.2"
Section 5.2.10, "Applying Oracle ADF Security on JCR Data Controls"
See Also:
Section 12.2.8, "Deploying a Content Integration Application" to learn how to deploy content integration applicationsA data control is a container for all the data objects, collections, methods, and operations used to create User Interface (UI) components within your WebCenter application. In your WebCenter application, you can create content repository data controls that connect to different repositories through the following adapters:
File System: The File System adapter is used to add content located on your operating system's file system to JSF JSP pages.
Note:
The File System adapter is intended for development purposes only.OracleAS Portal: The OracleAS Portal adapter is used to integrate content from a content repository located in the Oracle Application Server Portal schema.
Oracle Content DB: The Oracle Content DB adapter is used to integrate content from a content repository located in a database and managed by Oracle Content DB.
Oracle WebCenter Adapter for IBM Lotus Domino: This adapter is used to integrate content from IBM Lotus Domino repository.
Oracle WebCenter Adapter for Microsoft SharePoint: This adapter is used to integrate content from Microsoft SharePoint 2003 repository.
Oracle WebCenter Adapter for EMC Documentum: This adapter is used to integrate content from EMC Documentum repository.
Each type of data control contains common methods and parameters to publish content as links, tables, files, and folders, and to add search and advanced search capabilities for your content. While the methods are similar across all types of data controls, the method attributes are of the following types:
Default attributes: The default attributes are common across File System, OracleAS Portal, Oracle Content DB, JCR Lotus Domino, JCR SharePoint, and JCR Documentum data controls.
Extended attributes: The extended attributes are created with OracleAS Portal, Oracle Content DB, JCR Lotus Domino, JCR SharePoint, and JCR Documentum data controls and are unique to each.
Custom attributes: The custom attributes are requirement-specific and can be added easily.
Content Data Control Methods, Parameters, and Default Attributes
The following sections describe methods, parameters, and default attributes that are common across File System, OracleAS Portal, Oracle Content DB, JCR Lotus Domino, JCR SharePoint, and JCR Documentum data controls:
The search Method
The search method enables you to create a simple search by name pattern or keyword.
Table 5-1 describes the parameters of the search method.
Table 5-1 Parameters of the search Method
| Parameter | Description |
|---|---|
|
|
Starting path of the search. |
|
|
Specifies whether only the specified folder ( |
|
|
Search keyword for full text search. |
|
|
Pattern search on name. Use the |
Table 5-2 describes attributes of the search method.
Table 5-2 Attributes of the search Parameters
| Parameter | Description |
|---|---|
|
|
Describes the name of the returned file or folder. |
|
|
Describes the location of the returned file or folder within the content repository. The path is relative to the starting folder specified during the creation of the data control. |
|
|
The direct access URL of a file or folder. |
|
|
Describes whether the returned object is a file or folder. |
The advancedSearch Method
The advancedSearch method enables you to perform an advanced search by creating a set of search criteria out of any available attribute.
Table 5-3 describes the parameters of the advancedSearch method.
Table 5-3 Parameters of the advancedSearch Method
| Parameter | Description |
|---|---|
|
|
Starting path of the search. |
|
|
Specifies whether only the specified folder ( |
|
|
Search keyword for full text search. |
|
|
Pattern search on name. Use the |
|
|
Specifies whether all predicates ( |
|
|
A collection of |
|
|
Specifies what should be returned: only files, only folders, or any object. |
The advancedSearch method returns the attributes described in Table 5-4.
Table 5-4 Attributes of the advancedSearch Method Parameters
| Parameter | Description |
|---|---|
|
|
Describes the name of the returned file or folder. |
|
|
Describes the location of the returned file or folder within the content repository. The path is relative to the starting folder specified during the creation of the data control. |
|
|
The direct access URL of a file or folder. |
|
|
Describes whether the returned object is a file or folder. |
The getItems Method
The getItems method returns the files and folders stored starting at a particular location in the repository. This method enables you to publish content in forms, tables, and hierarchical trees. Using this method, you can also create navigation lists and buttons.
Table 5-5 describes the parameters of the getItems method.
Table 5-5 Parameters of the getItems Method
| Parameter | Description |
|---|---|
|
|
Defines starting point for |
|
|
Specifies what should be returned: only files, only folders, or any object. |
The getItems method returns the attributes described in Table 5-6.
Table 5-6 Parameters of the getItems Method
| Parameter | Description |
|---|---|
|
|
Describes the name of the returned file or folder. |
|
|
Describes the location of the returned file or folder within the content repository. The path is relative to the starting folder specified during the creation of the data control. |
|
|
The direct access URL of a file or folder. |
|
|
Describes whether the returned object is a file or folder. |
The getAttributes Method
The getAttributes method returns the list of attributes and their values for a given file or folder.
Table 5-7 describes the path parameter of the getAttributes method.
Table 5-7 Parameters of the getAttributes Method
| Parameter | Description |
|---|---|
|
|
Describes the path to the respective object. |
Table 5-8 describes the attributes that the getAttributes method returns.
Table 5-8 Parameters of the getAttributes Method
| Parameter | Description |
|---|---|
|
|
Name of the attribute. |
|
|
Value of the given item. |
The getURI Method
The getURI method returns the direct access URL to a file.
Table 5-9 describes the path parameter of the getURI method. You can use this method to create links to content and to inline content in your page.
Table 5-9 Parameters of the getURI Method
| Parameter | Description |
|---|---|
|
|
Describes the path to the respective object. |
The getURI method returns the URI attribute.
This section describes the procedure to configure a content data control based on the File System adapter that can access and publish content stored on your computer.
To configure a content data control based on the File System adapter, perform the following steps:
In Oracle JDeveloper, under the Applications Navigator, select your application that you created as described in Section 3.1, "Creating a WebCenter Application". Then, select Model and from the File menu select New. The New Gallery dialog box is displayed.
Under Categories, expand the Business Tier node and select Content Repository. Then, under Items, select the Content Repository Data Control, as shown in Figure 5-1, and click OK. The Create Data Control dialog box is displayed.
In the Create Data Control dialog box, click Next to skip the Welcome page.
On Step 1, enter a name for the data control, for example, SRFileSystem, and then click Next.
Note:
When you work on a UNIX system, the File System adapter inherits the case-sensitive file name characteristic of UNIX systems. So, on UNIX systems, you must ensure that references to files follow the same case as that used in the original file names. For example, suppose theTest.html file was created on a Microsoft Windows system. When you reference this file on a Linux system, you must ensure that you use Test.html, and not test.html or TEST.html.On Step 2, select File System from the Repository Type box.
In the Base Path field, enter the path to the folder in which your content is placed, for example, C:\SRContent.
Note:
This location will be used as the root ("/") for this data control in Section 5.3, "Using JCR Data Controls: Examples".Click the Test button to check whether you have entered the connection details correctly. You should see a Success! message, as shown in Figure 5-2.
If you get an error message, click OK. Then edit the Base Path to specify the full path and press Enter. Then, click Test again. If the test is successful, click OK to close the message box.
Click Next. The Attributes Configuration page is displayed, as shown in Figure 5-3. This page contains the lastModified extended attribute, which is used to show the date when the object was last modified.
Click Finish to complete the creation of the File System data control.
To display the data control you created, select Data Control Palette from the View menu.
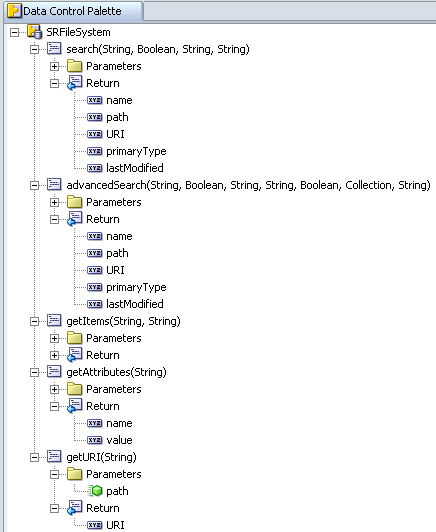
Expand SRFileSystem in the Data Control Palette to see a hierarchical list of methods, parameters, and operators for the new data control, as shown in Figure 5-4.
Note:
The default attributes are the same across File System, OracleAS Portal, and Oracle Content DB data controls. For more information, see Section 5.2.1, "Understanding Content Data Controls".Figure 5-4 Data Control Palette - SRFileSystem
See Also:
Section 5.3, "Using JCR Data Controls: Examples" for examples of how you can publish your content using these methodsThis section describes the procedure to create a content data control based on the OracleAS Portal adapter that enables you to integrate content from OracleAS Portal with your JSF JSP page.
This section covers the following:
Section 5.2.3.1, "What You Should Know About OracleAS Portal"
Section 5.2.3.2, "Creating a Content Data Control Based on the OracleAS Portal Adapter"
The following should be considered while using the OracleAS Portal adapter:
To use OracleAS Portal-based content data control functionality, you must install OracleAS Portal release 10.1.4. The OracleAS Portal must be up-to-date with the latest patches. Consult Oracle Application Server Release Notes for Microsoft Windows for release 10.1.3.2.0 to know the exact patch number.
In a production environment, OracleAS Portal-based content data control supports only public users.
The OracleAS Portal adapter uses a data source or a database connection and is dependent on connection pooling for good performance. So, to ensure high performance, the Oracle Containers for J2EE (OC4J) connection pooling must be configured in the embedded OC4J instance in your development environment, and in the OC4J instance to which you deploy your application. To configure connection pooling for the embedded OC4J, go to the Tools menu in Oracle JDeveloper and select Embedded OC4J Server Preferences. Then, under Data Sources, select jdev-connection-pool-your data source name and set Max Connections and Min Connections to 1. If you do not see jdev-connection-pool-your data source name, then click the Refresh Now button under Data Sources.
Note:
In the production environment, value for minimum and maximum connection parameters should be set based on the system load.For best performance and to minimize network latency, the portal repository database should be in the same subnet as the OC4J, with the deployed WebCenter application or as close as possible.
For the production environment, you can use Enterprise Manager to manually create a data source and connection pool. This requires the correct JNDI lookup name, which you can check in the data source configuration of the embedded OC4J instance in Oracle JDeveloper. For more information, see chapter titled "Data Sources" in Oracle Containers for J2EE Services Guide.
Only file, image, imagemap, and text item types and custom types based on these item types are supported.
The portal:container page type and its extensions are supported.
Content is always exposed in the default language of the page group. For example, if there are three page groups with different default languages, then the content displays only for those default languages and not for any translations that exist.
To create a content data control based on the OracleAS Portal adapter, perform the following steps:
In Oracle JDeveloper, go to the Applications Navigator. Under your application, select Model. Then, from the File menu select New. The New Gallery dialog box is displayed.
Under Categories, expand the Business Tier node and select Content Repository. Then, under Items, select the Content Repository Data Control, and click OK.
In the Create Data Control dialog box, click Next to skip the Welcome page.
On Step 1, enter a name for the data control, for example, SRContentRepository, and click Next.
On Step 2, select Oracle Portal from the Repository Type box, as shown in Figure 5-5.
Figure 5-5 Step 2 of Oracle Portal Configuration

Next to the Connection box, click New. The Create Database Connection - Welcome dialog box is displayed. Click Next.
On Step 1, enter a name for the database connection, for example, SRDatabase, and click Next.
On Step 2, enter database user name and password of the OracleAS Portal schema, and click Next. By default, the user is PORTAL.
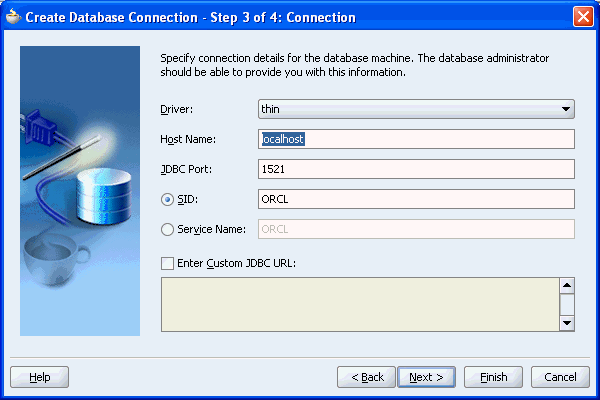
Table 5-10 Parameters for Creating OracleAS Portal-based Content Data Control
| Parameters | Description |
|---|---|
|
Driver |
There are two types of drivers: thin and oci8. The thin driver can be used to connect to Oracle Database release 8i or later databases with TCP/IP network protocols. This driver is included in the default Oracle JDBC library for all projects. The oci8 driver is used when creating a Java application that runs against an Oracle Application Server. This is a thick driver optimized for the Oracle Database. It is a mix of Java and native code. This driver handles any database protocol (TCP, IPX, BEQ, and so on). It is recommended for applications that are run from the computer on which they are stored. |
|
Host Name |
Name of the computer running on the Oracle Application Server. Use an IP address or a host name that can be resolved by TCP/IP, for example, |
|
JDBC Port |
Value to identify the TCP/IP port. |
|
SID |
Unique system identifier of an Oracle database instance. |
|
Service Name |
The service name for an Oracle database instance. |
|
Database URL |
Database URL of the portal schema in the
|
On Step 3, select a driver, enter the host name, JDBC port, SID, and service name, as shown in Figure 5-6. Alternatively, specify the database URL, as described in Table 5-10.
Figure 5-6 Create Database Connection - Step 3 of 4
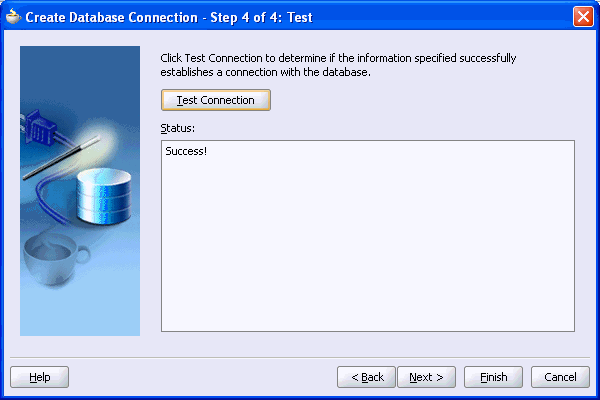
On Step 4, click Test. If the values are valid, then the Success! message is displayed, as shown in Figure 5-7.
Figure 5-7 Successful Database Connection
Click Finish to complete the database connection procedure. Step 2 of the Create Data Control dialog box is displayed.
Enter the OracleAS Portal SSO user name and password for logging in to your portal instance. The OracleAS Portal SSO user name and password are stored in the credential store. They are used by the data control to authenticate against the repository when the Use JAAS for Security checkbox is not selected.
Select the Use JAAS for security check box to transfer the identity from JAAS to the repository without passing the credentials. This option is useful for secured applications.
Click Test. The Success! message is displayed.
Note:
The test might fail if your OracleAS Portal instance is not up and running. A successful test is not necessary to create the data control.Click Next. The Attributes Configuration page is displayed, as shown in Figure 5-8.
The following are the extended attributes for OracleAS Portal:
lastModified: Shows the date when the object was last modified.
mimeType: Contains the mimetype of the corresponding document, or nothing for a folder.
creator: Shows the ID of the user who created the object.
lastModifier: Shows the ID of the user who last modified the object.
publishDate: Shows the date when the object was published.
expirationPeriod: Shows the date when the object will expire.
versionNumber: Shows the version number of the object.
To add custom attributes, click Add. Then, enter a name for the attribute as it should appear in the Data Control Palette, select its type, and enter the JCR path.
Note:
To retrieve the JCR paths of item attributes, run thegetAttributes method on the required items. Then, reenter the wizard to include those paths by selecting the DataControls.dcx file in the Applications Navigator, right-clicking the respective data control in the Structure Pane, and selecting Edit from the menu.You can remove a custom attribute by clicking Remove in the Attributes Configuration page.
Click Finish to complete the data control configuration procedure.
To display the data control that you created, from the View menu, select Data Control Palette.
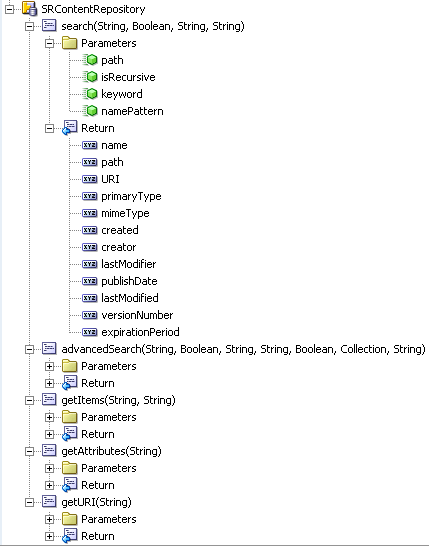
Expand SRContentRepository in the Data Control Palette to see the hierarchical list of methods, parameters, and operations for the new data control, as shown in Figure 5-9.
Note:
The default attributes are same across File System, OracleAS Portal, and Oracle Content DB data controls. See Section 5.2.1, "Understanding Content Data Controls" for more information.Figure 5-9 Data Control Palette - OracleAS Portal
See Also:
Section 5.3, "Using JCR Data Controls: Examples" for examples of how you can publish your content using these methods.This section describes how to configure a content data control based on the Oracle Content DB adapter for Oracle Content DB release 10.1.3.2.0 that ships with Oracle Application Server 10.1.3.2.0. In addition, it also discusses procedures to enable cleartext (unencrypted plain text) authentication and WS-Security, and configure Secure Sockets layer (SSL). Enabling cleartext authentication over HTTP and configuring SSL are optional.
Note:
To configure Oracle Content DB data control for Oracle Content DB version 10.2, see Section 5.2.5, "Configuring a Content Data Control Based on Oracle Content DB Version 10.2".This section contains the following subsections:
Section 5.2.4.1, "Configuring Keystores and Keys to Enable WS-Security"
Section 5.2.4.2, "Creating a Content Data Control Based on the Oracle Content DB Adapter"
Section 5.2.4.3, "Enabling Cleartext Authentication Over HTTP (Optional)"
To enable Web Services Security (WS-Security) trusted authentication for Oracle Content DB release 10.1.3.2.0, you must configure keystores on the system that hosts Oracle Content DB as well as on the system that hosts the WebCenter application. Trusted authentication means users can securely identify themselves to other users and servers on a network without sending secret information like passwords, over the network. WS-Security establishes a trust relationship between your WebCenter application and Oracle Content DB so that your WebCenter application can pass user identity information to Oracle Content DB without knowing the user's credentials.
Preparing to Configure Keystores and Keys
The following are the prerequisites for configuring keystores and keys:
You must configure Oracle ADF Security for your application before you set up a keystore. For more information about Oracle ADF Security, see Chapter 10, "Securing Your WebCenter Application".
On Windows, you can use the keytool utility provided with Oracle JDeveloper under JDEV_HOME/jdk/bin to set up keystores. However, you can find the keytool utility in any JDK, such as the JDK shipped with Oracle Application Server.
Note:
The steps in the following sections generate self-certified dummy keys. It is recommended that you use real certificates in a production environment.Configuring Keystores and Keys
To configure a keystore on the WebCenter application (client) side, perform the following steps:
In your development environment, go to JDEV_HOME/jdk/bin and open the command prompt.
Generate the client keystore by running the following keytool command:
keytool -genkey -keyalg RSA -validity 5000 -alias Client private key alias -keystore client-keystore.jks
-dname "cn=client" -keypass Private key password -storepass KeyStore password
To verify that the keys have been correctly created, run the following keytool command. This is an optional step, so you can skip it, if you want:
keytool -list -keystore client-keystore.jks -storepass KeyStore password
To use the key, sign it by running the following keytool command:
keytool -selfcert -validity 5000 -alias Client private key alias -keystore client-keystore.jks
-keypass Private key password -storepass KeyStore password
Export the client public key by running the following keytool command:
keytool -export -alias Client private key alias -keystore client-keystore.jks
-file client.pubkey -keypass Private key password -storepass KeyStore password
To configure a keystore for the Oracle Content DB (server) side, perform the following steps:
In the same development environment, go to JDEV_HOME/jdk/bin and open the command prompt.
Generate the server keystore by running the following keytool command:
keytool -genkey -keyalg RSA -validity 5000 -alias Server public key alias
-keystore server-keystore.jks -dname "cn=server" -keypass Private server key password -storepass KeyStore password
To verify that the keys have been correctly created, run the following keytool command:
keytool -list -keystore server-keystore.jks -keypass Server private key password -storepass KeyStore password
To use the key, sign it by running the following keytool command:
keytool -selfcert -validity 5000 -alias Server public key alias -keystore server-keystore.jks
-keypass Private server key password -storepass KeyStore password
Export the server public key to the server keystore by running the following keytool command:
keytool -export -alias Server public key alias -keystore server-keystore.jks
-file server.pubkey -keypass Server private key password -storepass KeyStore password
Verifying Signatures of Trusted Clients
To verify signatures of trusted clients, import the client public key into the server keystore, by performing the following steps:
In your development environment, go to JDEV_HOME/jdk/bin and open the command prompt.
To verify the signature of trusted clients, import the client's public key in to the server keystore by running the following keytool command:
keytool -import -alias Client public key alias -file client.pubkey -keystore
server-keystore.jks -keypass Private server key password -storepass KeyStore password
Import the server public key into the client keystore by running the following keytool command:
keytool -import -alias Server public key alias -file server.pubkey -keystore
client-keystore.jks -keypass Private key password -storepass KeyStore password
When the tool prompts you if the key is self certified, you must enter Yes. Example 5-1 shows a sample output that is generated after this procedure is completed successfully.
Example 5-1 Sample Output Generated by the Keytool
[user@server]$ keytool -import -alias client -file client.pubkey
-keystore server-keystore.jks -keypass Server private key password -storepass Keystore password
Owner: CN=client
Issuer: CN=client
Serial number: serial number, for example, 123a19cb
Valid from: Date, Year, and Time until: Date, Year, and Time
Certificate fingerprints:
        ...
Trust this certificate? [no]:  yes
Certificate was added to keystore.
Installing the Keystore on the Client
The client-keystore.jks file can be specified in either a relative path or an absolute path. If you use a relative path, then the keystore must be under Web Content/WEB-INF/lib/relative path. You specify the relative path to the keystore when you configure an Oracle Content DB-based content data control, described in Section 5.2.4.2, "Creating a Content Data Control Based on the Oracle Content DB Adapter".
If you use an absolute path, then the keystore is not deployed with your WebCenter application. Therefore, you must manually copy the keystore on the server where your WebCenter application is deployed and use the Predeployment tool to change the parameter if the absolute path you specified is not same on both computers. To learn the procedure to reconfigure keystore parameters using the Predeployment tool, see Section 12.2.2.2, "Predeploying WebCenter Applications and JCR Adapter-based Applications". It is recommended that you reconfigure the keystore and associated passwords when moving from a stage to a production environment. To learn how to reconfigure keystores and passwords, see chapter titled "Oracle Content DB Security" in Oracle Content Database for Oracle WebCenter Suite Administrator's Guide, and Section 12.5, "Updating Credentials in a Deployed Application".
Installing the Keystore on the Server
To install the keystore on the Oracle Content DB server, perform the following steps:
Copy the server keystore file server-keystore.jks in ORACLE_HOME/content/settings.
Set up the server keystore password that you created in Configuring Keystores and Keys, by running the changepassword script available in ORACLE_HOME/content/bin/ with the -k flag.
When executing the changepassword script for the first time, press the Enter key (without entering any value) for the old password.
Set up the private server key password that you created in Configuring Keystores and Keys, by running the changepassword script with the -p flag.
When executing the changepassword script for the first time, press the Enter key (without entering any value) for the old password.
Restart Oracle Content DB.
This section describes the procedure to create a content data control based on the Oracle Content DB adapter for Oracle Content DB release 10.1.3.2.0 that enables you to integrate content stored in an Oracle Database with your JSF JSP page. The Oracle Content DB data control contains methods and parameters discussed in Section 5.2.1, "Understanding Content Data Controls".
To create a content data control based on the Oracle Content DB adapter, perform the following steps:
In Oracle JDeveloper, go to the Applications Navigator. Under your application, select Model. Then, from the File menu select New. The New Gallery dialog box is displayed.
Under Categories, expand the Business Tier node and select Content Repository. Then, under Items, select Content Repository Data Control, and click OK.
In the Create Data Control dialog box, click Next to skip the Welcome page.
On Step 1, enter a name for the data control, for example, SRContentDB, and then click Next.
On Step 2, select Oracle Content DB from the Repository Type box.
Use WS-Security as the trusted authentication method and enter parameter values based on Table 5-11. You must set up keystores, as described in Section 5.2.4.1, "Configuring Keystores and Keys to Enable WS-Security", before configuring WS-Security trusted authentication method for Oracle Content DB data control.
Note:
The trusted client application does not need to provide a user credential because the server authenticates the trusted client application and assumes that the trusted client application has already verified the identity of the user.Table 5-11 Parameters for Configuring WS-Security Trusted Authentication in Oracle Content DB Release 10.1.3.2.0-Based Content Data Control
| Parameters | Description |
|---|---|
|
Trusted Authentication Method |
WS-Security is the trusted authentication method for servers release 10.1.3.2.0 and later. |
|
KeyStore Type |
The keystore type is usually |
|
KeyStore Password |
The password required to access the keystore. For more information, see Section 5.2.4.1, "Configuring Keystores and Keys to Enable WS-Security". |
|
KeyStore File Location |
The keystore location can be a relative path. For more information, see Installing the Keystore on the Client. |
|
Server Public Key Alias |
The public key of the server. For more information, see Section 5.2.4.1, "Configuring Keystores and Keys to Enable WS-Security". This key is used to encrypt messages sent to the server. |
|
Server URL |
URL of the server on which the data is located. It is a mandatory field. The format of server URL is:
|
|
Private Key Password |
The client private key password required to retrieve the key from the keystore. |
|
Private Key Alias |
The client private key alias in the keystore, for example client, as discussed in Section 5.2.4.1, "Configuring Keystores and Keys to Enable WS-Security". The key is used to sign messages to the server. The public key corresponding to this private key must be imported in the server keystore. |
|
Server Version Parameter |
This parameter is not required if the version of the server is 10.1.3.2 or later. |
Select the Use JAAS for security check box to transfer the identity to the repository without passing the credentials and instead relying on the trust relationship between the WebCenter application and Oracle Content DB. To use JAAS with the Oracle Content DB release 10.1.3.2.0, you must enable WS-Security.
Note:
You cannot test your content data control if the Use JAAS for security check box is selected.The Oracle Content DB data control does not support access using lightweight user name and password.
Click Next. The Attributes Configuration page is displayed, as shown in Figure 5-10.
Figure 5-10 Attributes Configuration - Oracle Content DB
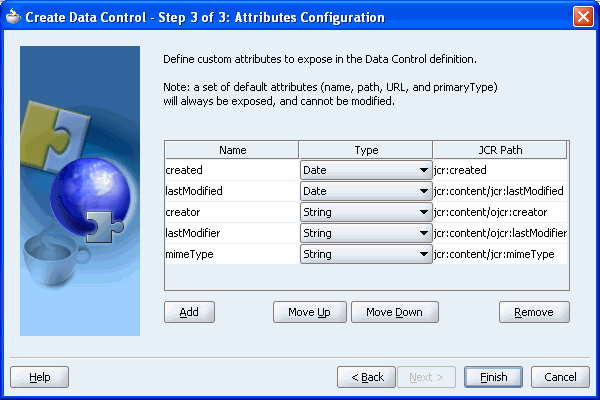
The following are the extended attributes for Oracle Content DB:
lastModified: Shows the date when the object was last modified.
creator: Shows the ID of the user who created the object.
lastModifier: Shows the ID of the user who last modified the object.
mimeType: Contains the mimetype of the corresponding document, or nothing for a folder.
To add custom attributes, click Add. Then, enter a name for the attribute as it should appear in the Data Control Palette, select its type, and enter the JCR path.
Note:
To retrieve the JCR paths of item attributes, run thegetAttributes method on the required items. Then reenter the wizard to include those paths by selecting the CPX file, right-clicking the respective data control in the Structure Pane, and selecting Edit from the menu.You can remove a custom attribute by selecting the attribute and then clicking Remove in the Attributes Configuration page.
Click Finish to complete the data control configuration procedure.
To display the data control that you created, from the View menu, select Data Control Palette.
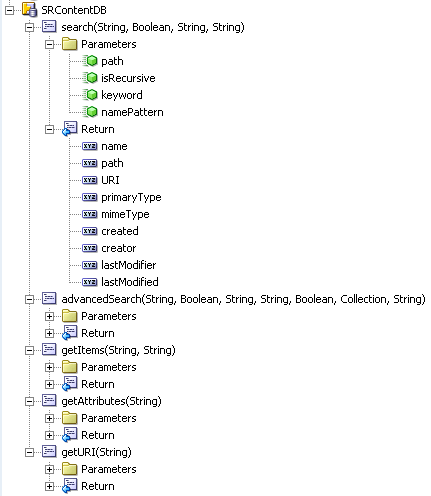
Expand SRContentDB in the Data Control Palette to see the hierarchical list of methods, parameters, and operations for the new data control, as shown in Figure 5-11.
Note:
The default attributes are same across File System, OracleAS Portal, and Oracle Content DB data controls. See Section 5.2.1, "Understanding Content Data Controls" for more information.Figure 5-11 Data Control Palette - Oracle Content DB
See Also:
Section 5.3, "Using JCR Data Controls: Examples" for examples of how you can publish your content using these methods.By default, the Oracle Content DB domain property CleartextAuthenticationRequiresHttps is set to true. If you want to access Oracle Content DB using simple credentials like user name and password over HTTP, then you must set this domain property to false. You do not have to set CleartextAuthenticationRequiresHttps to false in an environment where WS-Security is implemented over HTTP or HTTPS.
Caution:
If you enable cleartext authentication over HTTP, then your user name and password are transmitted in clear text. Change this domain property only in a development environment.To enable set CleartextAuthenticationRequiresHttps to false, perform the following steps:
Log in to the Application Server Control Console. The Cluster Topology page is displayed, as shown in Figure 5-12.
Under Members, expand any OC4J_Content instance, and then click content. The Application: content page is displayed, as shown in Figure 5-13.
Note:
The OC4J_Content instance must be running when you expand it. To start the OC4J_Content instance, select it and click Start.Under Related Links, click Content DB Extension, and then click the Administration tab. The Content DB: content page is displayed, as shown in Figure 5-14.
Next to Domain Properties, click the Go To Task icon. The Domain Properties page is displayed.
To find the IFS.DOMAIN.WS.CleartextAuthenticationRequiresHttps, property, enter it in the Search field and click Go. The page containing IFS.DOMAIN.WS.CleartextAuthenticationRequiresHttps is displayed, as shown in Figure 5-15.
Click IFS.DOMAIN.WS.CleartextAuthenticationRequiresHttps. The Edit IFS.DOMAIN.WS.CleartextAuthenticationRequiresHttps page is displayed.
Set the value to false, as shown in Figure 5-16, and click OK.
Figure 5-16 Edit IFS.DOMAIN.WS.CleartextAuthenticationRequiresHttps

Return to the Cluster Topology page and restart OC4J. If you have multiple Oracle Content DB middle tiers, then restart the OC4J_Content instance for each middle tier.
Secure Sockets Layer (SSL) configuration is optional, but SSL must be configured if there is a need to protect the integrity and security of the data transmitted between WebCenter applications and the Oracle Content DB server. It is highly recommended if your applications and server communicate over the public Internet. However, if WebCenter applications and Oracle Content DB are on the same server, or in the same data center, then it is not necessary to configure SSL.
To configure SSL, see section titled SSL Configuration for Oracle Content DB in Oracle Content Database for Oracle WebCenter Suite Administrator's Guide.
Note:
If your Oracle Content DB instance uses HTTPS, then a Security Alert dialog box may pop up prompting you to view the security certificate and add it to the list of trusted certificates. The Security Alert dialog box is displayed only if the Oracle Content Database (Oracle Content DB) instance uses a security certificate issued by a certificate authority that is not widely accepted. See Section 10.8, "Registering Custom Certificates with the Keystore" for the steps to be performed.Oracle Content DB release 10.1.3.2.0 comes packaged with Oracle Application Server 10.1.3.2.0 by default. However, WebCenter Framework also supports Oracle Content DB version 10.2. Section 5.2.5.1, "Creating a Content Data Control Based on Oracle Content DB" describes the procedure to configure a content data control for a Oracle Content DB adapter based on Oracle Content DB version 10.2.
Note:
Oracle Content DB must be up and running when you create an Oracle Content DB data control.The following sections include optional procedures:
This section describes the procedure to create an Oracle Content DB data control for Oracle Content DB version 10.2 that enables you to integrate content stored in an Oracle Database with your JSF JSP page. The Oracle Content DB data control contains methods and parameters discussed in Section 5.2.1, "Understanding Content Data Controls".
To create an Oracle Content DB data control, perform the following steps:
In Oracle JDeveloper, go to the Applications Navigator. Under your application, select Model. Then, from the File menu select New. The New Gallery dialog box is displayed.
Under Categories, expand the Business Tier node and select Content Repository. Then, under Items, select Content Repository Data Control, and click OK.
In the Create Data Control dialog box, click Next to skip the Welcome page.
On step 1, enter a name for the data control, for example, SRContentDB, and then click Next.
On step 2, select Oracle Content DB from the Repository Type box.
Use Service-to-Service (S2S) trusted authentication method, and enter appropriate parameter values based on Table 5-12.
For information about setting up service-to-service authentication, see Oracle Workspaces Web Services Application Developer's Guide on the Oracle Collaboration Suite Documentation page on Oracle Technology Network (OTN) (http://www.oracle.com/technology/documentation/collab.html).
Table 5-12 Parameters for Configuring S2S Trusted Authentication in Content Data Control Based on Oracle Content DB version 10.2
| Parameters | Description |
|---|---|
|
Trusted Authentication Method |
S2S is the trusted authentication method for servers of version 10.2. |
|
S2S Application Name |
The trusted client application name. The format is usually LDAP distinguished name (DN). |
|
S2S Application Password |
The trusted client application password. |
|
Server Version Parameters |
The version of the server is 10.2. |
|
Server URL |
URL of the server on which the data is located. It is a mandatory field. The format of server URL is:
|
Note:
The trusted client application does not need to provide a user credential because the server authenticates the trusted client application and assumes that the trusted client application has already verified the identity of the user.Select the Use JAAS for security check box to transfer the identity to the repository without passing the credentials and instead relying on the trust relationship between the application and Oracle Content DB. To access 10.2 version of Oracle Content DB, you must set up S2S authentication.
Note:
You cannot test your content data control if the Use JAAS for security check box is selected.Click Next. The Attributes Configuration page is displayed, as shown in Figure 5-10.
Figure 5-17 Attributes Configuration - Oracle Content DB

The following are the extended attributes for Oracle Content DB:
lastModified: Shows the date when the object was last modified.
creator: Shows the ID of the user who created the object.
lastModifier: Shows the ID of the user who last modified the object.
mimeType: Contains the mimetype of the corresponding document, or nothing for a folder.
To add custom attributes, click Add. Then, enter a name for the attribute as it should appear in the Data Control Palette, select its type, and enter the JCR path.
Note:
To retrieve the JCR paths of item attributes, run thegetAttributes method on the required items. Then, reenter the wizard to include those paths by selecting the DataControls.dcx file in the Applications Navigator, right-clicking the respective data control in the Structure Pane, and selecting Edit from the menu.You can remove a custom attribute by clicking Remove in the Attributes Configuration page.
Click Finish to complete the data control configuration procedure.
To display the data control that you created, from the View menu, select Data Control Palette.
Expand SRContentDB in the Data Control Palette to see the hierarchical list of methods, parameters, and operations for the new data control, as shown in Figure 5-11.
Note:
The default attributes are the same across File System, OracleAS Portal, and Oracle Content DB data controls. See Section 5.2.1, "Understanding Content Data Controls" for more information.Figure 5-18 Data Control Palette - Oracle Content DB

See Also:
Section 5.3, "Using JCR Data Controls: Examples" for examples of how you can publish your content using these methods.To enable cleartext authentication for Web services, see procedure in Section 5.2.4.3, "Enabling Cleartext Authentication Over HTTP (Optional)".
To configure SSL, see procedure in Section 5.2.4.4, "Configuring SSL (Optional)".
This section discusses the following:
Section 5.2.6.1, "Overview of the Oracle WebCenter Adapter for IBM Lotus Domino"
Section 5.2.6.2, "Platform Requirements for Oracle WebCenter Adapter for IBM Lotus Domino"
Section 5.2.6.3, "What You Should Know About Oracle WebCenter Adapter for IBM Lotus Domino"
Section 5.2.6.4, "Installing Oracle WebCenter Adapter for IBM Lotus Domino in Oracle JDeveloper"
Section 5.2.6.6, "Configuring a Data Control based on Oracle WebCenter Adapter for IBM Lotus Domino"
Section 5.2.6.7, "Verifying the JCR Domino Adapter Library in the Model Project"
Oracle WebCenter adapter for Lotus Domino extracts and searches content in a IBM Lotus Domino server. The adapter accesses IBM Lotus Domino server using Java APIs. Java classes access Domino objects through CORBA by making remote (IIOP) calls. The following are the main purposes of Oracle WebCenter adapter for Lotus Domino:
Read metadata and content of documents and views stored in a Domino database.
Search for documents stored in a Domino database.
Oracle WebCenter adapter for IBM Lotus Domino must be installed with a high speed network connection to the IBM Lotus Domino repository. The following are the platform requirements:
The Oracle WebCenter adapter for IBM Lotus Domino supports IBM Lotus Domino Server version 6.5.x or 7.0.x.
The IBM Domino database must be configured with full text indexing to support searches of its data.
It is recommended that both client and server are deployed on the same LAN network.
If a WAN network is used, then network throughput must be high and latency must be low to manage network traffic that the IIOP protocol generates.
For information on network-related analysis and troubleshooting of Domino servers, see the vendor documentation for IBM Lotus Domino.
The Domino adapter provides access to the Documents and Views within a Domino database. Appendix F, "Node Type Definitions for the Oracle WebCenter Adapter for IBM Lotus Domino" describes how the data is mapped to JCR node types.
The adapter node type mapping reflects the structure of a Domino database. Although this mapping uses nt:file and nt:folder types, the Domino types need to be more specialized to support the Domino data. The generic data control is optimized for content repositories that follow a simple file and folder model. Therefore, it is possible that pages built using the generic data control will not achieve the desired results for a particular Domino database. A possible approach for more complex data is to build a custom data control tailored to a Domino database. A custom data control can be created from a Java bean that uses the JCR interface directly to access the required data. The generic data control can be of use in the development of a custom data control since it allows a developer to explore the structure of data within a Domino database, for example viewing the Items as a Tree, as described in Section 5.3.3, "Publishing Folder Content in a Tree" and viewing the attributes of a particular node using the getAttributes method.
Latest Patch Required
To use IBM Lotus Domino-based content data control functionality, Oracle JDeveloper and Oracle Application Server must be up-to-date with the latest patch. Consult Oracle Application Server Release Notes for Microsoft Windows for release 10.1.3.2.0 to know the exact patch number.
Importing the Shared Library for Oracle WebCenter Adapter for IBM Lotus Domino
If the shared library is not imported by default, then the application's orion-application.xml must be modified to import the Domino shared library, as described in Section 12.2.1.3, "Manually Creating and Editing the orion-application.xml File". Example 5-2 shows the orion-application.xml file to import the Domino shared library.
Example 5-2 orion-application.xml to Import the Domino Shared Library
<?xml version = '1.0' encoding = 'windows-1252'?>
<orion-application xmlns:xsi="http://www.w3.org/2001/XMLSchema-instance"
xsi:noNamespaceSchemaLocation="http://xmlns.oracle.com/oracleas/schema/orion-application-10_0.xsd">
  <library path="./adf"></library>
  <jazn location="/jazn-data.xml" provider="XML"/>
  <imported-shared-libraries>
    <import-shared-library name ="oracle.vcr.adf2domino">
  </imported-shared-libraries>
</orion-application>
To install Oracle WebCenter adapter for IBM Lotus Domino on Oracle JDeveloper, perform the following steps:
Extract /adapter/adf2domino.zip that contains oracle.vcr.adf2jcr.10.1.3.zip, and oracle.vcr.adf2domino.10.1.3.zip.
Extract the shared library package oracle.vcr.adf2jcr.10.1.3.zip archive to JDEV_HOME/jdev/extensions. If you extracted this library package while installing Oracle WebCenter adapters for Microsoft SharePoint or EMC Documentum, then skip this step.
Extract the adapter package oracle.vcr.adf2domino.10.1.3.zip archive to JDEV_HOME/jdev/extensions.
Copy the Notes.jar archive from your IBM Lotus Notes Domino install to JDEV_HOME/jdev/extensions/oracle.vcr.adf2domino.10.1.3.
Restart Oracle JDeveloper to activate the Oracle WebCenter adapter for IBM Lotus Domino.
The adapter is installed into the Oracle Application Server as a shared library. You can install Oracle WebCenter adapter for IBM Lotus Domino on Oracle Application Server by performing either of the following procedures:
Installing Oracle WebCenter Adapter for IBM Lotus Domino on Oracle Application Server using admin_client.jar
To install the adapter on Oracle Application Server, perform the following steps:
Extract /adapter/adf2domino.zip that contains oracle.vcr.adf2jcr.10.1.3.zip, and oracle.vcr.adf2domino.10.1.3.zip.
Extract the oracle.vcr.adf2jcr.10.1.3.zip archive to a temporary directory, for example, mydomino.
Extract the oracle.vcr.adf2domino.10.1.3.zip archive to the mydomino directory.
Copy the Notes.jar from your IBM Lotus Domino install into the mydomino directory.
To create the Domino shared library, run the command shown in Example 5-3 on Linux and Example 5-4 on Windows, from the mydomino directory.
Example 5-3 Syntax to Install Oracle WebCenter Adapter for IBM Lotus Domino on Linux
#In the following syntax, the format of DEPLOYER_URI_OC4J_INSTANCE should be deployer:cluster:opmn://server.company.com:6004/home
#The opm request port may not be 6004. To find the port for an install, see APPLICATION_SERVER_INSTALL_DIR/opmn/conf/opmn.xml configuration file.
java -jar ORACLE_HOME/j2ee/home/admin_client.jar \
DEPLOYER_URI_OC4J_INSTANCE username password \
-publishSharedLibrary -name oracle.vcr.adf2domino -version 10.1.3 \
-installCodeSources \
oracle.vcr.adf2domino.10.1.3.jar \
oracle.vcr.adf2domino.10.1.3/day-commons-ldapclient.jar \
oracle.vcr.adf2domino.10.1.3/crx-auth-ldap.jar \
oracle.vcr.adf2domino.10.1.3/crx-core.jar \
oracle.vcr.adf2domino.10.1.3/crx2domino.jar \
oracle.vcr.adf2domino.10.1.3/adf2domino.jar \
oracle.vcr.adf2domino.10.1.3/commons-pool.jar \
oracle.vcr.adf2domino.10.1.3/ehcache.jar \
oracle.vcr.adf2jcr.10.1.3/adf2crx.jar \
oracle.vcr.adf2jcr.10.1.3/crx-api.jar \
oracle.vcr.adf2jcr.10.1.3/concurrent.jar \
oracle.vcr.adf2jcr.10.1.3/crx-commons.jar \
oracle.vcr.adf2jcr.10.1.3/day-collections.jar\
oracle.vcr.adf2jcr.10.1.3/slf4j-jdk14.jar \
oracle.vcr.adf2jcr.10.1.3/lucene-core.jar \
oracle.vcr.adf2jcr.10.1.3/did.jar \
oracle.vcr.adf2jcr.10.1.3/day-commons-text.jar \
oracle.vcr.adf2jcr.10.1.3/day-commons-naming.jar \
Notes.jar \
-imports adf.oracle.domain oracle.xml apache.commons.logging
Example 5-4 Syntax to Install Oracle WebCenter Adapter for IBM Lotus Domino on Windows
java -jar ORACLE_HOME\j2ee\home\admin_client.jar
deployer:oc4j:opmn://server.company.com:6004/home oc4jadmin password
-publishSharedLibrary -name oracle.vcr.adf2domino -version 10.1.3
-installCodeSources oracle.vcr.adf2domino.10.1.3.jar
oracle.vcr.adf2domino.10.1.3.jar
oracle.vcr.adf2domino.10.1.3/day-commons-ldapclient.jar
oracle.vcr.adf2domino.10.1.3/crx-auth-ldap.jar
oracle.vcr.adf2domino.10.1.3/crx-core.jar
oracle.vcr.adf2domino.10.1.3/crx2domino.jar
oracle.vcr.adf2domino.10.1.3/adf2domino.jar
oracle.vcr.adf2domino.10.1.3/commons-pool.jar
oracle.vcr.adf2domino.10.1.3/ehcache.jar
oracle.vcr.adf2jcr.10.1.3/crx-api.jar oracle.vcr.adf2jcr.10.1.3/concurrent.jar
oracle.vcr.adf2jcr.10.1.3/crx-commons.jar
oracle.vcr.adf2jcr.10.1.3/day-collections.jar
oracle.vcr.adf2jcr.10.1.3/slf4j-jdk14.jar
oracle.vcr.adf2jcr.10.1.3/lucene-core.jar oracle.vcr.adf2jcr.10.1.3/did.jar
oracle.vcr.adf2jcr.10.1.3/day-commons-text.jar
oracle.vcr.adf2jcr.10.1.3/day-commons-naming.jar dfc.jar dfcBase.jar
Before configuring a data control based on Oracle WebCenter adapter for IBM Lotus Domino, you must perform the procedure in Section 5.2.6.4, "Installing Oracle WebCenter Adapter for IBM Lotus Domino in Oracle JDeveloper".
To configure the data control, perform the following steps:
In the Oracle JDeveloper, under Applications Navigator, select the Model project of your application. Then, select New from the File menu. The New Gallery is displayed.
Under Business Tier, select Content Repository and click OK.
Click Next to skip the Welcome page.
On Step 1: Data Control Name, enter a name for the new Domino adapter-based data control, and click OK.
On Step 2: Content Repository Configuration, select JCR Domino Adapter from the Repository Type box.
On Step 2: Content Repository Configuration, specify the configuration parameters as shown in Table 5-13.
Table 5-13 Configuration Parameters for the Data Control based on Oracle WebCenter Adapter for IBM Lotus Domino
| Parameter | Description |
|---|---|
|
Password |
Password of an IBM Lotus Domino administrative user for the database. |
|
Max. view entries |
This is a mandatory parameter and accepts numeric value. This can be used to restrict the number of child nodes retrieved in a view. For example, for an IBM Lotus Notes email database, the inbox (view name ( |
|
Cache directory |
By default, the adapter uses the current directory to cache information. Using this parameter you can specify a different directory for this cache location. |
|
Host name |
The name or IP address of the server where IBM Lotus Domino is installed. |
|
Database name |
The name of the database in the IBM Lotus Domino server, for example, |
|
Username |
The name of IBM Lotus Domino user. The user must have administrative rights, that is the user must have full access rights to the database specified by previous parameter.Note that the users are identified by their Lotus Domino User ID rather than Lotus Domino username. |
|
Server name |
The name of the IBM Lotus Domino server. |
Select either the Use JAAS for Security check box, or supply a set of shared credentials in the Username and Password fields. If you specify shared credentials, then every connection to the Oracle WebCenter adapter for IBM Lotus Domino will use this same set of shared credentials. If you use JAAS for security, then the user identity will be used to log into the adapter. When configuring JAAS, for security reasons, it is strongly advised that the IBM Lotus Domino repository shares identity management with the application server. This is because the JCR adapter uses a trust model to permit logon to the Domino repository based on user identity alone.
Note:
To change shared credentials post deployment, use the Edit Data Control wizard and then redeploy the application.Click Finish to complete the creation of the JCR data control. The data control is displayed under the Data Control Palette.
You can verify the JCR Domino adapter library after you have performed the procedure in Section 5.2.6.6, "Configuring a Data Control based on Oracle WebCenter Adapter for IBM Lotus Domino".
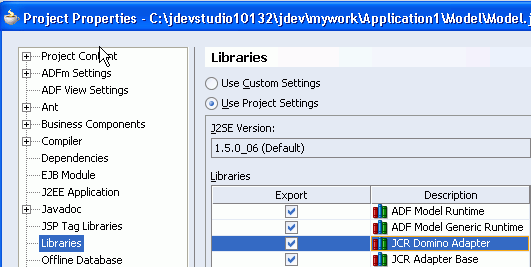
To verify whether the JCR Domino adapter has been added to the library, perform the following steps:
In the Oracle JDeveloper, right-click the Model project of your application under Applications Navigator, and select Project Properties. The Project Properties dialog box is displayed.
Select Libraries. The JCR Domino Adapter library is displayed under Libraries.
Figure 5-19 Project Properties Dialog Box
Click OK to close the Project Properties dialog box.
This section discusses the following:
Section 5.2.7.1, "Overview of Oracle WebCenter Adapter for Microsoft SharePoint"
Section 5.2.7.3, "What You Should Know About Oracle WebCenter Adapter for Microsoft SharePoint"
Section 5.2.7.4, "Installing Oracle WebCenter Adapter for Microsoft SharePoint in Oracle JDeveloper"
Section 5.2.7.6, "Installing Additional SharePoint Services on Microsoft SharePoint 2003 Server"
The Oracle WebCenter adapter for Microsoft SharePoint extracts and searches content within a Microsoft SharePoint 2003 repository. The adapter supports the various object types with a SharePoint 2003 repository. For information about the type support and mapping to JCR, see Section F.2, "Node Type Definitions for the Oracle WebCenter Adapter for Microsoft SharePoint".
The adapter accesses the repository using the Microsoft SharePoint SOAP interfaces, and additionally uses some JCR components installed on the SharePoint server for search and change notification support.
The Oracle WebCenter adapter for Microsoft SharePoint requires Microsoft SharePoint Services 2003 with Microsoft SQL Server 2000.
The Oracle WebCenter adapter for Microsoft SharePoint runs on the following:
Windows Server 2000, 2003
Red Hat Enterprise Linux Advanced Server 3 and 4
To enable certain search features, additional configuration steps are performed in the SharePoint instance. The Full-text search needs to be enabled in the Administrative Tools. To enable search in specific language, the correct language resource package must be selected in the MS SQL server (for example, neutral). For more information, see MS SharePoint 2003 documentation.
This section covers the following:
Importing the Shared Library of Oracle WebCenter Adapter for Microsoft SharePoint
Optimizing Performance of Oracle WebCenter Adapter for Microsoft SharePoint
Latest Patch Required
To use Microsoft SharePoint-based content data control functionality, Oracle JDeveloper and Oracle Application Server must be up-to-date with the latest patch. Consult Oracle Application Server Release Notes for Microsoft Windows for release 10.1.3.2.0 to know the exact patch number.
Importing the Shared Library of Oracle WebCenter Adapter for Microsoft SharePoint
If the shared library of Oracle WebCenter adapter for Microsoft SharePoint is not imported by default, then the application's orion-application.xml must be modified to import the SharePoint shared library, as described in Section 12.2.1.3, "Manually Creating and Editing the orion-application.xml File". Example 5-5 shows orion-application.xml file to import the SharePoint shared library.
Example 5-5 orion-application.xml to Import the SharePoint Shared Library
orion-application.xml:
<?xml version = '1.0' encoding = 'windows-1252'?>
<orion-application xmlns:xsi="http://www.w3.org/2001/XMLSchema-instance"
xsi:noNamespaceSchemaLocation="http://xmlns.oracle.com/oracleas/schema/orion-application-10_0.xsd">
  <library path="./adf"></library>
  <jazn location="/jazn-data.xml" provider="XML"/>
  <imported-shared-libraries>
     <import-shared-library name ="oracle.vcr.adf2sharepoint">
  </imported-shared-libraries>
</orion-application>
Application Listener for Change Notification
The Oracle WebCenter adapter for Microsoft SharePoint includes a change listener servlet. The SharePoint Changes Service can send notifications of repository changes to this servlet. To enable notifications, the application's web.xml configuration file must include the servlet. Example 5-6 shows a sample web.xml entry for the servlet.
Example 5-6 web.xml
<servlet>
<servlet-name>SharepointChangeListenerServlet</servlet-name>
<servlet-class>oracle.vcr.adf2sharepoint.SharepointChangeListenerServlet</servlet-class>
</servlet>
<servlet-mapping>
<servlet-name>SharepointChangeListenerServlet</servlet-name>
<url-pattern>/sharepoint-changes</url-pattern>
</servlet-mapping>
Note:
Theurl-pattern must NOT be under a security constraint.The SharePoint Changes service must also be configured to send notification to the application. See Section 5.2.7.6.2, "Installing SharePoint Changes Service on Microsoft SharePoint 2003 Server" for an explanation of the service and its configuration.
Optimizing Performance of Oracle WebCenter Adapter for Microsoft SharePoint
This section explains how you can optimize performance of the Oracle WebCenter adapter for Microsoft SharePoint on Windows and Linux platforms, as follows:
Optimizing Performance of Oracle WebCenter Adapter for Microsoft SharePoint on Windows
Optimizing Performance of Oracle WebCenter Adapter for Microsoft SharePoint on Linux
Optimizing Performance of Oracle WebCenter Adapter for Microsoft SharePoint on Windows
This section describes the settings to tune Windows 2000, Windows XP, and Windows 2003 operating systems to optimize the performance of the Oracle WebCenter adapter for Microsoft SharePoint.
Configure the following settings or variables according to your specific tuning needs:
TCPTimedWaitDelay: The TCPTimedWaitDelay determines the time that must elapse before TCP/IP can release a closed connection and reuse its resources. This interval between closure and release is known as the TIME_WAIT state or twice the maximum segment lifetime (2MSL) state. During this time, reopening the connection to the client and server costs less than establishing a new connection. By reducing the value of this entry, TCP/IP can release closed connections faster and provide more resources for new connections. Adjust this parameter if the running application requires rapid release, the creation of new connections, or an adjustment because of a low throughput caused by multiple connections in the TIME_WAIT state. To set this parameter:
Run the regedit command and access the HKEY_LOCAL_MACHINE\SYSTEM\CurrentControlSet\ Services\TCPIP\Parameters registry subkey.
Create a new REG_DWORD value named TcpTimedWaitDelay.
Set the value to decimal 30, which is Hex 0x0000001e. This value sets the wait time to 30 seconds.
The default value is 0xF0, which sets the wait time to 240 seconds (4 minutes). The recommended value is minimum 0x1E, which sets the wait time to 30 seconds.
Stop and restart the system.
MaxUserPort: This determines the highest port number that TCP/IP can assign when an application requests an available user port from the system. To set this parameter:
Run the regedit command and access the HKEY_LOCAL_MACHINE\SYSTEM\CurrentControlSet\ Services\TCPIP\Parameters registry subkey.
Create a new REG_DWORD value named MaxUserPort.
Set this value to at least decimal 32768.
The default value is none. The recommended value is at least decimal 32768.
Stop and restart the system.
Optimizing Performance of Oracle WebCenter Adapter for Microsoft SharePoint on Linux
To optimize the performance of Oracle WebCenter adapter for Microsoft SharePoint on Linux, set the timeout_timewait parameter. To do so, run the following command:
echo 30 > /proc/sys/net/ipv4/tcp_fin_timeout
Tip:
Thetimeout_timewait parameter on Linux and the TCPTimedWaitDelay parameter on Windows perform the same function. See Optimizing Performance of Oracle WebCenter Adapter for Microsoft SharePoint on Windows for an overview of the TCPTimedWaitDelay parameter.To install the Oracle WebCenter adapter for Microsoft SharePoint in Oracle JDeveloper, perform the following steps:
Extract /adapter/adf2sharepoint.zip that contains oracle.vcr.adf2jcr.10.1.3.zip, oracle.vcr.adf2sharepoint.10.1.3.zip, and sharepoint-services.zip.
Extract the shared library package oracle.vcr.adf2jcr.10.1.3.zip archive to JDEV_HOME/jdev/extensions. If you extracted this library package while installing Oracle WebCenter adapters for IBM Lotus Domino or EMC Documentum, then skip this step.
Extract the adapter package oracle.vcr.adf2sharepoint.10.1.3.zip archive to JDEV_HOME/jdev/extensions.
Restart Oracle JDeveloper to activate the Oracle WebCenter adapter for Microsoft SharePoint.
The Oracle WebCenter adapter for Microsoft SharePoint is installed into the Oracle Application Server as a shared library. You can install the adapter by performing either of the following procedures:
Installing Oracle WebCenter Adapter for Microsoft SharePoint on Oracle Application Server using admin_client.jar
To install the Oracle WebCenter adapter for Microsoft SharePoint on Oracle Application Server, perform the following steps:
Extract /adapter/adf2sharepoint.zip that contains oracle.vcr.adf2jcr.10.1.3.zip, oracle.vcr.adf2sharepoint.10.1.3.zip, and sharepoint-services.zip.
Extract the oracle.vcr.adf2jcr.10.1.3.zip archive to a temporary directory, for example, mysharepoint.
Extract the oracle.vcr.adf2sharepoint.10.1.3.zip archive to the mysharepoint directory.
To create the SharePoint shared library, run the command shown in Example 5-7 on Linux and Example 5-8 on Windows, from the mysharepoint directory:
Example 5-7 Syntax to Install the Oracle WebCenter Adapter for Microsoft SharePoint on Linux
#In the following syntax, the format of DEPLOYER_URI_OC4J_INSTANCE should be
deployer:cluster:opmn://server.company.com:6004/home
#The opm request port is by default 6004, but on actual install it may be
different. To find the port for an install, see APPLICATION_SERVER_INSTALL_DIR/opmn/conf/opmn.xml configuration file.
java -jar ORACLE_HOME/j2ee/home/admin_client.jar DEPLOYER URI OC4J INSTANCE username password -publishSharedLibrary -name\
oracle.vcr.adf2sharepoint -version 10.1.3 -installCodeSources\
oracle.vcr.adf2sharepoint.10.1.3.jar \
oracle.vcr.adf2sharepoint.10.1.3/wsdl4j.jar \
oracle.vcr.adf2sharepoint.10.1.3/axiom-api.jar \
oracle.vcr.adf2sharepoint.10.1.3/axis2-adb.jar \
oracle.vcr.adf2sharepoint.10.1.3/sharepoint-api.jar \
oracle.vcr.adf2sharepoint.10.1.3/crx-core.jar \
oracle.vcr.adf2sharepoint.10.1.3/crx2sharepoint.jar \
oracle.vcr.adf2sharepoint.10.1.3/commons-httpclient.jar \
oracle.vcr.adf2sharepoint.10.1.3/commons-lang.jar \
oracle.vcr.adf2sharepoint.10.1.3/stax-api.jar \
oracle.vcr.adf2sharepoint.10.1.3/adf2sharepoint.jar \
oracle.vcr.adf2sharepoint.10.1.3/axis2-kernel.jar \
oracle.vcr.adf2sharepoint.10.1.3/commons-codec.jar \
oracle.vcr.adf2sharepoint.10.1.3/axiom-impl.jar \
oracle.vcr.adf2sharepoint.10.1.3/sharepoint-axis-impl.jar \
oracle.vcr.adf2sharepoint.10.1.3/stax.jar \
oracle.vcr.adf2sharepoint.10.1.3/xbean.jar \
oracle.vcr.adf2sharepoint.10.1.3/policy.jar \
oracle.vcr.adf2jcr.10.1.3/adf2crx.jar \
oracle.vcr.adf2jcr.10.1.3/crx-api.jar \
oracle.vcr.adf2jcr.10.1.3/concurrent.jar \
oracle.vcr.adf2jcr.10.1.3/crx-commons.jar \
oracle.vcr.adf2jcr.10.1.3/day-collections.jar \
oracle.vcr.adf2jcr.10.1.3/slf4j-jdk14.jar \
oracle.vcr.adf2jcr.10.1.3/lucene-core.jar \
oracle.vcr.adf2jcr.10.1.3/did.jar \
oracle.vcr.adf2jcr.10.1.3/day-commons-text.jar \
oracle.vcr.adf2jcr.10.1.3/day-commons-naming.jar \
-imports adf.oracle.domain oracle.xml apache.commons.logging
Example 5-8 Syntax to Install the Oracle WebCenter Adapter for Microsoft SharePoint on Windows
java -jar ORACLE_HOME\j2ee\home\admin_client.jar
deployer:oc4j:opmn://server.company.com:6003/home oc4jadmin password
-publishSharedLibrary -name oracle.vcr.adf2sharepoint -version 10.1.3
oracle.vcr.adf2sharepoint.10.1.3.jar
oracle.vcr.adf2sharepoint.10.1.3/wsdl4j.jar
oracle.vcr.adf2sharepoint.10.1.3/axiom-api.jar
oracle.vcr.adf2sharepoint.10.1.3/axis2-adb.jar
oracle.vcr.adf2sharepoint.10.1.3/sharepoint-api.jar
oracle.vcr.adf2sharepoint.10.1.3/crx-core.jar
oracle.vcr.adf2sharepoint.10.1.3/crx2sharepoint.jar
oracle.vcr.adf2sharepoint.10.1.3/commons-httpclient.jar
oracle.vcr.adf2sharepoint.10.1.3/commons-lang.jar
oracle.vcr.adf2sharepoint.10.1.3/stax-api.jar
oracle.vcr.adf2sharepoint.10.1.3/adf2sharepoint.jar
oracle.vcr.adf2sharepoint.10.1.3/axis2-kernel.jar
oracle.vcr.adf2sharepoint.10.1.3/commons-codec.jar
oracle.vcr.adf2sharepoint.10.1.3/axiom-impl.jar
oracle.vcr.adf2sharepoint.10.1.3/sharepoint-axis-impl.jar
oracle.vcr.adf2sharepoint.10.1.3/stax.jar
oracle.vcr.adf2sharepoint.10.1.3/xbean.jar
oracle.vcr.adf2sharepoint.10.1.3/policy.jar
oracle.vcr.adf2jcr.10.1.3/adf2crx.jar
oracle.vcr.adf2jcr.10.1.3/crx-api.jar
oracle.vcr.adf2jcr.10.1.3/concurrent.jar
oracle.vcr.adf2jcr.10.1.3/crx-commons.jar
oracle.vcr.adf2jcr.10.1.3/day-collections.jar
oracle.vcr.adf2jcr.10.1.3/slf4j-jdk14.jar
oracle.vcr.adf2jcr.10.1.3/lucene-core.jar
oracle.vcr.adf2jcr.10.1.3/did.jar
oracle.vcr.adf2jcr.10.1.3/day-commons-text.jar
oracle.vcr.adf2jcr.10.1.3/day-commons-naming.jar
-imports adf.oracle.domain oracle.xml apache.commons.logging
The Oracle Application Server can be configured such that the adapter's shared library is imported by default by every application deployed to the server. This is done by updating the system-application.xml file. For information on system application, see chapter titled "Introduction to Oracle Containers for J2EE (OC4J)" of Oracle Containers for J2EE Configuration and Administration Guide. Such a configuration is only advisable if the contents of the SharePoint shared library will not conflict with applications deployed to the container. If the SharePoint adapter shared library is not imported by default, the application must include the import in its configuration. See Importing the Shared Library of Oracle WebCenter Adapter for Microsoft SharePoint for more information.
Installing Oracle WebCenter Adapter for Microsoft SharePoint on Oracle Application Server using Application Server Control Console
To install Oracle WebCenter adapter for Microsoft SharePoint using Application Server Control Console, see the procedure described in Installing the Oracle WebCenter Adapter for EMC Documentum on Oracle Application Server using Application Server Control Console. See Installing Oracle WebCenter Adapter for Microsoft SharePoint on Oracle Application Server using admin_client.jar for the required JARs.
In addition to installing the Oracle WebCenter adapter for Microsoft SharePoint on your Oracle JDeveloper or Oracle Application Server instance, you must install two additional services on the SharePoint server. These services support search and notification between the SharePoint server and JCR SharePoint adapter.
This section covers the following tasks:
Section 5.2.7.6.1, "Installing Search Web Service On Microsoft SharePoint 2003 Server"
Section 5.2.7.6.2, "Installing SharePoint Changes Service on Microsoft SharePoint 2003 Server"
Before configuring the data control based on Oracle WebCenter adapter for Microsoft SharePoint, you must install the search Web service on your Microsoft SharePoint 2003 server version 2.0.
Note:
See Section 5.2.7.2, "Platform Requirements" for server requirements for supporting full text and natural language search.This section covers the following tasks:
Installing the Search Web Service
To install the search Web service, perform the following steps:
The search Web service is packaged as sharepoint-services.zip. Create a folder called sharepoint-services and extract this ZIP file. The following files are extracted:
etc\Web.config
lib\search\SharepointDBSearchService.asmx
lib\search\bin\log4net.dll
lib\search\bin\SharePointSearchService.dll
Create a new folder, for example, SharePointSearchService, on your local hard drive.
Copy the following search Web service files from the sharepoint-services folder to the SharePointSearchService folder. The directory structure should look like this:
SharePointSearchService\SharePointDBSearchService.asmx, the web service wrapper.
SharePointSearchService\Web.config, the web service configuration file.
SharePointSearchService\bin\log4net.dll, the logging library.
SharePointSearchService\bin\SharePointSearchService.dll, the web service library.
Open the Internet Information Services (IIS) Manager from Administrative Tools under Control Panel.
In the IIS Manager snap-in, open the Web site for which you would like to configure the search and add a new virtual folder, SharePointSearchService. To do this, perform the following steps:
Right-click the Web site and select New, Virtual Directory.
In the Virtual Directory Creation Wizard, specify SharePointSearchService, as the name for the service and click Next.
Select the directory where you have copied the service files and click Next.
Provide read and execute permission by selecting the Read and Execute options and click Next to complete the Virtual Directory Creation Wizard.
Configuring the SharePoint Environment
To configure the SharePoint environment to use the search Web service, perform the following steps:
Open the SharePoint Central Administration and click the Configure virtual server settings link in the Virtual Server Configuration section.
From the Virtual Server List, select the site for which you want to configure search.
Click the Define managed paths link in the Virtual Server Management section.
In the Add a New Path section, specify /SharePointSearchService in the Path field, and select the Excluded path option.
Click OK.
The new path, /SharePointSearchService, should now appear in the Excluded Paths section of this page.
To verify that the service was created successfully, use the following URL in your browser:
http://<site>/SharePointSearchService/SharePointDBSearchService.asmx
A Web service page is displayed with a list of operations supported by the Web service methods.
Configuring the Search Web Service
To configure the search Web service connection to the Microsoft SharePoint repository, you must change some settings of the copied Web.config file. To do this, open the Web.config file and update the following parameters with details specific to your installation:
<appSettings>
  <add key="ConnectionString"  value="DataSource=w2k3-11\sharepointportal;Initial Catalog=STS_W2K3-11_1040801166;Integrated Security=SSPI;" />
</appSettings>
To configure the connection to the SharePoint DB Server, use the connection strings in the ConnectionString parameter. These strings vary depending on the type of authentication used to access the MSSQL Server 2000 data:
Using Integrated Windows Authentication to access site data
Data Source=<DBINSTANCE>;Initial Catalog=<DBNAME>;Integrated Security=SSPI;
Using SQL authentication to access site data
Data Source=<DBINSTANCE>;Initial Catalog=<DBNAME>;User Id=<DBUSER>;Password=<DBUSERPASSWORD>;
where,
<DBINSTANCE> is an instance of the MSSQL Server 2000 with the SharePoint site's content, typically <hostname>/SHAREPOINT.
<DBNAME> is the name of the database with site content.
<DBUSER> is the SQL user name.
<DBUSERPASSWORD> is the SQL user password.
The name of the database can be retrieved from the SharePoint Central Administration page. Click the Configure virtual server settings link, select the server whose changes you want to listen to, and click the Manage Content Databases link. The database name is available in the Content Databases section.
The advantages of using Windows authentication is that no passwords are stored in the service configuration file. However, you must configure an application pool identity, which has sufficient rights to access the SharePoint site database, for the application pool to run as a Windows user. You can use IIS Manager snap-in to configure the application pool identity.
The SQL authentication does not require any additional steps to configure application pool identity, but in this case the SQL user password is stored in clear text which is not secure.
Executing Search SQL Scripts
Open any tool which can provide the script execution on the Microsoft SQL Server 2000. For example, you can use the standard Query Analyzer tool. Choose the database with the SharePoint Site data and run the Functions.sql script available in the SearchWebService\SQLScripts folder. This script creates all the necessary functions to provide the extended search feature.
Ensure that the script ran successfully.
Before configuring the data control based on the Oracle WebCenter adapter for Microsoft SharePoint, you must install changes service on your MS SharePoint 2003 server version 2.0. The Changes Service ensures that the JCR adapter's cache is notified when content in the SharePoint repository changes.
This section covers the following procedures:
Installing the SharePoint Changes Service
To install the changes service, perform the following steps:
The SharePoint changes service is packaged as sharepoint-services.zip. Extract this ZIP file on your machine. This folder contains the following files:
etc\SharePointChangeListener.exe.config
lib\observation\SharePointChangeListener.exe
lib\observation\log4net.dll
lib\observation\sql\Tables.sql
lib\observation\sql\Triggers.sql
Create a new folder, for example, SharePointChangesService, on your local hard drive.
Copy the following Changes Service files from the sharepoint-services folder to the folder you just created:
log4net.dll, the logging library
SharePointChangeListener.exe, the service executable
SharePointChangeListener.exe.config, the service configuration file
Install the service with the InstallUtil utility and configure it
Open the command prompt and go to the Microsoft .NET installation directory, for example:
MICROSOFT_NET_FRAMEWORK_PATH\v1.1.4322\
Start the command to register the service.
InstallUtil SERVICE_FOLDER_PATH\SharePointChangeListener.exe
where MICROSOFT_NET_FRAMEWORK_PATH is the path of the Microsoft .NET framework, which is typically C:\WINDOWS\Microsoft.NET\Framework.The SERVICE_FOLDER_PATH is the path to the change service folder, SharePointChangesService.
Verify that the changes service was installed successfully. To do this, perform the following steps:
Look through the log files to confirm that the installation was successful.
Ensure that the installed service appears in the list of the computer services.
Before starting the change service, you must configure it, as described in Configuring the SharePoint Changes Service.
Configuring the SharePoint Changes Service
To configure the SharePoint Changes Service you just installed, first configure the connection to your SharePoint repository and the list of JCR applications that must be notified of Repository changes. In addition, to add database objects to support the change notification, run scripts against the SharePoint repository mechanism, as described in the following steps:
To configure the SharePoint repository connection, modify the application setting in the SharePointChangeListener.exe.config file:
<appSettings>
   <add key="Delay" value="10" /> - interval(in seconds) of scanning for changes
   <add key="ConnectionString" value="connection_string" /> - connection string to the SharePoint site database
</appSettings>
To configure the connection to the SharePoint database server in the ConnectionString parameter, use the two types of connection strings available. These strings vary depending on the authentication method used to access the MSSQL Server 2000 data. The two types of connection strings are as follows:
Using Integrated Windows Authentication to access site data
Data Source=<DBINSTANCE>;Initial Catalog=<DBNAME>;Integrated Security=SSPI;
Using SQL authentication to access site data
Data Source=<DBINSTANCE>;Initial Catalog=<DBNAME>;User Id=<DBUSER>;Password=<DBUSERPASSWORD>;
where,
<DBINSTANCE> is an instance of the MSSQL Server 2000 with the SharePoint site's content, typically <hostname>/SHAREPOINT.
<DBNAME> is the name of the database with site content.
<DBUSER> is the SQL user name.
<DBUSERPASSWORD> is the SQL user password.
The name of the database can be retrieved from the SharePoint Central Administration page. Click the Configure virtual server settings link, select the server whose changes you want to listen to, and click the Manage Content Databases link. The database name is available in the Content Databases section.
The advantages of using Windows authentication is that no passwords are stored in the service configuration file. However, you must configure an application pool identity for the application pool to run as a Windows user, which has sufficient rights to access the SharePoint site database. You can use IIS Manager snap-in to configure the application pool identity.
The SQL authentication does not require any additional steps to configure application pool identity, but in this case the SQL user password is stored in clear text which is not secure.
To configure the list of JCR applications to be notified of changes, update the <listeners> element in the SharePointChangeListener.exe.config file:
<listeners>
    <listener>http://host:port/myapp/sharepoint-changes</listener>
</listeners>
Note:
The SharePoint changes service must be stopped before any changes are made to its config file. When the service is stopped, the notifications registered (notification events) to the application are lost.The configuration file of the JCR application must include the SharePoint changes servlet, Application Listener for Change Notification.
To add the database objects to support changes notification, run the supplied SQL scripts on the database with the stored SharePoint site data. The scripts can be found in the lib\observation\sql folder, as explained in Step Configuring the SharePoint Changes Service 0 of Installing the SharePoint Changes Service. Open any tool which can provide script execution on the Microsoft SQL Server 2000. For example, you can use the standard Query Analyzer tool. Select the database with the SharePoint Site data and execute the SQL scripts on it in the following order:
Tables.sql - This script creates all necessary tables to provide event listening
Triggers.sql - This script creates all necessary listeners on the site content tables
Ensure that the scripts ran successfully and that the table, CRXMESSAGES, has been successfully created in the SharePoint site database.
Start the SharePoint Changes Service. To do so, click Start, select Control Panel. In the Control Panel, open Administrative Tools, then open Services.
To configure a data control based on Oracle WebCenter adapter for Microsoft SharePoint, perform the following steps:
In the Oracle JDeveloper, select the Model project of your application under Applications Navigator. Then, select New from the File menu. The New Gallery is displayed.
Under Business Tier, select Content Repository, and click OK.
Click Next to skip the Welcome page.
On Step 1: Data Control Name, enter a name for the new data control, and click Next.
On Step 2: Content Repository Configuration, select JCR SharePoint Adapter from the Repository Type box.
Then specify the configuration parameters as described in Table 5-14.
Table 5-14 Configuration Parameters for the Data Control Based on Oracle WebCenter Adapter for Microsoft SharePoint
| Parameter | Description |
|---|---|
|
Password |
Password of the SharePoint admin user. To change the admin user password post deployment, perform the procedure given in Section 12.5, "Updating Credentials in a Deployed Application" and modify the value of |
|
Domain |
Microsoft Windows domain of SharePoint Server. |
|
Port |
Port on which SharePoint Web Services are available. |
|
Cache directory |
Directory where the adapter stores cache and other data. It can be set to default or outside of the read-only installation location. |
|
Host name |
Host running SharePoint services. |
|
Username |
Microsoft Windows username for SharePoint. The user must have administrative rights, that is the user must have full access to the database specified by previous parameter. To change the username postdeployment, edit the |
Select either the Use JAAS for Security check box, or supply a set of shared credentials in the Username and Password fields. If you specify shared credentials, then every connection to the Oracle WebCenter adapter for Microsoft SharePoint will use this same set of shared credentials. If you use JAAS for security, then the user identity will be used to log into the adapter. When configuring JAAS, for security reasons, it is strongly advised that the SharePoint repository shares identity management with the application server. This is because the JCR adapter uses a trust model to permit logon to the SharePoint repository based on user identity alone.
Note:
To change shared credentials post deployment, use the Edit Data Control wizard and then redeploy the application.Click Finish to complete the creation of the data control. The data control is displayed under the Data Control Palette.
To verify if the Oracle WebCenter adapter for Microsoft SharePoint has been added to the library, perform the procedure described in Section 5.2.6.7, "Verifying the JCR Domino Adapter Library in the Model Project".
This section discusses the following:
Section 5.2.8.1, "Overview of the Oracle WebCenter Adapter for EMC Documentum"
Section 5.2.8.2, "Platform and DFC Requirements for the Oracle WebCenter Adapter for EMC Documentum"
Section 5.2.8.3, "What You Should Know About the Oracle WebCenter Adapter for EMC Documentum"
Section 5.2.8.4, "Installing Oracle WebCenter Adapter for EMC Documentum in Oracle JDeveloper"
Section 5.2.8.6, "Configuring a Data Control Based on Oracle WebCenter Adapter for EMC Documentum"
The Oracle WebCenter adapter for EMC Documentum extracts content from an EMC Documentum repository and submits to the JCR Documentum adapter. The Oracle WebCenter adapter for EMC Documentum reads Documentum objects, documents, folders, users, and groups. It accesses the Documentum repository using the Documentum Foundation Classes (DFC). This adapter is used for the following purposes:
Read: Allows to read users, groups, group memberships, and content stored in a Documentum repository.
Search: Allows to search content stored in a Documentum repository.
The Oracle WebCenter adapter for EMC Documentum periodically checks for content updates, for example, modified, created, or deleted Documentum objects, in the Documentum repository. The adapter also checks for user and permission updates, such as users, groups, and group memberships, in the Documentum repository. The frequency of these checks is configurable.
The Oracle WebCenter adapter for EMC Documentum receives JCR internal query from WebCenter framework, and converts it to Documentum query language (DQL). Then, it converts Documentum resultset into JCR query results.
Platform Requirements:
EMC Documentum server version 5.3 or 5.2.5
Platform-independent JAR files, such as dfc.jar, dfcBase.jar.
Platform-specific library files:
Windows platform: dmcl40.dll
Unix/Linux platform: libdmcl40.so
Documentum Foundation Classes (DFC) Requirements:
DFC 5.0 files. DFC is an EMC Documentum client API library, and therefore needs to be obtained separately.
Consider the following points while you install the Oracle WebCenter adapter for EMC Documentum:
Latest Patch Required: To use EMC Documentum-based content data control, Oracle JDeveloper and Oracle Application Server must be up-to-date with the latest patch. Consult Oracle Application Server Release Notes for Microsoft Windows for release 10.1.3.2.0 to know the exact patch number.
Design Time Performance: The Oracle WebCenter adapter for EMC Documentum is optimized for running in a server environment where a fast access time against a running connector outweighs a slower start-up time. A result of this is that the Test button in the JDeveloper Content Repository may be slow to complete the test.
Documentum Foundation Classes (DFC): The Oracle WebCenter adapter for EMC Documentum uses DFC to communicate with the Documentum server, therefore the JCR Documentum adapter is dependent on native libraries and configuration files found in the DFC install. DFC must be installed before any EMC Documentum client product can use it. DFC may also be installed independently.
Installing other Documentum client applications may also install DFC, for example installing Documentum Desktop.
Documentum User: The Oracle WebCenter adapter for EMC Documentum must be configured with the credentials of a Documentum user that is a super user and that has the CONFIG AUDIT extended privilege.
Shared Library Import for Oracle WebCenter Adapter for EMC Documentum: If the shared library is not imported by default, then the application's orion-application.xml must be modified to import the Documentum shared library, as described in Section 12.2.1.3, "Manually Creating and Editing the orion-application.xml File". Example 5-9 shows orion-application.xml file to import the Documentum shared library.
Example 5-9 orion-application.xml to Import the Documentum Shared Library
orion-application.xml:
<?xml version = '1.0' encoding = 'windows-1252'?>
<orion-application xmlns:xsi="http://www.w3.org/2001/XMLSchema-instance"
xsi:noNamespaceSchemaLocation="http://xmlns.oracle.com/oracleas/schema/orion-application-10_0.xsd">
  <library path="./adf"></library>
  <jazn location="/jazn-data.xml" provider="XML"/>
  <imported-shared-libraries>
    <import-shared-library name ="oracle.vcr.adf2documentum">
  </imported-shared-libraries>
</orion-application>
This section describes the following procedures:
Installing Oracle WebCenter Adapter for EMC Documentum in Oracle JDeveloper on Windows
Installing the Oracle WebCenter Adapter for EMC Documentum in Oracle JDeveloper on Linux
Installing Oracle WebCenter Adapter for EMC Documentum in Oracle JDeveloper on Windows
Before you install the Oracle WebCenter adapter for EMC Documentum on Windows, make sure that the following libraries are available in appropriate directories:
dmcl.ini in Windows home.
dmcl40.dll in the DFC directory, which must be included in the PATH environment variable.
To install the Oracle WebCenter adapter for EMC Documentum in Oracle JDeveloper, perform the following steps:
Extract /adapter/adf2documentum.zip that contains oracle.vcr.adf2jcr.10.1.3.zip and oracle.vcr.adf2documentum.10.1.3.zip.
Exit Oracle JDeveloper, if it is running.
Extract the oracle.vcr.adf2jcr.10.1.3.zip archive to JDEV_HOME/jdev/extensions. If you extracted this archive while installing SharePoint adapter, then skip this step.
Extract the adapter archive oracle.vcr.adf2documentum.10.1.3.zip to JDEV_HOME/jdev/extensions.
From Documentum DFC installation, copy the Documentum JARs, dfc.jar and dfcbase.jar to the JDEV_HOME/jdev/extensions/oracle.vcr.adf2documentum.10.1.3 directory.
Create a JDEV_HOME/jdev/extensions/oracle.vcr.adf2documentum.10.1.3/classes directory.
Copy the dfc.properties file from your Documentum client install into this classes directory. The dfc.properties file may be found in the config directory.
Ensure that the directories containing the Documentum DFC native libraries and the dmcl.ini configuration file are on the system path. The Documentum native library directory is the directory containing dmcl40.dll, dmcl40.pdb files. The dmcl.ini file should be in the Windows directory, for example, c:\windows. The Documentum installer is likely to have placed it in this location.
Restart Oracle JDeveloper to activate the Oracle WebCenter adapter for EMC Documentum.
Installing the Oracle WebCenter Adapter for EMC Documentum in Oracle JDeveloper on Linux
Extract /adapter/adf2documentum.zip that contains oracle.vcr.adf2jcr.10.1.3.zip and oracle.vcr.adf2documentum.10.1.3.zip.
Exit Oracle JDeveloper, if it is running.
Extract the oracle.vcr.adf2jcr.10.1.3.zip archive to JDEV_HOME/jdev/extensions. If you extracted this archive while installing Oracle WebCenter adapters for IBM Lotus Domino or Microsoft SharePoint, then skip this step.
Extract the shared library package oracle.vcr.adf2documentum.10.1.3.zip archive to JDEV_HOME/jdev/extensions.
Copy the dfc.jar and dfcbase.jar files to the JDEV_HOME/jdev/extensions/oracle.vcr.adf2documentum.10.1.3 directory.
Create a JDEV_HOME/jdev/extensions/oracle.vcr.adf2documentum.10.1.3/classes directory.
Copy the dfc.properties file from your Documentum client install into this classes directory. The dfc.properties file may be found in the config directory.
Define environment variable DMCL_CONFIG as the path to the dmcl.ini file, for example, setenv DMCL_CONFIG Documentum/dmcl.ini.
Add the full path to the directory containing the Documentum native library file, libdmcl40.so, to LD_LIBRARY_PATH and PATH. For example, setenv LD_LIBRARY_PATH $LD_LIBRARY_PATH:/usr/dfc and setenv PATH $PATH:/usr/dfc.
Restart Oracle JDeveloper to activate the Oracle WebCenter adapter for EMC Documentum.
The Oracle WebCenter adapter for EMC Documentum is installed into the Oracle Application Server as a shared library. You can install the adapter using either of the following procedures:
Installing the Oracle WebCenter Adapter for EMC Documentum on Oracle Application Server on Windows
Installing the Oracle WebCenter Adapter for EMC Documentum on Oracle Application Server on Linux
Installing the Oracle WebCenter Adapter for EMC Documentum on Oracle Application Server on Windows
This section explains how to install the Oracle WebCenter adapter for EMC Documentum on Oracle Application Server in Windows.
Extract /adapter/adf2documentum.zip that contains oracle.vcr.adf2jcr.10.1.3.zip and oracle.vcr.adf2documentum.10.1.3.zip.
Extract the oracle.vcr.adf2documentum.10.1.3.zip archive to a temporary working directory.
Extract the oracle.vcr.adf2jcr.10.1.3.zip archive to the same directory.
Copy the dfc.jar and dfcbase.jar files from your Documentum installation to the same directory.
Copy the dfc.properties file to the same directory.
Run the following command from the directory where you have copied dfc.properties file:
jar cf dfcProperties.jar dfc.properties
Note:
Now thedfc.properties file is duplicated. The Oracle Application Server will use the one packaged in dfcProperties.jar.Run the following command:
java -jar ORACLE_HOME/j2ee/home/admin_client.jar \
          DEPLOYER_URI_OC4J_INSTANCE username password \
          -publishSharedLibrary \
          -name oracle.vcr.adf2documentum -version 10.1.3 \
          -installCodeSources \
          oracle.vcr.adf2documentum.10.1.3.jar \
          oracle.vcr.adf2documentum.10.1.3/crx-core.jar \
          oracle.vcr.adf2documentum.10.1.3/crx2documentum.jar \
          oracle.vcr.adf2documentum.10.1.3/adf2documentum.jar \
          oracle.vcr.adf2documentum.10.1.3/commons-lang.jar \
          oracle.vcr.adf2documentum.10.1.3/log4j.jar \
          oracle.vcr.adf2jcr.10.1.3/adf2crx.jar \
          oracle.vcr.adf2jcr.10.1.3/crx-api.jar \
          oracle.vcr.adf2jcr.10.1.3/concurrent.jar \
          oracle.vcr.adf2jcr.10.1.3/crx-commons.jar \
          oracle.vcr.adf2jcr.10.1.3/day-collections.jar \
          oracle.vcr.adf2jcr.10.1.3/slf4j-jdk14.jar \
          oracle.vcr.adf2jcr.10.1.3/lucene-core.jar \
          oracle.vcr.adf2jcr.10.1.3/did.jar \
          oracle.vcr.adf2jcr.10.1.3/day-commons-text.jar \
          oracle.vcr.adf2jcr.10.1.3/day-commons-naming.jar \
          dfc.jar dfcbase.jar dfcProperties.jar \
          -imports adf.oracle.domain oracle.xml
Place the Documentum native library files, dmcl40.dll and dmcl40.pdb, in the bin subdirectory of your ORACLE_HOME.
Installing the Oracle WebCenter Adapter for EMC Documentum on Oracle Application Server on Linux
This section explains how to install the Oracle WebCenter adapter for EMC Documentum on Oracle Application Server in Linux.
Extract /adapter/adf2documentum.zip that contains oracle.vcr.adf2jcr.10.1.3.zip and oracle.vcr.adf2documentum.10.1.3.zip.
Extract the oracle.vcr.adf2documentum.10.1.3.zip archive to a temporary working directory.
Extract the oracle.vcr.adf2jcr.10.1.3.zip archive to the same directory.
Copy the dfc.jar and dfcbase.jar files from your Documentum installation to the same directory.
Copy the dfc.properties file to the same directory.
Run the following command from the directory where you have copied dfc.properties file:
jar cf dfcProperties.jar dfc.properties
Note:
Now thedfc.properties file is duplicated. The Oracle Application Server will use the one packaged in dfcProperties.jar.Run the following command:
java -jar ORACLE_HOME/j2ee/home/admin_client.jar \
          DEPLOYER_URI_OC4J_INSTANCE username password \
          -publishSharedLibrary \
          -name oracle.vcr.adf2documentum -version 10.1.3 \
          -installCodeSources \
          oracle.vcr.adf2documentum.10.1.3.jar \
          oracle.vcr.adf2documentum.10.1.3/crx-core.jar \
          oracle.vcr.adf2documentum.10.1.3/crx2documentum.jar \
          oracle.vcr.adf2documentum.10.1.3/adf2documentum.jar \
          oracle.vcr.adf2documentum.10.1.3/commons-lang.jar \
          oracle.vcr.adf2documentum.10.1.3/log4j.jar \
          oracle.vcr.adf2jcr.10.1.3/adf2crx.jar \
          oracle.vcr.adf2jcr.10.1.3/crx-api.jar \
          oracle.vcr.adf2jcr.10.1.3/concurrent.jar \
          oracle.vcr.adf2jcr.10.1.3/crx-commons.jar \
          oracle.vcr.adf2jcr.10.1.3/day-collections.jar \
          oracle.vcr.adf2jcr.10.1.3/slf4j-jdk14.jar \
          oracle.vcr.adf2jcr.10.1.3/lucene-core.jar \
          oracle.vcr.adf2jcr.10.1.3/did.jar \
          oracle.vcr.adf2jcr.10.1.3/day-commons-text.jar \
          oracle.vcr.adf2jcr.10.1.3/day-commons-naming.jar \
          dfc.jar dfcbase.jar dfcProperties.jar \
          -imports adf.oracle.domain oracle.xml
Add Documentum environment variables DMCL_CONFIG and LD_LIBRARY_PATH to ORACLE_HOME/opmn/config/opmn.xml in the corresponding ias-component:
<ias-component id="default_group">
             <environment>
                <variable id="DMCL_CONFIG" value="/usr/dfc/dmcl.ini"/>
<!-- TThe value of DMCL_CONFIG is the full path to the dmcl.ini in the DFC install. -->
                <variable id="LD_LIBRARY_PATH" value="$LD_LIBRARY_PATH:/usr/dfc"/>
<!-- The value of the LD_LIBRARY_PATH includes the full path to the directory where the DFC native libraries are found. -->
             </environment>
          ...
</ias-component>
      ...
The Oracle Application Server can be configured such that the adapter shared library is imported by default by every application that is deployed to the server. This is done by updating the system-application.xml file. For information on system application, see chapter titled "Introduction to Oracle Containers for J2EE (OC4J)" of Oracle Containers for J2EE Configuration and Administration Guide. Such a configuration is only advisable if the contents of the Documentum shared library will not conflict with applications deployed to the container. If the shared library of Oracle WebCenter adapter for EMC Documentum is not imported by default, the application must include the import in its configuration. See Section 5.2.8.3, "What You Should Know About the Oracle WebCenter Adapter for EMC Documentum" for more information.
Installing the Oracle WebCenter Adapter for EMC Documentum on Oracle Application Server using Application Server Control Console
To install the Oracle WebCenter adapter for EMC Documentum on Oracle Application Server, perform the following steps:
Log into Application Server Control Console. The Cluster Topology page is displayed.
Under Members, click the home instance. The Home tab is displayed.
Select the Administration tab. Under Administration Tasks, as shown in Figure 5-20, click the Go to Task icon next to Shared Libraries. The Shared Library page is displayed, as shown in Figure 5-21.
Click Create. The Create Shared Library: Attributes page is displayed, as shown in Figure 5-22.
Figure 5-22 Create Shared Library: Attributes
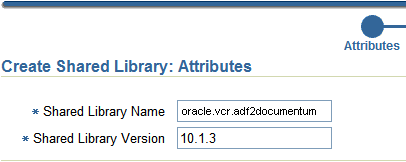
Enter the library name, oracle.vcr.adf2documentum and version, 10.1.3, and click Next. The Create Shared Library: Add Archives page is displayed.
Click Add. The Add Archives: Add Archive page is displayed.
Specify the path to JARs of both adf2jcr.10.1.3.jar and adf2documentum.10.1.3.jar. For example, adf2documentum.10.1.3.jar includes the following JARs:
oracle.vcr.adf2documentum.10.1.3.jar \
oracle.vcr.adf2documentum.10.1.3/crx-core.jar \
oracle.vcr.adf2documentum.10.1.3/crx2documentum.jar \
oracle.vcr.adf2documentum.10.1.3/adf2documentum.jar \
oracle.vcr.adf2documentum.10.1.3/commons-lang.jar \
oracle.vcr.adf2documentum.10.1.3/log4j.jar \
Specify a minimum or maximum version to import. This is an optional step.
Click Finish. The Documentum shared library is added and is displayed under the Shared Library page.
Before configuring a data control based on Oracle WebCenter adapter for EMC Documentum, you must perform the procedure in Section 5.2.8.4, "Installing Oracle WebCenter Adapter for EMC Documentum in Oracle JDeveloper".
To configure a data control, perform the following steps:
In the Oracle JDeveloper, select the Model project of your application under Applications Navigator. Then, select New from the File menu. The New Gallery is displayed.
Under Business Tier, select Content Repository, and click OK.
Click Next to skip the Welcome page.
On Step 1: Data Control Name, enter a name for the new Documentum adapter-based data control, and click Next.
On Step 2: Content Repository Configuration, select JCR Documentum Adapter from the Repository Type box.
Then, specify the configuration parameters as described in Table 5-15.
Table 5-15 Configuration Parameters for the Data Control Based on Oracle WebCenter Adapter for EMC Documentum
| Parameter | Description |
|---|---|
|
Documentum version |
Version of the adapter, either 5.2 or 5.3. |
|
Root path |
It is the Documentum subtree. It defaults to the user's default cabinet and is set to " Assign to the |
|
Document base |
Documentum DocBase name, for example, |
|
Allowed objects |
This parameter is used to specify the types of objects that can be accessed through the Oracle WebCenter adapter for EMC Documentum. Add Documentum types with a comma-seperated list of the acceptable types, for example The |
|
Denied objects |
Deny Documentum types with a comma seperated list. The |
|
Refresh interval |
The |
|
User name |
Username of the admin user to connect to the Oracle WebCenter adapter for EMC Documentum. To change the username postdeployment, edit the |
|
password |
Password of the admin user as required by Oracle WebCenter adapter for EMC Documentum to connect to the repository. To change the admin user password post deployment, perform the procedure given in Section 12.5, "Updating Credentials in a Deployed Application" and modify the value of |
|
Cache directory |
Path where java content repository is to be created. This is an optional field. However, it is required for Oracle Application Server to place the directory outside the hierarchy. |
Select either the Use JAAS for Security check box, or supply a set of shared credentials in the Username and Password fields. If you specify shared credentials, then every connection to the adapter will use this same set of shared credentials. If you use JAAS for security, then the user identity will be used to log into the Oracle WebCenter adapter for EMC Documentum. When configuring JAAS, for security reasons, it is strongly advised that the Documentum repository shares identity management with the application server. This is because the adapter uses a trust model to permit logon to the Documentum repository based on user identity alone.
Note:
To change shared credentials post deployment, use the Edit Data Control wizard and then redeploy the application.Click Finish to complete the creation of the data control. This data control is displayed under the Data Control Palette.
To verify whether the Oracle WebCenter adapter for EMC Documentum has been added to the library, perform the procedure explained in Section 5.2.6.7, "Verifying the JCR Domino Adapter Library in the Model Project".
This section describes a generic procedure to edit content data controls that you configured as described in Section 5.2, "Configuring Content Data Controls for JCR Adapters".
To edit a content data control, perform the following steps:
In Oracle JDeveloper, go to the application that contains your content data control.
Under your application, expand Model and Application Sources. Then select DataControls.dcx, as shown in Figure 5-23.
In the Structure window, select the content data control you want to edit, as shown in Figure 5-24.
Figure 5-24 Content Data Control in the Structure Window
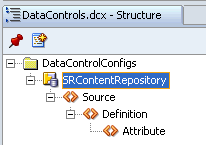
Right-click your content data control and select Edit, as shown in Figure 5-25. The Create Data Control dialog is displayed, as shown in Figure 5-25.
To edit the repository path, use the Content Repository Configuration tab.
To add or delete custom attributes, use the Attributes Configuration tab.
You can enable security for the new bindings and executables created in the page definition. See Section 10.2.3.4, "Applying Security on JCR Data Controls" for details.
In this section, you will use getURI, getItems, and search methods to add content to a page at design time, to publish content as a table and tree, and to add search capabilities for the integrated content.
Read the sample procedures in the following sections to use the data control methods created in Section 5.2, "Configuring Content Data Controls for JCR Adapters":
Section 5.3.4, "Adding Search Capabilities to Content Repositories"
Section 5.3.5, "Configuring Custom Attributes in Oracle Content DB"
Section 5.3.6, "Creating Clickable Images Using Custom Attributes"
Note:
If you are using an Oracle Content DB adapter-based data control and encounter a generic exception such asJBO-29000: Unexpected exception caught: java.lang.RuntimeException, msg=Unknown exception while running your JSPX page, then check OC4J and opmn log files corresponding to the Oracle Content DB instance. By default, application logs are located in:
ORACLE_HOME/j2ee/OC4J_Content/application-deployments/Content/OC4J_Content_default_group_1/application.log
ORACLE_HOME/opmn/logs/default_group~OC4J_Content~default_group~1.log
For more information about logs, see chapter titled "Monitoring Domain, Node, Service, and Server Performance" in Oracle Content Database for Oracle WebCenter Suite Administrator's Guide.
This section describes how to create hyperlinks to files stored in a file system and convert them into textual and image links. You use the ADF Go Link and the getURI method to create textual links and the ObjectImage of ADF Faces Core to create image links. The output of these procedures should be similar to Figure 5-27 and Figure 5-28.
Figure 5-28 ADF Object Image Link in a Browser
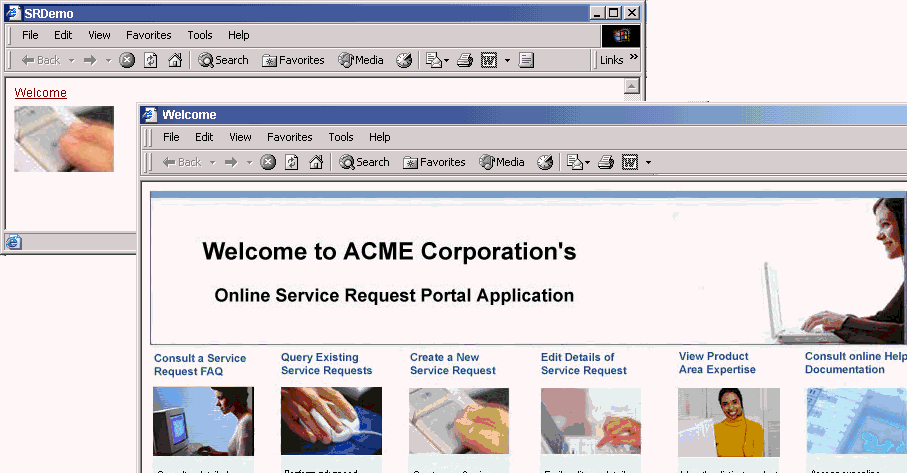
This section includes the following procedures:
In this section, you will use the Oracle ADF Go Link option of the getURI method to publish your content as a textual link.
To publish content as a textual link, perform the following steps:
In the Applications Navigator, double-click a .jspx page to open it in the Visual Editor. In this example the page name is MySRPage.jspx.
In the Data Control Palette, under SRFileSystem, expand the getURI (String) method and expand Return. You should see the URI attribute, as shown in Figure 5-29.
Select the URI attribute and drag and drop it on to the page, or in the Structure window under h:form. From the Create menu, select ADF Go Link, as shown in Figure 5-30. The Action Binding Editor dialog box is displayed.
Figure 5-30 Oracle JDeveloper Context Menu for the getURI method
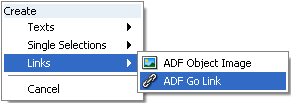
Note:
The Action Binding Editor dialog box displays only the first time that you drop thegetURI string. To modify or delete the path that you specified the first time, edit the page definition by right-clicking the page and selecting Go to Page Definition.In the Value field of the path parameter, enter the path of the file for which you want to create the link, as shown in Figure 5-31. Enter a slash (/).
Note:
To grant edit, personalize, customize, and view permissions at the attribute level, see Section 5.2.10, "Applying Oracle ADF Security on JCR Data Controls".Click OK.
Right-click the page and select Run. In your browser, you should see the URL for the page without any formatting.
By default, the link displays the text goLink1. In the Structure window, select af:goLink - goLink - 1 and view the properties in the Property Inspector.
In the Text field, enter a name for the link, for example, Welcome, as shown in Figure 5-32.
Right-click your page and select Run. The page appears in your browser window with the new link.
Click the link to check that the correct file is displayed. Your browser should look like the one displayed in Figure 5-27.
In Section 5.3.1.2, "Publishing Content As an Image Object", you will extend this textual link into an image link.
Adding Textual Links to Display Different Content from a Repository
To add another link to your .jspx page, perform the following steps:
In the Applications Navigator, right-click the .jspx page, in which you created the ADF Go Link, and select Go to Page Definition.
In the executables element, add another methodIterator and change the methodIterator id and value of Binds, as shown in Bold in the following example:
<executables>
    <methodIterator id="getURIIter" Binds="getURI.result"
                    DataControl="SRContentRepository" RangeSize="10"
                    BeanClass="SRContentRepository.getURI_return"/>
    <methodIterator id="getURIIter1" Binds="getURI1.result"
                    DataControl="SRContentRepository" RangeSize="10"
                    BeanClass="SRContentRepository.getURI_return"/>
  </executables>
In the Bindings element, add another methodAction and change the methodAction id, ReturnName, and NDValue, as shown in Bold in the following example:
<methodAction id="getURI" InstanceName="SRContentRepository"
                  DataControl="SRContentRepository" MethodName="getURI"
                  RequiresUpdateModel="true" Action="999"
                  IsViewObjectMethod="false"
               ReturnName="SRContentRepository.methodResults.SRContentRepository_getURI_result">
      <NamedData NDName="path" NDValue="/SRContentRepository/welcome.html"
                 NDType="java.lang.String"/>
    </methodAction>
    <methodAction id="getURI1" InstanceName="SRContentRepository"
                  DataControl="SRContentRepository" MethodName="getURI"
                  RequiresUpdateModel="true" Action="999"
                  IsViewObjectMethod="false"
                  ReturnName="SRContentRepository.methodResults.SRContentRepository_getURI1_result">
      <NamedData NDName="path" NDValue="/SRContentRepository/edit.jpg"                 NDType="java.lang.String"/>
    </methodAction>
In the Bindings element, add another attributeValues tag to specify the new Id, as shown in bold in the following example:
<attributeValues id="getURI_returnURI" IterBinding="getURIIter">
      <AttrNames>
        <Item Value="URI"/>
      </AttrNames>
    </attributeValues>
    <attributeValues id="getURI_returnURI1" IterBinding="getURIIter1">
      <AttrNames>
        <Item Value="URI"/>
      </AttrNames>
    </attributeValues>
Follow steps 2 and 3 from the first procedure of Section 5.3.1.1, "Publishing Content As a Textual Link".
In the Structure window, double-click the new goLink, for example, af:goLink2 to display the GoLink Properties window.
In the Text field, enter a display name for your new link.
In the Destination field, click Bind to display the Bind to Data dialog box. Then, expand ADF Bindings, bindings, and getURI_returnURI1.
Double-click inputValue variable to create the #{bindings.getURI_returnURI1.inputValue} expression, as shown in Figure 5-33, and click OK. This expression is based on new elements that you added in executables and bindings in steps 2 and 3.
Run your page to see the output in a browser. The new link should display content from the new path (NDValue) that you specified in step 3. Figure 5-34 shows the new link in addition to the Welcome link that was added in the first procedure described in Section 5.3.1.1, "Publishing Content As a Textual Link".
You can add as many links as required by following these steps.
In this section, you will use the ObjectImage option of ADF Faces Core to publish your content as a clickable image object. Clicking the image object displays your content.
To publish content as a clickable image object, perform the following steps:
In the Applications Navigator, open the .jspx page, in which you created the ADF Go Link, by double-clicking it.
In the Structure window, right-click af:goLink, which you created in Section 5.3.1.1, "Publishing Content As a Textual Link", select Insert Inside af:goLink, and then select ADF Faces Core, as shown in Figure 5-35. The Insert ADF Faces Core Item dialog box is displayed.
Figure 5-35 Insert Inside af:goLink - ADF Faces Core
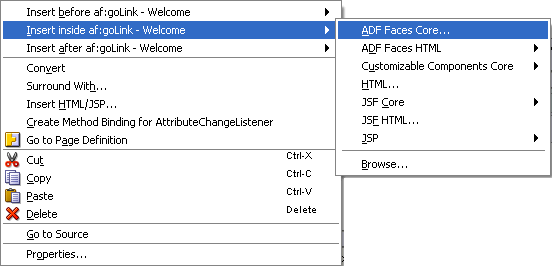
From the Select an ADF Faces Core item to create list, select ObjectImage, as shown in Figure 5-36.
Click OK. The Insert ObjectImage dialog box is displayed.
Browse to the image file you want to display as the image link, for example, design.jpg, as shown in Figure 5-37.
Click OK. The Structure window should look like Figure 5-38.
Right-click your page and select Run. The output should be similar to Figure 5-28.
In this section, the getItems data control method is used to publish file and folder information in a table. This section describes the following procedures:
Section 5.3.2.1, "Displaying Files and Folders in Read-Only Format": This procedure generates output similar to Figure 5-39.
Figure 5-39 Files and Folders Displayed in a Read-Only Table
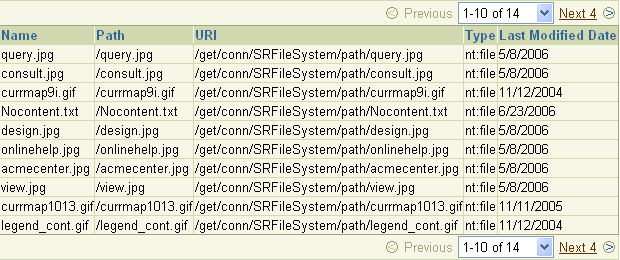
Section 5.3.2.2, "Displaying the Name Attribute As a GoLink": This procedure generates output similar to Figure 5-40.
Figure 5-40 Folder Content Displayed as Hyperlinks
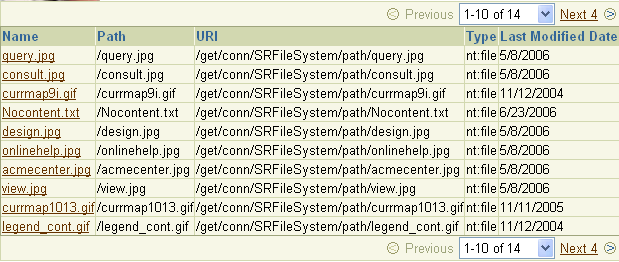
Section 5.3.2.3, "Configuring a Table to Show Only a Single Column": This procedure generates output similar to Figure 5-41.
Figure 5-41 Files and Folders Displayed in a Single-Column Table
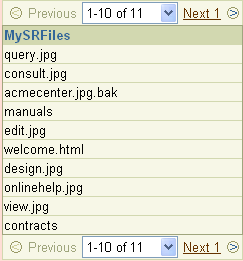
Section 5.3.2.4, "Configuring a Table to Show Only Files": This procedure generates output similar to Figure 5-42.
Figure 5-42 Files Displayed in a Single-Column Table
To display folder content in a read-only table, perform the following steps:
To open the page in the Visual Editor, double-click MySRPage.jspx in the Applications Navigator.
In the Data Control Palette, under SRFileSystem, expand the getItems method and the Return node, as shown in Figure 5-43.
To create a table that lists every file and folder available through this data control, drop the Return node on to the page or under h:form in the Structure window. The Create menu is displayed.
From the Create menu, select Tables and then select ADF Read-only Table, as shown in Figure 5-44. The Action Binding Editor dialog box is displayed.
Figure 5-44 Oracle JDeveloper Context Menu for getItems Method
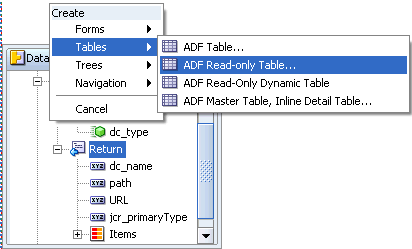
Note:
The Action Binding Editor dialog box displays only the first time that you drop the return node. To modify or delete the path you specified the first time, edit the page definition by right-clicking the page and selecting Go to Page Definition.Enter the path of the content directory as the path parameter, as shown in Figure 5-45. You must enter a slash (/).
Leave the type parameter blank. This implies that the table displays both files and folders.
Note:
To grant edit, personalize, customize, and view permissions at the attribute level, See Section 5.2.10, "Applying Oracle ADF Security on JCR Data Controls".Click OK. The Edit Table Columns dialog box is displayed, as shown in Figure 5-46.
Click <bound to attr label> under Display Label and enter Name.
Repeat this step for the path, URI, primaryType, and lastModified attributes. Enter new display labels such as Path, URL, and so on.
Click OK. You should now see a table on MySRPage.jspx that looks like Figure 5-47.
Figure 5-47 Read-Only Table for Publishing Folder Content

Note:
You can turn the page caching on or off. To do so, open the page definition and expand executables, and select methodIterator in the Structure Pane. Then, in the Property Inspector, set CacheResults to true or false, as required.Run the page in the browser to see the output. You should see a list of all files and folders available in your content directory, as shown in Figure 5-39.
By default, the table displays file or folder attributes as read-only text (af:outputText). The next section describes how to display the Name attribute (name) as a GoLink (af:goLink).
To display the Name attribute as a GoLink, perform the following steps:
In the Structure window (Figure 5-48), expand the first column of the table (af:column - Name) to show the default display format af:outputText - #{row.name}.
Figure 5-48 Default Formatting for the Name Column
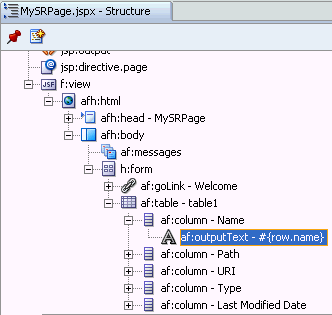
Right-click af:outputText - #{row.name} and click Convert. The Convert OutputText dialog box is displayed.
Select ADF Faces Core as the component category. In the Select the item to be created box select GoLink, as shown in Figure 5-49, then click OK. The Confirm Convert dialog box is displayed. Click OK to complete conversion.
Figure 5-49 Convert OutputText to a GoLink
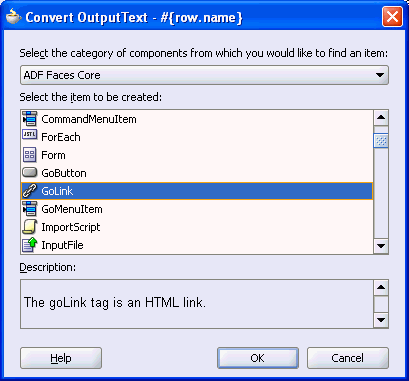
In the Structure window, double-click af:goLink - goLink - 1 to display the GoLink Properties dialog box.
To build the #{row.name} expression that displays the file or folder name, click Bind next to the Text field. The Bind to Data dialog box is displayed.
Expand JSP Objects, and then expand row. Click OK. Then, click OK in the GoLink Properties dialog box.
In the Destination field, click Bind to build #{row.URI}, an expression from Expression Language that passes the correct URL for the HTTP link, as shown in Figure 5-50.
Right-click the page in the Applications Navigator and select Run. You should see a list of hyperlinked file and folder names like the one shown in Figure 5-40.
Click one of the file names. The file you pick should appear in a browser window.
Click the name of a folder. You should see an authorization error, because you cannot access folders through a direct URL. Folders can be accessed through a data control only.
To configure the table to show only the Name column, perform the following steps:
In the Structure window, double-click the af:table -table node to display the Properties dialog box.
Click the Column Summary tab. Use the Delete button to remove all but the Name column.
Click the Column Details tab. In the Header Text field enter a name, for example, MySRFiles, as shown in Figure 5-51, and click OK. The Name column is configured.
Figure 5-51 Table Properties - Column Detail Tab
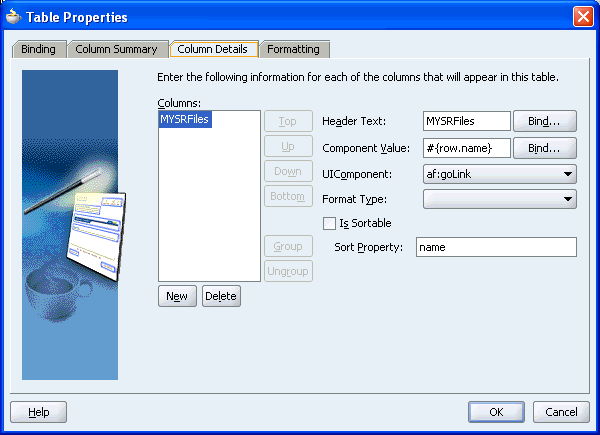
Run the page to view the output, as shown in Figure 5-41.
In the next section, the Name column will be configured to show only files.
The type attribute is used to configure a table to show only files.
To configure the table to show files (not folders), perform the following steps:
Right-click your .jspx page and select Go to Page Definition. The page definition is displayed.
Note:
TheRangeSize binding setting, which is used to control the number of items displayed on a page, is set to 10 by default in the page definition file. You can change it, as required, in the Property Inspector.In the Structure window, expand Bindings and getItems, and double-click type.
The type options are nt:file and nt:folder. To specify the display of only files, enter nt:file in the NDValue field, as shown in Figure 5-52, and click OK.
Now run the page. The list of files should look like Figure 5-42.
In this section, you will use the getItems method to publish content in a hierarchal tree format. This section describes the following procedures:
Section 5.3.3.1, "Displaying Files and Folders in Read-Only Format": This procedure generates output similar to Figure 5-53.
Figure 5-53 Folder Content Displayed in a Tree
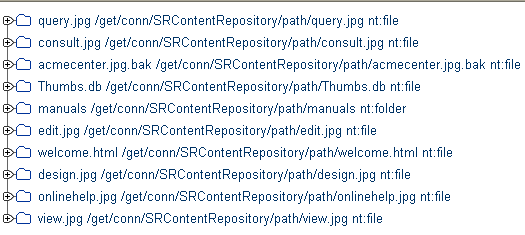
Section 5.3.3.2, "Displaying File Names As Hyperlinks": This procedure generates output similar to Figure 5-54.
Figure 5-54 Tree with File Names as Hyperlinks
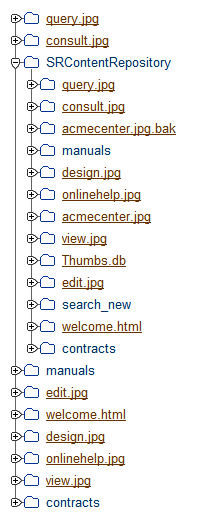
To display your content in the tree format, perform the following steps:
In the Applications Navigator, double-click your page to open it in the Visual Editor. In this example, the name of the page is MySRPage.jspx.
In the Data Control Palette, under SRFileSystem, expand the getItems method as shown in Figure 5-55.
Select the Return node and drag it onto the page. The Create menu is displayed.
Select Trees and then ADF Tree, as shown in Figure 5-56. The Action Binding Editor dialog box is displayed, as shown in Figure 5-57.
Figure 5-56 Oracle JDeveloper Create Menu for getItems
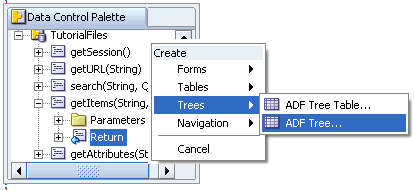
Note:
The Action Binding Editor dialog box displays only the first time when you drop the return node. To modify or delete the path you specified the first time, edit the page definition by right-clicking the page and selecting Go to Page Definition.To create a tree that displays everything under the base path, enter the slash (/) for the path parameter, as shown in Figure 5-57.
Leave type parameter blank to show both files and folders.
Click OK. The Tree Binding Editor dialog box is displayed.
Under Display Attribute, select name, URI, and primary type, as shown in Figure 5-58.
In the Branch Rule Accessor, select Items, and then click Add New Rule. You should see a message that a new rule is added to the Show Rules tab. Click OK to close the message.
Click OK. A tree displays on MySRPage.jspx that looks like Figure 5-59.
Figure 5-59 Tree for Navigating Folder Content

Run your page to display the results.
When the page appears in your browser window, you should see a list of files and folders available through the SRFileSystem data control, as shown in Figure 5-53. Expand a branch to see the content in this subdirectory.
Note:
By default, the range size is10. To change the number of items displayed in the tree, edit the RangeSize property for the data control in the page definition file (My_PagePageDef.xml).By default, the tree displays file and folder names as read-only text. You can add hyperlinks to the file names (not folders), but you cannot hide the folders as they are required for navigation through the tree. So, you can display the folder names as read-only text. The next section describes the procedure to create hyperlinks to file names while keeping the folder names read-only.
To create hyperlinks to file names and to keep folder names read-only, you need the af:switcher component with two facets: one for folders and one for files.
To use the Switcher component for folders and files, perform the following steps:
In the Structure window, navigate to nodeStamp to show the default display format af:outputText - {#node}, as shown in Figure 5-60.
Figure 5-60 Default Display Format for Trees
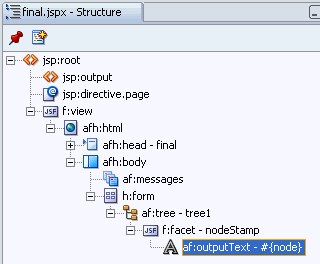
Right-click af:outputText - #{node} and click Convert. The Convert dialog box is displayed.
Select ADF Faces Core as the category of the component. Under the Select the item to be created box, select Switcher, and click OK. The Confirm Convert dialog box is displayed.
Click OK to complete conversion and display the Switcher in the Structure window, as shown in Figure 5-61.
Figure 5-61 Output Text Converted to a Switcher Component
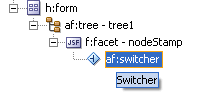
Double-click af:switcher to display the Switcher Properties dialog box.
In the FacetName field, enter the expression #{node.primaryType} and click OK.
Now insert two facets for the switcher. Right-click af:switcher and select Insert Inside af:switcher. From the JSF Core menu, select Facet. Name the first facet nt:folder and click OK. Folder names require no additional formatting, so you can display the node names as plain text.
The facet is added, as shown in Figure 5-62.
Repeat this step and add a second Facet named nt:file.
Figure 5-62 Switcher Component with Two Facets
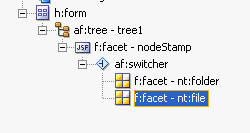
Right-click f:facet - nt:folder and select Insert Inside f:facet - nt:folder. Select ADF Faces Core as the category, then select OutputText.
Double-click af:outputText - outputText1 to display the Properties dialog box. In the Value field, enter the expression #{node.name}, and click OK.
Right-click f:facet - nt:file and select Insert Inside f:facet - nt:file. The Insert Item dialog box is displayed.
Select ADF Faces Core as the category of the component. Then, select GoLink from the Select the item to be created box, and click OK.
In the Structure window, double-click af:goLink - goLink to display the GoLink Properties dialog box.
In the Text field, enter the #{node.name} expression.
In the Destination field, enter the expression #{node.URI} and click OK.
Run the page to see a list of hyperlinked file names, as shown in Figure 5-54.
With help of two examples, this section describes the procedures to enable simple and advanced search functionality for the integrated content. The simple search enables users to search for content based on name or content fragments in specific locations. The advanced search enables users to search by attribute values of the content.
This section contains the following topics:
Consider the following points while adding search capabilities:
The functionality or how certain operations work depends on the implementation of the adapter and the underlying repository. While read and query operations are similar, full text search works differently. For example, the file system adapter looks for the provided string in the binary content of the files, but OracleAS Portal and Oracle Content DB adapters perform full text index operation on their documents using a database functionality.
The file system, OracleAS Portal, and Oracle Content DB adapters do not support search based on the primaryType attribute. The only supported way to search based on type is through the element (*, type) construct.
If you use the OracleAS Portal adapter, then the behavior of search functionality varies depending on whether Oracle Text is set to On or Off. The Oracle Text can enable or disable full text search of items and their contents. It is advised that Oracle Text is set to On.
The OracleAS Portal does not support translations and will only return content in the base language of a page group. Search across multiple page groups with different base languages is not supported.
To enable the search function, perform the following steps:
Steps 1 to 9 enable you to create a simple search that will enable users to use the input field to perform name-based search. This search will also enable users to use % for wildcard search. For instance, if %.ppt% is used as input, the search will return files with the .ppt extension.
In the Applications Navigator, double-click your .jspx page to open it.
In the Data Control Palette, expand the search node.
To enable users to execute a search by clicking a button, drag and drop the search node on your .jspx page. The Create menu is displayed. Select Methods and then select ADF Command Button. The Action Binding Editor dialog box is displayed.
Note:
The Action Binding Editor dialog box displays only the first time when you drop a node. To modify or delete the path that you specified the first time, edit the page definition by right-clicking the page and selecting Go to Page Definition.For the path parameter, enter / as the value, as shown in Figure 5-63.
To enable a search from the location specified in the path attribute and its subdirectories, enter true as the value for the isRecursive parameter, as shown in Figure 5-63, and click OK.
Figure 5-63 Action Binding Editor - search
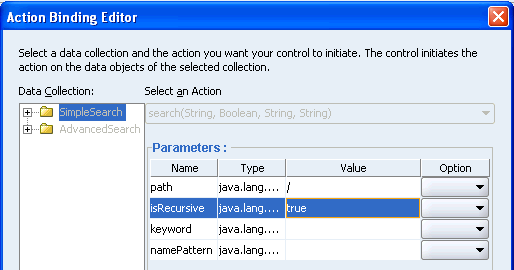
To enable search by file name, expand search and parameters and drag and drop the namePattern attribute onto the page. The Create menu is displayed. Select Texts and then select ADF Input Text.
To enable the display of search results in a read-only table, drag and drop the Return node onto the page. The Create menu appears. Select Tables and then select ADF Read-Only Table. The Edit Table Columns dialog box is displayed, as shown in Figure 5-64.
Click OK. A table similar to Figure 5-65 is displayed.
Figure 5-65 Table with Four Columns - search

Run this page in a browser and search for %jpg%. All .jpg files from your repository display, as shown in Figure 5-66.
Figure 5-66 Search Results for .jpg Files

Steps 10 to 12 extend the simple search such that users can enter a value for the path and can select the check box to determine whether the search should be performed at the folder tree level or should be limited to the specified location (=path).
Drag and drop the path attribute onto the page. The Create menu is displayed. Select Texts and then select ADF Input Text.
To create a check box for users to select if the search should be performed from the location specified in the path attribute and its subdirectories, drag and drop the isRecursive parameter onto the page. The Create menu is displayed. Select Single Selections and then select ADF Select Boolean Checkbox. The Boolean Binding Editor dialog box is displayed.
Enter true in the Selected State Value field and false in the Unselected State Value field, as shown in Figure 5-67, and click OK.
Run the page in a browser. The output should be similar to Figure 5-68.
In the next section, this simple search will be extended into an advanced search.
To enable the advanced search function, perform the following steps:
In the Applications Navigator, double-click the .jspx page in which you created the simple search function.
To enable users to execute an advanced search by clicking a button, from the Data Control Palette drop the advancedSearch node onto the page. The Create menu is displayed. Select Methods and then select ADF Command Button. The Action Binding Editor dialog box is displayed.
Note:
The Action Binding Editor dialog box displays only the first time when you drop a node. To modify or delete the path you specified the first time, edit the page definition by right-clicking the page and selecting Go to Page Definition.For the path parameter, enter / as the value, as shown in Figure 5-69.
To enable a search from the location given in the path attribute and its subdirectories, enter true as the value for the isRecursive parameter, as shown in Figure 5-69, and click OK.
Figure 5-69 Action Binding Editor - advancedSearch
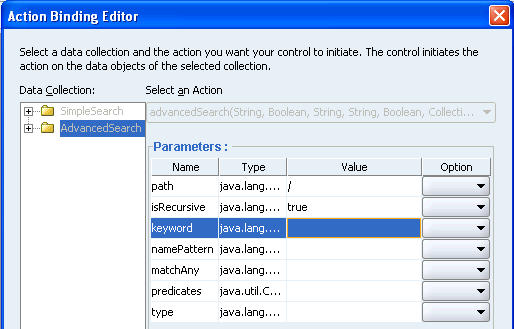
To enable the display of advanced search results in a read-only table, drag and drop the Return node of advancedSearch on your .jspx page. The Create menu appears. Select Table and then select ADF Read-only Table. The Edit Table Columns dialog box is displayed, as shown in Figure 5-70.
Change the display label, if you want, and click OK.
To create an input field for the parameter value, from the Component Palette, select ADF Faces Core, and then drag and drop an SelectInputDate control onto the page.
Double-click the advancedSearch button. The Bind Action Property dialog box is displayed. Ensure that the Generate ADF Binding Code check box is selected, as shown in Figure 5-71. This generates a skeleton in the backing bean where you will add the code to build the predicates.
Click OK. The commandButton1_action() method displays in the source mode.
To include necessary classes that create the code, include the following entries in the Source mode, if they do not exist already:
import oracle.vcr.datacontrol.search.Operator;
import oracle.vcr.datacontrol.search.Predicate;
import java.util.ArrayList;
import java.util.GregorianCalendar;
import java.util.Calendar;
Now, modify the commandButton1_action() to look like the following:
public String commandButton1_action() {
        // Get the bindings.
        BindingContainer bindings = getBindings();
        // Set Date format
         Date value = (Date) selectInputDate1.getValue();
         Calendar cal = new GregorianCalendar();
         cal.setTime(value);
        // Create a predicate out of the value of your inputDate, the operation and the attribute you want to search for.
        Predicate p = new Predicate("jcr:content/jcr:lastModified", Operator.GREATER_THAN, cal);
        ArrayList al = new ArrayList(1);
        // Add this predicate to the list of predicates for the search.
        // You can have multiple predicates and use the "MatchAll" attribute to define
        // whether they should be concatenated by a logical AND or OR.
        al.add(p);
        // Get the advancedSearch operation binding.
        OperationBinding operationBinding =
getBindings().getOperationBinding("advancedSearch");
        // Assign the list of predicates to the "predicates" attribute.
        operationBinding.getParamsMap().put("predicates", al);
        // Execute the operation.
        Object result = operationBinding.execute();
        return null;
    }
Note:
To retrieve the JCR paths of item attributes, run thegetAttributes method on the required items.In the Design mode, the page should look like Figure 5-72.
Figure 5-72 Advanced Search Page in the Design Mode

Run the page in a browser and search for a document using its last modified date. Figure 5-73 shows search results based on the last modified date entered as the search criterion.
This section shows through an example how to add advanced search capabilities based on the Oracle WebCenter adapter for EMC Documentum.
To add advanced search capabilities, perform the following steps:
Add custom attributes of String type to your data control.
To add custom attributes, open the DataControls.dcx file under Applications Navigator. Then right-click the data control under the Structure pane and select Edit. The Create Data Control wizard is displayed.
Under the Attributes Configuration tab, click Add to include the attributes listed in the following table:
| Attribute Name | JCR Path |
|---|---|
| mimeType | jcr:content/jcr:mimeType |
| title | dctm:title |
| subject | dctm:subject |
The Attributes Configuration tab looks like Figure 5-74.
The new attributes show under Data Control Palette, as shown in Figure 5-75.
Open your .jspx page.
From the Data Control Palette, drag and drop advancedSearch method onto the page. Select Parameters and then select ADF Parameter Form. The Edit Form Fields dialog box is displayed.
Select the predicates value binding and click Delete. This value binding is deleted because predicates value cannot be bound to a single input text control on the page. Predicates will be built separately in this procedure, and the value will be bound to the data control programmatically.
In the Data Control Palette, expand advancedSearch and Return nodes.
Under Components Palette, select InputText from the ADF Faces Core and drop it under af:panelForm in the Structure pane. Then, rename it to MimeType.
Repeat this step to include Title and Subject as InputText.
From the Data Control Palette, drag and drop the Return node onto the page. From the Create menu, select Tables and then select ADF Read-only Table. The Edit Table Columns dialog box is displayed.
Click OK. The ADF Read-only Table is added in the design mode. The design mode looks like Figure 5-76.
Figure 5-76 advancedSearch in the Design View
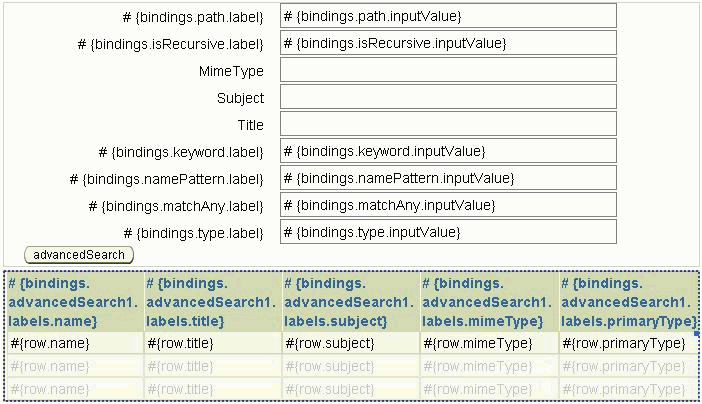
In the design mode, double-click the advancedSearch button. The Bind Action Property dialog box is displayed.
Click OK to generate the method. The source mode is displayed with the method.
Replace the existing commandButton1_action() method with the example method shown in Figure 5-76.
Example 5-10 commandButton1_action() Method
public String commandButton1_action() {
        // Add in predicates binding to bindings container
        ArrayList predicates = new ArrayList();
        String _mimeType = (String) mimeType.getValue();
        if ( _mimeType != null && ! "".equals(_mimeType)) {
          predicates.add(
           new Predicate("jcr:content/jcr:mimeType", Operator.LIKE, _mimeType));
        }
        String _title = (String) title.getValue();
        if ( _title != null  && ! "".equals(_title)) {
          predicates.add(
           new Predicate("dctm:title", Operator.LIKE, _title));
        }
        String _subject = (String) subject.getValue();
        if ( _subject != null && ! "".equals(_subject)) {
          predicates.add(
           new Predicate("dctm:subject", Operator.LIKE, _subject));
        }
        BindingContainer bindings = getBindings();
        OperationBinding operationBinding =
         bindings.getOperationBinding("advancedSearch");
        operationBinding.getParamsMap().put("predicates", predicates);
        Object result = operationBinding.execute();
        if (!operationBinding.getErrors().isEmpty()) {
        // Add error handling
              return null;
        }
        return null;
    }
Add the following imports to the class:
import java.util.ArrayList;
import oracle.vcr.datacontrol.search.Operator;
import oracle.vcr.datacontrol.search.Predicate;
Display the page in a browser by right-clicking the page and selecting Run.
Perform a search as shown in Figure 5-77.
This section demonstrates, using examples, how to create attributes in Oracle Content DB and add them as custom attributes while creating the Oracle Content DB data control. This section discusses the following:
In this section you will create categories and then add attributes to them. These attributes will then be added as custom attributes when you create the Oracle Content DB data control.
To create categories and attributes, perform the following steps:
Log in to Oracle Content DB and switch to administration mode by clicking the Switch to Administration Mode button on the top-right corner of the window. The window shown in Figure 5-78 is displayed.
Figure 5-78 Administration Mode in Oracle Content DB
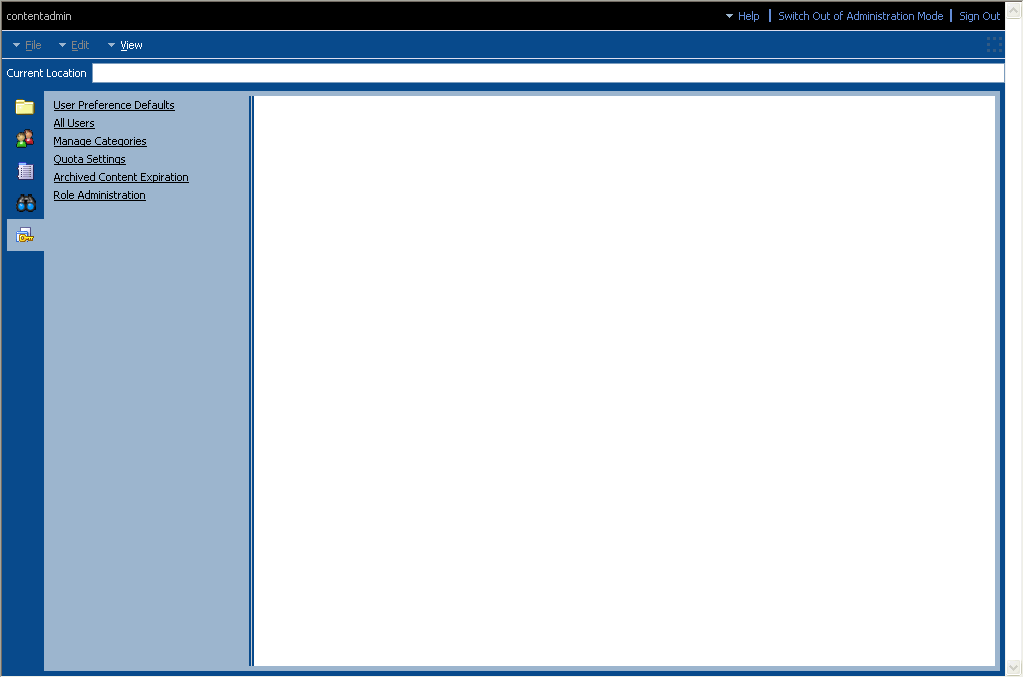
Click Manage Categories on the left pane. The Manage Categories window is displayed, as shown in Figure 5-79.
Click New Category. The New Category window is displayed. Enter a name for the new category, for example, CustomerInfo, as shown in Figure 5-80, and click Add.
Click Add. The Add Attributes window is displayed. Enter a name for the new attribute, for example, CustomerName, as shown in Figure 5-81 and and select a datatype for the new attribute from the Type dropdown, and then click OK.
You can add more attributes, for example, Contact, CustomerID, and so on, as shown in Figure 5-82.
Figure 5-82 Attributes of the CustomerInfo Category
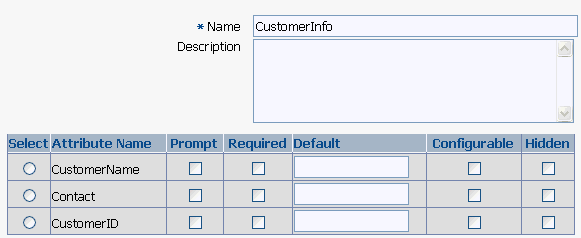
To add subcategories, click Manage Categories on the left pane. The Manage Categories window is displayed, as shown in Figure 5-83.
Select the CustomerInfo option, as shown in Figure 5-83, and then click New Sub-Category. The New Category window is displayed.
To add subcategories, click Add. Enter a name for the subcategory, for example, InternalCustomer, and click OK. The Add Attributes window is displayed.
Subcategories inherit main properties from the parent but can have additional properties.
Enter a name for the new attribute, for example, CustomerRep, and click OK.
You can add more attributes for the InternalCustomer subcategory, for example, CostCenter, as shown in Figure 5-84.
Now switch out of administration mode by clicking Switch Out of Administration Mode.
To assign a category to a file, navigate to the file by clicking the Folder icon on the left pane.
Right-click the file to which you want to assign the category, then select Properties from the menu. The Properties window is displayed, as shown in Figure 5-85.
Click the Categories tab and then click Add. The Add Categories window is displayed.
Select the new category option, for example, CustomerInfo, and click OK.
Now provide values for the new attributes, as shown in Figure 5-86.
Figure 5-86 Properties Window with New Attributes
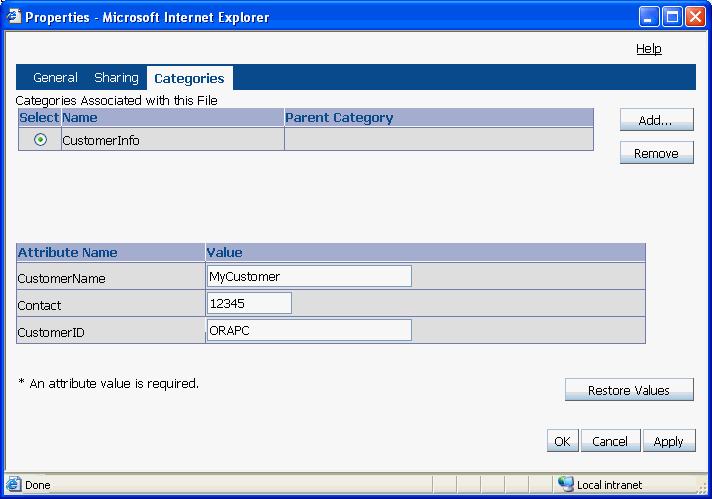
Click Apply and then click OK.
In this section, you will add attributes that you created in Section 5.3.5.1, "Creating Attributes in Oracle Content DB" as custom attributes to your Oracle Content DB data control.
To add custom attributes to your Oracle Content DB data control, perform the following steps:
Perform steps 1 to 9 from Section 5.2.4.2, "Creating a Content Data Control Based on the Oracle Content DB Adapter".
In the Attributes Configuration page, click Add three times to add three blank rows for the CustomerName, CustomerID, and Contact attributes that you created earlier.
Enter a name and JCR path for each attribute. The JCR path should be in the following format:
jcr:content/csjcr:categories/CategoryName/AttributeName
The JCR paths for CustomerName, CutomerID, and Contact attributes are:
jcr:content/csjcr:categories/CustomerInfo/CustomerName
jcr:content/csjcr:categories/CustomerInfo/CustomerID
jcr:content/csjcr:categories/CustomerInfo/Contact
Figure 5-87 shows the customerName, cutomerID, and contact custom attributes in the Attributes Configuration page.
Figure 5-87 Attributes Configuration Page
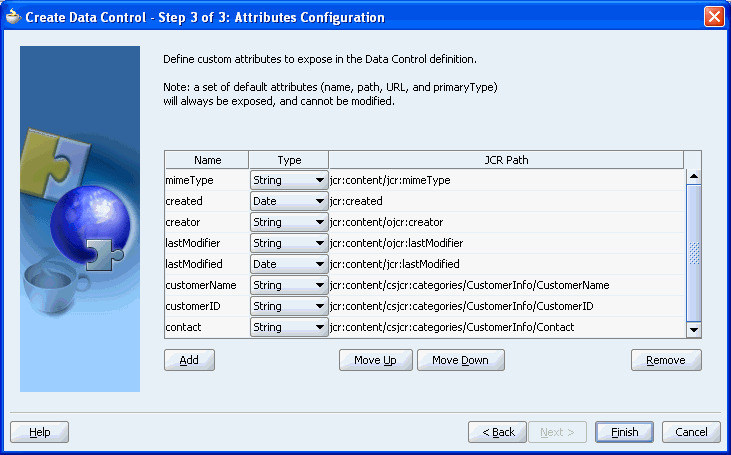
Click Finish to complete the creation of the data control.
In the Data Control Palette, expand the Oracle Content DB data control that you created. You should see these custom attributes, as shown in Figure 5-88.
Web applications often contain images, such as product pictures, that support the information provided on the page. These images frequently link to other parts of the Web site. One way of managing these images is to store them in your content management system and tag them with additional information using custom attributes. This example shows how you can use these images and the information in the custom attributes to enhance the experience of your WebCenter application. The following steps show you how to do so using Oracle Content DB as the content repository. You can, however, follow the steps after creating the data control using any content repository, using the appropriate naming convention for the custom attribute.
This section contains the following:
Section 5.3.6.1, "Creating a Custom Attribute in Oracle Content DB"
Section 5.3.6.2, "Creating a Data Control based on Oracle Content DB Adapter"
Section 5.3.6.3, "Creating a Clickable Image and Table of Clickable Images"
In Oracle Content DB, you can create custom attributes for the images you want to add to your WebCenter application. In Oracle Content DB, you organize custom attributes into categories, then assign them to items or folders in the repository.
To create the category and custom attribute, perform the following steps:
Ensure that you have uploaded the image(s) you want to use with your WebCenter application to Oracle Content DB.
In Oracle Content DB, click Switch to Administration Mode to display the administration options.
Click Manage Categories to create or modify categories and their associated custom attributes.
Click New Category to display the New Category dialog box.
In the New Category dialog box, enter a name for the new category in the Name field. For the purposes of this example, enter ImageAttributes.
Click Add to add a new attribute to this category.
In the Add Attribute dialog box, in the Name field, enter TargetURL and choose String from the Type dropdown list.
Click OK to return to the New Category dialog box. The attributes you add display below the category name.
Here, you can set options such as whether the user should be prompted for this attribute, whether the attribute is required, the default value, and whether the attribute is configurable or hidden. Once you have defined your attributes and categories, you can apply attributes to images in the content repository.
Click OK to return to the Administration page.
Click Switch Out of Administration Mode to view the File Management page. On the File Management page, you find the images to which you want to apply the custom attributes.
Right-click the image you want to modify, then choose Properties from the context menu.
Click the Categories tab.
Click Add to add the category you created earlier.
Note:
The list of categories is defined on the folder level. A folder can either inherit the list of categories from its parent folder or the administrator can manually define the list of categories.Select the ImageAttributes category to display its custom attributes. Here, you can provide values for the attributes contained in the ImageAttributes category, such as the URL to which you want the image to link.
In the TargetURL field, enter a URL, such as http://www.oracle.com/technology.
Click Apply, then OK to apply the custom attribute to your image.
After you have set up custom attributes for your images in Oracle Content DB, you must create a data control using the Oracle Content DB adapter so that you can add the images to your WebCenter application.
For information about creating a data control, see Section 5.2.4, "Configuring a Content Data Control Based on the Oracle Content DB Adapter".
To create the data control, perform the following steps:
In the Create Data Control Wizard, enter a name for your data control (for example, Images), then enter the connection information for your instance of Oracle Content DB.
On Step 3 of the Create Data Control Wizard, on the Attributes Configuration page, add the attribute for the image, TargetURL.
Custom attributes are addressed by path in the JCR node tree. In this example, the attribute carrying the necessary information is called TargetURL in the category ImageAttributes.
In the JCR Path field for the TargetURL attribute, enter:
jcr:content/csjcr:categories/ImageAttributes/TargetURL
Note:
If you do not know the exact syntax of this path for a particular attribute, create a simple JSPX page that uses thegetAttributes method of the Data Control on an item where you know the attribute exists. The resulting table will show the attribute path and the value of the attributes for this item. You can then reenter the Create Data Control Wizard and add all the custom attributes by simply cutting and pasting the attribute path.Click Finish.
Once you have set up the custom attribute in Oracle Content DB and created the data control, you can add the image to your WebCenter application and enable the image to be clicked. You can also create a table of clickable images to publish all images from a folder.
Creating a Clickable Image
To create a clickable image, perform the following steps:
In Oracle JDeveloper, open your JSPX page.
In the Data Control Palette, expand that data control you created in Section 5.3.6.2, "Creating a Data Control based on Oracle Content DB Adapter" and expand the search method.
Under Return, click URI, then drag the URI attribute onto the page.
From the Create list, choose Link, then Object Image to display the Action Binding Editor.
In the Action Binding Editor, enter the input parameters for the search method. In our example, set the values for Path and NamePattern. These values should be the path where the image resides and the image filename.
Click OK.
In the Structure Pane, right-click the ObjectImage you created and click Insert Before, then Browse.
From the category dropdown list, choose ADF Faces Core.
Choose GoLink from the list of items, then click OK to insert the GoLink into the page before the ObjectImage.
In the Structure Pane, drag and drop ObjectImage below the new GoLink so that the ObjectImage is a child of the GoLink.
View the Page Definition for your JSPX page. To do so, right-click your JSPX page then choose Go to Page Definition from the context menu.
In the Structure Pane, right-click Bindings, choose Insert Inside, then select attributeValues from the context menu.
In the Attributes Binding Editor, expand the data control node (in this example, the Images node), then the search node, then select Return to view a list of available attributes.
In the Attribute list, select TargetURL and click OK to create the attribute binding.
Return to your JSPX page from the Page Definition.
In the Structure Pane, right-click goLink and choose Properties from the context menu.
In the Properties dialog box, delete the text in the Text field. The image in this case will be clickable, not the text.
Next to the Destination field, click Bind.
Click ADF Bindings, then Bindings to find a node for the attributeValue you just created.
Search for the AttributeValues you just created (TargetURL), then click the arrow to add the binding to the Expression.
Click OK.
The resulting code will look something like the following:
<f:verbatim>
  <p>
    <af:goLink binding="#{backing_imageLink.goLink1}"
   id="goLink1"
 destination="#{bindings.getItems_returntargetURL.inputValue}">
      <af:objectImage binding="#{backing_imageLink.outputText1}"
                      id="outputText1"
                      source="#{bindings.getItems_returnURI.inputValue}"/>
    </af:goLink>
  </p>
</f:verbatim>
Run the page. When you click the image, the target URL you used for the attribute should display its contents.
Creating a Table of Clickable Images
You can also create a table of clickable images to publish all images from a folder in Oracle Content DB.
To create a table of clickable images, perform the following steps:
Create a new JSPX page in your WebCenter application.
From the Data Control palette, drag and drop the Return of the getItems method as an ADF Read-Only Table onto the page.
Note:
When you drag and drop the Return node onto your page, a context menu appears where you can choose Create > Tables > ADF Read-Only Table. Doing so displays the Action Binding Editor.In the Action Binding Editor, next to the path parameter, specify the path to the location of the image, then click OK.
In the Edit Table Columns dialog box that displays, remove all columns except for the URI column, then click OK to generate the table.
In the Structure Pane, right-click outputText, then choose Convert to create an object image out of the selected item.
Open the Properties dialog box for the converted item and, next to the Source input field, click Bind.
In the Structure Pane, right-click goLink and choose Properties from the context menu.
In the Action Binding Editor, expand JSP Objects > Row and select the URI to create the binding expression, then click OK.
In the Structure Pane, right-click objectImage and choose Insert Before > ADF Core from the context menu.
From the list of available components, select GoLink, then click OK.
In the Structure Pane, drag and drop the objectImage to become a child of the goLink.
In the Properties dialog box, delete the value from the Text field. The image in this case will be clickable, not the text.
Next to the Destination field, click Bind.
In the Binding dialog box, expand JSP Objects > Row and select TargetURL to create the binding expression, then click OK.
In the Structure Pane for your page, right-click ObjectImage and choose Properties from the context menu.
On the Common Properties tab, next to the source attribute, click Bind to define the expression language for the image source.
Click OK, then run your page. You should see a table of all the images in the directory, and each image should link to its respective Web site.
Note:
You can also search for items based on certain custom attributes and render those on your page. For example, you could display product images for certain categories of pages or filter images from mixed-type result sets. To do so, follow the steps in Creating a Table of Clickable Images but use the advancedSearch method instead of the getItems method and manually build a query predicate.In addition to Oracle Content DB, you can integrate other content management systems, such as Stellent. Stellent provides numerous ways for you to integrate its functionality into custom applications. These integration methods include a Web services API as well as a J2EE API (which is part of the Content Integration Suite). For more information about Stellent integration in custom applications, please see Getting Started with the Stellent Developer's Kit (SDK). This guide provides the background information you will need and gives pointers to other, more detailed documents.
As WebCenter Framework is based on Oracle ADF, you can leverage Web services and custom data controls to simplify development, as described in the following sections:
Section 5.4.1, "Configuring Web Service Data Controls Based on Stellent Content Server"
Section 5.4.2, "Integrating Content from Stellent Content Server Using a Custom Data Control"
Stellent Content Server exposes its services as Web services. You retrieve the necessary information about the different services using the WSDL file, which comes packaged with the Stellent SOAP component. This WSDL file is available in the <install_dir>/weblayout/groups/secure/wsdl/custom/ directory. For information on Stellent Web services support, see Stellent Content Server - Using WSDL Generator and SOAP Manual.
The Web Service data control enables you to integrate content from Stellent Content Server into your WebCenter application. In this section, we use the search.wsdl file to create a Web Service data control that will enable integration of content from Stellent Content Server into your WebCenter application.
To create a Stellent Content Server-based data control, perform the following steps:
Start Oracle JDeveloper, then open your WebCenter application and project.
Select the Model project, then select New from the File menu. The New Gallery window is displayed.
In the Filter By field, select All Technologies, if not selected already.
Expand Business Tier and select Web Services.
Under Items, select Web Service Data Control, as shown in Figure 5-89.
Figure 5-89 New Gallery - Web Service Data Control
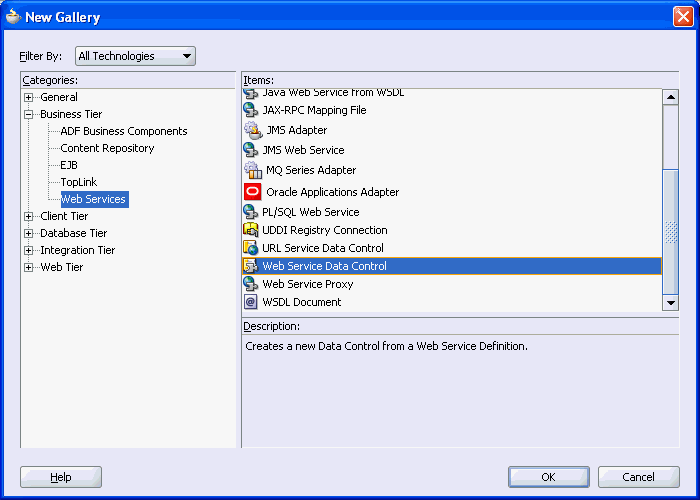
Click OK. The Create Web Service Data Control wizard is displayed.
If the Welcome page is displayed, then click Next to skip it.
On the Data Source page of the wizard, enter a name for the data control in the Name field. Then, in the URL field, select your WSDL file, for example search.wsdl, by clicking Browse, as shown in Figure 5-90.
Click Next. The Data Control Operations page of the wizard is displayed.
Select all available operations by clicking Add All, as shown in Figure 5-91, and click Next.
Click Next to skip the Response Format page of the wizard.
On the Endpoint Authentication page, select SearchSoap, and specify the username and password to log in to Stellent Content Server as shown in Figure 5-92.
Click Finish. The Stellent data control is created. Figure 5-93 shows DataControls.dcx and Stellent.xml files under the Applications Navigator and the Stellent data control under the Data Control Palette.
Figure 5-93 Stellent Data Control in the Applications Navigator and the Data Control Palette
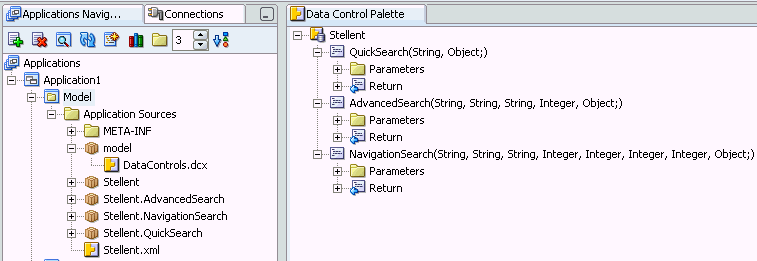
Tip:
To change the Endpoint URL or the user information, expand your Model project under the Applications Navigator. Under the Model project, expand themodel package, then select the DataControls.dcx file. In the Structure pane, right-click the data control and select Edit Web Service Connection.You can create a custom data control to integrate content from Stellent Content Server. A custom data control has an advantage over the Web Service data control, that is, it enables you to address complex scenarios, such as concatenating operations, adding business logic around the content operations, and so on.
Before you create your custom data control, you need to expose the relevant Web service proxy and custom Java class. The procedures to create Web service proxy, custom Java class, and custom data control are described in the following sections:
The first step in the process of creating a custom data control is to create a Java proxy.
To create a Java Proxy, perform the following steps:
In Oracle JDeveloper, open your WebCenter application and project.
Select the Model project, then select New from the File menu. The New Gallery window is displayed.
Expand Business Tier, then select Web Services.
Under Items, select Web Service Proxy, as shown in Figure 5-94.
Figure 5-94 New Gallery - Web Service Proxy
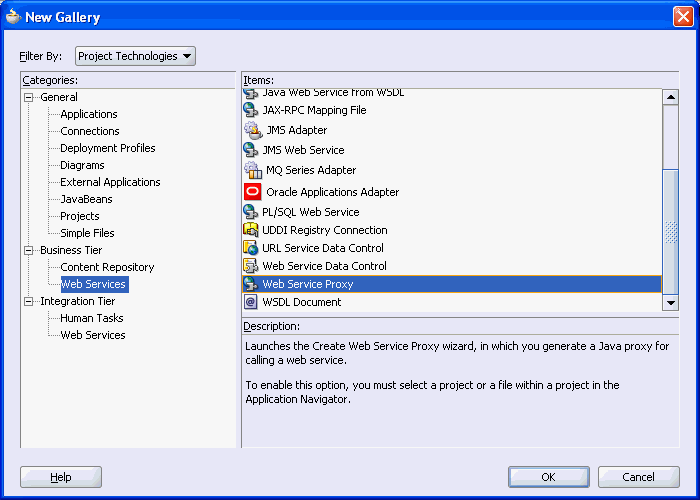
Click OK. The Create Web Service Proxy wizard is displayed.
If the Welcome page is displayed, then click Next to skip it.
On the Web Service Description page of the wizard, click Browse under WSDL Document URL and select the path to WSDL document, for example, search.wsdl, as shown in Figure 5-95.
On the Port Endpoints page, as shown in Figure 5-96, you can modify the Endpoint URL, if necessary.
If required, perform the following optional steps:
Click Next on the Port Endpoints page.
On the Custom Mappings page, shown in Figure 5-97, specify mappings between XML types and their corresponding Java class types.
Click Next.
On the Defined Handlers page, shown in Figure 5-98, specify any handler class that you have to deal with the Web service message. You can also use this page to update any initialization parameters, SOAP roles, or SOAP headers.
Click Next.
On the Default Mapping Options page, define default packages for proxy classes and value types as shown in Figure 5-99. These packages will be used when generating classes for which no mapping exists in a mapping file.
Click Next.
On the Support Files page, shown in Figure 5-100, specify whether you want to generate the extra classes and files to help you develop and test your proxy.
Click Next to display the Finish page, which lists the service endpoint interfaces and methods that will be generated on finishing the wizard, as shown in Figure 5-101.
Click Finish.
A set of classes for your Web service proxy are created under the Model project, as shown in Figure 5-102.
After creating the Web service proxy, the class that implements the business logic must be created.
To create a custom Java class, perform the following steps:
In Oracle JDeveloper, open your WebCenter application and project.
Select the Model project, then select New from the File menu. The New Gallery window is displayed.
Expand General, then select Simple Files.
Under Items, select Java Class, as shown in Figure 5-103.
Click OK. The Create Java Class dialog box is displayed, as shown in Figure 5-104.
Specify Name and Package, and click OK. The class.java file is opened in the design mode.
Add your business logic to the class. To ensure that required parameters can be passed and data returned, make sure you define input parameters and a valid Return. In Example 5-11, a search term is submitted and the result is returned. In this example, the username and password are hard-coded to simplify the code, but these could also be provided as parameters or derived through other methods from the application.
Example 5-11 Sample Java Class
package model;
import model.proxy.QuickSearchResult;
import model.proxy.SearchSoapClient;
public class StellentImpl {
    public QuickSearchResult StellentImpl(String queryTerm) {
        String docURL = "";
        QuickSearchResult result;
        result = new QuickSearchResult();
                try {
            SearchSoapClient myPort = new SearchSoapClient();
            myPort.setUsername("sysadmin");
            myPort.setPassword("idc");
            result = myPort.quickSearch(queryTerm, null);
        } catch (Exception ex) {
            ex.printStackTrace();
        }
        return result;
     }
}
After you have added your business logic, save the Java class.
Now that you have created a Java class with the custom code, you can create a custom data control from it.
To create a custom data control, go to the Applications Navigator and right-click the .java file that you created, as shown in Figure 5-105. Your custom data control is created and it is displayed under the Data Control Palette, as shown in Figure 5-106.
Figure 5-105 The Create Data Control Option
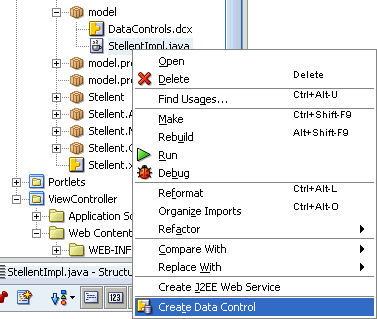
Figure 5-106 Custom Data Control in the Data Control Palette
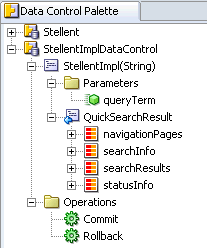
The following sections discuss through examples how to use Stellent Content Server-based Web service and custom data controls:
Section 5.5.1, "Adding Simple Search Capabilities Using the Web Service Data Control"
Section 5.5.2, "Adding Simple Search Capabilities Using the Custom Data Control"
To add simple search capabilities that enable search in Stellent Content Server, perform the following steps:
If Oracle JDeveloper is not open, then start it and open the desired WebCenter application and project.
Expand ViewController, then double-click your JSPX page.
Note:
If your JSPX page does not expose UI components in a new managed bean, then create a new page with the Automatically Expose UI Components in a New Managed Bean option enabled. You can enable this option on the Component Binding page of the Create JSF JSP wizard. See Section 4.2, "Building WebCenter Application-Enabled Pages in Oracle JDeveloper with Oracle ADF" for more information.In the Data Control Palette, expand the QuickSearch node and its parameters, as shown in Figure 5-107.
Figure 5-107 Data Control Palette - QuickSearch
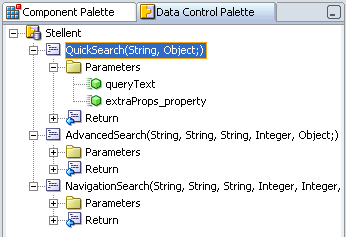
Drag and drop the QuickSearch node onto the page. From the Create menu, select Methods, then select ADF Command Button. The Action Binder Editor dialog box is displayed.
Leave the parameter fields blank, and click OK.
In the Data Control Palette, select the queryText attribute under Parameters, and drop it onto the page. From the Create menu, select Texts, then select ADF Input Text w/Label.
Expand the Return node and its child node QuickSearchResult, as shown in Figure 5-108.
Figure 5-108 The Return Node - QuickSearchResult
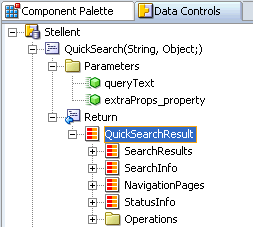
Under QuickSearchResult, select SearchResults and drop it onto the page. From the Create menu, select Tables, then select ADF Read-only Table. The Edit Table Columns dialog box is displayed.
In the Edit Table Columns dialog box, add or delete the columns as needed, and click OK. Your page in the design mode should look like Figure 5-109.
Figure 5-109 QuickSearch in the Design Mode

Run the page in a browser. The page should look like Figure 5-110.
Now submit a query, for example, dDocTitle <substring> Project, your search is executed and the results are displayed in the table, as shown in Figure 5-111. The results displayed in the table depend on the content of the Stellent Content Server.
To add simple search capabilities to your JSPX page, perform the following steps:
If Oracle JDeveloper is not already open, then start it, and open the desired WebCenter application and project.
Expand ViewController, then double-click your JSPX page.
In the Data Control Palette, expand your custom data control and drop the method, for example, StellentImp onto the page. From the Create menu, select Methods, then select ADF Command Button. The Action Binding Editor is displayed.
Click OK.
Under Parameters, select queryTerm, as shown in Figure 5-112, and drop it onto the page. From the Create menu, select Texts, then select ADF Input Text w/Label.
Under QuickSearchResults, select searchResults, as shown in Figure 5-113, and drop it on the page. From the Create menu, select Tables, then select ADF Read-only Table. The Edit Table Columns dialog box is displayed.
Click OK and run the page in a browser. Your page should look like Figure 5-114.
Perform a search for dDocTitle <substring> Project, for example. Your page should show the expected results.
Oracle Business Intelligence Publisher reduces the high costs associated with the development, customization and maintenance of business documents; while increasing the efficiency of reports management. Utilizing a set of familiar desktop tools users can create and maintain their own report formats based on data extracts from diverse sources.
You can integrate Oracle Business Intelligence (BI) Publisher in either of the following ways:
Integrate the BI Publisher application. BI Publisher is a self-contained application that manages a set of reports. After logging in, you are presented with a hierarchy of reports organized by category. Each of these reports can be independently included in your WebCenter application. See Section 5.6.1, "Integrating BI Publisher Reports into Your WebCenter Application" for more information.
Integrate scheduled BI Publisher reports. BI Publisher runs scheduled reports and stores their output. These reports can subsequently be viewed by directly accessing the underlying document repository. See Section 5.6.2, "Storing BI Publisher Reports in the WebCenter Content Repository" for more information.
For detailed information about how to use BI Publisher, see Oracle Business Intelligence Publisher User's Guide.
The most convenient mechanism for integrating BI Publisher with your WebCenter application is the built-in Web Clipping portlet. This portlet enables you to select any part of a BI Publisher report and display it directly within your WebCenter application. It also handles aspects such as external application integration and parameterization of these reports.
Add a Web Clipping portlet to your page by following the instructions in Section 17.2.1, "Registering a Web Clipping Producer" and Section 17.2.2, "Adding a Web Clipping Portlet to a Page". Once you have the Web Clipping portlet, you must obtain the starting URL for BI Publisher.
Log in to BI Publisher and view the report that you want to include in your WebCenter application. For detailed information about how to use BI Publisher, see Oracle Business Intelligence Publisher User's Guide.
Note:
If you want to use the initial BI Publisher URL as your first page URL, you must turn on accessibility mode on the login page.Cut and paste the URL of this report page as the start page for your Web Clipping portlet. Alternatively, you could construct this URL by following the instructions in "Accessing Reports via a URL" in the Oracle Business Intelligence Publisher User's Guide.
Proceed through the Web Clipping process as described in Section 17.2.3, "Selecting a Section of a Web Page to Display in the Web Clipping Portlet". The result displays all or part of the BI Publisher report in your WebCenter application.
If you do not want your users to have to enter credential information when they view the page, you can register the Web Clipping producer used to display your reports as an external application. Follow the instructions in Section 17.3, "Integrating Authenticated Web Content Using Single Sign-On". You must choose the following options in the Register External Application Wizard:
For Login URL, enter a URL of the following form:
http://host:port/xmlpserver/login.jsp
For User Name/ID Field Name, enter id.
For Password Field ID, enter passwd.
For Authentication Method, choose POST.
Scheduled BI Publisher reports leverage WebDAV APIs to store the reports to the desired document repository. WebCenter Framework uses Oracle Content DB as it's out-of-the-box content repository. Oracle Content DB includes a WebDAV server that BI Publisher can leverage for persisting reports into Oracle Content DB.