32.4 Format Your Report in the Paper Design View
The steps in this section will show you how to preview your report in the Paper Design view, and make a few last-minute tweaks using the tools in the Paper Design view. It is sometimes easier to use the Paper Design view to finish your report, since you can see actual data displayed.
To format your report in the Paper Design view:
-
Click the Paper Design button in the toolbar to display the Paper Design view.
-
In the Paper Design view, click the field F_PRODUCT_DESCRIPTION.
Tip:
If you cannot find this field, you can use the Object Navigator to find the field name and click it. When you select an item in the Object Navigator, the corresponding object is selected in the Paper Design view. -
Increase the size of this field as much as possible, given the size of the area on your form.
-
Shift-click to select the four numbered fields, then click the Align Right button in the toolbar.
-
At the bottom of the page, Shift-click the two fields (F_PAGE_TOTAL and F_ORDER_TOTAL), then click the Line Color tool in the tool palette and choose No Line.
-
Shift-click the three currency number fields on the right.
-
Click the Currency button in the toolbar to add a dollar sign to the amounts.
-
Click the Commas button to add a comma to values over 999.
-
Click the Add Decimal Place button twice to add two decimal places to the values.
-
In the Object Navigator, Shift-click the following three objects:
-
B_TBP
-
F_ORDER_TOTAL
-
F_PAGE_TOTAL
-
-
Choose Tools > Property Inspector to display the Property Inspector, and set the following properties:
-
Under Advanced Layout, set the Print Object On property to All Pages, and set the Base Printing On property to Enclosing Object.
-
-
In the Paper Design view, adjust the sizes of the fields according to the measurements on your preprinted form.
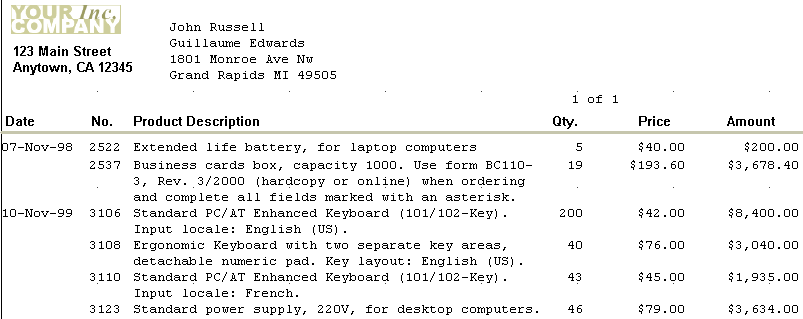
Your report should now look like this:
Figure 32-12 Final preview of your preprinted form report

Description of "Figure 32-12 Final preview of your preprinted form report"
Note:
To see a more complete view of the report, you can open the sample report we have provided, calledpreprint.rdf. To view the report, open the report and click the Run Paper Layout button in the toolbar. -
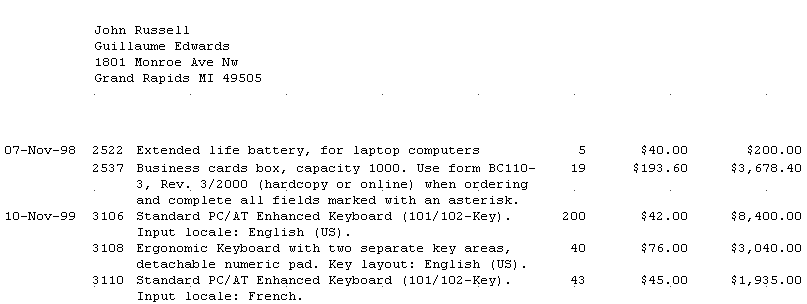
When you print your report on to the form, it might look something like this:
Figure 32-13 Final report printed on a sample preprinted form

Description of "Figure 32-13 Final report printed on a sample preprinted form"
Note:
The Paper Design view of your report will not look like the image above. We printed our report on a sample preprinted form. The above image is a snapshot of that form. -
Save your report.