|
|
This chapter explains how to use Workshop for WebLogic propagation tools to propagate a WebLogic Portal. Workshop for WebLogic provides propagation tools that guide you through the process of downloading and uploading portal inventories, merging portal inventories, setting scopes and policies, and committing a final inventory. If you would like to explore a more programmatic, automated approach to propagation, see Using the Propagation Ant Tasks.
| Note: | The propagation tools only work with inventories that were created using the same version of WebLogic Portal. For example, you cannot use an inventory generated with WebLogic Portal 10.0 with propagation tools from a later version of WebLogic Portal. |
| Tip: | Before reading this chapter, we recommend that you review Developing a Propagation Strategy and Propagation Topics. |
This chapter includes these topics:
Workshop for WebLogic provides a set of tools that let you perform a complete portal propagation. The tools provided in the Workshop for WebLogic Propagation let you:
Workshop for WebLogic lets you merge inventory files, graphically depicts this merged inventory, and highlights the artifacts that have been added, removed, or updated during the merge. You then have a chance to tune the merged inventory and produce a final inventory file that you can upload to a destination server.
| Tip: | All of the propagation features that are available in Workshop for WebLogic are also available through the propagation Ant tasks. The Ant tasks offer a programmatic approach to propagation and offer additional features, such as the ability to place the server in maintenance mode, that are not offered in Workshop for WebLogic. See Using the Propagation Ant Tasks for more information. |
Propagating a portal using Workshop for WebLogic involves these major steps. Each step is explained in this chapter.
Before performing certain propagation operations, you need to have certain security privileges on the server to which you are propagating. These operations include the online Ant tasks and the Export Propagation Inventory to Server and Import Propagation Inventory From Server operations in Workshop for WebLogic.
You must be granted delegated administration rights to the artifacts you wish to propagate. In most cases, it is recommended that you be a member of the Admin role when you propagate. This role allows you to propagate any artifact in the application and is the safest approach to propagation because the propagation tools have full visibility into the application configuration.
The following tasks require the user to be in the PortalSystemAdministrator role:
For the OnlineCommitTask and OnlineDownloadTask we recommend the user be in the Admin role to ensure that all resources can be read or modified. If the user is not in the Admin role, the OnlineCommitTask and OnlineDownloadTask tasks will fail by default. The user must explicitly set the allowNonAdminUser modifier to true when calling the task.
Certain propagation operations must send files to the InventoryManagementServlet. If the propagation user is not in the Admin role, the user must have File Upload rights on the server. This privilege is required for any operations that send files to the server. This applies to the OnlineCheckMutexTask, OnlineCommitTask, OnlineDownloadTask, OnlineMaintenanceModeTask, OnlineUploadTask tasks.
For information on managing the File Upload security policy of your domain, refer to the WebLogic Server documentation on e-docs.
Note, however, that use cases exist in which the propagation is targeted to a specific area of the application and the previous advice does not apply. For example, a content administrator may want to propagate a single folder of content items. This user will likely not have delegated administration rights to any Portal Framework assets, but that is not a problem in this use case.
In such cases it is acceptable for you to perform a propagation without full delegated administration rights to the application. It is important to understand that this may cause errors in cases where the you are attempting to add items that exist in the destination, but are not visible to you because of the absence of delegated administration rights. You will see errors on the console about the conflicted artifacts failing to add because they already exist.
For more information on delegated administration, see the WebLogic Portal Security Guide.
Workshop for WebLogic provides a Propagation perspective which provides views for viewing and editing inventory files. This section introduces the Propagation perspective.
Figure 7-1 shows an example Propagation Perspective. The numbered areas are described briefly below the figure.
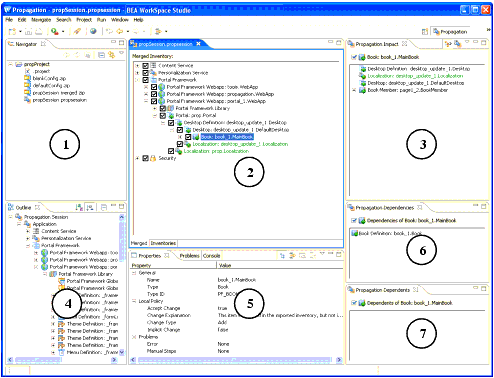
1. Navigator – Shows the contents of the propagation session, including source and destination files, merged inventory files, and properties files.
2. Merged Inventory/Inventories – This view lets you switch between a hierarchical representation of the merged inventory file or the source and destination inventories. To switch between these two views, click the Merged or the Inventories tab below the view.
3. Propagation Impact – This view shows you the inventory nodes that are affected when you modify a merged inventory file. For instance, if you deselect a node in the merged inventory, to remove it from the propagation scope, the Propagation Impact view highlights nodes that are dependent on the deleted node.
4. Outline – This view lets you view and navigate the portal inventory.
5. Properties – The Properties view displays information about the selected inventory node. This view also lists the policy that applies to the node and any manual changes that will be required if the policy is applied.
6. Propagation Dependencies – This view shows you assets upon which the selected asset depend. Removing any of the dependent assets will make the selected asset invalid.
7. Propagation Dependents – This view shows you the assets that depend on the selected asset. If you remove the selected asset, these dependent assets will become invalid.
This section explains how to download a portal inventory file from a server. To propagate a portal, you need to download the source and the destination inventories, combine them, and then upload and commit the final combined inventory.
| Note: | This operation extracts the portal inventory and attempts to write it to a ZIP file. If the ZIP file created exceeds 4 GB, this operation fails and a message is written to the server log and the verbose log. If this occurs, try scoping your inventory to limit the size of the resulting archive file. See Understanding Scope for more information. |
| Tip: | You can also use the OnlineDownloadTask Ant task to download an inventory file. See Propagation Ant Task Reference for more information. |
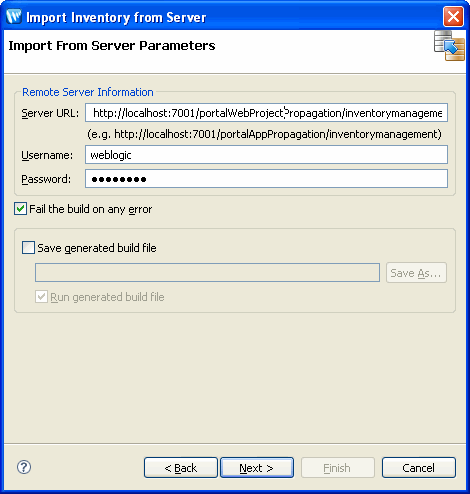
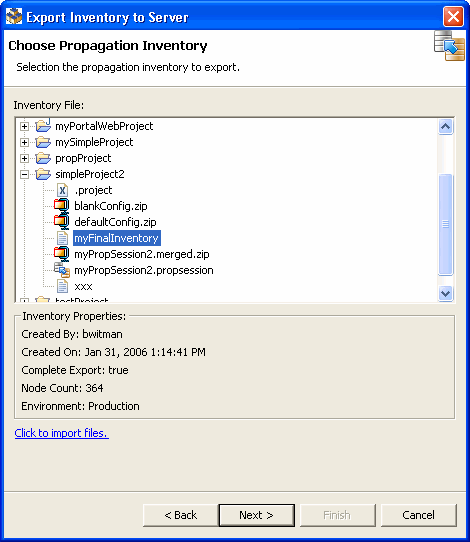
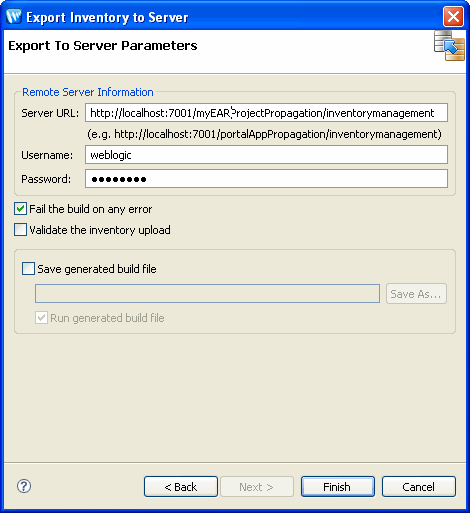
In the Import Inventory from Server dialog, complete the Server URL, Username, and Password fields. The server URL is the URL of the propagation servlet that is deployed on the target server. When it is deployed, you can access the servlet as follows:
http://server:port/earProjectNamePropagation/inventorymanagement
Where earProjectName is the name of the EAR project that contains the portal application that you are propagating. For example: myEARProjectPropagation
| Tip: | The propagation servlet is deployed, by default, in all WebLogic Portal EAR projects. This servlet enables communication with remote propagation clients, such as the Workshop for WebLogic propagation tools and Propagation Ant Tasks. The servlet allows remote clients to perform online operations, such as downloading, uploading, and committing WebLogic Portal inventories. |
A sample Import Inventory from Server dialog is shown in Figure 7-3.
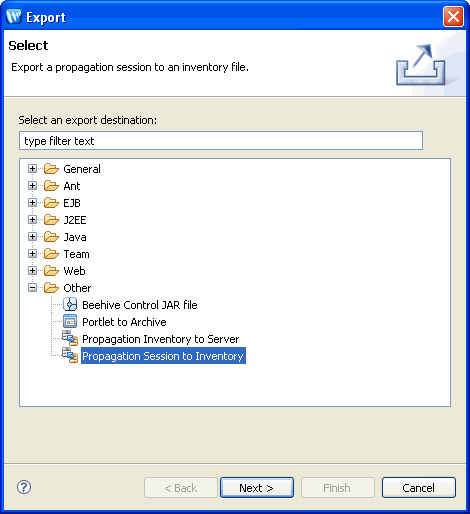
This section explains how to use the Propagation Session wizard to set up a propagation project in Workshop for WebLogic. This section discusses the following tasks:
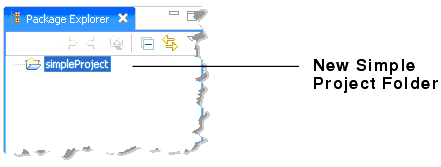
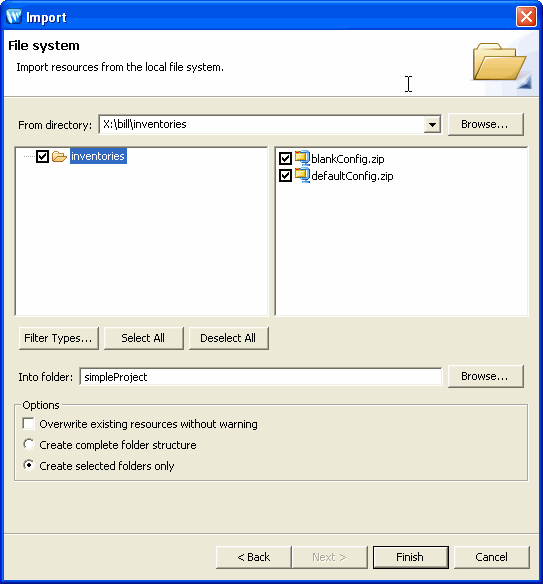
A propagation project must reside in a project folder. If you do not currently have a project folder in which to put your propagation project, you need to create one first. In this initial task, you create a simple project for this purpose.
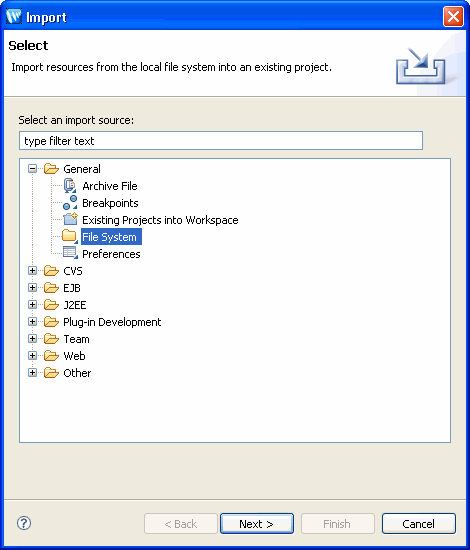
To create a simple project, do the following:
A propagation session provides a wizard that guides you through the process of importing inventory files, viewing them, and merging them.
To begin a propagation session, do the following:
Checkpoint: In the next task, you will import a source and a destination inventory file. Workshop for WebLogic then lets you view these files, adjust the scope and policies, and merge the files into a final merged inventory file that you can upload and commit to the destination server.
| Note: | The propagation tools only work with inventories that were created using the same version of WebLogic Portal. For example, you cannot use an inventory generated with WebLogic Portal 10.0 with the propagation tools from a later version of WebLogic Portal. |
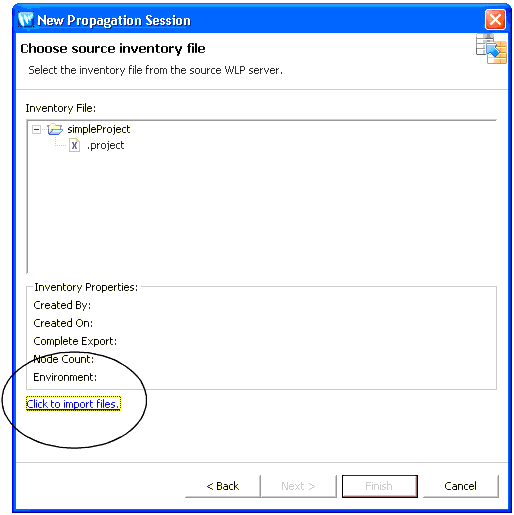
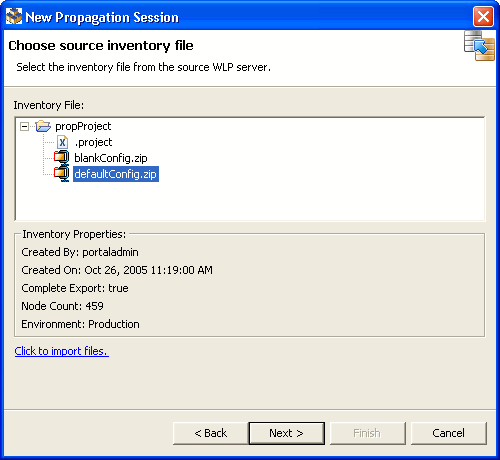
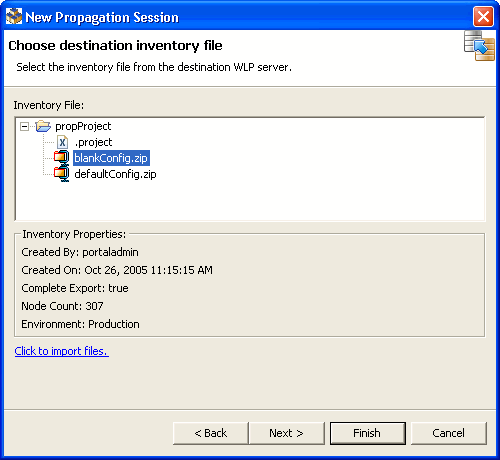
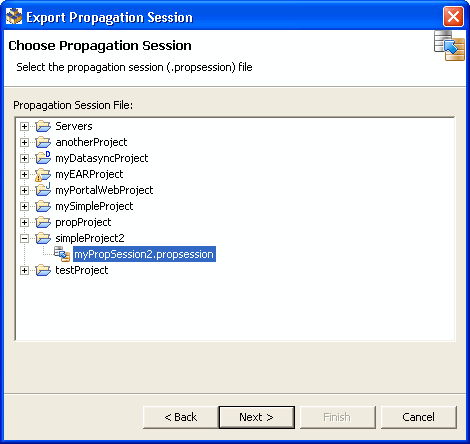
The propagation tools operate on a pair of WebLogic Portal inventory files: a source and a destination file. In this task, you import a previously downloaded source inventory file into the project.
| Tip: | You can download a portal inventory using Workshop for WebLogic or the OnlineDownloadTask Ant task. The Workshop for WebLogic method is described in Downloading an Inventory File. The Ant task is described in Using the Propagation Ant Tasks. |
The imported inventory file describes the entire Enterprise application environment, as contained in the database, for that system. The source inventory file is stored in the form of XML files, which are grouped into a single ZIP file.
| WARNING: | Never edit the individual XML files in the exported inventory ZIP file. |
| Tip: | If you select the Import Inventory from Server option, the wizard lets you import the inventory directly from the server. If you choose this path, the basic steps are identical to the steps outlined in Downloading an Inventory File. |
| Tip: | Oracle recommends that you store all propagation session files within a source control system. |
Checkpoint: You now have imported the source and destination inventory files into the propagation project. Now you will create a merged inventory file from the source and destination files.
In this task, you select the source and destination inventory files and generate a merged inventory file. A merged inventory file contains all of the artifacts resulting in the union of the source and destination files. Later, you can view and refine the merged inventory file before creating a final inventory file.
The files are merged using a set of rules, which include:
For detailed information on these rules, see Propagation Topics. For the example in this chapter, default rules are used.
| Tip: | By clicking Finish, you bypass the remaining dialogs of the Propagation Session wizard, accepting all of the default values. If you want to learn more about these options, see Propagation Topics. |
| Tip: | You can always open the Propagation Perspective manually by selecting Window > Open Perspective > Other, and selecting Propagation from the Select Perspective dialog. |
The interim merged inventory file is created. By default, this file is named:
where propSessionName is the name of the propagation session file you created previously.
Checkpoint: At this point, you have imported a source and a destination inventory file into your propagation session and generated a merged inventory file, which is the union of the contents of the source and destination files. Next, you will view and tune the merged inventory file.
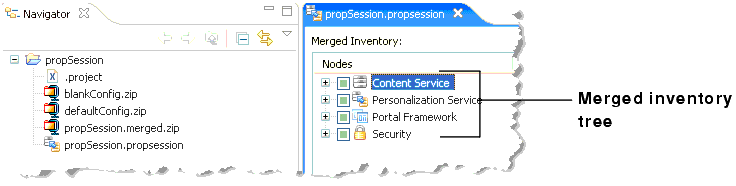
After you generate the merged inventory file, it appears in the Merged Inventory Tree View, as shown in Figure 7-11.
| Note: | You must be in the Propagation Perspective to see the merged inventory. You can open this perspective by selecting Window > Open Perspective > Other, and selecting Propagation from the Select Perspective dialog. |
The tree view is a hierarchical description of the content of the merged inventory files.
By expanding the merged inventory tree, you can see the detailed contents of the inventory, including the artifacts that have been added, deleted, or updated. Figure 7-12 shows that as you drill down into an inventory view, added artifacts are indicated with a + (Plus) icon and by a notation in the Change Type column.
| Tip: | You can turn the grid lines on or off in the Merged Inventory view by selecting Window > Preferences. In the Preferences dialog, select WebLogic Portal, and then select Propagation Tool. |

The merged inventory file graphically shows the state of each node with a combination of color and special icons badges. These visual cues include:
Tuning the inventory refers to manually selecting or deselecting nodes in the inventory tree. If the resource is an update election then selecting it means the source version of the XML will be in the final merged inventory. Deselecting it means that the destination version of the XML will be in the final merged inventory. In other words, you are accepting what is already on the destination.
If the change is an add election and you deselect it, the resource will be excluded from the final inventory. In Figure 7-13, the deselected desktop, which was added, will be excluded from the final inventory.
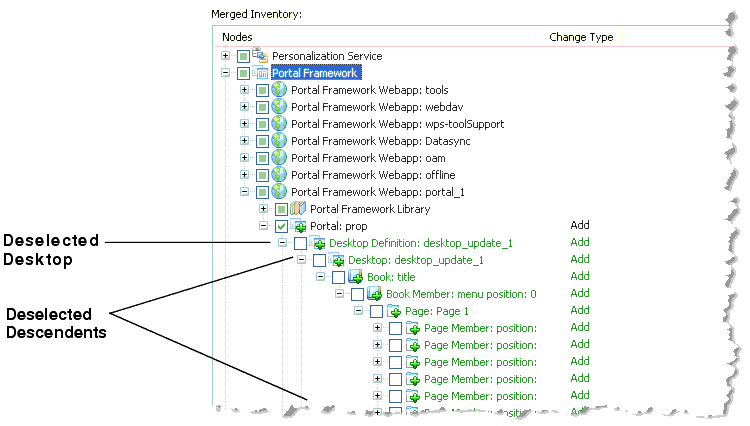
Because many artifacts are dependent on other artifacts, deselecting one artifact often results in other artifacts automatically becoming deselected. Because the dependencies between portal artifacts are often complex, any discussion of modifying the merged inventory is beyond the scope of this chapter. For more information on editing the inventory, see Propagation Topics.
If a particular node cannot be modified, the checkbox is greyed out (you can’t change it). If the unmodifiable node has children, the node’s label is shown in grey text. If the unmodifiable node does have children, the text is shown in the normal color.
The default colors listed in Table 7-1 can be changed in the Eclipse IDE. To change the color assigned to the name of an unmodifiable node or any of the colors listed in Table 7-1, do the following:
| Tip: | You can right-click a node to access additional functions, such as view filters. For example, you can filter the view to just show additions. Refer to online help in Workshop for WebLogic for more information. |
| Tip: | The Propagation Dependencies and Propagation Dependents views help you asses the impact of adding or deleting portal assets from the merged view. For more information on these views, see Overview of the Propagation Perspective. |
Checkpoint: After viewing and modifying the merged inventory, you are ready to create a final merged inventory file.
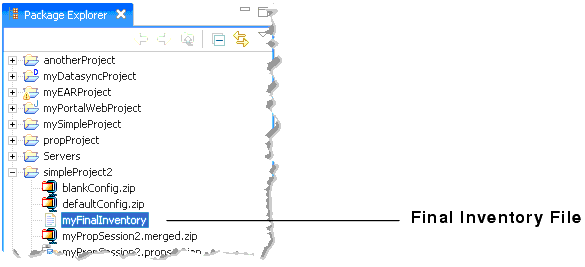
After you are satisfied with the state of the interim merged inventory, you need to generate a final version of the merged file. At this time, any changes you made to the interim file are executed and a final, merged inventory file is created. The final inventory file is always smaller than the interim file. This is because the interim file has to maintain all of the artifacts resulting in the union of the source and destination files, while the final file contains only the merged contents of the two files.
The final inventory file appears in the Package Explorer in the folder you designated, as shown in Figure 7-16.
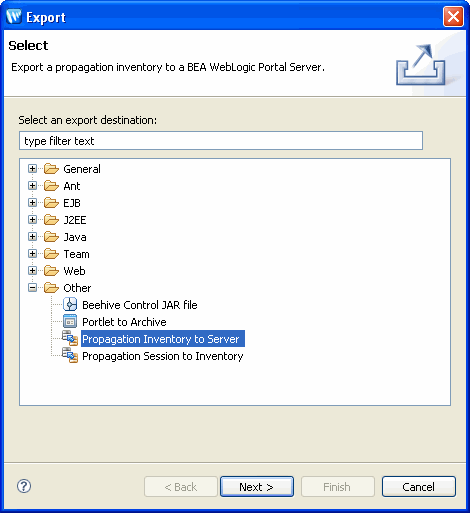
This section explains how to upload the final inventory to a destination server.
| Note: | Workshop for WebLogic does not automatically place the server in maintenance mode to prevent users from changing portal data using the WebLogic Portal Administration Console or Visitor Tools on the production system. If a user makes changes on the production system after the inventory listing has been imported and validated, propagation results might be inaccurate and changes could be unsuccessful. If you want to place the destination system in maintenance mode, you can use the OnlineMaintenanceModeTask Ant task, which is described in Propagation Ant Task Reference. |
| WARNING: | It is very important that you make no changes to the production system during the final upload. |
Before you upload the final inventory, the source application EAR file must be deployed on the destination server. In other words, if you are propagating an application from the staging environment to the production environment, you must deploy the EAR from staging to production before you upload the inventory.
For more information, see Deploy the J2EE Application (EAR).
When you propagate the inventory to the server, Workshop for WebLogic propagates the database assets in the final inventory file to the production server, according to the scope you assigned and the policies you selected previously.
| Note: | The user performing the propagation must have rights to the File Upload security policy of WebLogic Server or be in the Admin or Deployer role. See Security and Propagation for more information. |
| Tip: | In this step, Workshop for WebLogic uploads the file to the server and commits it. The propagation Ant tasks OnlineUploadTask and OnlineCommitTask can be used for the same purpose. |
When it is deployed, you can access the servlet as follows:
http://server:port/earProjectNamePropagation/inventorymanagement
Where earProjectName is the name of the EAR project that contains the portal application that you are propagating. For example: myEARProjectPropagation
| Tip: | The propagation servlet is deployed, by default, in all WebLogic Portal EAR projects. This servlet enables communication with remote propagation clients, such as the Workshop for WebLogic propagation tools and Propagation Ant Tasks. The servlet allows remote clients to perform online operations, such as downloading, uploading, and committing WebLogic Portal inventories. |
Workshop for WebLogic deploys the merged inventory file to the server.
Verbose logging is useful in the event that a problem occurs with your propagation.
| Note: | This verbose log is not the same as the log created by the propagation servlet. This log only stores debug-level messages generated locally by the Workshop for WebLogic propagation plugin. |
You can choose to enable verbose logging in Workshop for WebLogic by following these steps:
workshop.ini file:
-Dcom.bea.wlp.eclipse.proptool.verbosefolder=D:\propagation\elogs
where D:\propagation\elogs is the directory in which you want the verbose logs to be saved.
| Note: | The verbose logs will be written to the specified directory. You must purge this directory from time to time, to avoid unwanted disk space use. |


|