Production Operations User Guide
|
|
Using the Propagation Utility
This chapter provides information about each page of the Propagation Utility web-based interface.
Before you use the Propagation Utility, familiarize yourself with how the Propagation Utility handles various types of data, and what you need to do before using it. See Inside the Propagation Utility.
The sections in this chapter are:
Inventory Export Process
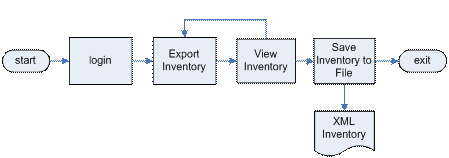
You use the Propagation Utility to export a system inventory from a source system, which is typically a staging system. This exported inventory list describes the entire Enterprise application environment, as contained in the database, for that system. The exported inventory is stored in the form of XML files, which are grouped into a single ZIP file.
Figure 8-1 shows the overall process of exporting an inventory:
Figure 8-1 Exporting an Inventory
During the export process, you create an inventory report that describes the entire content of the source environment. Later, during the import process, you assign the scope of the information to propagate. For more information, see Inventory Import Process.
Warning: You must not edit the individual XML files generated during the export task.
Starting the Propagation Utility and Logging In
Before running the Propagation Utility you must have already completed the steps in Before You Begin.
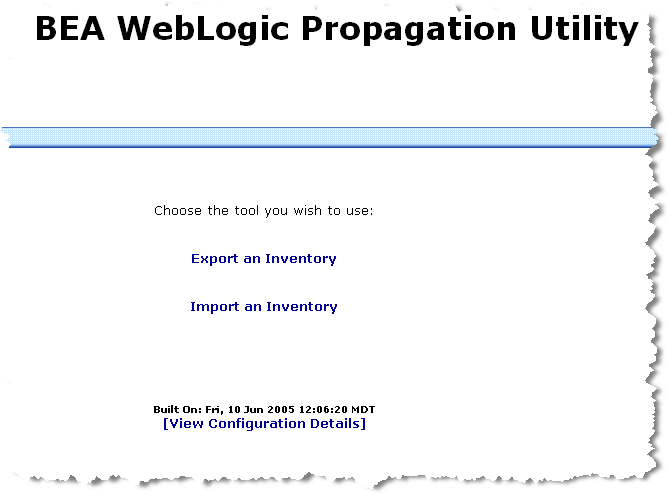
To start the Propagation Utility, open your Web browser and enter a URL in the following format:
Figure 8-2 displays:
Figure 8-2 Propagation Utility Start Page
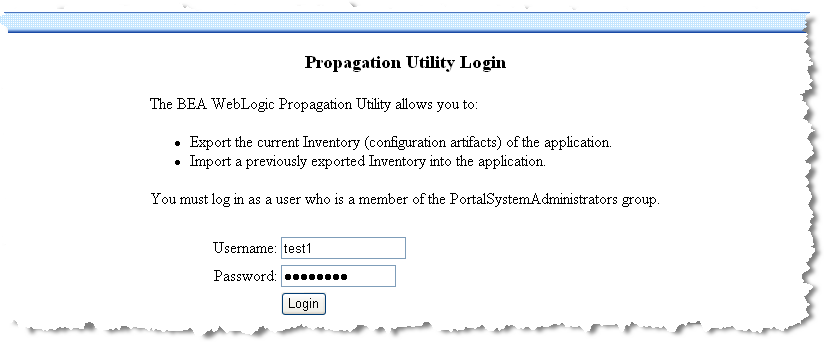
Select the task Export an Inventory. Then log in with the username and password of a valid user on the destination system; you must belong to the PortalSystemAdministrators group.
Figure 8-3 shows the login page:
Figure 8-3 Propagation Utility Login Page
Viewing the Application Inventory
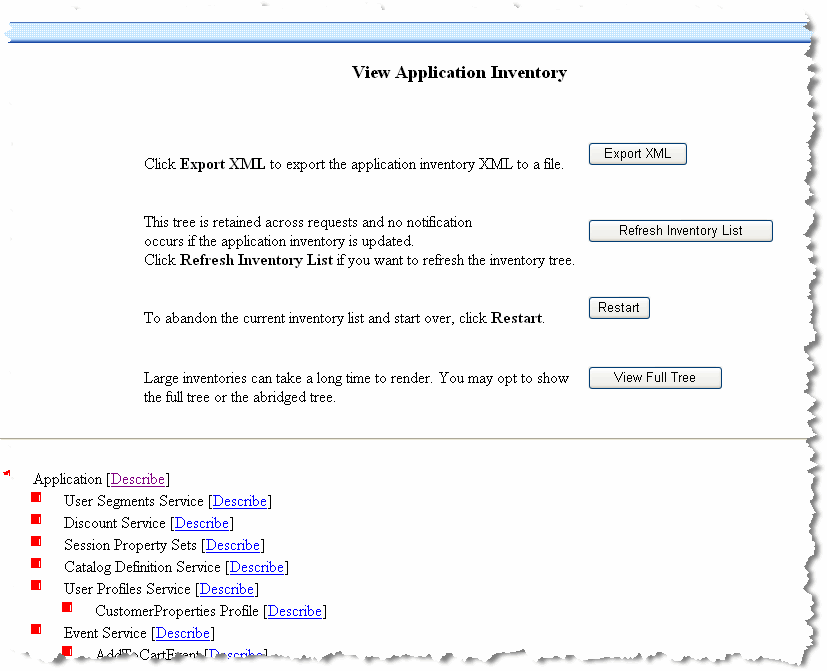
After you log in, the Propagation Utility creates an inventory tree and displays it, as shown in Figure 8-4. Options for accepting this inventory listing, regenerating an inventory listing, or restarting the Propagation Utility are also shown.
Figure 8-4 Propagation Utility View Application Inventory Page
By default, the Propagation Utility displays a summarized, or "abridged" view of the inventory listing. If you want to view a more detailed listing of the inventory, click View Full Tree.
If you want to accept the inventory listing as shown and save it, click Export XML. If you know that changes were made using the WebLogic Administration Portal after you started the export process, you can click Refresh Inventory List to recreate the inventory listing. If you want to start the export process again from the beginning without using this inventory, click Restart.
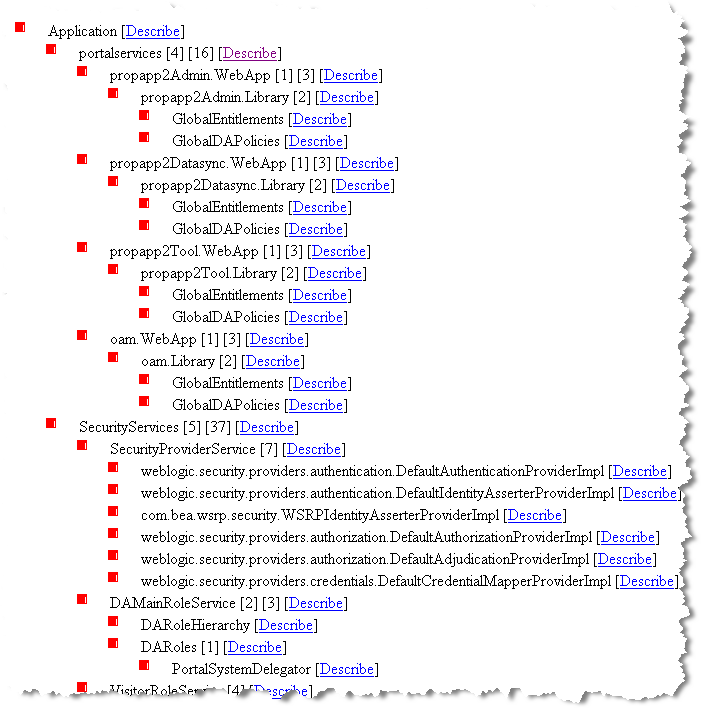
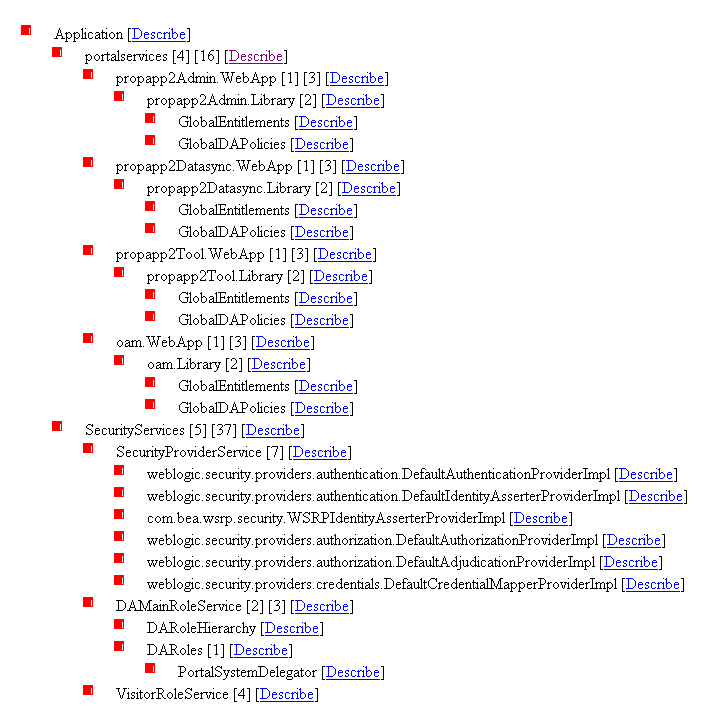
The inventory list contains a hierarchical description of the entire content of the source environment that you want to propagate. Figure 8-5 shows a segment of an inventory listing:
Figure 8-5 Propagation Utility Inventory Listing Example
If you click the Describe link, detailed information about the particular asset (node) in the tree is displayed, including:
- XML Description - The XML for the asset. Note that the XML generated by the Propagation Utility must not be hand-edited; if you do so, propagation results might be corrupted.
- Dependencies - If applicable, displays a list of nodes that, if removed, will make this asset invalid.
- Dependents - If applicable, displays a list of nodes that will become invalid if this node is removed.
Exporting the Application Inventory to a File
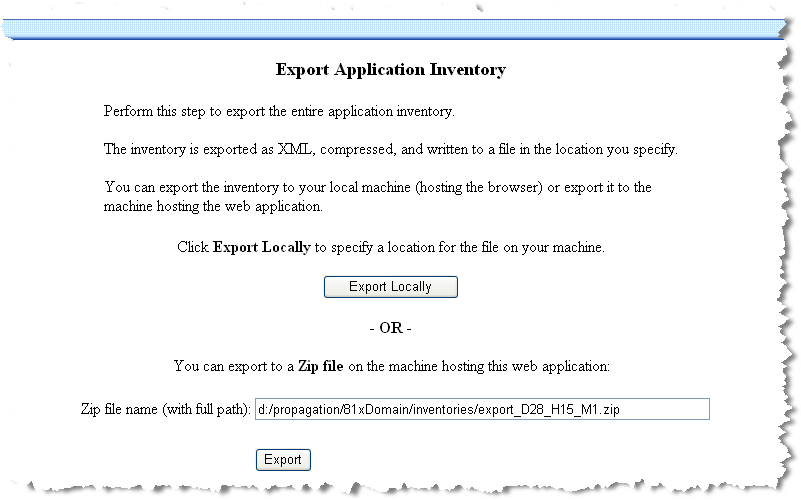
You can choose to save the inventory file on your local machine, or save it on the machine hosting the associated inventory—the machine you are exporting from. For example, you might want to save the file to your local system for storage in a source control system.
Figure 8-6 shows the available locations for saving the exported inventory list:
Figure 8-6 Propagation Utility Export Application Inventory Page
If you prefer to export the file to your local system, click Export Locally. A file download window appears; follow the instructions to save the file to a desired location. The filename inventory.zip appears by default; create a meaningful name so that you can track this file, but keep the .zip file extension.
Note: If the file to be exported is larger than 5 MB in size, you must export it to the server that you are exporting from.
If you prefer to save the file on the machine you are exporting from, you can either use the automatically generated working directory path or enter a path and filename of your choice. The Propagation Utility displays the working directory path as it is set up in the web.xml deployment descriptor file, and appends a day_hour_minute label.
Tip: BEA recommends that you store the saved file within a source control system for safe-keeping. At a minimum, keep track of your exported filenames and locations so that you can easily access them during the propagation Import process.
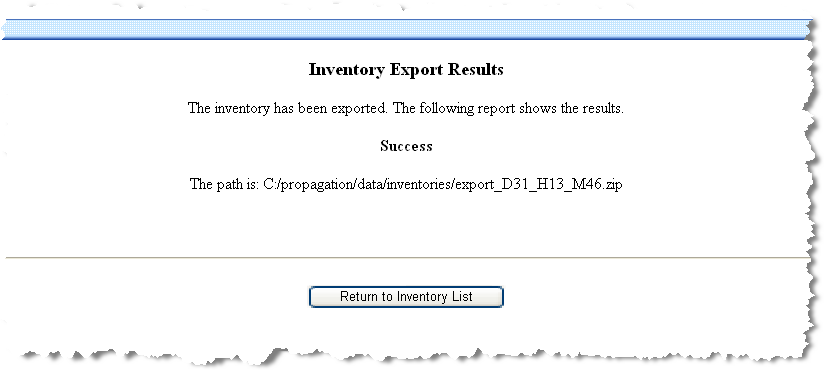
After you save the file, a final page describes the export results, as shown in Figure 8-7:
Figure 8-7 Propagation Utility Inventory Export Results Page
If the inventory file is saved successfully the results page will display a simple message indicating success. If a problem occurred, such as selecting an existing filename or inadequate disk space, an error description displays.
After a successful export, you can import the inventory from the source system into the destination system.
Warning: You must not edit the individual XML files generated during the export task.
Reviewing Propagation Utility Export Log Files
The Propagation Utility creates the following logging information during an export process:
- Overview information is placed in the default server log file. You control the detail level of this log using the WebLogic Server console. For details about server log files, see the topic Server Log in the WebLogic Server Administration Console Online Help.
- A verbose log is placed in the working directory—the same location where inventory files are stored. For details on the working directory and how to change its location, see Customize the Session Timeout and Inventory/Log File Location (Optional).
You should review the overview log file to ensure that the import process completed as expected. The verbose log file is primarily for diagnostic purposes.
Inventory Import Process
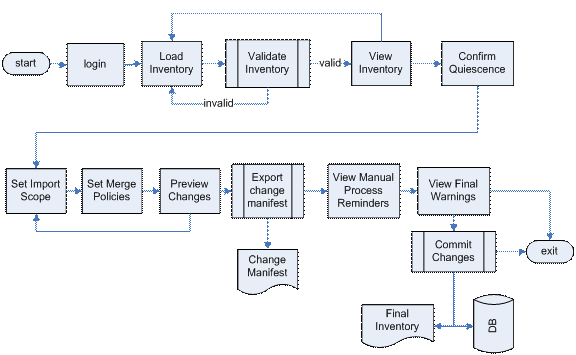
Figure 8-8 shows the overall process of importing an inventory:
Figure 8-8 Inventory Import Process
Starting the Utility
Follow the startup and login instructions as described in Starting the Propagation Utility and Logging In.
Selecting the Source Inventory to Import
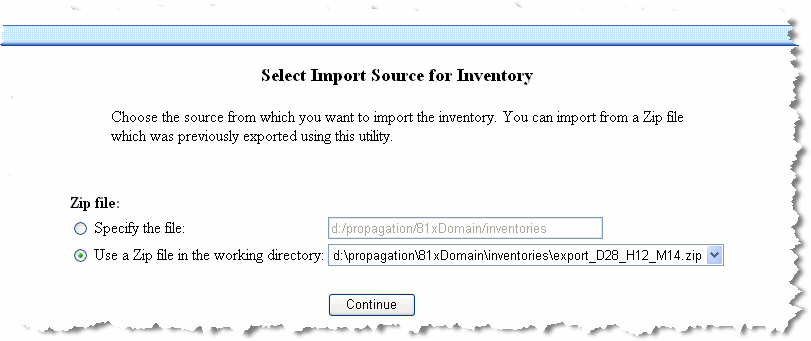
Choose the source inventory (the ZIP file you exported in from the source system) from which you want to import changes, as shown in Figure 8-9:
Figure 8-9 Propagation Utility Select Import Source Page
Select a radio button to provide the source file using one of these methods:
- Select to specify a path and filename. The field automatically displays the working directory path, as it is set up in the
web.xmldeployment descriptor file. - Use the dropdown menu to select a ZIP file in the working directory.
Click Continue to retrieve and validate the inventory.
Loading and Validating the Imported Inventory List
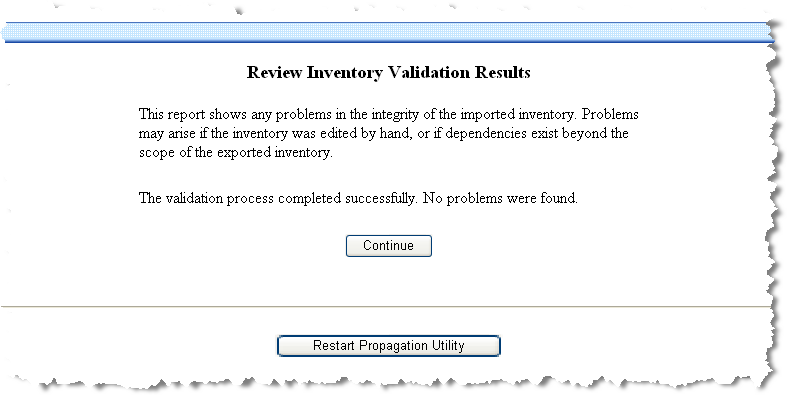
The Propagation Utility validates the imported inventory according to the XML schema. Validation errors that can occur include missing dependencies, for example.
The utility displays the results of the validation. Figure 8-10 shows the results of a successful validation:
Figure 8-10 Propagation Utility Review Inventory Validation Results Page
Click Continue to view the validated inventory listing on which the propagation will be based.
Viewing the Application Inventory
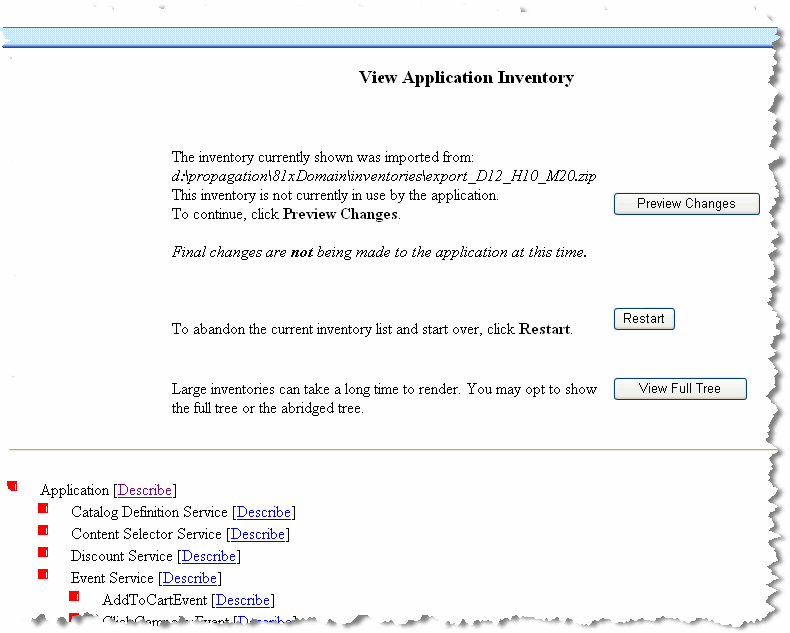
The Propagation Utility displays the validated inventory, as shown in Figure 8-11. Options for accepting this inventory listing or restarting the Propagation Utility are included.
Figure 8-11 Propagation Utility View Application Inventory Page
The Propagation Utility displays a hierarchical description of the content of the imported source environment that you want to propagate. By default, the Propagation Utility displays a summarized, or "abridged" view of the inventory listing. If you want to view a more detailed listing of the inventory, click View Full Tree.
Later, you can refine the set of changes by setting policies for making changes and by setting a level of scope for the propagation.
If you want to accept the inventory listing as shown and continue, click Preview Import. If you determine that you do not want to use this inventory and you want to start the Propagation Utility again from the beginning, scroll to the bottom of the page and click Restart Propagation Utility.
If you click the Describe link, detailed information about the particular asset (node) in the tree is displayed. This information is the same as that displayed as part of the export process, as described in Viewing the Application Inventory.
Figure 8-12 shows a segment of an inventory listing:
Figure 8-12 Propagation Utility Inventory Listing Example
Acknowledging the Quiescence Requirement
The Propagation Utility does not automatically quiesce the system to prevent users from changing portal data using the Administration Portal or Visitor Tools on the production system. If a user makes changes on the production system after the inventory listing has been imported and validated, propagation results might be inaccurate and changes could be unsuccessful.
Warning: It is very important that you make no changes to the production system after you load and validate the inventory during the import process.
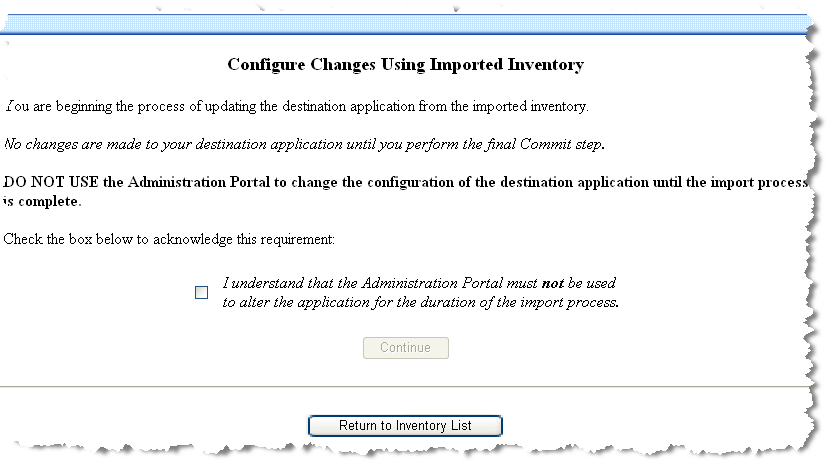
To ensure that you understand and agree to this requirement, a confirmation page appears, as shown in Figure 8-13. Select the checkbox and click Continue to proceed to the next step.
Figure 8-13 Propagation Utility Configure Changes Confirmation Page
Deploying the J2EE Application on the Destination
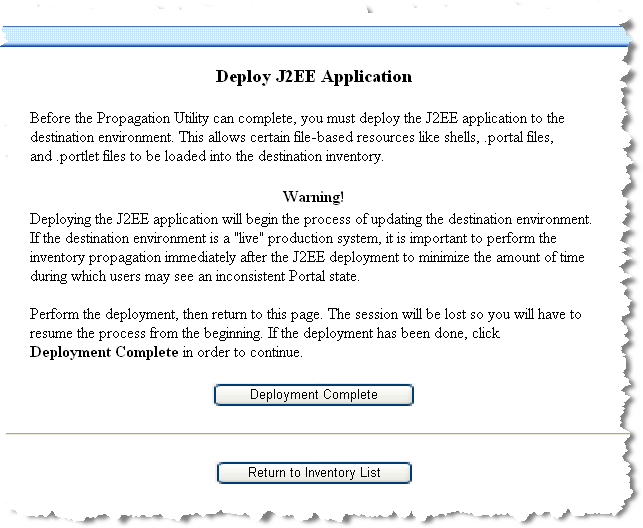
If you have not already done so, you must deploy the J2EE application (EAR file) from the source system to the destination system before committing changes that the Propagation Utility identified. For more information on this requirement, see Deploy the J2EE Application (EAR).
Figure 8-14 shows the Deploy J2EE Application reminder page:
Figure 8-14 Propagation Utility Deploy J2EE Application Page
If you have not yet deployed the application, you can leave this window open while you do so, and then return to this page and click Deployment Complete to continue.
Note: If you leave the Propagation Utility window open while you perform other activities, the Propagation Utility might time out. If this occurs, your previous process and selections are lost. You must restart the Propagation Utility and perform the import again. For instructions on changing the session timeout period, see Customize the Session Timeout and Inventory/Log File Location (Optional).
Setting the Scope
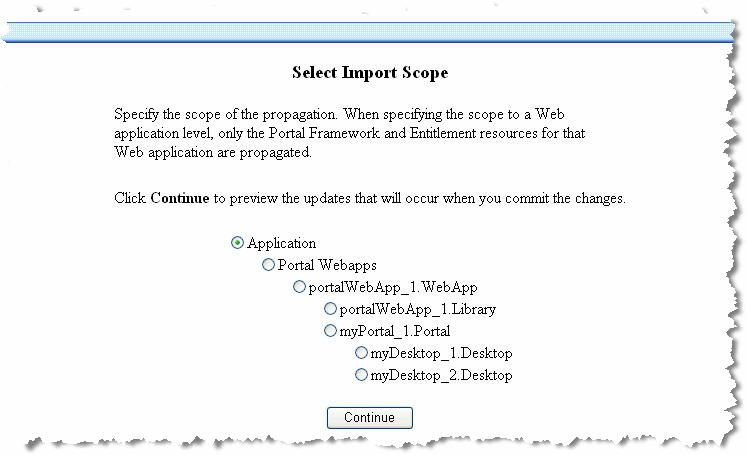
You specify the scope of a propagation during the import process. The Propagation Utility detects differences that exist between the source and destination systems and creates a nested list of possible scopes. A page similar to Figure 8-15 appears:
Figure 8-15 Propagation Utility Select Import Scope Page
You can select to scope the propagation at several levels of granularity, depending on where differences exist between your two systems. For detailed information on scoping, see Propagation Scope.
Tip: When using the Propagation Utility, the best practice is to scope to the highest level— Enterprise application. This ensures the that the destination environment will closely mirror the source environment. If you scope to a lower level, web application or desktop, the source and destination might be in different states. In this case, additional quality assurance testing may be required on the destination. For details, see Set the Scope to the Enterprise Application Level.
Creating Policies for Merging Inventory Information
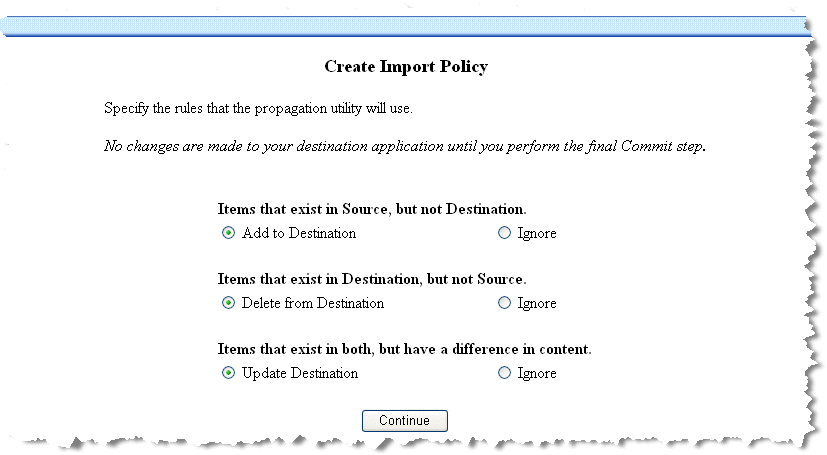
The Propagation Utility merges source and destination data based on policy rules, also called merge rules, that you can configure for your requirements.
Figure 8-16 shows the policy setting page in the Propagation Utility:
Figure 8-16 Propagation Utility Create Import Policy Page
For more details on how the Propagation Utility prioritizes and implements these policies, and some considerations that you must keep in mind, see Conflict Resolution Using Policies.
Previewing Changes
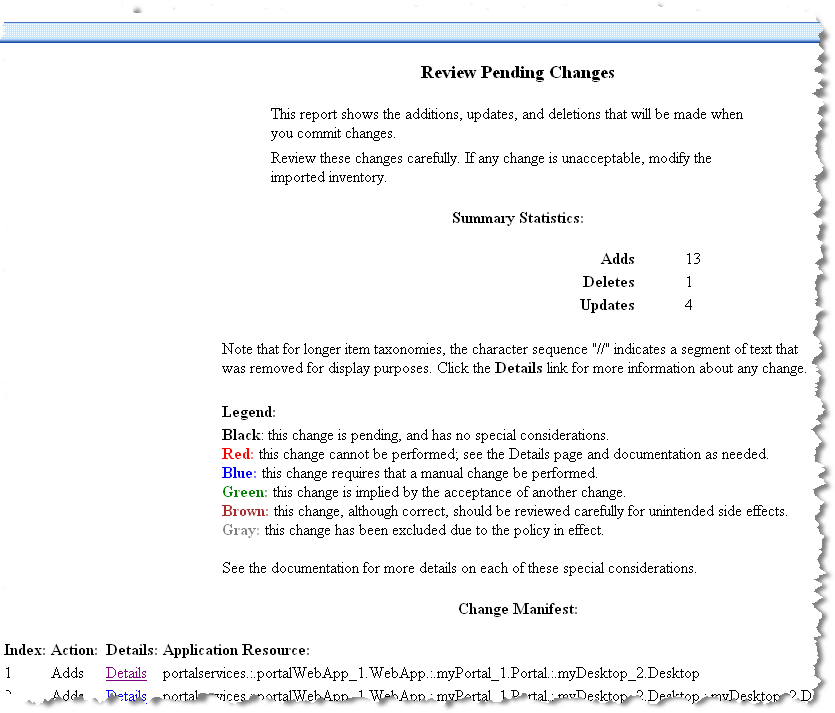
In the final step prior to committing the pending changes to the destination system, the Propagation Utility displays the changes that will be made to the destination if you continue. The Review Pending Changes page is similar to the example shown in Figure 8-17:
Figure 8-17 Propagation Utility Review Pending Changes Page
If you find that the changes displayed do not reflect your desired results, do not continue. Make changes as needed and return to this step later. Depending on the action that you want to change, you might be able to correct the propagation by changing the propagation scope or the propagation policies. If this does not solve the problem, exit from the Propagation Utility. Make changes within your source or destination environment, and run the export or import task again.
The Review Pending Changes page contains summary statistics, a detailed application resource change list, and a filename selection for saving the pending change manifest (pending changes) to a file. The following sections contain more details on each of these part of the page.
Summary Statistics
The totals in this section reflect the number and type of changes included in the Action column of the change list.
The Propagation Utility counts the total number of potential changes whether or not they will actually be carried out. For example, if 15 potential deletes were found, but 12 of them will be excluded because of policies that you specified earlier, the count will still include them.
Change Manifest Legend
The color-coding of the inventory list identifies the status of a pending change, indicating any items that might require special attention from you.
The following list describes each color and its meaning:
- Black - This change is pending, and has no special considerations.
- Red - This change cannot be performed; this status occurs very rarely, in a situation when a potential change violates a data integrity rule.
- Blue - This change requires that an associated manual change be performed; for example, entitlement changes are blue to indicate that any associated users or groups must be added manually on the destination system. Manual changes are also identified separately later; for details, see Making Manual Changes Prior to Propagation.
- Green - This change is implied by another change that the Propagation Utility will be making; for example, when you propagate using either portal or desktop scope, new pages and books are added to the Portal Library if they do not already exist there.
Assets can have multiple dependencies, but depending on the type of dependency they might appear in the change manifest only once. Carefully review the listing for dependencies that result in multiple changes.
- Brown - This change, although correct, should be reviewed carefully for unintended side effects; for example, an item has this status if a change is required to the item based on the policy, but the item is not within the scope of the propagation.
- Gray - This change has been excluded due to the policy in effect; for example, if you chose to ignore (not delete) assets that exist on the destination but not on the source, all assets that meet this criteria (they exist on the destination but not on the source) are shown in gray and will not be deleted.
For detailed information on any asset in the change manifest, click the Details link for that asset.
Pending Change List (Change Manifest)
The Pending Change List shows each change that will be made to the destination system by the Propagation Utility when you commit changes. To keep the display to a manageable size, long asset identifiers are shortened, with the notation "//" used to indicate a portion of the identifier that was removed.
Note: The Change Manifest includes only the updates that will be made explicitly by the Propagation Utility on the destination system, once you commit the changes. For example, changes that occur on the destination based on the EAR deployment that you perform prior to previewing changes are not included in the Change Manifest.
Figure 8-18 show an example portion of a Change Manifest:
Figure 8-18 Propagation Utility Change Manifest Listing Example
You can click the Details link to see the details for a particular change; these details include the following information:
- Identifier - The internal identifier for the particular asset.
- Taxonomy - The complete taxonomy used internally by the Propagation Utility to track assets. For items displayed in the change manifest with shortened entries, you can view complete taxonomies here.
- Item Description - The description of the individual asset.
- Explanation - The reason for including this asset in the change manifest.
- Has this change been implied by another change? - Indicates whether or not the asset is an implied change based on another pending change.
- Is this change impossible? - Indicates whether this change can be performed by the Propagation Utility.
- Does this change require manual work by the operator? - Indicates whether or not the item requires that you perform an associated manual change.
- Source XML - The XML listing of the item from the source system, if it exists there.
- Destination XML - The XML listing of the item from the destination system, if it exists there.
Exporting the Change Manifest for the Inventory
If the pending change list correctly describes the propagation that you want to perform, save the change manifest. The Propagation Utility automatically displays a path and filename; you can accept this as shown or enter a different path and filename. Click Continue to save the file and continue to the next step.
Making Manual Changes Prior to Propagation
Because the Propagation Utility does not propagate the complete set of portal resources from the source to the destination system, there might be cases where propagated data depends on other data that is not propagated. For example, delegated administration roles are propagated to the destination but the related users and groups are not, so you must manually add those related users and groups on the destination system.
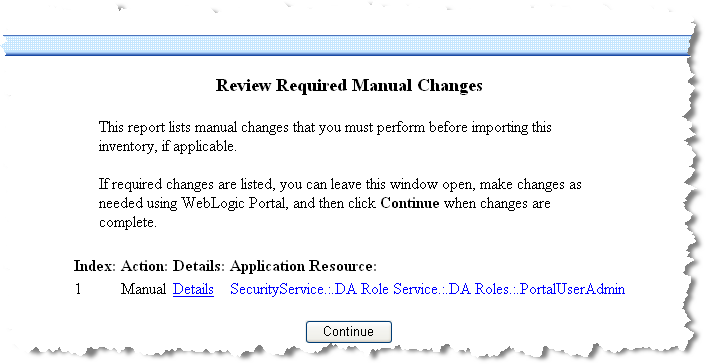
If manual changes are needed to coordinate your two environments, the Propagation Utility displays these necessary changes on the Review Required Manual Changes page. The Review Required Manual Changes page is similar to the following example, as shown in Figure 8-19:
Figure 8-19 Propagation Utility Review Required Manual Changes Page
This page lists manual changes that you must perform before importing this inventory, if applicable. For more information, see Make Required Manual Changes.
If required changes are listed, you can leave the Propagation Utility window open, make changes as needed using WebLogic Portal, and then come back to this page and click Continue when changes are complete.
Note: If you leave the Propagation Utility window open while you perform other activities, the Propagation Utility might time out. If this occurs, your previous process and selections are lost. You must restart the Propagation Utility and perform the import again. For instructions on changing the session timeout period, see Customize the Session Timeout and Inventory/Log File Location (Optional).
Committing the Inventory Import
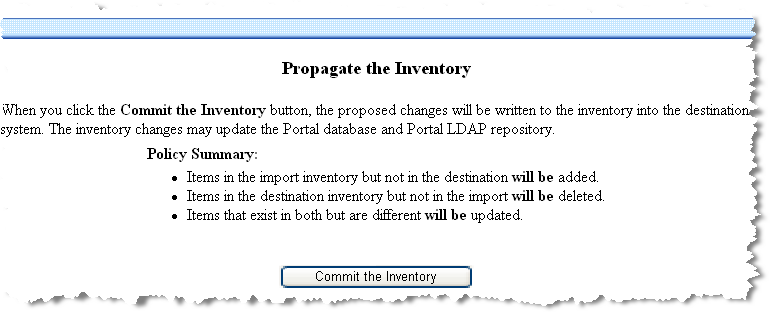
The Propagate the Inventory page summarizes the policy selections you made previously, and provides an opportunity to return to the inventory listing if you decide you do not want to propagate this change. Figure 8-20 provides an example of the page:
Figure 8-20 Propagation Utility Propagate the Inventory Page
When you click Commit Inventory, the Propagation Utility propagates the database assets from the staging server to the production server, according to the scope you assigned and the policies you selected previously.
When complete, a results page displays the status of the completed propagation and the time required to complete it. To save an inventory listing of the destination system after the propagation, click Begin Export to start an export process for the new destination inventory.
Reviewing the Import Log Files
The following sections describe log files that the Propagation Utility creates during an import process:
You should review the overview log file to ensure that the import process completed as expected. The verbose log files are primarily for diagnostic purposes.
Import Overview Log File
This log file contains errors and warnings, including:
- Warnings for propagated assets that depend on other non-propagated assets; for example, propagated roles dependent on non-propagated groups that do not exist on the destination.
- Warnings for "implied" changes
This information is placed in the default server log file. You control the detail level of this log using the WebLogic Server console. For details about server log files, see the topic Server Log in the WebLogic Server Administration Console Online Help.
Import Processing Verbose Log Files
The Propagation Utility creates two verbose log files for each import:
- Verbose output from the processes of reading in and validating the inventory on the filesystem
- Verbose output from the differencing and commiting process
Verbose logs are placed in the working directory—the same location where inventory files are stored. For details on the working directory and how to change its location, see Customize the Session Timeout and Inventory/Log File Location (Optional).
