Your Workshop for WebLogic projects can be exported into archive files:
|
||||||||||||
You can:
Note that options on the Export dialog that are not described in this documentation do not apply to Workshop for WebLogic projects. For example, you can use the Archive and JAR file options of the Export dialog to create JAR files for EJB and web projects. However this is only a useful feature for creating utility JAR files for sharing code.
To export an EAR project to an EAR file:


If the file already exists, you must check the Overwrite existing file selection to replace the existing file.
Normally the Export source files option is unchecked. If you wish to include the Java source files in your archive, you must check this option. The most common reason to export an EAR file is to deploy for production, and in that case, the source files should not be included. Include the source files only if you wish to view/edit source at the destination.
To export a web project to a WAR file:


If the file already exists, you must check the Overwrite existing file selection to replace the existing file.
Normally the Export source files option is unchecked. If you wish to include the Java source files in your archive, you must check this option. The most common reason to export a WAR file is to deploy for production, and in that case, the source files should not be included. Include the source files only if you wish to view/edit source at the destination.
Note that if you use this process to create a JAR file from a utility project, then the controls within the JAR will not appear in the IDE correctly (although they will work correctly). You can also export the controls in a utility project to a control JAR.
To export a utility project to a JAR file:


If the file already exists, you may check the Overwrite existing files without warning selection to replace the existing file.
Normally the Export source files option is unchecked. If you wish to include the Java source files in your archive, you must check this option. The most common reason to export an EAR file is to deploy for production, and in that case, the source files should not be included. Include the source files only if you wish to view/edit source at the destination.
The screens that manage the JAR format are standard Eclipse screens documented in the Workbench User Guide.
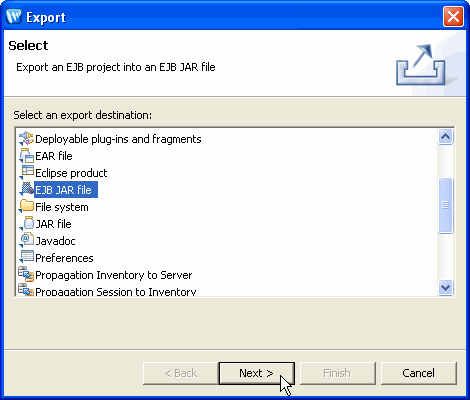
To export an EJB project to an EJB JAR file:


If the file already exists, you must check the Overwrite existing file selection to replace the existing file.
Normally the Export source files option is unchecked. If you wish to include the Java source files in your archive, you must check this option. The most common reason to export an EJB JAR file is to deploy for production, and in that case, the source files should not be included. Include the source files only if you wish to view/edit source at the destination.
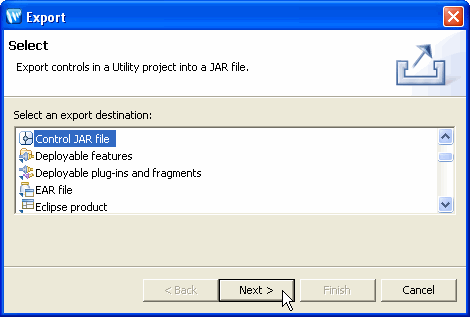
To export the controls in a utility project to a JAR file, follow the steps below. The resulting control JAR contains all of the contents of the utility project, but also stores the Beehive control manifest entries so that controls are displayed correctly in the IDE.


Normally the Include Java source files option is unchecked. If you wish to include the Java source files in your archive, you must check this option. The most common reason to export a JAR file is to deploy for production, and in that case, the source files should not be included. Include the source files only if you wish to view/edit source at the destination.
none.