Step 4. Examine the Database Components Using DbXaminer
Workshop's DbXaminer renders database diagrams for a specific schema, table, or column and maps out the relationships between the tables, the primary keys, and foreign keys. The DBXaminer also provides an SQL editor that allows you to author queries and update data.
The tasks in this step are:
To Examine the Relationships Between Database Tables
To View Data for a Table or a Column
To Use the SQL Editor to Author an SQL query and Add / Edit / Delete Data
To Examine the Relationships Between
Database Tables
- In DbXplorer, right-click the schema SalesDBConnection and select Show in DbXaminer
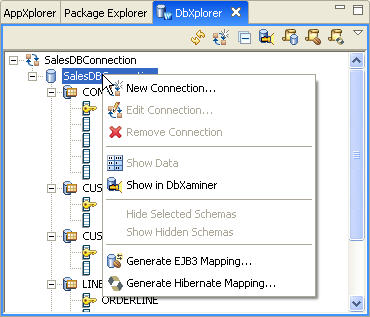
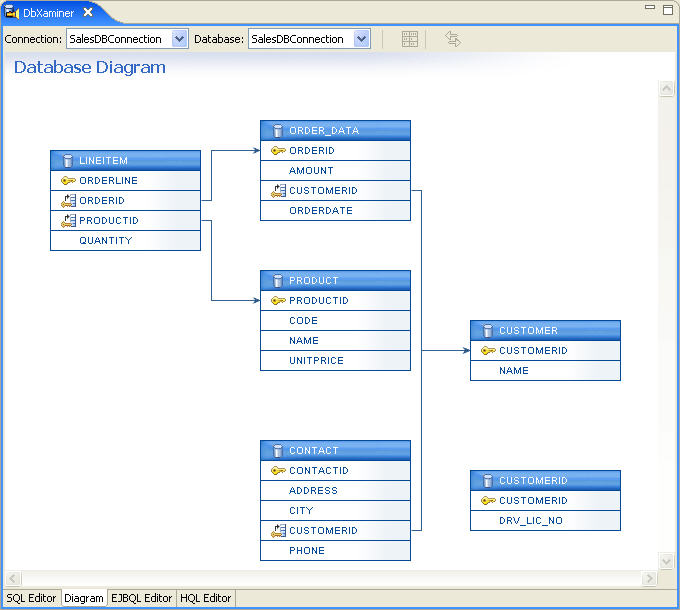
- The DbXaminer view renders the database diagram for the
selected schema. It displays a list of tables along with columns of the table.
DbXaminer also renders the relationship between database tables. The relevant
properties of each selected artifact are displayed in the Properties view.
- To move the focus of the database diagram to a different table or column
simply click on it. You can also click on a schema, table or column in the DbXplorer view
to change the diagram focus. If you right-click on a schema, table or column
in the DbXplorer view and
choose Show in DbXaminer, then the diagram is redrawn to
center on the selected element.
- When you run the mouse over database components, the DbXaminer view
displays the properties of that database component as a tooltip.
- On the Diagram tab (indicated by the tab at the bottom
of the DbXaminer view),
you can perform various operations like Zoom In, Zoom Out, and Auto Arrange
by right-clicking and selecting an option.
To View Data for a Table or Column
- To view the data for a table or column, select the Product table on
the Diagram tab
and click the Show Data button in the toolbar of the DbXaminer view.

- Workshop generates the appropriate SQL query and displays the results in
the SQL Editor tab of the DbXaminer
view.
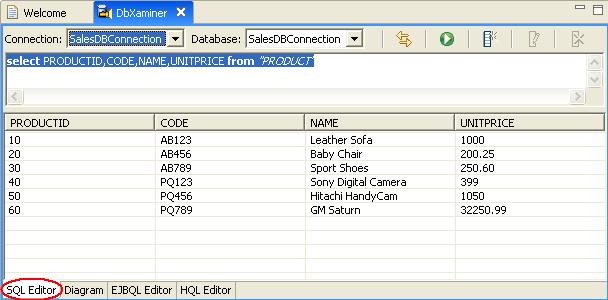
- You can sort the data by clicking the column headers.
- Similarly, to view the data of a specific column, click the Diagram tab,
select a column and click the Show Data button.
To Use the SQL Editor to Author an SQL query and Add/Edit/Delete Data
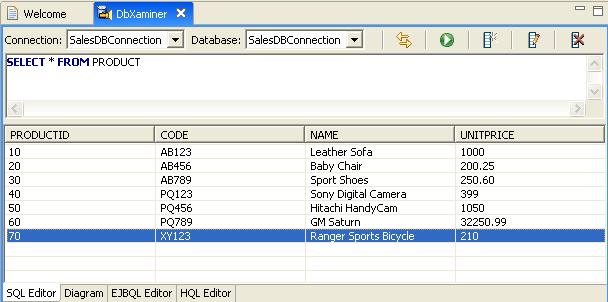
In these tasks, you will use the SQL Editor to define and run SQL statements,
display and sort query results, and add new data.
Define and run SQL statements
When defining an SQL statement in SQL Editor, Workshop provides code completion for SQL keywords and the database artifacts
when you press CTRL+SPACE.
In this step, we will define an SQL SELECT query using the code completion facility.
- Click the SQL Editor tab, type S and press CTRL+SPACE.
Workshop displays a list of SQL keywords starting with letter S.
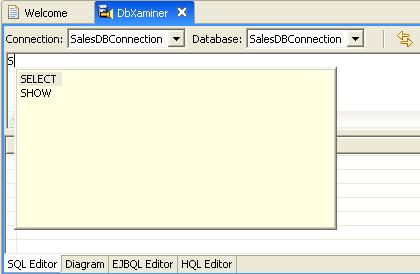
- Select the SELECT keyword.
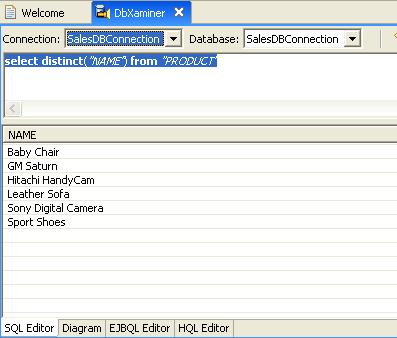
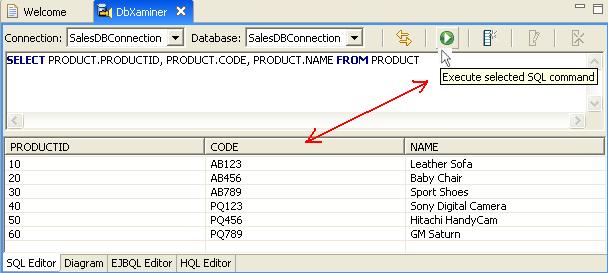
- Using the code completion technique, enter the following querie:
SELECT PRODUCT.PRODUCTID, PRODUCT.CODE, PRODUCT.NAME FROM PRODUCT
- Click the Execute selected SQL command button or press
CTRL+ENTER.
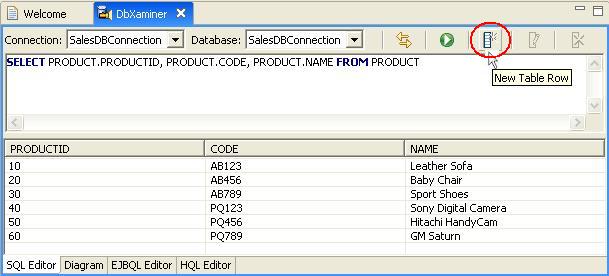
To Add New Data to a Database Table
- To add a new row to an existing table, click the New Table Row button in SQL Editor.
- From within the Insert Row dialog, select the PRODUCT table from the drop down menu and fill in the appropriate column information as shown below.
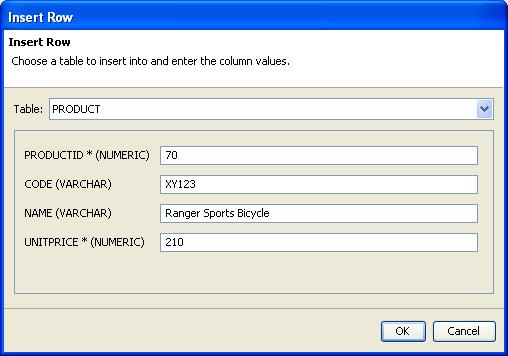
- Click OK to insert the row into the PRODUCT table.
Workshop validates the data prior to submission to ensure that it conforms
to the column definitions (type, size, etc.).
- Run the SQL SELECT
query to retrieve all data from the PRODUCT table and verify the new record has been added.
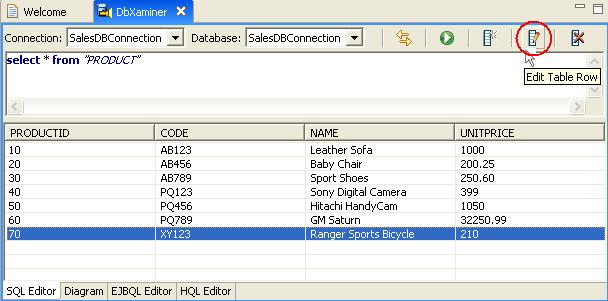
To Edit the Data in a Table Column
- In the SQL Editor, select the record in the PRODUCT table that has the PRODUCTID value set to 70 and click the Edit Table Row button.
- In the Edit Row dialog, change the value of the UNITPRICE column
to 150.
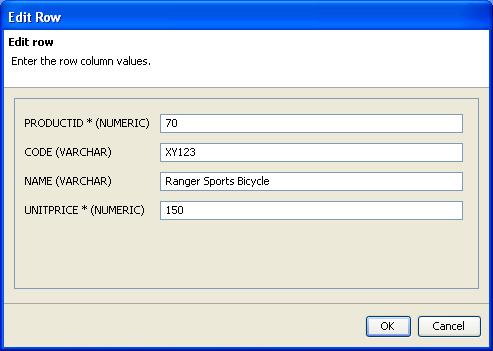
- Click OK.
Workshop updates the UNITPRICE column value from 210 to 150 for that record.

To Delete a Record
- In the SQL Editor, select the record from the PRODUCT table that has a PRODUCTID value set to 70 and click the Delete Table Row button.

- Click Yes in Delete Table Row dialog.
- Workshop deletes the record.

Click one of the following arrows to navigate through the tutorial:
Still need help? Post a question on the Workshop
newsgroup.