Step 4: Create SQL Statements and Submit them to the Database
From the DbXaminer view, you can create SQL queries and submit them to the database.
Define SQL query and Add / Edit / Delete data using SQL Editor
In this step, you will use the SQL Editor to define and run SQL statements, display and sort query results, and add new data.
Define and run SQL statements
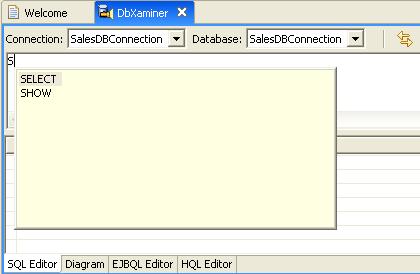
When defining an SQL statement in SQL Editor, Workshop Studio provides code completion for SQL keywords and the database artifacts by pressing CTRL+SPACE. First, we will define an SQL SELECT query using the code completion facility. Click the SQL Editor tab, type S and press CTRL+SPACE. Workshop Studio displays a list of SQL keywords starting with letter S.
Select the SELECT keyword.
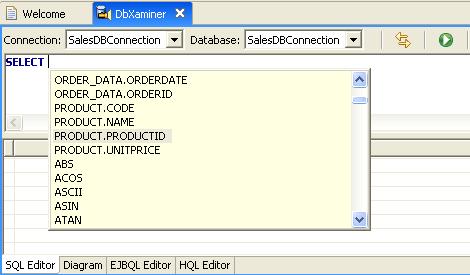
Press the space bar and press CTRL+SPACE. Workshop Studio displays a list of table columns from the database as well as the SQL keywords that would be appropriate. Select the column PRODUCT.PRODUCTID from the list.
Type a comma, then select the column PRODUCT.CODE. Type a comma, then select the column PRODUCT.NAME. Type a space.
Enter FROM (You can use code completion for the FROM keyword) and press the space bar.
Press CTRL+SPACE to get a list of tables and select the PRODUCT table.
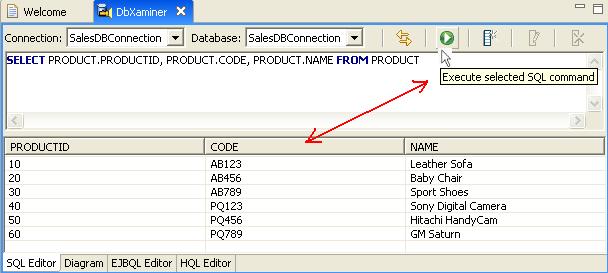
Now, we have defined the SQL SELECT query. You can execute the query by either clicking the Execute selected SQL command button or by using the hotkey, CTRL+ENTER.
Add new data to a database table
To add a new row to an existing table, click the New Table Row button in SQL Editor.
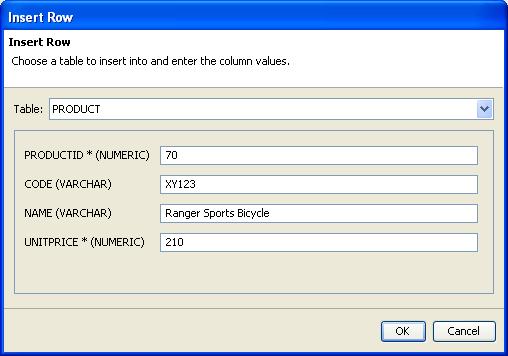
From within the Insert Row dialog, select the PRODUCT table from the drop down menu and fill in the appropriate column information as shown below.
Click OK to insert the row into the PRODUCT table. Workshop validates the data prior submission to ensure that it conforms to the column definitions (type, size, etc.).
Run the SQL SELECT query to retrieve all data from the PRODUCT table and verify the new record has been added.
Edit the data in a table column
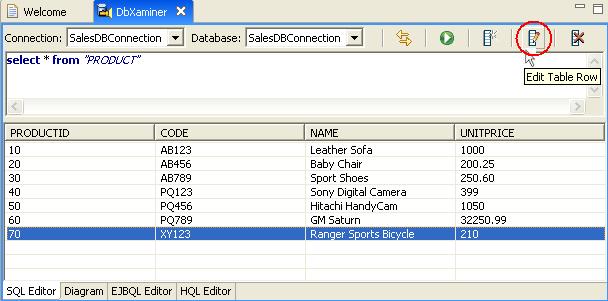
In the SQL Editor, select the record in the PRODUCT table that has the PRODUCTID value set to 70 and click the Edit Table Row button.
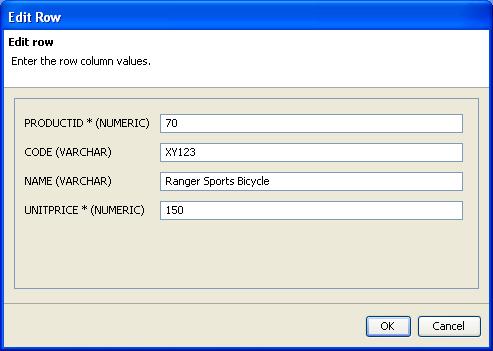
In the Edit Row dialog, change the value of the UNITPRICE column to 150.
Click OK. Studio updates the UNITPRICE column value from 210 to 150 for that record.
Delete a record
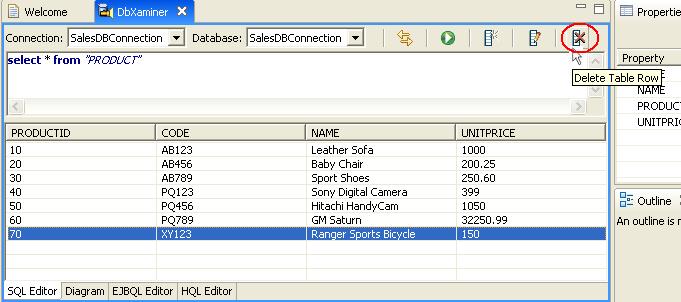
In the SQL Editor, select a record of PRODUCT table having PRODUCTID 70 and click the Delete Table Row button.
Click Yes in Delete Table Row dialog.
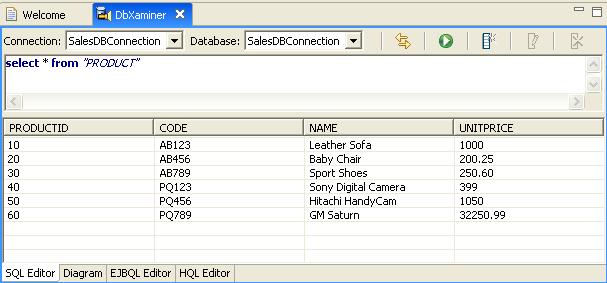
Workshop Studio deletes the record.
Click the arrow to return to the previous step of the tutorial: