13.4 Use the Paper Layout View to Create Two Layouts
Once your data model is complete, you need to create a layout for the data objects to display in the report output. This particular report consists of two separate layouts:
-
a group left layout for listing customer purchases individually
-
a tabular layout that shows a summary of the customer's purchases by product
Given that two layouts are required, you need to create the first layout through the Report Wizard and the second by inserting a report block. The reason for taking this approach is that the Report Wizard overwrites everything in the layout. Hence, you can only create the first layout through the Report Wizard. Additional layouts must be created by inserting a report block.
-
Choose Tools > Report Wizard.
-
On the Report Type page, select Create Paper Layout only.
-
On the Style page, select Group Left.
-
On the Groups page, ensure that all of the groups from your data model appear in the Displayed Groups list.
-
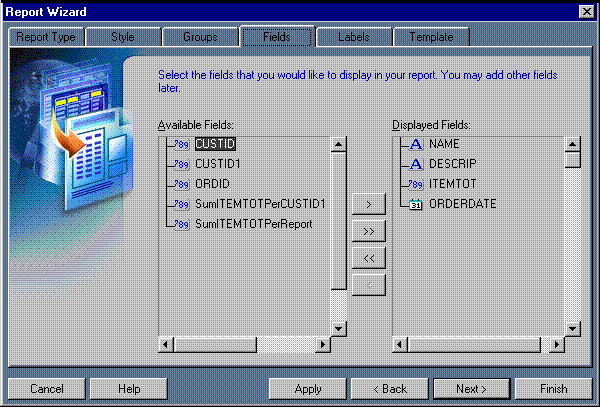
On the Fields page, click column names and the right arrow (>) or left arrow (<) to move columns so that the following columns appear in the Displayed Fields list:
-
NAME
-
DESCRIP
-
ITEMTOT
-
ORDERDATE
-
-
On the Labels page, change the labels and field widths as follows:
-
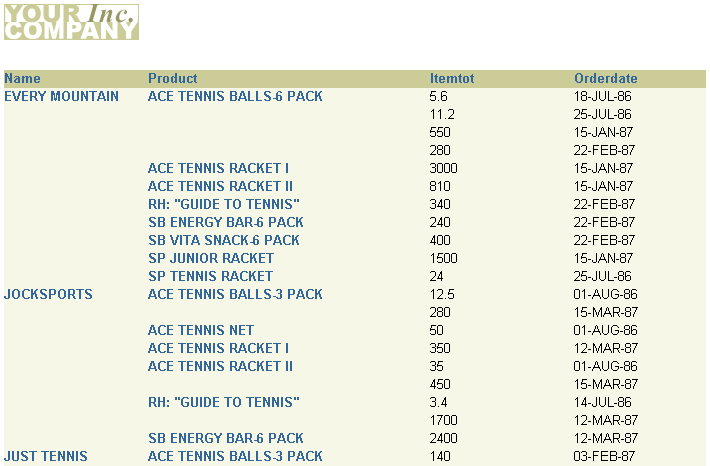
On the Template page, make sure Beige is selected under Predefined Template, then click Finish to display your report output in the Paper Design view. It should look like this:
Figure 13-6 Paper Design view for the group left layout with two group columns

Description of "Figure 13-6 Paper Design view for the group left layout with two group columns"
-
Click the Paper Layout button in the toolbar to display the Paper Layout view.
-
In the Paper Layout view, click the Report Block tool in the tool palette.
-
Starting about 0.5 inches (1.5 centimeters) below the existing layout, click and drag a box about 2 inches (5 centimeters) high and 4 inches (19 centimeters) wide. Release your mouse button to display the Report Block Wizard.
-
In the Report Block Wizard, on the Style page, select Tabular, then click Next.
-
On the Groups page, click G_CUSTID1 and click Down to specify the Print Direction and move this group to the Displayed Groups list, then click Next. (G_CUSTID1 should be the only group in the Displayed Groups list when you are done.)
-
On the Fields page, click the following fields and click the right arrow (>) to move them to the Displayed Fields list, then click Next:
-
DESCRIP
-
SumITEMTOTPerCUSTID1.
DESCRIP and SumITEMTOTPerCUSTID1 should be the only fields in the Displayed Fields list when you are done.
-
-
On the Labels page, change the labels as follows, then click Next:
-
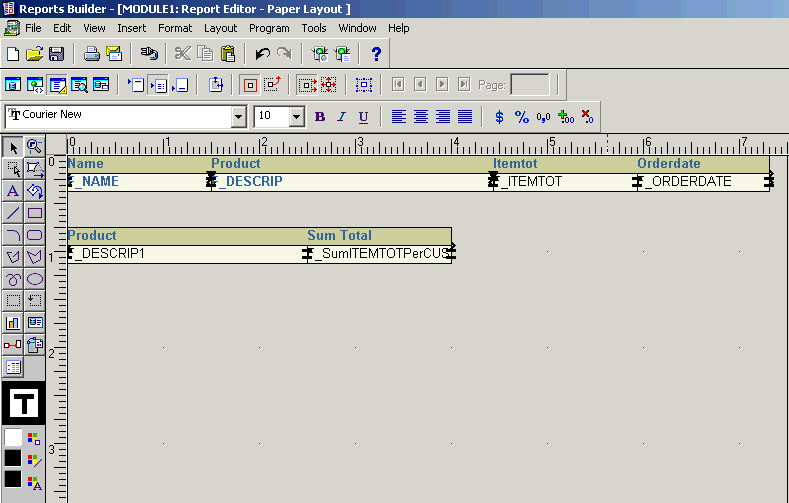
On the Template page, make sure Beige is selected under Predefined Template, then click Finish to display your report output in the Paper Design view. It should look like this:
Figure 13-7 Paper Layout view with two layouts

Description of "Figure 13-7 Paper Layout view with two layouts"
