22 Working with the People Connections Service
The People Connections service provides a rich set of social networking tools for creating a personal profile and connecting with other users. People Connections exposes these features through task flows that assist you in viewing user profiles, adding and maintaining personal connections, viewing application activities, viewing and posting messages, and providing feedback to your connections.
This chapter discusses the People Connections service and provides information about its task flows. It contains the following sections:
-
Section 22.1, "What You Should Know About the People Connections Service"
-
Section 22.2, "Working with People Connections Service Task Flows"
-
Section 22.3, "Setting People Connections Service Task Flow Properties"
This chapter is for users who want to leverage social networking services, such as connections and profiles, to work collaboratively within the WebCenter Spaces environment.
Much of this information also applies to custom WebCenter applications, though it is written with WebCenter Spaces users in mind. (For information about the People Connections service in custom WebCenter applications, see the chapter "Integrating the People Connections Service" in Oracle Fusion Middleware Developer's Guide for Oracle WebCenter.)
Your application administrator has the authority to expose or hide a particular service's task flows. Tasks discussed in this chapter are not available to you if the relevant service is hidden.
22.1 What You Should Know About the People Connections Service
The People Connections service exposes its features in different views that may include all or a summary of available information for a given feature. You can use Preference settings to determine the type of information that is shown and control other users' access to your views. For more information about People Connections preferences, see Section 3.2.8, "Setting People Connections Preferences."
People Connections configuration settings are exposed from the Administration level—which affect People Connections application-wide—all the way down to individual task flow instances. All of these levels of People Connections configuration settings are subject to an order of precedence:
-
Administrative settings affect all users' views of People Connections features.
-
Preferences settings affect the view of the user who set them, and they override administrative settings.
-
Settings on a particular task flow affect just that task flow instance, and they override Preference settings:
-
Values set in page edit mode (customization) affect all users' views of that task flow instance.
-
Values set in page view mode (personalization) affect only that user's view of that task flow instance, and they override task flow customizations.
-
See Also:
For information about setting application-wide preferences for the People Connections service, see "Managing the People Connections Service," in Oracle Fusion Middleware Administrator's Guide for Oracle WebCenter.Once you place a People Connections task flow onto a page, you can use its properties to control the appearance and behavior of that particular task flow instance. For example, use task flow properties to specify how much information to show, whether the instance has a header or a footer, your preferred layout style, and the like. For more information, see Section 22.3, "Setting People Connections Service Task Flow Properties."
People Connections features fall into five groups. These are discussed in the following subsections:
22.1.1 What You Should Know About Profile
The Profile feature provides a variety of views into your own and other users' personal profile information. Such information can include your mail address, phone number, office location, department, manager, direct reports, and so on. Profile takes the bulk of its information from the back-end identity store that provides your WebCenter application with its users. Additionally, Profile may offer opportunities for altering some of this information and for providing additional data not included in the identity store.
When you connect with other users, you give them access to your Profile, and gain access to theirs. You can control how much of your Profile information a connection can view through People Connections Preferences.
See Also:
For information about setting your Profile Preferences, see Section 3.2.8.3, "Setting Profile Preferences."WebCenter Spaces provides five Profile task flows:
-
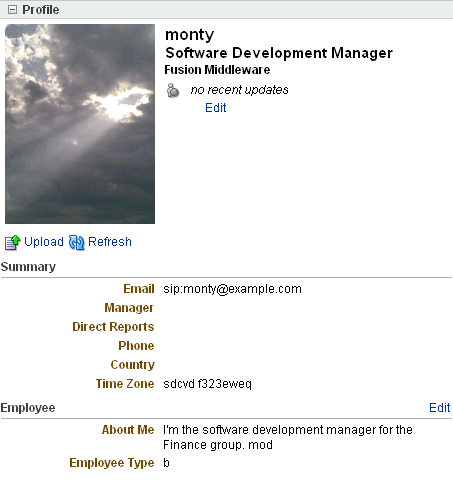
Profile for displaying a user's profile details and uploading a photo (Figure 22-1)
-
Profile - Actions for accessing quick links to actions associated with contacting another user (Figure 22-2).
-
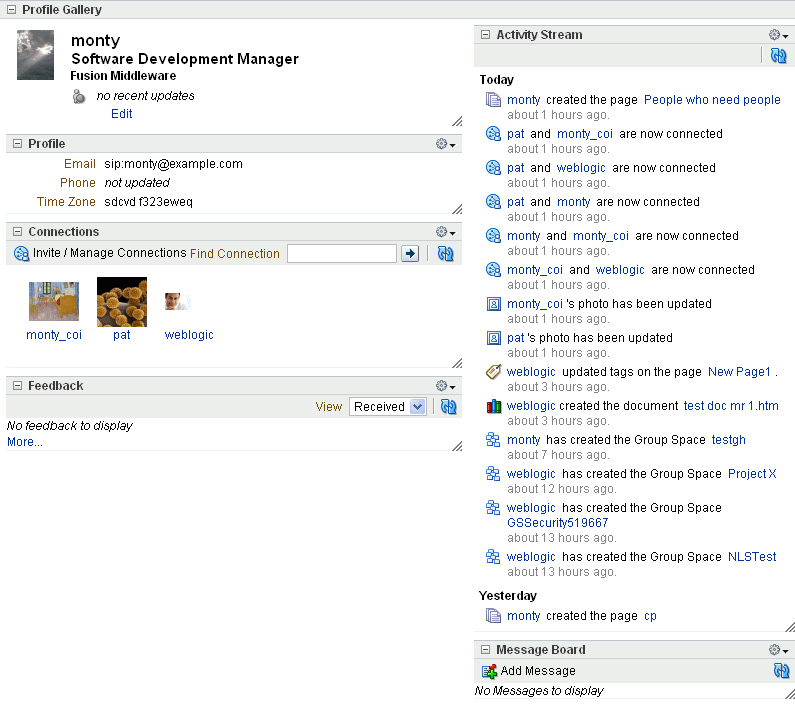
Profile Gallery for accessing all of your social networking information from one view (Figure 22-3)
-
Profile - Snapshot for viewing a user photo and status message (Figure 22-4)
-
Profile - Summary View for a summary of user contact information (Figure 22-5).
For information about using Profile features, see Section 22.2.1, "Working with Profile Task Flows."
22.1.2 What You Should Know About Connections
The Connections feature provides tools for managing your own connections and viewing the connections of others. Connections provide a means of collecting your business friends and contacts into a social network. Using People Connections Preferences, you can grant differing levels of access to those who are and are not your connections. For example, you can enable your connections to offer Feedback and those who are not your connections only to view it.
Note:
For information about setting your People Connections Preferences, see Section 3.2.8, "Setting People Connections Preferences."WebCenter Spaces provides three Connections task flows:
-
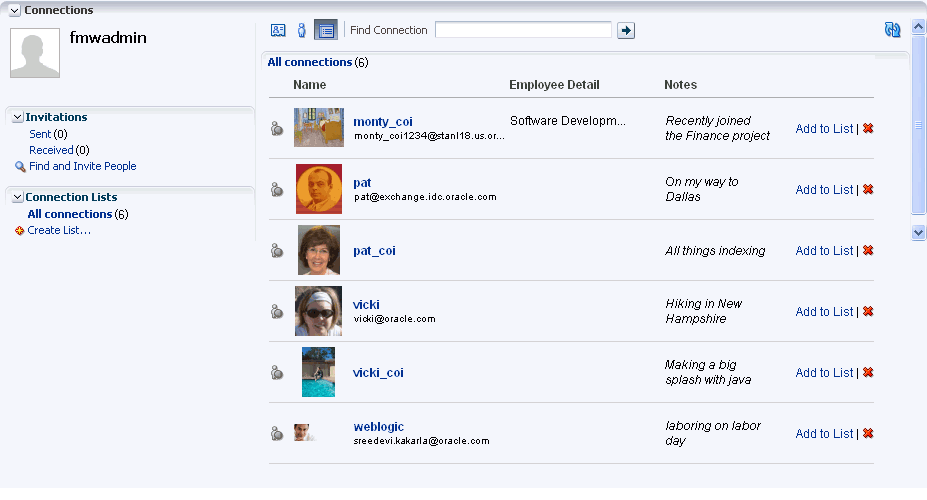
Connections for viewing and managing your connections, creating connections lists, and sending and responding to invitations to connect (Figure 22-6)
-
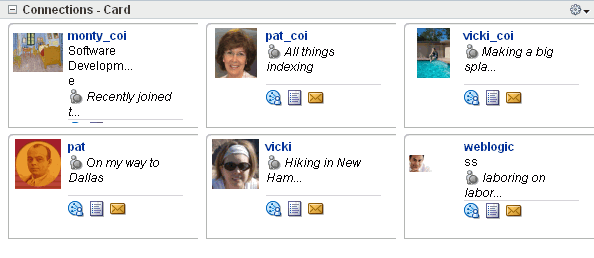
Connections - Card for photos, status messages, and instant contact options to your connections (Figure 22-7)
-
Connections - Quick View for photos and quick access to your connections (Figure 22-8)
The Connections - Quick View task flow includes an Invite/Manage Connections button for navigating to the main Connections page where you can invite and manage your connections.
For information about using Connections features, see Section 22.2.2, "Working with Connections Task Flows."
22.1.3 What You Should Know About Feedback
The Feedback feature provides a means of viewing, posting, and managing feedback. By default, you can view feedback in your own Feedback view. You can view and post feedback in other users' Feedback views—provided they have granted you access.
Note:
You can grant access to your Feedback through Preferences. For more information, see Section 3.2.8.5, "Setting Feedback Preferences."WebCenter Spaces provides two Feedback task flows:
-
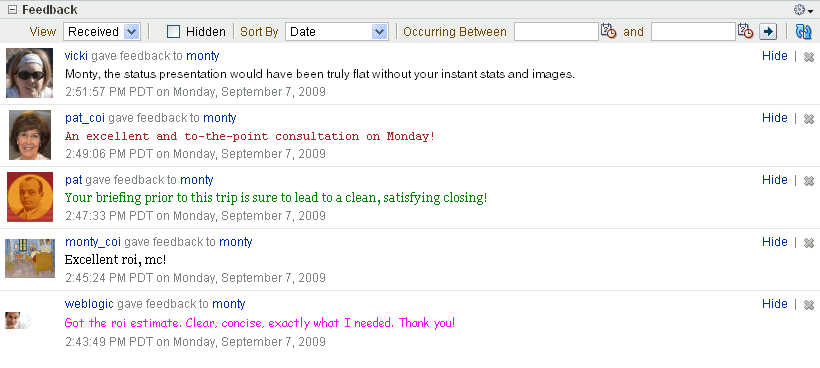
Feedback for viewing, posting, and managing feedback (Figure 22-9)
-
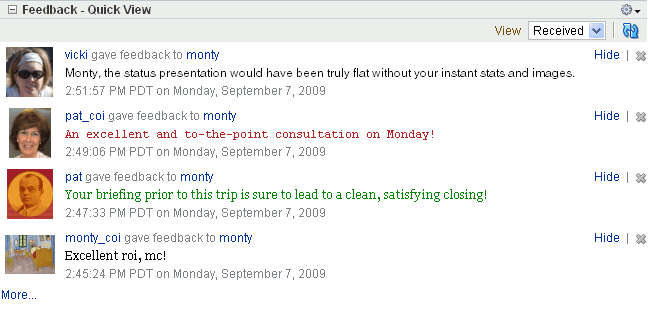
Feedback - Quick View for viewing and posting feedback (Figure 22-10)
For information about using Feedback features, see Section 22.2.3, "Working with Feedback Task Flows."
22.1.4 What You Should Know About Message Board
The Message Board feature provides a means of viewing and posting messages. By default, you can view and post messages in your own Message Board. You can view and post messages on other users' Message Boards, provided they have granted you access.
Note:
You can grant access to your Message Board through People Connections Preferences. For more information, see Section 3.2.8.4, "Setting Message Board Preferences."WebCenter Spaces provides two Message Board task flows:
-
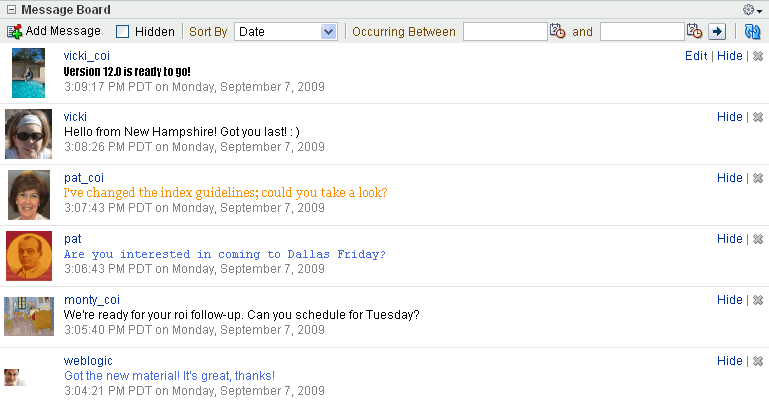
Message Board for adding, updating, hiding, deleting, and managing your view of messages (Figure 22-11)
-
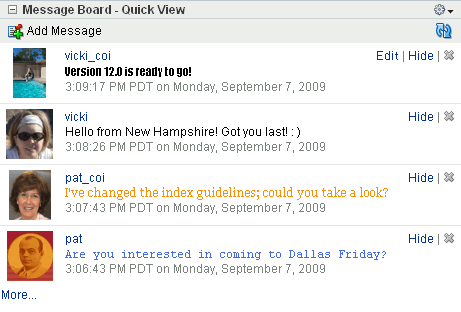
Message Board - Quick View for adding, viewing, hiding, and deleting messages (Figure 22-12)
For information about Message Board features, see Section 22.2.4, "Working with Message Board Task Flows."
22.1.5 What You Should Know About Activity Stream
The Activity Stream feature can track and report on all the application activity of you and your connections in the services you specify, your personal space, and the group spaces to which you belong. For example, Activity Stream can note when you or a connection post feedback, upload a document, and create a discussion forum.
Table 22-1 lists and describes the types of activities that can be reported through Activity Stream.
Table 22-1 Activities Tracked by Activity Stream
| Service | Tracked Activities | Scope | Activities Shared or Private |
|---|---|---|---|
|
Announcements |
|
Group space |
Shared with other group space members |
|
Discussions |
|
Group space |
Shared with other group space members |
|
Documents |
|
|
|
|
Events |
|
Group space |
Shared with other group space members |
|
Group Space |
|
Group space |
Shared with other group space members |
|
Lists |
|
Group space |
Shared with other group space members |
|
Page |
|
|
|
|
People Connections |
|
Personal space |
Shared with whomever is permitted to view such activities (for more information, see Section 3.2.8, "Setting People Connections Preferences," and the section, "Configuring the People Connections Service in WebCenter Spaces" in the Oracle Fusion Middleware Administrator's Guide for Oracle WebCenter) |
|
Wiki and Blog |
|
|
|
Use Activity Stream Preferences to specify who can view your Activity Stream details and which activities to show.
See Also:
For more information about Preferences relating to Activity Stream task flows, see Section 3.2.8.1, "Setting Activity Stream Preferences."WebCenter Spaces provides one Activity Stream task flow:
-
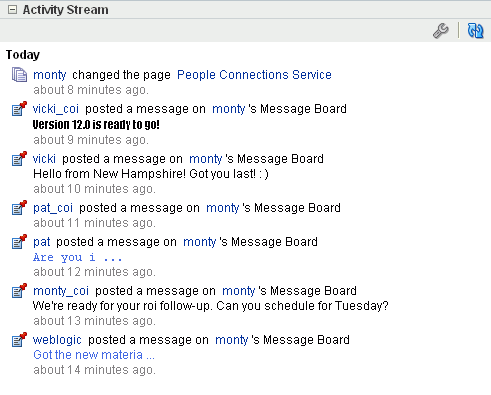
Activity Stream for viewing application activities and the activities of your connections (Figure 22-13)
Clicking an object in an Activity Stream opens the object. For example, clicking the name of a newly created document in an Activity Stream opens the document. Additionally, clicking on a user name in an Activity Stream, opens a user profile pop-up.
For more information, see Section 22.2.5, "Working with the Activity Stream Task Flow."
22.2 Working with People Connections Service Task Flows
This section provides details about using the features offered through the People Connections task flows. It contains the following subsections:
22.2.1 Working with Profile Task Flows
Profile task flows provide quick access to contact and status information about you and your connections. Additionally, they offer a means of making instant contact with your connections and uploading a picture to include with your personal profile.
Note:
The level of access you have to a profile is determined by the People Connections defaults set by the application administrator and a given connection's People Connections Preference settings.For information about People Connections Preferences, see Section 3.2.8, "Setting People Connections Preferences." For information about People Connections defaults set by the application administrator, see the chapter, "Managing the People Connections Service," in the Oracle Fusion Middleware Administrator's Guide for Oracle WebCenter.
This section describes how to use the features offered through Profile task flows. It contains the following subsections:
22.2.1.1 Viewing Profile Details
You can view your full profile details by clicking your user name at the top of the application (Figure 22-14) and then, on the resulting page, clicking the Profile tab to bring it forward.
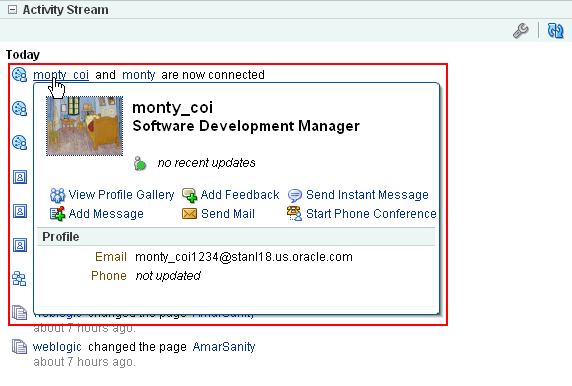
You can view summary profile details for yourself and all of your connections simply by clicking a name wherever it appears in any People Connections task flow. Clicking a name opens a Profile dialog (Figure 22-15).
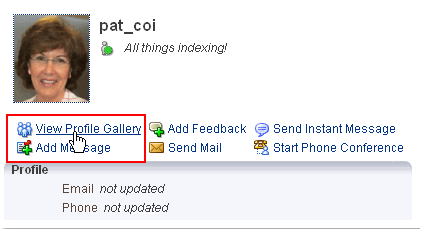
Click the View Profile Gallery link in the dialog to access your connection's Profile Gallery.
This dialog also opens when you click a user name in Search results, in Buddies and Members task flows, and on the Members tab of a group space Settings page.
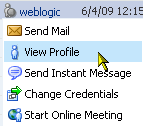
Where user names appear in the application in places other than those mentioned, you can access a user's profile by clicking the user name and selecting View Profile from the resulting context menu (Figure 22-16).
22.2.1.2 Setting Your Personal Status Note
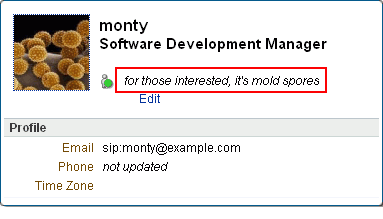
Your personal status note is a type of flag that alerts your connections, and any other users you have enabled to view your profile, to your current activities, state of mind, availability, and the like (Figure 22-17).
Anywhere you see an Edit link under your personal status message, you can revise its content.
To revise a personal status message:
-
Log in, and click your user name at the top of the application, and then click the Profile tab to bring it forward.
Tip:
You can also edit your personal status message from the Profile Gallery, which is the default page that opens when you click your user name at the top of the application. -
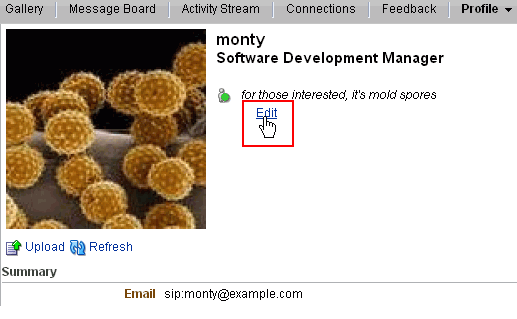
Click the Edit link under your personal status message (Figure 22-18).
-
In the resulting field, revise your personal status message, and click Done.
22.2.1.3 Uploading and Updating a Personal Profile Picture
Any user with a personal profile can upload an image file to his or her own profile, or update an existing image. This section describes how.
Note:
The file must have the mime-type image, and cannot have the extension*.ico.To upload or update your profile image:
-
Log in, and click your user name at the top of the application (Figure 22-19).
-
On the resulting page, click the Profile tab to bring it forward.
-
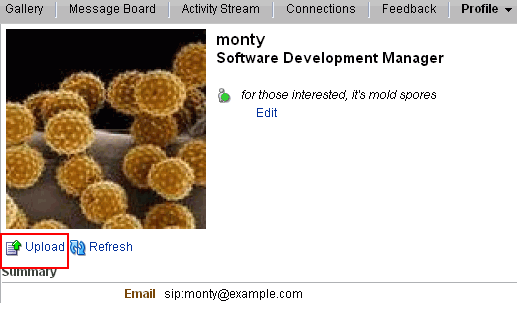
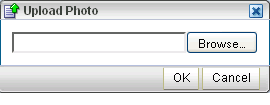
Click the Upload link (Figure 22-20) to open the Upload Photo dialog (Figure 22-21).
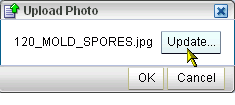
When you update your profile photo, additional dialogs may come into play. When you click the Upload link, the Upload Photo dialog opens, displaying the name of the current file along with an Update button (Figure 22-22).
Click Update to open the Upload Photo dialog depicted in Step 3. Follow Steps 4 and 5, and then click OK in the Upload Photo (Update) dialog.
22.2.1.4 Editing Your Personal Profile
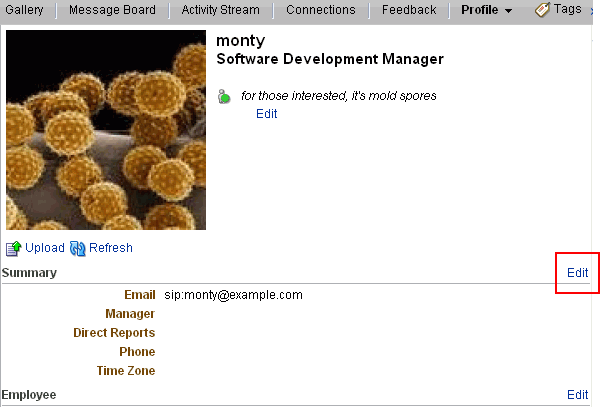
Your application administrator has discretion over how much of your personal profile you may revise (for more information, see the section, "Configuring Profiles," in the Oracle Fusion Middleware Administrator's Guide for Oracle WebCenter). Wherever you have permission to revise a profile section, an Edit link displays to the right of the section name (Figure 22-23).
Click this link to open an edit view of your personal profile.
Note:
Even when your application administrator has enabled the editing of a particular section, all fields in that section may not be editable.To edit your personal profile:
-
Log in, and open your personal profile.
-
Click the Edit link to the right of the profile section you want to revise (see Figure 22-23).
22.2.2 Working with Connections Task Flows
Connections provides the core features for building and visualizing your social network. Use Connections task flows to invite other users to connect, to accept connection invitations, to create connections lists, and to remove obsolete connections.
Note:
The level of access you have to a connection is determined by the People Connections defaults set by the application administrator, a given connection's People Connections Preference settings, and properties set on a Connections task flow instance.For information about People Connections Preferences, see Section 3.2.8, "Setting People Connections Preferences." For information about People Connections defaults set by the application administrator, see the chapter, "Managing the People Connections Service," in the Oracle Fusion Middleware Administrator's Guide for Oracle WebCenter. For information about Connections task flow properties, see Section 22.3, "Setting People Connections Service Task Flow Properties."
This section provides information about working with Connections. It contains the following subsections:
22.2.2.1 Viewing Your Connections
You can view your connections in any Connections task flow. One of these is always available on the Connections page that becomes available when you click your user name at the top of the application. In large lists of connections, you can use the search feature to locate a particular connection.
This section describes how to access the Connections page and view or search through your connections. It includes the following subsections:
22.2.2.1.1 Viewing Your Connections
-
Log in, and click your user name at the top of the application.
-
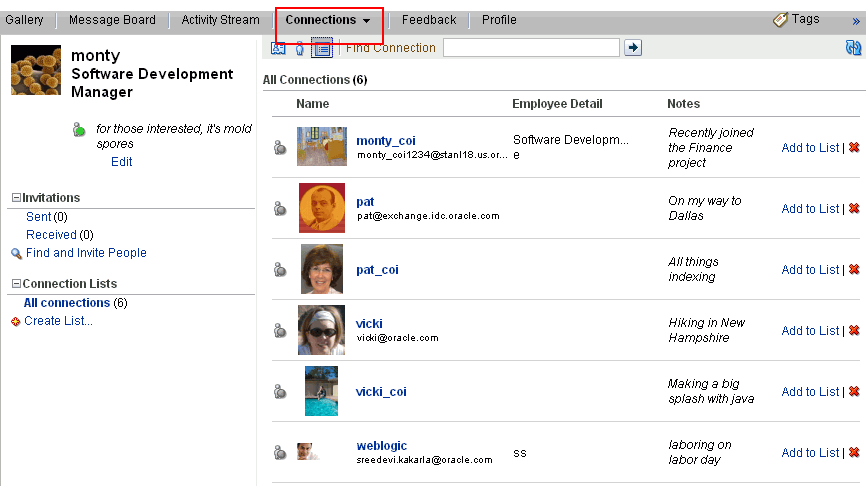
On the resulting page, click the Connections tab to bring it forward (Figure 22-24).
The Connections page displays all of your current connections. Click a connection name to open a Profile dialog and view profile details.
22.2.2.1.2 Searching Through Your Connections
The People Connections search feature provides an efficient way to locate a particular connection in an otherwise long list of connections. To search through your connections:
-
Log in, and click your user name at the top of the application.
-
On the resulting page, click the Connections tab to bring it forward (Figure 22-25).
The Connections page displays all of your current connections.
-
Under Connection Lists, click the name of the connections list you want to search through, or click All connections to search through all of your connections.
The connections on the selected list appear to the right.
-
In the Find Connection field, enter the user name of the connection for which to search, and click the Find connection icon next to the field.
Results appear to the right. Click a connection name to open a Profile dialog and view profile details.
To exit the search, click the Close icon that appears to the right of the Find Connection field (Figure 22-26).
22.2.2.2 Personalizing Your View of Connections
You can toggle your view of the main Connections task flow between Card Style, Iconic, and List Style.
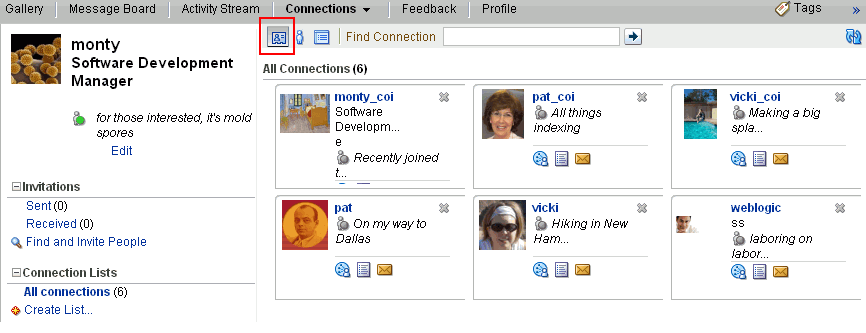
Card Style displays each connection in a virtual business card and includes the connection's user name and status message and quick-access buttons for interacting with your connections (Figure 22-27).
Iconic displays the connection's personal profile photo and user name (Figure 22-28).
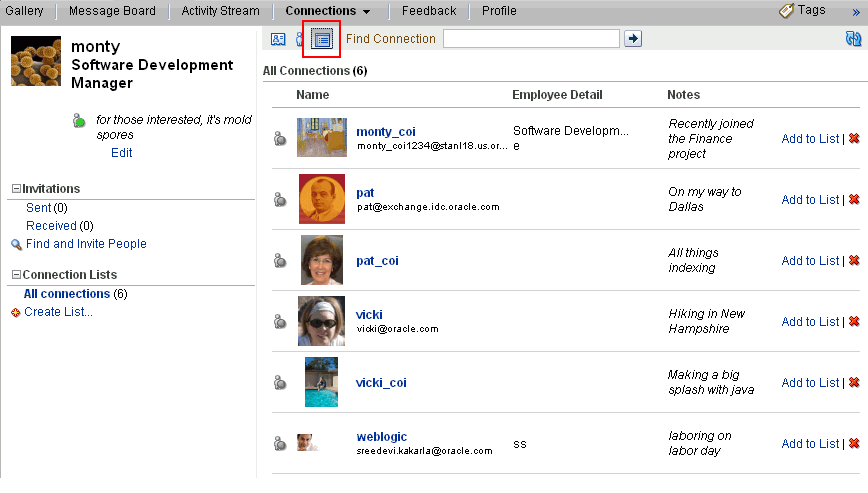
List Style displays the connection's personal profile photo, user name, job title, and personal status message (Figure 22-29)
Additionally, you can select which connections to show. Choose from showing all connections or a custom list of connections that you created (see Section 22.2.2.6.1, "Creating a Connections List").
To personalize your view of the Connections task flow:
-
Log in, and click your user name at the top of the application.
-
On the resulting page, click the Connections tab to bring it forward.
-
Click the icon associated with your preferred view of Connections.
Select from:
-
Card Style (Figure 22-30)
-
Iconic (Figure 22-31)
-
List Style (Figure 22-32)
-
22.2.2.3 Inviting Others to Connect
Connecting to another user potentially provides view access to that user's personal profile and Activity Stream, and view and post access to the user's Feedback and Message Board. The level of access you have to a connection is determined by the People Connections defaults set by the application administrator, the individual user's People Connections Preference settings, and properties set on the task flow instance.
See Also:
For information about People Connections Preferences, see Section 3.2.8, "Setting People Connections Preferences." For information about People Connections defaults set by the application administrator, see the chapter, "Managing the People Connections Service," in the Oracle Fusion Middleware Administrator's Guide for Oracle WebCenter. For information about Connections task flow properties, see Section 22.3, "Setting People Connections Service Task Flow Properties."You can issue invitations from the Connections and Connections - Quick View task flows and from the Connections page that you access through your user name. This section describes the Connections page method.
To invite another user to connect:
-
Log in, and click your user name at the top of the application.
-
On the resulting page, click the Connections tab to bring it forward.
-
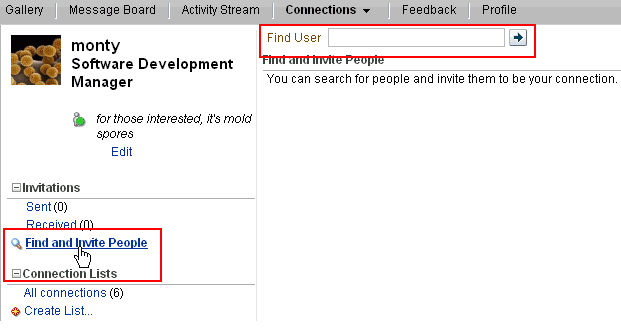
On the Connections page, click the Find and Invite People link to access the Find User field (Figure 22-33).
-
In the Find User field, enter the user name of the person you want to invite to be your connection and click the Search icon.
Results are shown in a list format.
-
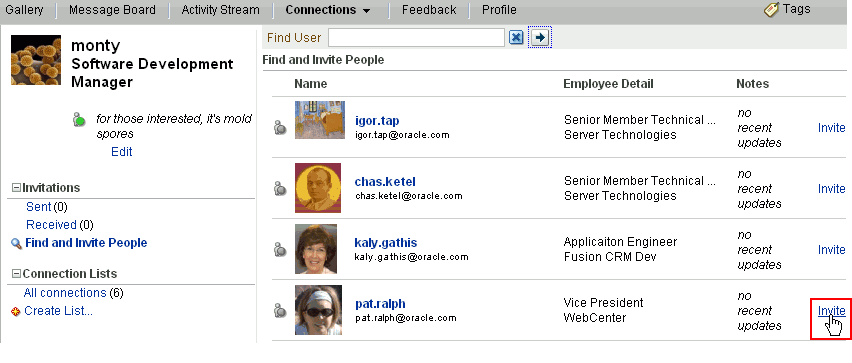
Click the Invite link next to the name of user to invite to be your connection (Figure 22-34).
-
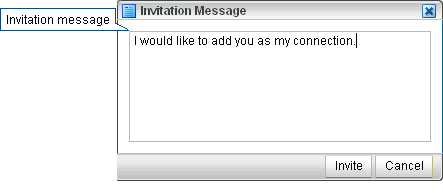
In the resulting Invitation Message dialog, enter a connection invitation or use the default message (Figure 22-35).
-
Click Invite.
If the person you have invited set Preferences to automatically accept all invitations, you are connected immediately. Otherwise, the invitation appears in the person's view of the Connections page. You can also view invitations from the Connections task flow, and you can navigate to them from the Connections - Quick View task flow (click Manage Connections to open the Connections page). For more information, see Section 22.2.2.4, "Viewing Invitations to Connect."
See Also:
For information about People Connections Preferences, see Section 3.2.8, "Setting People Connections Preferences."
22.2.2.4 Viewing Invitations to Connect
You can view the invitations you have sent and received in the Connections task flow and on the Connections page. This section describes the Connections page case. It includes the following subsections:
22.2.2.4.1 Viewing Invitations You Have Sent
To view invitations you have sent:
-
Log in, and click your user name at the top of the application.
-
On the resulting page, click the Connections tab to bring it forward.
-
On the Connections page under Invitations, click Sent.
Note:
The number next to Sent represents the number of unanswered invitations you have sent.
22.2.2.4.2 Viewing Invitations You Have Received
To view invitations you have received:
-
Log in, and click your user name at the top of the application.
-
On the resulting page, click the Connections tab to bring it forward.
-
On the Connections page under Invitations, click Received.
Note:
The number next to Received represents the number of unanswered invitations you have received.
22.2.2.5 Responding to Invitations to Be a Connection
The People Connections service provides two methods for responding to an invitation to connect:
-
You can set your Connections Preferences to automatically accept such invitations.
See Also:
For information about setting Connections Preferences, see Section 3.2.8, "Setting People Connections Preferences." -
You can manually accept, decline, or delete such invitations through the main Connections task flow or on the Connections page associated with your user name.
This section describes the manual method of responding to invitations to connect from the Connections page.
To respond to invitations to connect:
-
Log in, and click your user name at the top of the application.
-
On the resulting page, click the Connections tab to bring it forward.
-
On the Connections page under Invitations, click Received.
A list of the invitations to which you have not responded appears.
-
To the right of a given invitation, click your desired response.
Choose from:
-
Accept link—Make the connection.
-
Decline link—Refuse the connection, with notification. When you decline an invitation to connect, the issuer becomes aware of this by watching his sent invitations.
-
Delete icon—Remove the connection, without responding. When you delete an invitation to connect, the issuer does not become aware of this by watching his sent invitations.
Once you respond to an invitation, it is removed from the list of received invitations. The users whose invitations you accept appear in your view of the Connections page.
-
22.2.2.6 Creating and Managing Connections Lists
The People Connections service provides a means of grouping your connections into lists for managing the display of your connections and your connections activities. For example:
-
You can select a list and view just its members on your Connections page.
-
You can configure a Connections - Card task flow instance to display only the connections on a specified list (for more information, see Section 22.3, "Setting People Connections Service Task Flow Properties").
-
You can configure Activity Stream Preferences to show activities only from specified connections lists (for more information, see Section 3.2.8.1, "Setting Activity Stream Preferences").
-
You can configure a particular instance of an Activity Stream to show activities only from specified connections (for more information, see Section 22.2.5, "Working with the Activity Stream Task Flow").
This section describes how to create and manage lists of connections. It contains the following subsections:
22.2.2.6.1 Creating a Connections List
To create a list of connections:
-
Log in, and click your user name at the top of the application.
-
On the resulting page, click the Connections tab to bring it forward.
-
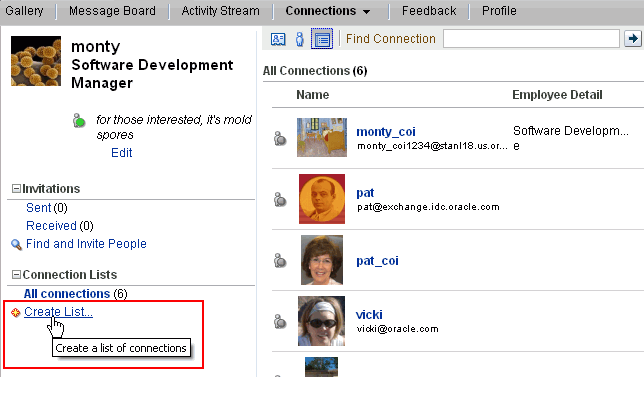
On the Connections page under Connection Lists, click Create List (Figure 22-36).
-
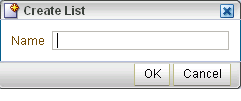
Click Create List to open the Create List dialog (Figure 22-37).
-
In the Name field, enter a name for your list of connections.
-
Click OK.
See Also:
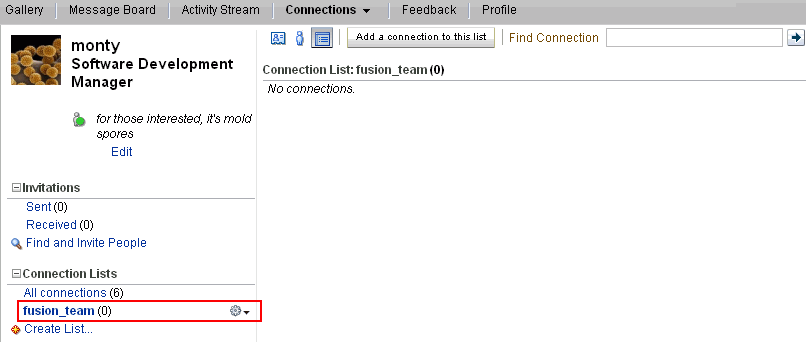
For more information, Section 22.2.2.6.2, "Adding a Connection to a List."Once you create a list, the Connections page presents a view of that list (Figure 22-38).
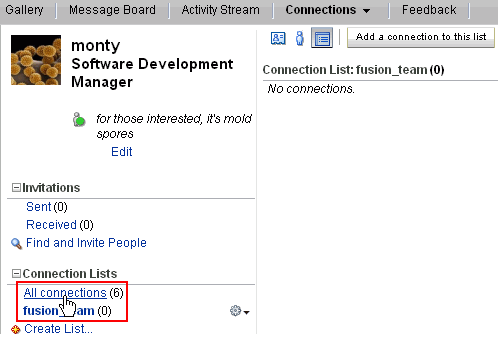
To view all of your connections, click the All connections link that appears under the Connection Lists heading (Figure 22-39).
22.2.2.6.2 Adding a Connection to a List
To add a connection to a connections list:
-
Log in, and click your user name at the top of the application.
-
On the resulting page, click the Connections tab to bring it forward.
-
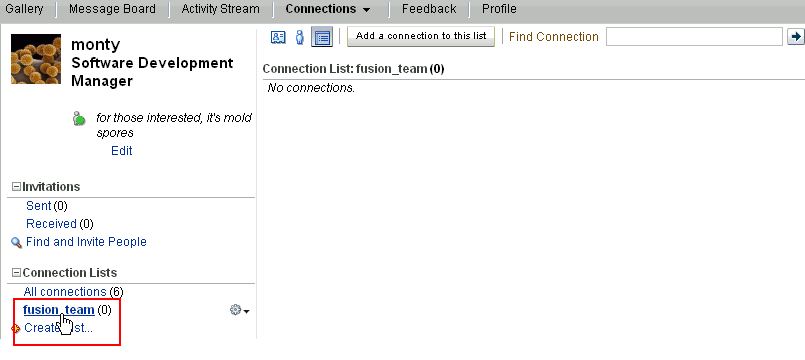
On the Connections page under Connection Lists, click the name of the list you want to populate to open a view of the list (Figure 22-40).
-
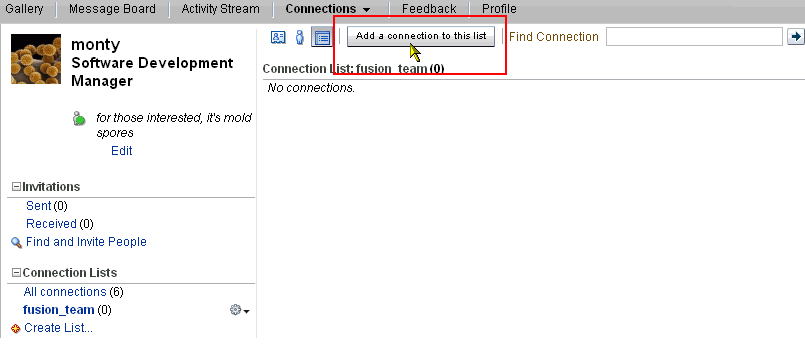
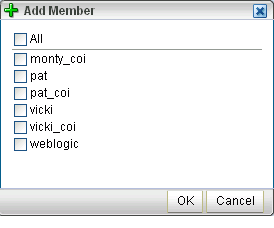
In the list view, click Add a connection to this list (Figure 22-41) to open the Add Member dialog (Figure 22-42).
-
Select All to add all of your connections to the list, or select individual connections to add.
-
Click OK.
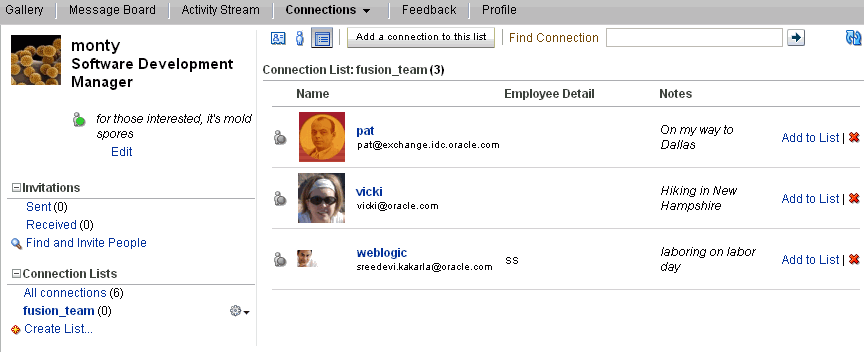
The list is populated, and selected members appear to the right of the list (Figure 22-43).
-
To exit the list, click All connections under Connection Lists.
You can use the Add to List link to the right of a list member to add them or remove them from other lists. For more information, see Section 22.2.2.6.3, "Removing a Connection from a List."
22.2.2.6.3 Removing a Connection from a List
To remove a connection from a list:
-
Log in, and click your user name at the top of the application.
-
On the resulting page, click the Connections tab to bring it forward.
-
On the Connections page under Connection Lists, click the list from which to remove connections.
-
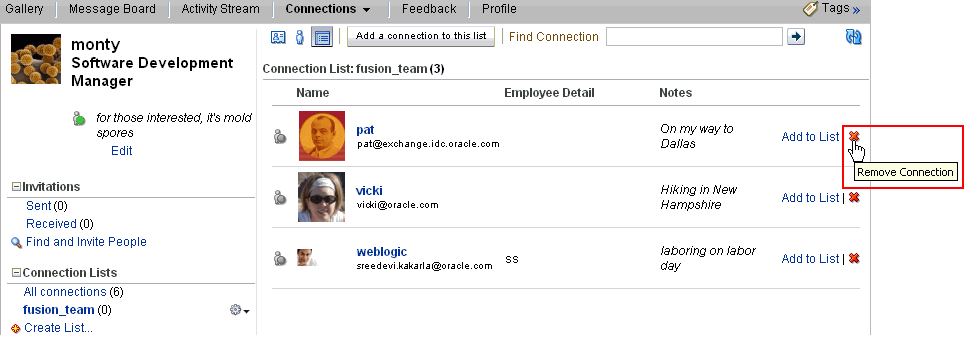
Click the Remove Connection icon next to the name of the connection you want to remove from the list (Figure 22-44).
-
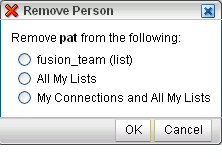
In the resulting Remove Person dialog, select the option that best suits how you want to remove the connection (Figure 22-45).
Choose from:
-
list_name (list)—Remove the selected connection from the current list.
-
All My Lists—Remove the selected connection from all of your lists.
-
My Connections and All My Lists—Remove the selected connection from all of your lists, and sever your connection with this user.
-
-
Click OK.
22.2.2.6.4 Deleting a Connections List
When you delete a list, you are not deleting the connections you added to the list. You are deleting only the particular grouping mechanism, that is, the list itself. The connections that were on the deleted list continue to be your connections.
To delete a connections list:
-
Log in, and click your user name at the top of the application.
-
On the resulting page, click the Connections tab to bring it forward.
-
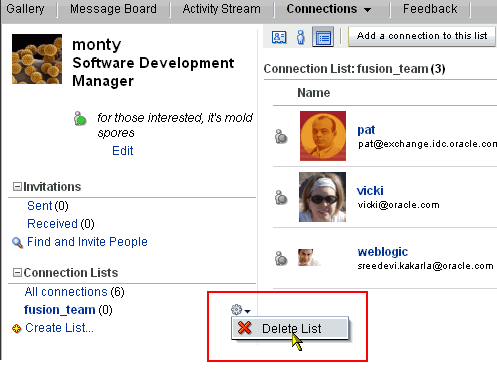
On the Connections page, click the Actions icon next to the list you want to delete and select Delete List from the resulting context menu (Figure 22-46).
-
In the resulting confirmation dialog, click Delete List.
The list is deleted, and your view of the Connections page is returned to the top level.
22.2.2.7 Deleting a Connection
Included in the process of managing your connections is the occasional necessity of weeding people out: they may leave your group or the company, or there may no longer be a compelling reason to stay connected.
To remove one of your connections:
-
Log in, and click your user name at the top of the application.
-
On the resulting page, click the Connections tab to bring it forward.
-
On the Connections page, how you delete a connection depends on your currently selected view option:
-
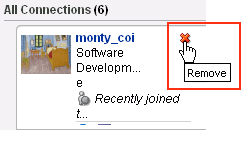
In Card Style view, click the Remove icon in the card header (Figure 22-47).
-
In List Style view, click the Remove Connection link to the right of the connection (Figure 22-48).
Note:
There is no option to remove a connection in Iconic view. -
22.2.3 Working with Feedback Task Flows
Feedback provide a means of viewing and posting user feedback. You can view the feedback you have posted and that was posted for you in your own view of the Feedback task flow. You can view all the feedback left for other users and post feedback for those users in their views of the Feedback task flow, provided they have granted you view and post access.
When you view another user's feedback, you can view only the feedback they have received from others. You cannot view the feedback they have sent, except in the views of the users for whom the feedback was posted.
See Also:
Use Preferences settings to configure user access to your Feedback. For more information, see Section 3.2.8.5, "Setting Feedback Preferences."This section discusses how to post feedback and how to hide, show, sort, and filter feedback messages. It contains the following subsections:
22.2.3.1 Viewing Feedback You Have Posted or Received
A View menu on the Feedback page provides a means of viewing the feedback you have posted for others and the feedback you have received yourself.
To view feedback you have posted or received:
-
Log in, and click your user name at the top of the application.
-
On the resulting page, click the Feedback tab to bring it forward.
-
From the View dropdown list (Figure 22-49), select either:
-
Given—To view the feedback you have posted for others
-
Received—To view the feedback others have left for you
-
22.2.3.2 Posting Feedback
Use Feedback to pass along remarks to your connections about their efforts and results. Keep in mind that a wider audience than just the connection may see your feedback message.
To post a Feedback message:
-
Log in, and view the profile gallery of the person for whom to leave feedback.
For more information, see Section 22.2.1.1, "Viewing Profile Details."
-
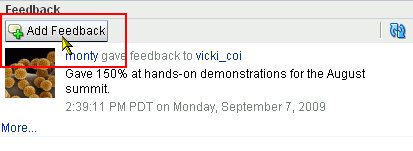
In the Feedback task flow, click Add Feedback (Figure 22-50).
-
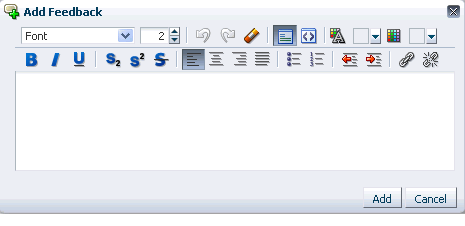
In the resulting Add Feedback dialog, enter your feedback in the text area and click the Add button when you have finished (Figure 22-51).
The Add Feedback dialog provides an integrated Rich Text Editor that enables you to add styles, links, and other HTML encoding to your feedback. For information about how to use Rich Text Editor controls, see Table 15-4, "Rich Text Editor Controls".
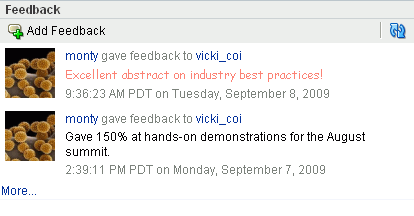
Once you click the Add button, your feedback appears in the selected user's view of the Feedback task flow (Figure 22-52).
22.2.3.3 Sorting and Filtering Feedback Posts
The Feedback page (and the main Feedback task flow) includes sorting and filtering features for controlling what is shown in your view. Use the sorting feature to sort your feedback by date or by person—that is, the user name of the person who left the feedback. Use the filtering feature to display feedback posted on a particular date or within a given date range.
To sort and filter your feedback:
-
Log in, and click your user name at the top of the application.
-
Click the Feedback tab to bring it forward.
-
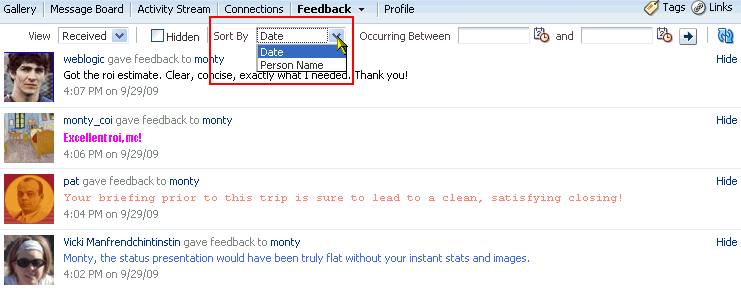
From the Sort By dropdown list (Figure 22-53), select from:
-
Date—To sort Feedback posts from the most recent to the oldest.
-
Person Name—To sort Feedback posts by the name of the user who left it for you (Received) or by the name of the user you left it for (Given).
-
-
To specify a date range within which to view Feedback posts, enter a start date in the field that follows Occurring Between and enter an end date in the field that follows and (Figure 22-54).
You must enter both a start and end date, even when you want to view Feedback posts from a given day. In such a case, enter the same date in both fields.
Instead of entering dates, you can click the Select Date icon next to a field to select a date from a calendar.
-
Click the Search icon.
All of the Feedback posts (either received or given) that fall within the specified date range appear on the Feedback page (or the Feedback task flow, whichever you used).
Tip:
To remove the date filtering criteria from your Feedback view, clear the date range fields and click the Search icon.22.2.3.4 Hiding Feedback in Your Own View
You can hide any feedback in your own view of the Feedback page. Hiding provides a means of removing Feedback posts from your own view without actually deleting them. Users to whom you have given access to your feedback can still see the posts you have hidden.
See Also:
For more information about undoing this action, see Section 22.2.3.5, "Showing Hidden Feedback Posts").To hide feedback in your own view:
-
Log in, and click your user name at the top of the application.
-
On the resulting page, click the Feedback tab to bring it forward.
-
Click the Hide link next to the feedback message to hide (Figure 22-55).
22.2.3.5 Showing Hidden Feedback Posts
Use the Hidden checkbox on the Feedback page to show all the feedback you have hidden. The Hidden checkbox provides a means of showing all hidden feedback in one operation, making it available to be unhidden or deleted.
To view and show or delete hidden feedback posts:
-
Log in, and click your user name at the top of the application.
-
Click the Feedback page to bring it forward.
-
Select Hidden at the top of the page (Figure 22-56).
-
All the Feedback posts you have hidden are shown.
-
Use the link or icon next to a Feedback post to show it or delete it.
-
To change a post from a hidden to a shown state, click the Unhide link to the right of it.
-
To delete a hidden post, click the Delete icon to the right of it.
-
-
To remove hidden Feedback posts from your view, clear the Hidden checkbox.
22.2.3.6 Deleting Feedback You Have Posted
You can delete feedback you have posted to other users provided your WebCenter Spaces administrator has enabled you to do so (for more information, see the chapter, "Managing the People Connections Service," in the Oracle Fusion Middleware Administrator's Guide for Oracle WebCenter).
To delete Feedback you have posted:
-
Log in, and click your user name at the top of the application.
-
Click the Feedback tab to bring it forward.
-
From the View dropdown list, select Given.
-
Click the Delete icon next to the post you want to delete (Figure 22-57).
-
Click Delete in the resulting confirmation dialog.
The feedback is deleted from your view and from the view of the user for whom you left it.
22.2.4 Working with Message Board Task Flows
Message Board task flows provide a means of viewing and posting messages to your connections. This section discusses how to post messages and how to edit, hide, show, sort, filter, and delete messages. It contains the following subsections:
See Also:
Users grant access to their Message Boards through People Connections Preferences. For more information, see Section 3.2.8.4, "Setting Message Board Preferences."22.2.4.1 Viewing Message Board Messages
You can view the messages other users have sent to you in your view of any Message Board task flow. You can view the messages you have sent to others in their views of any Message Board task flow. This section describes both scenarios using the Message Board page, though you can view messages wherever a Message Board task flow is placed.
This section includes the following subsections:
22.2.4.1.1 Viewing Messages Left for You
To view Message Board messages other users have left for you:
-
Log in, and click your user name at the top of the application.
-
Click the Message Board tab to bring it forward.
The messages you have received appear on the page (Figure 22-58).
22.2.4.1.2 Viewing Messages Left for Others
To view Message Board messages other user have received (including those you have left for them):
-
Log in, and click your user name at the top of the application.
-
Click the Connections tab to bring it forward.
-
Click the user name of the connection whose messages you want to see.
-
In the resulting dialog, click View Profile Gallery (Figure 22-59).
See Also:
There are various ways you can access this dialog or its equivalent. For more information, see Section 22.2.1.1, "Viewing Profile Details." -
On the resulting page, click the Message Board tab to bring it forward.
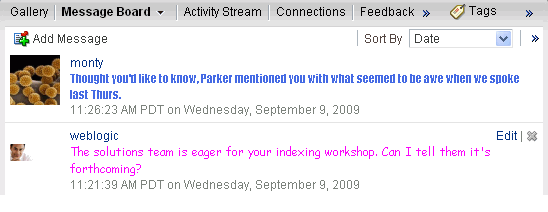
The messages the selected user has received appear on the page (Figure 22-60).
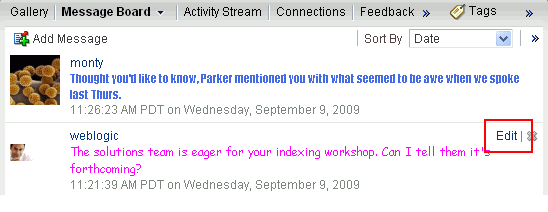
In Figure 22-60, notice that the message from user
weblogichas an associated Edit link and Delete icon. Provided the Message Board is configured to enable you to do so, you can revise or delete the messages you leave for others.See Also:
-
For information about editing a message you have posted, see Section 22.2.4.3, "Editing Message Board Messages."
-
For information about deleting a message you have posted, see Section 22.2.4.7, "Deleting Message Board Messages."
-
For information about configuring application-level Message Board settings, see the "Configuring Message Board," section of Oracle Fusion Middleware Administrator's Guide for Oracle WebCenter.
-
22.2.4.2 Posting Message Board Messages
Your access to any user's Message Board is determined by the application permissions put in place by your application administrator (for more information, see the chapter, "Managing the People Connections Service" in the Oracle Fusion Middleware Administrator's Guide for Oracle WebCenter). Provided you have sufficient access, you can post a message to any user whose profile is available to you through the application user interface (for more information, see Section 22.2.1.1, "Viewing Profile Details"). You can also post messages to your own Message Board; though, depending on permissions, you may first have to log in.
This section describes one way to access another user's Message Board. You can use this information to try others.
To post a Message Board message:
-
Log in, and click your user name at the top of the application.
-
On the resulting page, click the Connections tab to bring it forward.
-
Click the name of the user for whom to leave a message.
-
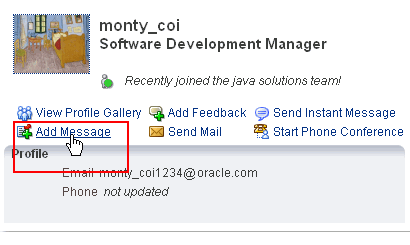
In the resulting dialog, click Add Message (Figure 22-61).
See Also:
There are various ways you can access this dialog or its equivalent. For more information, see Section 22.2.1.1, "Viewing Profile Details." -
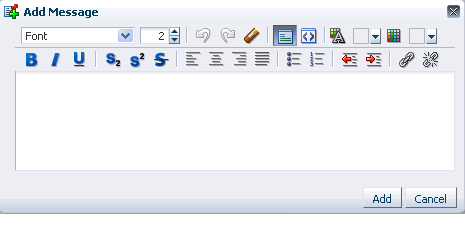
In the resulting Add Message dialog, enter a message (Figure 22-62).
The Add Message dialog provides an integrated Rich Text Editor that enables you to add styles, links, and other HTML encoding to your message. For information about Rich Text Editor controls, see Table 15-4, "Rich Text Editor Controls".
-
Click Add when you have finished.
Your message appears on the selected user's Message Board.
22.2.4.3 Editing Message Board Messages
Your application administrator can configure the Message Board feature to allow users to revise the messages they leave. Provided this permission is in place, you can edit any message you post. This section describes how.
See Also:
For information about configuring application-level Message Board settings, see the "Configuring Message Board," section of Oracle Fusion Middleware Administrator's Guide for Oracle WebCenter.To edit a Message Board message:
-
Log in, and click your user name at the top of the application.
-
On the resulting page, click the Connections tab to bring it forward.
-
Click the name of the user to whom you have sent a message you want to edit.
-
In the resulting dialog, click View Profile Gallery (Figure 22-63).
-
On the resulting page, click the Message Board tab to bring it forward.
-
Click the Edit link next to the message to edit (Figure 22-64).
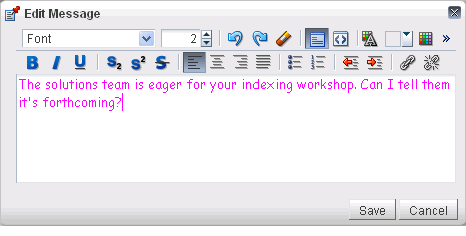
A Rich Text Editor (RTE) opens, prepopulated with your message text (Figure 22-65).
For information about RTE controls, see Table 15-4, "Rich Text Editor Controls".
-
Revise your message, and click Save.
22.2.4.4 Sorting and Filtering Message Board Messages
Your full view of the Message Board task flow includes sorting and filtering features for managing your view of your messages. Use the sorting feature to sort your messages by date or by the person who left the message. Use the filtering feature to display messages posted on a particular date or within a given date range.
To sort and filter your Message Board messages:
-
Log in, and click your user name at the top of the application.
-
On the resulting page, click the Message Board tab to bring it forward.
-
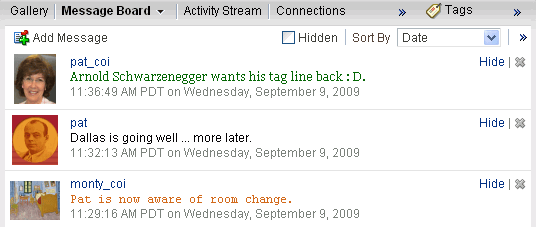
From the Sort By dropdown list, select a sorting option (Figure 22-66).
Choose from:
-
Date—Sort your messages by the date they were posted, from most recent to oldest.
-
Person Name—Sort your messages by the user name of the person who posted them, from A to Z.
-
-
To display messages between a particular range of dates, enter the beginning and end of the range respectively in the fields after Occurring between (Figure 22-67).
-
Click the button to the right of the fields to apply the filter.
The Message Board refreshes, showing only those messages that fit your sorting and filtering criteria.
Tip:
To remove the date filtering criteria from your Message Board view, click the Remove icon to the right of the date range fields.
22.2.4.5 Hiding Messages You Have Received
You can hide any message you have received on your Message Board. Hiding provides a means of removing messages from your own view without actually deleting them. Users to whom you have given access to your messages can still see the messages that you have hidden.
See Also:
For information about Message Board Preferences, see Section 3.2.8.4, "Setting Message Board Preferences."To hide Message Board messages:
-
Log in, and click your user name at the top of the application.
-
On the resulting page, click the Message Board tab to bring it forward.
-
Click the Hide link next to the message you want to hide (Figure 22-68).
The message is hidden in your view of the Message Board. Other users can see this message when they visit your view of the Message Board.
22.2.4.6 Showing Hidden Messages
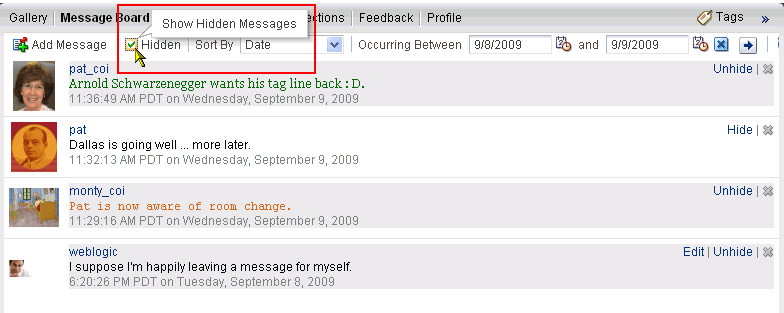
Use the Hidden checkbox on the Message Board page to show all the messages you have hidden. The Hidden checkbox provides a means of showing all hidden messages in one operation, making it available to be unhidden or deleted.
To view and show or delete hidden Message Board messages:
-
Log in, and click your user name at the top of the application.
-
Click the Message Board page to bring it forward.
-
Select Hidden at the top of the page (Figure 22-56).
-
All the Message Board messages you have hidden are shown.
-
Use the link or icon next to a message to edit, show, or delete it.
-
To edit a hidden message, click the Edit link to the right of it (for more information, see Section 22.2.4.3, "Editing Message Board Messages").
-
To change a message from a hidden to a shown state, click the Unhide link to the right of it.
-
To delete a hidden message, click the Delete icon to the right of it.
-
-
To remove hidden messages from your view, clear the Hidden checkbox.
22.2.4.7 Deleting Message Board Messages
Your application administrator can configure the Message Board to allow users to delete the messages they send. Provided this permission is in place, you can delete any message you send.
See Also:
For information about configuring application-level Message Board settings, see the "Configuring Message Board," section of Oracle Fusion Middleware Administrator's Guide for Oracle WebCenter.To delete a message you sent:
-
Log in, and click your user name at the top of the application.
-
On the resulting page, click the Connections tab to bring it forward.
-
Click the user name of the person to whom you sent the message you want to delete, and select View Profile Gallery from the resulting dialog.
-
In the user's profile gallery, click the Message Board tab to bring it forward.
-
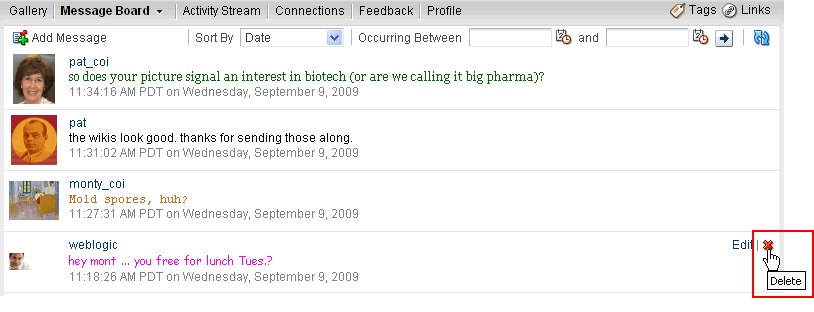
Click the Delete icon next to the message you want to delete (Figure 22-70).
22.2.5 Working with the Activity Stream Task Flow
Use Activity Stream to track the activities of your connections, the activities occurring in selected services, and additional application activities (for more information, see Table 22-1, "Activities Tracked by Activity Stream").
The Activity Stream task flow provides a configuration feature for determining the content of a given task flow instance. This section describes how to use it.
See Also:
There is an order of precedence for which settings control the content and behavior of a task flow instance. It moves from administrative settings (application-wide), to Preferences (individual view of all instances), to a given instance. The settings on a given instance affect only your view when made in page view mode and everyone's view when made in page edit mode. For more information, see Section 22.1, "What You Should Know About the People Connections Service."The following procedure steps you through configuration using the Activity Stream page that becomes available when you click your user name at the top of the application; however, these steps also work for the Activity Stream task flow.
To configure an Activity Stream task flow instance:
-
Log in, and click your user name at the top of the application.
-
Click the Activity Stream tab to bring it forward.
-
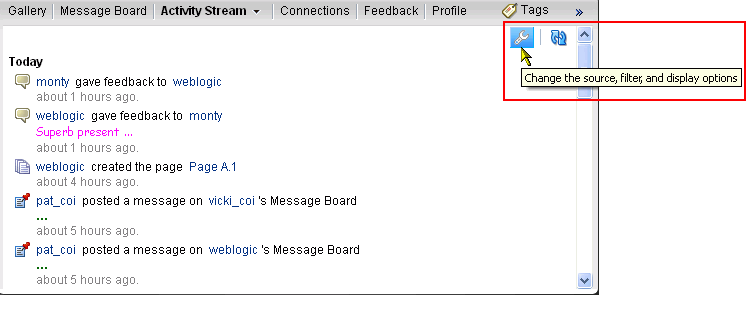
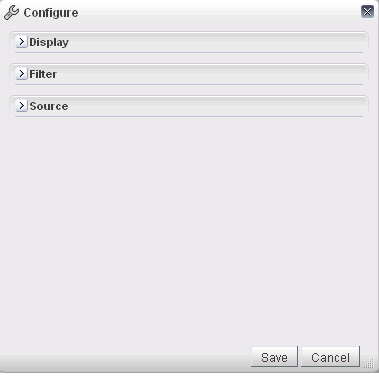
Click the Change the source, filter, and display options icon (wrench) on the Activity Stream (Figure 22-71) to open the Activity Stream Configure dialog (Figure 22-72).
-
Set values for the individual task flow instance as described in Section 3.2.8.1, "Setting Activity Stream Preferences."
-
Click Save.
If you entered these values in page view mode, they affect only your view of the task flow instance. If you entered these values in page edit mode, they affected all users' views of this task flow instance.
22.3 Setting People Connections Service Task Flow Properties
The People Connections service has associated properties, which users with sufficient privileges can access in Oracle Composer. Use properties to adjust task flow appearance and data on a single task flow instance and to wire task flows to each other and to page parameters and page definition variables.
See Also:
For information about wiring pages and components, see Chapter 8, "Wiring Pages, Task Flows, Portlets, and UI Components".People Connections service Component Properties are presented on five tabs:
-
Parameters
-
Display Options
-
Style
-
Content Style
-
Events
Not all components provide the same properties; consequently, not all components display all five tabs.
All properties on the Parameters and Display Options tabs provide access to the Expression Builder, which you can use to select or specify a variable value in lieu of a constant value. Click the Edit icon next to a property field to open the Expression Builder (Figure 22-73).
Use the Expression Builder to select predefined values, under Choose a value, or to enter a value or an Expression Language (EL) expression, under Type a value or expression. The Expression Builder provides a test feature, which you can use to validate your selection or entry. For information about using the Expression Builder and for access to a table of common EL expressions, see Section 7.5.5, "Using Expression Language (EL) Expressions with Component Properties."
Many properties are common to all task flows. Additionally, the method for accessing task flow properties is the same from task flow to task flow. Common task flow properties and how to access them are discussed in Section 7.5, "Setting Properties on Page Content."
Some properties are unique to the task flow type. Those properties unique to People Connections service task flows are listed and described in Table 22-2.
Table 22-2 People Connections Service Task Flow Parameters
| Parameter | Description |
|---|---|
|
A Boolean value representing whether a control is available on the task flow for updating a profile status message Enter either This parameter appears in the component properties for the Profile – Snapshot task flow. |
|
|
A Boolean value representing whether a control is available on the task flow for uploading a profile photo Enter either This parameter appears in the component properties for the Profile – Snapshot task flow. |
|
|
A Boolean value representing whether a control is available on the task flow for removing a connection Enter either This parameter appears in the component properties for the Connections – Card task flow. |
|
|
The name of a grouped list of connections Use this parameter to limit the display of connections to those on the specified connections list. This parameter appears in the component properties for the Connections – Card task flow. |
|
|
The ending date for a date range within which to show feedback messages Use the format This parameter appears in the component properties for the following task flows:
|
|
|
The number of characters to show for each feedback message Messages exceeding the specified value are truncated. This parameter appears in the component properties for the Feedback – Quick View task flow. |
|
|
A Boolean value representing whether a control is available on the task flow for configuring Filter, Source, and Display options Enter either This parameter appears in the component properties for the Activity Stream task flow. |
|
|
A Boolean value representing whether to hide the task flow footer This parameter turns the More link on ( Enter either
This parameter appears in the component properties for the following task flows:
|
|
|
A Boolean value representing whether to hide the task flow header Enter either
This parameter appears in the component properties for the following task flows:
|
|
|
The size of the Profile photo to show Values can be one of: This parameter appears in the component properties for the Profile – Snapshot task flow. |
|
|
The number of columns to show in the task flow For example, in the Connections – Card task flow with six connections to show, a value of This parameter appears in the component properties for the following task flows:
|
|
|
A number representing the maximum number of connections to show in the task flow For example, enter This value is honored only when both This parameter appears in the component properties for the following task flows:
|
|
|
The number of Feedback items to show in the task flow For example, enter This parameter appears in the component properties for the following task flows:
|
|
|
The number of messages to show in the task flow For example, enter This parameter appears in the component properties for the following task flows:
|
|
|
The number of rows to show in the task flow For example, in the Connections – Card task flow with six connections to show and a value of A More link appears at the bottom of the task flow when there are more connections than can fit in the specified number of columns and rows. Users click More to open the main view of the task flow where all connections are shown. (See also, This parameter appears in the component properties for the following task flows:
|
|
|
The layout style for the task flow Enter one of the following:
This parameter appears in the component properties for the Connections – Card task flow. |
|
|
A value to act as a filter against task flow content For example, to show only those connections with a user name that includes the term pat (including patrick or sripathy), enter This parameter appears in the component properties for the Connections – Card task flow. |
|
|
The connections sort order Enter This parameter appears in the component properties for the Connections – Card task flow. |
|
|
The starting date for a date range within which to show feedback messages Use the format This parameter appears in the component properties for the following task flows:
|
|
|
The ID of the user to show in the task flow This value is set automatically( This parameter appears in the component properties for all People Connections task flows. |
