3 Entering Item Information
This chapter contains the following topics:
3.1 Understanding Item Information
Before you can work with inventory, you must provide the JD Edwards EnterpriseOne Inventory Management system with information about the items that you stock. When you enter each inventory item, you provide the JD Edwards EnterpriseOne Inventory Management system with details such as:
-
Item identifiers.
-
Item descriptions (foreign and domestic).
-
Item rules.
-
Item costs and prices.
-
Item weights and measures.
You also must provide the JD Edwards EnterpriseOne Inventory Management system with information about the location of each item, including:
-
The branch/plant where each item resides.
-
The locations that are used within each branch/plant.
The JD Edwards EnterpriseOne Inventory Management system uses this information to help track and process each item through the distribution and manufacturing systems. Entering an item includes two steps:
-
Entering item master information, which includes basic information about an item.
-
Configuring the item master information to suit each branch/plant that the item occupies.
When you enter item master information, the JD Edwards EnterpriseOne Inventory Management system creates a record in the Item Master table (F4101). This table includes item information that applies throughout the branch, such as category codes and planner/buyer numbers. When you enter branch/plant information for an item, the JD Edwards EnterpriseOne Inventory Management system creates records in the Item Branch File (F4102) and the Item Location File (F41021), which includes item information that is specific to certain locations, such as on-hand quantities and General Ledger GL class codes.
3.1.1 Prerequisites
Before you complete the tasks in this chapter, you must:
-
Review and modify branch/plant constants.
-
Set up default locations and printers.
-
Set up applicable user-defined codes (UDCs), including:
-
GL class codes in UDC table (41/9).
-
Stocking type codes in UDC table (41/I).
-
Units of measure in UDC table (00/UM).
-
Classification code categories
-
Cost method codes
-
Language preference codes in UDC table (01/LP).
-
3.2 Entering Item Master Information
This section provides overviews of item master information and manufacturing information, lists prerequisites, and discusses how to:
-
Set processing options for Item Master (P4101).
-
Set up item information.
-
Enter alternate descriptions.
-
Attach messages to items.
-
Enter notes for items.
-
Add classification codes to items.
-
Enter default units of measure for items.
-
Define item unit of measure conversions.
-
Specify dual unit of measures for items.
-
Set up search sequence using price units of measure.
-
Set up manufacturing information.
Country-specific functionality for entering item master information exists for Brazil.
3.2.1 Understanding Item Master Information
You must enter master information for all stock and non-stock items. Item master information includes the item number, item name, description, and general information about the item. The JD Edwards EnterpriseOne Inventory Management system uses this information to identify and process each item in the distribution and manufacturing systems.
Each item can have up to three inventory item numbers:
-
Primary number.
-
Secondary number (for vendor, manufacturing, or industry standards).
-
System-assigned number.
In addition to identifying items numerically, you can describe each item with information such as:
-
Standard description.
-
Technical description with specifications.
-
Warning message.
-
Vendor information and availability.
You can use any of the item descriptions or numbers interchangeably on forms, reports, or in transaction processing.
You cannot delete an item if any of this information exists:
-
Item branch records
-
Bills of material
-
Item cross-reference numbers
-
Supplier relationships
-
Sales prices
You may want to enter one item that you use as a template for additional items. By creating an item to use as a template, you can enter field values that are common to many items that you want to add in the future. When you add the new items, you first locate the item that you entered as the template and modify field values as necessary for the new item.
When you enter a new item, the system creates an item master record in the Item Master table (F4101).
3.2.1.1 Item Units of Measure Information
You must enter the item units of measure that are most common to each of the distribution processes, such as sales, purchasing, and so on. For example, you might purchase an item in pallets, stock it in boxes, and ship it in individual containers.
If you work with an item in multiple units of measure, you must specify how to convert one unit of measure to another. For example, if you stock items in boxes and crates, you must specify the number of individual items in a box and the number of boxes in a crate.
In some instances, the JD Edwards EnterpriseOne Inventory Management system must work with an item in its smallest (primary) unit of measure. The item conversions that you specify must enable the JD Edwards EnterpriseOne Inventory Management system to trace all units of measure back to the primary unit of measure.
You can set up unit of measure conversions that are specific to an item or to an item and branch/plant combination. You specify whether item conversions are specific to a branch/plant on the System Constants form. You can also set up units of measure that are standard for all items.
Units of measure for an item are stored in the Item Unit of Measure table (F41002) or the Unit of Measure Standard Conversions table (F41003). The JD Edwards EnterpriseOne Inventory Management system verifies the item unit of measure conversions before using standard unit of measure conversions.
3.2.1.2 Dual Unit of Measure
You can maintain inventory and perform transactions for items in two units of measure. For example, you specify a dual unit of measure for an item that is sold by quantity but purchased by cost or priced by weight. Similarly, a transaction can use a dual unit of measure for which a standard conversion exists. For example, if an item's unit of measure is weight, you can consider a transaction in tons or pounds to be a dual unit of measure. In this case, the dual unit of measure is the unit of measure that is used on item ledger records and item balance records for the dual quantity. The JD Edwards EnterpriseOne Inventory Management system enables a dual unit of measure only for packaged, manufactured end items, not for bulk items.
When you specify a dual unit of measure, the JD Edwards EnterpriseOne Inventory Management system determines whether the item has a variable conversion between the primary unit of measure and secondary unit of measure for all inventory transactions. You must set up the item with the primary unit of measure as the costing unit of measure and the secondary unit of measure as the other unit of measure to track inventory.
These programs enable you to enter either the transaction quantity that is related to primary unit of measure, or the transaction quantity that is related to secondary, dual unit of measure; a standard conversion is used to determine the other quantity:
-
Purchase Orders (P4310).
-
Sales Order Entry (P4210).
-
Manufacturing Work Order Processing (P48013).
You can also enable picking options and set tolerance amounts, as described in this table:
| Option | Setup Task |
|---|---|
| Picking | Picking is the movement of inventory from a warehouse location to satisfy an order. You can specify at the item level whether warehouse suggestions display the primary unit of measure or the dual unit of measure. Picking with dual units of measure also specifies whether the entire quantity has been shipped for a sales order line or whether the line requires splitting.
For example, if a sales order for 100 pounds and 10 cases is hard committed, the picking option enables 10 cases that weigh 98 pounds to satisfy the order without creating a line for 2 pounds. Assuming that the tolerances are met and that you are using the picking option, the system would not split the sales order. Picking with dual units of measure affects other areas of the system in these ways:
|
| Tolerance | After you specify a dual unit of measure for an item, you can specify whether the system must check for tolerance amounts during any inventory transaction. Tolerances ensure that when you enter secondary quantities on a transaction that the primary and secondary quantities are within a certain percentage of the standard conversion. For example, if a case of an item weighs approximately 100 pounds and you set the tolerance to 3 percent, the weight must be between 97 and 103 pounds to fall within the tolerance level.
The system does not check tolerances when using the Inventory Adjustments (P4114) or the Inventory Issues (P4112) programs. |
The system converts the dual unit of measure using the special handling code. For a dual unit of measure item, the special handling code of the primary and secondary units of measure is different. For similar units of measure, such as ounces, pounds, and tons, the special handling code is the same. For example, weight might have pounds as the dual unit of measure. A dual transaction quantity could be entered for tons. In this case, pounds and tons must have the same special handling code.
The system uses these tables when processing information for dual units of measure:
-
F4101
-
F4111
-
F41021
-
F4602
3.2.1.3 Classification Codes
You can use classification codes to group items with similar characteristics so that you can work with the entire group at the same time. For example, grouping items provides good sales analysis information. You can assign classification codes to items when you enter item master information or when you enter item branch/plant information. In either case, you assign classification codes on the Category Codes form.
Several categories of classification codes are available, and each category represents a different item classification or property type, such as shipping conditions. From the shipping conditions category, you can select a code that indicates the condition, such as fragile, under which you ship an item.
Four types of classification codes are available. Each type relates to one or more of these systems:
-
JD Edwards EnterpriseOne Sales Order Management
-
JD Edwards EnterpriseOne Procurement
-
JD Edwards EnterpriseOne Inventory Management
-
JD Edwards EnterpriseOne Warehouse Management
-
JD Edwards EnterpriseOne Transportation Management
3.2.1.4 Attachments
Typically, you enter attachments for an item to provide graphical information, such as a picture or diagram. Unlike item notes, you can view and print attachments regardless of the language in which those attachments were entered. Therefore, if you attach a diagram that contains text to an item, the system displays the text only in the language in which the text was entered.
You can set up an attachment, by selecting Attachments from the Form menu of the Item Notes Revisions form or selecting Internal Attachment from the Row menu on the Work With Item Master Browse form.
3.2.2 Understanding Manufacturing Information
When you enter item master information, you define manufacturing information about an item, including:
-
Requirements planning information to develop an inventory planning forecast that you use to run the distribution and manufacturing operations.
-
Leadtime information to calculate the time frames that are necessary to assemble or manufacture items.
-
Engineering information about the drawing plans for an item.
3.2.2.1 Item Grade and Potency Information
After you enter item master information or item branch/plant information, you specify whether grade or potency applies to an item. You enter a grade to classify items (for example, grade A eggs and grade B eggs). You enter potency to specify an active ingredient in a product (for example, the percentage of alcohol in cough syrup).
When you activate grade or potency control for an item, you can enter a standard grade or potency for the item and a range of acceptable values. If you receive or issue items that are not within the range, the system provides a warning message. You cannot complete sales transactions on items that are not within the range of acceptable values.
You can specify an acceptable grade or potency range for each of the customers using preference profiles. Item grade and potency are applicable only to items that are produced in lots. You cannot use both grade control and potency control for the same item. You can specify the grade or potency of all items in a lot on the Work With Lot Master form. If you do not specify a grade or potency, the system uses the standard grade or potency from the Additional System Information form.
3.2.2.2 Blend Management
One of the key processes in JD Edwards EnterpriseOne Blend Management requires mixing additive substances into a blend to achieve a desired effect. For example, when you blend wine, you can mix in malic acid to influence the flavor.
You set up additives in the system with Item Master and Item Branch records. When you set up these records, you can define operational and cumulative maximum and minimum thresholds for the active ingredients of any blend additive. The system uses the operational threshold value to evaluate the extended ingredient amount for the current operation. The cumulative threshold applies to the PPM quantity for the accumulated additives for an operation.
If the operational or cumulative ingredient quantity exceeds the maximum and minimum threshold for an active operation, the system issues a warning. If the ingredient quantity exceeds the threshold for actual and closed operations, the system issues an error. For either comparison, the system retrieves the threshold values from the Item Branch table.
3.2.2.3 Demand Flow®
Use the JD Edwards EnterpriseOne Demand Flow® Manufacturing system to specify that an end item belongs to the Demand Flow process. You specify a demand flow end item to suppress Material Requirements Planning (MRP) messages and to facilitate uploading DFM items to the DFM system.
If you are going to include an end item in the line design, you must specify that the end item is part of the Demand Flow® process. Multimode manufacturers who use both MRP and Demand Flow® processes must specify which end items are part of the Demand Flow® process.
3.2.3 Prerequisites
Before you complete the tasks in this section, you must:
-
Verify that Branch/Plant ALL is available.
The system uses Branch/Plant ALL as a source of default information.
-
Set up the special handling code in the UDC table (00/UM).
-
Specify the values for unit of measure in the Sales Price Retrieval UOM and Purchase Price Retrieval UOM fields on the System Constants form of the Branch/Plant Constants program (P41001).
See Setting Up Constants.
-
Specify a primary item identifier on the Branch/Plant Constants form.
3.2.4 Forms Used to Enter Item Master Information
| Form Name | FormID | Navigation | Usage |
|---|---|---|---|
| Work With Item Master Browse | W4101E | Inventory Master/Transactions (G4111), Item Master | Review items. |
| Item Master Revisions | W4101A | On the Work With Item Master Browse form, click Add. |
|
| Item Master Alternative Description | W41016WA | On the Work With Item Master Browse form, select Item Alt Desc from the Row menu. | Enter alternate descriptions. |
| Work With Item Notes | W40163B | On the Work With Item Master Browse form, select a record, and then select Item Notes from the Row menu. | Review item notes. |
| Item Notes Revisions | W40163A | On the Work With Item Notes form, click Add. | Enter notes for items. |
| Category Codes | W4101B | On the Work With Item Master Browse form, select Category Codes from the Row menu. | Add classification codes to items. |
| Work With Item Unit of Measure Conversions | W41002A | Item Revisions (G4112), Item Master U/M Conversion | Review item unit of measure conversions. |
| Item Unit of Measure Conversions | W41002D | On the Work With Item Unit of Measure Conversions form, click Add.
On the Item Master Revisions form, select Conversions from the Form menu. |
|
| Additional System Information | W4101C | On the Work With Item Master Browse form, select Add System Info from the Row menu. | Set up manufacturing information. |
3.2.5 Setting Processing Options for Item Master (P4101)
Processing options enable you to specify the default processing for programs and reports.
3.2.5.1 Defaults
- 1. Primary Unit of Measure
-
Specify a user-defined code from UDC table (00/UM) that identifies the primary unit of measure that the system uses. If you leave this processing option blank, the system uses EA (each).
- 2. Weight Unit of Measure
-
Specify a user-defined code from UDC table (00/UM) that identifies the unit of measure for weight that the system uses. If you leave this processing option blank, the system uses LB (pounds).
- 3. Volume Unit of Measure
-
Specify a user-defined code from UDC table (00/UM) that identifies the unit of measure by metric conversion for ambient volume. If you leave this processing option blank, the system uses GA (gallons).
- 4. Template
-
Specify a template name to use when entering items in the Item Master program (P4101). This name is case-sensitive. If you leave this field blank, the system does not use a template.
3.2.5.2 Process
- 1. Notes From Date
-
Specify the effective-from date that the system uses in the Item Notes table (F4016). If you leave this processing option blank, the system uses the system date.
- 2. Notes Thru Date
-
Specify the effective-through date that the system uses in the F4016 table. If you leave this processing option blank, the system uses the last day of the default century.
- 3. Category Codes
-
Specify whether the system displays the Category Codes form when you add or change information on the Item Master Revisions form. Values are:
Blank: Do not display.
I: Display.
- 4. Additional System Information
-
Specify whether the system displays the Additional System Information form when you add or change information on the Item Master Revisions form. Values are:
Blank: Do not display.
I: Display.
- 5. Storage/Shipping
-
Specify whether the system displays the Storage/Shipping form when you add or change information on the Item Master Revisions form. Values are:
Blank: Do not display.
1: Display.
- 6. Cost Revisions (Conditional)
-
Specify whether the system displays the Cost Revisions form when you add or change information on the Item Master Revisions form. Values are:
Blank: Do not display.
1: Display.
To display the Cost Revisions form, you must also enter 1 in the Inventory Cost Level field to on the Item Master Revisions form.
- 7. Price Revisions (Conditional)
-
Specify whether the system displays the Price Revisions form when you add or change information on the Item Master Revisions form. Values are:
Blank: Do not display.
1: Display.
To display the Price Revisions form, you must also enter 1 in the Sales Price Level field on the Item Master Revisions form.
- 8. Unit Of Measure Conversions (Conditional)
-
Specify whether the system displays the Unit of Measure form when you add or change information and when the system performs the unit of measure conversations at the item level. Values are:
Blank: Do not display.
1: Display.
- 9. Item Branch
-
Specify whether the system displays the Item Branch form when you add or change information on the Item Master Revisions form. Values are:
Blank: Do not display the Item Branch form.
1: Display the Item Branch form, but return to the Item Master form.
2: Display and remain on the Item Branch form.
- 10. Attachments
-
Specify whether the system displays the Item Notes form when you select a media object on the Work With Item Master Browse form. Values are:
Blank: Display only the internal attachments.
1: Display the Item Notes form.
- 11. Use Templates
-
Specify whether you want to use templates for segmented items. Values are:
Blank: Do not use templates.
1: Use templates.
3.2.5.3 Global Update
This processing option enables you to update changes that are made to the second or third item numbers to records in selected tables.
- 1. Transfer Changes
-
Specify which tables the system updates when you make changes to item numbers in the item branch records. Use UDC table (40/IC) to compile the list of tables. Values are:
Blank: The system does not update any tables.
1: The system updates only those tables that contain item branch information with changes to the second and third item numbers.
2: The system updates only selected tables that contain item branch information with changes to the second and third item numbers.
3.2.5.4 Versions
If you leave any of the following processing options blank, the system uses version ZJDE0001.
- 1. Item Availability (P41202)
-
Specify the version of the P41202 program to use.
- 2. Item Branch (P41026)
-
Specify the version of the P41026 program to use.
- 3. Cost Revisions (P4105)
-
Specify the version of the P4105 program to use.
- 4. Segmented Item Availability (P41206)
-
Specify the version of the P41206 program to use.
- 5. Item Segment Selection (P410015)
-
Specify the version of the P410015 program to use.
3.2.5.5 Interop
- 1. Transaction Type
-
Specify a user-defined code from UDC table (00/TT) that identifies the default transaction type, such as an invoice or a sales order, the system uses. If you leave this processing option blank, the system does not perform outbound interoperability processing.
- 2. Before/After Image Processing
-
Specify whether the system creates a record of a transaction after the transaction is changed, or whether the system creates records of a transaction before and after a transaction is changed. Values are:
Blank: Create a record of a transaction after changes.
1: Create two records; one record before changes and one record after changes.
3.2.5.6 Style
- 1. Additional Style Item Information
-
Specify whether the system displays the Additional Style Item Information form (WCW45A) when you add or change information on the Item Master Revisions form for a style item. Values are:
Blank: Do not display the form.
1: Display the form.
- 2. Composition
-
Specify whether the system displays the Work With Composition form (WCW44A) when you add or modify style item information on the Item Master Revisions form. Values are:
Blank: Do not display the form.
1: Display the form.
- 3. Structure Definition
-
Specify whether the system displays the Item Structure Definition form (WCW02C) when you add information on the Item Master Revisions form (W4101A) for a style item. Values are:
Blank: Do not display the Item Structure Definition form.
1: Display the Item Structure Definition form.
3.2.6 Setting Up Item Information
Access the Item Master Revisions form.
When you enter a new item, first you must enter information that identifies the item. Next, you must enter an item description and the text. The item description and text represent the information upon which you are most likely to search when trying to locate the item. Each item can have up to three identifiers that you use to locate the item. These identifiers can represent universal product codes (UPCs), bar codes, supplier numbers, or a user-defined value.
Item processing information consists of values that control how the JD Edwards EnterpriseOne Inventory Management system processes the item. These values pertain to stocking, packaging, accounting transactions, system interfaces, and so on.
|
Note: You can also translate item descriptions and search text into multiple languages to locate items using alternate languages. The system administrator can make descriptions in other languages available based on user profiles. |
If you revise the second and third item identifiers, the program can transfer these changes to other selected files, depending on how you activate the related processing option.
You can also specify the persons or businesses that are responsible for the item, including the buyers, planners, and preferred carriers. Before you can assign responsible persons or businesses to an item, each person and business must have an address book number in the JD Edwards EnterpriseOne Address Book system.
3.2.6.1 Basic Item Data
Select the Basic Item Data tab.
- Item Number
-
Enter an identifier for an item.
- Catalog Number
-
Enter an identifier for an item.
- Description
-
Enter a user-defined description of the item. The system will use this value to search for items.
- Search Text
-
Enter a user-defined phrase that describes the item. Enter specific and descriptive text that a user might enter when searching for an item. The system will use this value to search for items.
In single-byte environments, where computer storage space can hold only Latin-based language character sets, the system inserts the first 30 characters from the item's description if you do not enter search text.
In double-byte environments, where computer storage space can hold more complex language character sets (in languages such as Japanese, Chinese, and Korean), you must complete this field. It is a single-byte field that you complete with single-byte characters to phonetically represent the item description (which can be single-byte, double-byte, or both).
- Stocking Type
-
Enter a code from UDC table (41/I) that specifies how you stock an item, for example, as finished goods or as raw materials. Some stocking types are hard-coded and should not be changed.
In UDC table (41/I), the first character in the Description 2 field indicates whether the item is purchased, (P), or manufactured, (M).
- GL Class
-
Enter a code from UDC table (41/9) that specifies which general ledger accounts receive the monetary amount of inventory transactions for this item.
- Planner Number
-
Enter the address number of the material planner for this item.
- Buyer Number
-
Enter the address number of the person responsible for setting up and maintaining the correct stocking levels for the item.
- Backorders Allowed
-
Select this check box to enable backorders for this item. You can enable backorders by item in the Item Master (P4101) program or the Item Branch/Plant (P41026) program, by customer in the Customer Billing Instructions program (P03013), or by branch/plant in the Branch/Plant Constants program (P41001).
- Check Availability
-
Select this check box to enable availability checking. You might want to enable availability checking for certain items. For other items, if you assume that an adequate supply is available, leave availability checking disabled.
- Inventory Cost Level
-
Enter code for UDC table (H40/CL) that indicates whether the system maintains one overall inventory cost for the item, a different cost for each branch/plant, or a different cost for each location and lot within a branch/plant. The system maintains inventory costs in the Cost Ledger File (F4105). Values are:
1: Item level
2: Item/Branch level
3: Item/Branch/Location level
- Purchase Price Level
-
Enter code for UDC table (H40/PP) that indicates where to retrieve the purchase price for an item when you enter a purchase order. Values are:
1: Use the supplier/item price from the Purchase Price table (F41061).
2: Use the supplier/item/branch price from the Purchase Price table (F41061).
3: Use the inventory cost from the Cost Ledger File (F4105). This cost is based on the inventory cost level and the purchasing cost method you specify for the item.
The first two codes are applicable only if you set up supplier costs in the Procurement system. If you do not set up supplier costs, the system uses the inventory cost as the default for the purchase order.
3.2.6.2 Additional Info
Select the Additional Info. tab.
- A Ranking,B Ranking,C Ranking, and D Ranking None
-
Enter a code that specifies this item's ABC ranking by sales amount. Values are:
A: Assign this item to the first (largest) amount ranking.
B: Assign this item to the second (intermediate) amount ranking.
C: Assign this item to the third (smallest) amount ranking.
D: Do not include this item when you run ABC analysis.
Three types of ABC analysis are available: sales, margin, and on-hand value. Within each type of analysis, you can have three groups: A, B, and C.
The ABC code fields contain a percentage that tells the system how to define the A, B, and C groups for categorizing items during ABC analysis. Each group measures a total within the type of analysis.
For all groups, the system compares the appropriate sales, margin, or on-hand value totals of a single item to the appropriate total for all items and calculates the value of each item. An item's value is its percentage of the appropriate total. The system then arranges the values of all items from highest to lowest value and accumulates the percentages. The next step depends on the group:
A group: If an item's value causes the accumulated total to exceed the A accumulated percentage, the system assigns the item to the B group.
B group: When the accumulated total reaches the percentage that you entered for items in the A group, the system continues adding values until it reaches the percentage that you entered for items in the B group. The system assigns all items for which the value falls between the A and B percentages to the B group.
C group: If an item's value causes the accumulated total to exceed the B accumulated percentage, the system assigns the item to the C group. The percentage that you usually enter for the C group is 999.
3.2.6.3 Lot Processing
Select the Lot Processing tab.
- Serial No. Required (serial number required)
-
Enter the code that specifies whether you must attach a serial number to this item at receipt or sale for basic serial number processing, or whether memo lot information is required for advanced serial number processing. Advanced serial number processing enables you to use a serial number to track an item through purchasing and sales. For basic serial number processing, the values are:
Y: The system requires a serial number for all transactions pertaining to this item in related inventory, sales, and purchase order programs.
N: The system does not require a serial number.
To specify lots for items with serial numbers, the values are:
3: Supplier lot number is required (purchasing only).
4: Supplier lot number is required (purchasing only). Memo lot 1 is also required.
5: Supplier lot number is required (purchasing only). Memo lot 1 and memo lot 2 are also required.
6: Non-serialized item number.
Values 3 through 5 specify whether lot assignment is required for items with serial numbers. You can require assignment of up to three lot numbers, including supplier lot, memo lot 1, and memo lot 2.
- Lot Status Code
-
Enter a user-defined code from UDC table (41/L) that indicates the status of the lot. If you leave this field blank, the system indicates that the lot is approved. All other codes indicate that the lot is on hold. You can assign a different status code to each location in which a lot resides on Item/Location Information or Location Lot Status Change.
- Lot Process Type
-
Enter the user-defined code from UDC table (H41/SR) that specifies whether lot or serial number is assigned. Lot and serial number processes use the F4108 table. Values are:
0: Lot assignment is optional. You can manually assign numbers. Quantity can be greater than one. (default)
1: Lot assignment is required. The system assigns numbers using the system date in YYMMDD format. Quantity can be greater than one.
2: Lot assignment is required. The system assigns numbers in ascending order using next numbers. Quantity can be greater than one.
3: Lot assignment is required. You must manually assign numbers. Quantity can be greater than one.
4: Serial number assignment is optional except during shipment confirmation. Quantity must not exceed one.
5: Serial number assignment is required. The system assigns numbers using the system date in YYMMDD format. Quantity must not exceed one.
6: Serial number assignment is required. The system assigns numbers in ascending order using next numbers. Quantity must not exceed one.
7: Serial number assignment is required. You must manually assign numbers. Quantity must not exceed one.
- Country of Origin Required
-
Select the checkbox to indicate that the system requires a country of origin when you create a new lot or serial number. The checkbox is enabled only when the value for Lot Process Type is 1-3 or 5-7.
Note:
The system disables the Country of Origin Required checkbox when you identify an item as bulk. - Commitment Date Method
-
Enter a user-defined code from UDC table (H40/CD) that specifies which date the system uses to commit inventory when an item is committed by date. The default value is 01 (lot expiration date). The date fields are stored in the F4108 table.
- Lot Expiration Date Method
-
Enter the code that indicates which method the system uses for calculating the expiration date for a lot. Values are:
1: On-hand date plus shelf life days
2: Based on date plus shelf life days
3: Least expiration date of active components
- Shelf Life Days
-
Enter the number of days that an item can remain in inventory before it expires. The system adds this number to the date that the item is received to determine the expiration date for the item. If you do not enter a value here, you must enter an expiration date each time that you receive the lot item.
- Best Before/Sell By Default Days
-
Enter the number of days that an item can remain in inventory before it should be consumed. The system uses the number that you enter to calculate the best-before date using two different methods, depending on whether the number that you enter in this field is positive or negative. If the value is positive, the system adds the days to the based-on date to determine the best-before date for the lot. If the number is negative, the system subtracts the days from the lot expiration date to determine the best-before date.
- Manufacturing Effective Days
-
Enter the number of days that an item must remain in inventory before the system considers the item to be available for sales and manufacturing commitments. To calculate the lot-effective date, the system adds the number that you enter in this field to the based-on date that appears in the F4108 table.
- Purchasing Effective Days
-
Enter the number of days after a purchased item is received that a lot becomes available. The system uses this number when calculating and displaying the Effective Date field in the Purchase Orders program (P4310) and the PO Receipts program (P4312).
- User Lot Date 1–5 Default Days
-
Enter the number of days that the system uses to calculate the value for the User Lot Date 1 through User Lot Date 5 fields of the F4108 table. The system calculates the values using one of two methods, depending on whether the number that you enter in this field is positive or negative. If you enter a positive value, the system adds the days to the based-on date to determine the value for the fields. If you enter a negative value, the system subtracts the days from the lot expiration date to determine the value for the fields.
3.2.7 Entering Alternate Descriptions
Access the Item Master Alternative Description form.
Figure 3-2 Item Master Alternative Description form

Description of "Figure 3-2 Item Master Alternative Description form "
After you enter item identification and processing information, you can locate the item and enter a description and search text in one or more languages. This alternate text is available in the language setup at the system level or in the user profile.
- Language Preference
-
Enter a user-defined code from UDC table (01/LP) that specifies the language to use on forms and printed reports. Before you specify a language, a code for that language must exist at either the system level or in the user preferences.
3.2.8 Attaching Messages to Items
Access the Item Master Revisions form.
After you enter basic item information, you can attach predefined messages to an item. Other users can also view or print this messages when working with the item. Item messages are predefined, so you can attach the same message to multiple items.
- Print Message
-
Enter a code from UDC table (40/PM) that represents a predefined message from the Print Message Revisions form. You can print the message on sales orders, purchase orders, and so forth.
- Item Flash Message
-
Enter a code from UDC table (40/FL) that specifies the message the system displays each time that someone works with the item.
When you work with an item that has a flash message, the message appears next to the item number or the system highlights the item number. If the number is highlighted, you can access the message by placing the cursor on the item number and performing the appropriate function called for by the program.
3.2.9 Entering Notes for Items
Access the Item Notes Revisions form.
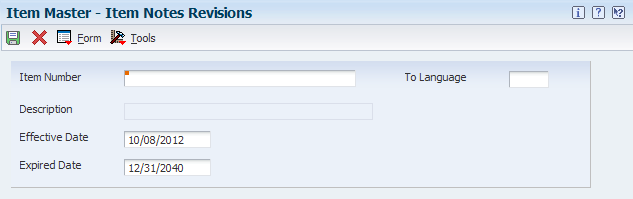
Enter item notes to provide additional information about an item, such as information about discounts or deliveries. Item notes are not predefined. If notes already exist for an item, a paper clip button appears next to the item number on the Work With Item Notes form. The JD Edwards EnterpriseOne Inventory Management system stores item notes by the language in which they are entered so that you can print the notes on documents (such as invoices and purchase orders) in multiple languages
- Item Number
-
Enter a number that the system assigns to an item. It can be in short, long, or third-item number format.
- Effective Date
-
Enter the date when a transaction, contract, obligation, preference, or policy rule becomes effective.
- Effective Date
-
Enter the date on which a transaction, text message, agreement, obligation, or preference has expired or been completed.
3.2.10 Adding Classification Codes to Items
Access the Category Codes form.
3.2.10.1 Sales Classification Codes
- Sales Catalog Section
-
Enter a code from UDC table (41/S1) that represents an item property type or classification, such as color or material content. The system uses this code to sort and process like items.
This field is one of 10 classification categories that are available primarily for sales purposes.
- Sub Section
-
Enter a code from UDC table (41/S2) that represents an item property type or classification, such as color or material content. The system uses this code to sort and process like items.
This field is one of 10 classification categories that are available primarily for sales purposes.
- Sales Category Code 3
-
Enter a code from UDC table (41/S3) that represents an item property type or classification, such as color or material content. The system uses this code to sort and process like items.
This field is one of 10 classification categories that are available primarily for sales purposes.
- Sales Category Code 4
-
Enter a code from UDC table (41/S4) that represents an item property type or classification, such as color or material content. The system uses this code to sort and process like items.
This field is one of 10 classification categories that are available primarily for sales purposes.
- Sales Category Code 5
-
Enter a code from UDC table (41/S5) that represents an item property type or classification, such as color or material content. The system uses this code to sort and process like items.
This field is one of 10 classification categories that are available primarily for sales purposes.
- Preferred Sales Carrier
-
Enter the address number for the preferred carrier of the item. The supplier or the organization might prefer to assign item responsibility to a certain carrier because of route or special handling requirements.
This value serves as the carrier default when you enter a purchase order for the item.
- Item Pool Code
-
Enter a code from UDC table (41/P0) that represents an item property type or classification, such as commodity type or planning family. The system uses this code to sort and process like items.
This field is one of six classification categories that are available primarily for purchasing purposes.
- Category Code 6
-
Enter a code from UDC table (41/S6) that represents an item property type or classification, such as color or material content. The system uses this code to sort and process like items.
This field is one of 10 classification categories that are available primarily for sales purposes.
- Category Code 7
-
Enter a code from UDC table (41/S7) that represents an item property type or classification, such as color or material content. The system uses this code to sort and process like items.
This field is one of 10 classification categories that are available primarily for sales purposes.
- Category Code 8
-
Enter a code from UDC table (41/S8) that represents an item property type or classification, such as color or material content. The system uses this code to sort and process like items.
This field is one of 10 classification categories that are available primarily for sales purposes.
- Category Code 9
-
Enter a code from UDC table (41/S9) that represents an item property type or classification, such as color or material content. The system uses this code to sort and process like items.
This field is one of 10 classification categories that are available primarily for sales purposes.
- Category Code 10
-
Enter a code from UDC table (41/S0) that represents an item property type or classification, such as color or material content. The system uses this code to sort and process like items.
Use this field as one of 10 classification categories that are available primarily for sales purposes.
3.2.10.2 Purchasing Classification Codes
- Commodity Class
-
Enter a code from UDC table (41/P1) that represents an item property type or classification, such as commodity type or planning family. The system uses this code to sort and process like items.
This field is one of six classification categories that are available primarily for purchasing purposes.
- Commodity Sub Class
-
Enter a code from UDC table (41/P2) that represents an item property type or classification, such as commodity type or planning family. The system uses this code to sort and process like items.
This field is one of six classification categories that are available primarily for purchasing purposes.
- Supplier Rebate Code
-
Enter a code from UDC table (41/P3) that represents an item property type or classification, such as commodity type or planning family. The system uses this code to sort and process like items.
This field is one of six classification categories that are available primarily for purchasing purposes.
- Master Planning Family
-
Enter a code from UDC table (41/P4) that represents an item property type or classification, such as commodity type or planning family. The system uses this code to sort and process like items.
This field is one of six classification categories that are available primarily for purchasing purposes.
- Landed Cost Rule
-
Enter a code from UDC table (41/P5) that indicates the landed cost rule for an item.
The landed cost rule determines purchasing costs that exceed the actual price of an item, such as broker fees or commissions. You set up landed cost rules on the Landed Cost Revisions form.
3.2.10.3 Inventory and Transportation Classification Codes
The JD Edwards EnterpriseOne Transportation Management system uses the Shipping Conditions Code and Shipping Commodity Class fields.
- Shipping Conditions Code
-
Enter a code from UDC table (41/C) that represents an item property type or classification, such as special shipping conditions. The system uses this code to sort and process like items.
This field is one of three classification categories that are available primarily for inventory and shipping purposes.
- Shipping Commodity Class
-
Enter a code from UDC table (41/E) that represents an item property type or classification, such as international shipment handling. The system uses this code to sort and process similar items. This field is one of three classification categories that are available primarily for inventory and shipping purposes.
- Cycle Count Category
-
Enter a code from UDC table (41/8) that represents the family or cycle in which an item is counted. Cycle counting means that you count different inventory items at different times. Cycle codes commonly represent item values, item locations, time frames, or product groups.
3.2.10.4 Warehouse Classification Codes
- Item Dimension Group
-
Enter a code from UDC table (41/01) that identifies a group of items that share the same dimensions. An item dimension group defines the dimensions for all items that belong to the group. After you set up an item dimension group, you can assign items to the group through the Classification Codes program (P41011).
- Warehouse Process Grp 1 through Warehouse Process Grp 3 (warehouse process group)
-
Enter codes from UDC table (41/02) that identify a group of items that you want to move the same way. A process group determines what movement instructions the system uses for putaway, picking, and replenishment. You use the Classification Codes program (P41011) to assign items to process groups.
3.2.11 Entering Default Units of Measure for Items
Access the Item Master Revisions form.
After you enter basic item information, such as the item identifier and the item's primary unit of measure, you must provide the system with more specific unit of measure information for the different distribution processes.
3.2.11.1 Weights and Measures
Select the Weights and Measures tab.
- Primary
-
Enter a code from UDC table (00/UM) that indicates the primary unit of measure for the item. The primary unit of measure must be the smallest unit of measure in which you handle the item.
This is the PSAU of measure that the system uses to store all inventory. If you change the primary unit of measure, the conversion factors in the item-level conversion table are no longer valid.
The default value for this field is the unit of measure that you specify for the item on the Item Master Revisions form.
- Secondary
-
Enter a code from UDC table (00/UM) that indicates an alternate unit of measure for the item.
- Purchasing
-
Enter a code from UDC table (00/UM) that identifies the unit of measure in which you usually purchase the item.
- Pricing
-
Enter a code from UDC table (00/UM) that indicates the unit of measure in which you usually price the item.
- Shipping
-
Enter a code from UDC table (00/UM) that indicates the unit of measure in which you usually ship the item.
- Production
-
Enter a code from UDC table (00/UM) that indicates the unit of measure in which you produce the item.
- Component
-
Enter a code from UDC table (00/UM) that indicates the unit of measure for an item when the item serves as a component, for example, for a bill of material or work order parts list.
- Weight
-
Enter a code from UDC table (00/UM) that identifies the unit of measure that the system uses to indicate weight for this item. As weight standards, you can specify ounces, grams, kilograms, and so on. The system uses this unit of measure for the item or overrides it for an individual item or container.
The default value for this field is the weight unit of measure that you specify in processing options for the Item Master program.
- Volume
-
Enter a code from UDC table (00/UM) that indicates the unit of measure by metric conversion for ambient volume. For example, the unit of measure code for a gallon might be GL, or for a liter it might be LT.
3.2.12 Defining Item Unit of Measure Conversions
Access the Item Unit Of Measure Conversions form.
Figure 3-5 Item Unit Of Measure Conversions form
Description of "Figure 3-5 Item Unit Of Measure Conversions form"
After you enter the default unit of measure information, you must provide the system with unit of measure conversion information if the item has multiple units of measure (for example, an item that you stock in boxes and in crates).
You can update conversion information only for items that already exist in the system. For new items, you must select OK to save the item, and then select the item on the Work With Item Master Browse form, and return to the Item Master Revisions form.
- From UoM (from unit of measure)
-
Enter a code from UDC table (00/UM) that identifies the unit of measure for an item. For example, the unit of measure can be eaches, cases, or boxes.
- Quantity
-
Enter the factor that the system uses to convert one unit of measure to another unit of measure.
- To UoM (to unit of measure)
-
Enter a code from UDC table (00/UM) that indicates a secondary unit of measure.
3.2.13 Specifying a Dual Unit of Measure for an Item
Access the Item Master Revisions form.
3.2.13.1 Weights and Measures
Select the Weights and Measures tab.
- Secondary
-
Enter a code from UDC table (00/UM) that indicates an alternate unit of measure for the item.
3.2.13.2 Additional Info.
Select the Additional Info. tab.
- Dual Unit of Measure Item
-
Use this option to specify whether the system must maintain inventory balances and record transactions for an item in a secondary unit of measure that does not have a fixed conversion to the primary unit of measure. Typically, you select this option when the item is ordered or sold by a packaged quantity and priced by weight or volume.
Note:
For a dual unit of measure item, the system might require a tolerance check for inventory transactions (excluding inventory adjustments) between the primary unit of measure and the secondary unit of measure. - Dual Picking Process
-
Specify whether the system uses the primary or secondary unit of measure for a dual unit of measure item for these processes:
-
Picking.
-
Sales order availability checking.
-
Committing inventory for sales.
-
Splitting purchase order lines.
To use the primary unit of measure, do not select this option. To use the secondary unit of measure, select this option.
-
- Dual Unit of Measure Tolerance
-
Specify whether the system must maintain inventory balances and record transactions for an item in a secondary unit of measure that does not have a fixed conversion to the primary unit of measure. Typically, you select this option when the item is ordered or sold by a packaged quantity and priced by weight or volume.
Note:
For a dual unit of measure item, the system might require a tolerance check for inventory transactions (excluding inventory adjustments) between the primary unit of measure and the secondary unit of measure. - Dual Tolerance Percentage
-
Enter a number, expressed as a percentage, that the system uses to ensure that the primary and dual quantities on a transaction are within a certain range of the standard conversion. For example, assume that you enter 3 percent as the dual tolerance for an item and that a case of the item weighs approximately 100 pounds. When the system confirms shipment for a case of the item, you must enter a weight between 97 and 103 pounds to be within dual tolerance. The system does not check dual tolerance for inventory adjustments due to evaporation or shrinkage.
3.2.14 Setting Up Search Sequence Using Price Units of Measure
Access the Item Unit Of Measure Conversions form.
Figure 3-6 Item Unit Of Measure Conversions form

Description of "Figure 3-6 Item Unit Of Measure Conversions form"
You can specify multiple units of measure to locate base prices and adjustments. For example, you can specify that pallets are the first unit of measure for the system to use when searching, then cases as the second unit of measure, and then boxes. You can set up as many as eight sequences for a specific item and the search sequences do not have to follow a certain progression.
The system uses the conversion factors to convert adjustments into the other unit of measure. For example, if the system locates an adjustment using the transaction unit of measure, the system also displays the pricing unit of measure. The system uses the unit of measure conversion factors to recalculate the adjustment in the pricing unit of measure
You can set up two price unit of measure sequences: one for sales and another for procurement.
The system uses these tables for processing search sequences using units of measure:
-
F41001
-
F41002
-
F4072
-
F4106
- Sales UOM Seq. (sales unit of measure sequence)
-
Enter a code that determines which from level units of measure the system uses when searching for base prices and adjustments. This code also determines the order in which the system searches for the units of measure. The system always searches first for the unit of measure with the smallest sales price code value.
- Procurement UOM Seq. (procurement unit of measure sequence)
-
Enter a code that determines the units of measure for the from level that the system uses when searching for purchase prices and adjustments. This code also determines the order in which the system searches for units of measure. The system first searches for units of measure that have the lowest purchase price code value.
|
See Also: |
3.2.15 Setting Up Manufacturing Information
Access the Additional System Information form.
Figure 3-7 Additional System Information form
Description of "Figure 3-7 Additional System Information form"
3.2.15.1 Manufacturing Data
Select the Manufacturing Data tab.
- Order Policy Code
-
Enter a user-defined code from UDC table (H41/OP) that specifies the rules for inventory reordering in the JD Edwards EnterpriseOne Requirements Planning system and the JD Edwards EnterpriseOne Procurement system. The hard-coded values are:
0: Reorder point [not planned by Master Production Schedule (MPS), Material Requirements Planning (MRP), or Distribution Requirements Planning (DRP)].
1: Lot-for-lot or as required.
2: Fixed order quantity.
3: Economic order quantity (EOQ).
4: Periods of supply.
5: Rate scheduled item.
- Value Order Policy
-
Enter a hard-coded order policy code. Values are:
2: Fixed order quantity.
4: Periods of supply. This value represents the number of days of net requirements that the system uses to determine order size.
5: Rate scheduled item. This value represents the desired inventory level. When the ending available quantity is less than the desired inventory level, the system then issues an increase rate to message. When the ending available quantity is greater than the desired inventory level, the system then issues a decrease rate to message.
Note:
If you enter a order policy code other than 2,4, or 5, the value has no significance in MRP. - Planning Code
-
Enter a user-defined code from UDC table (H41/MP) that indicates how MPS, MRP, or DRP processes this item. The hard coded values are:
0: Not planned by MPS, MRP, or DRP.
1: Planned by MPS or DRP.
2: Planned by MRP.
3: Planned by MRP with additional independent forecast.
4: Planned by MPS, Parent in Planning Bill.
5: Planned by MPS, Component in Planning Bill.
- Planning Fence Rule
-
Enter a user-defined code from UDC table (34/TF) that the system uses in conjunction with the Planning Time Fence Days field to determine how forecast demand or actual customer demand is used. Values are:
C: Customer demand before, greater of forecast or customer demand after.
F: Forecast before, forecast plus customer demand after.
G: Greater of forecast or customer demand before, forecast after.
S: Customer demand before, forecast after.
1: Zero before, forecast after.
3: Zero before, forecast plus customer demand after.
For example, if you enter 5 in the Planning Time Fence Days field and S in this field, then the system uses only customer demand for the regeneration for the first 5 days. After 5 days, the system uses the forecast for the regeneration.
- Planning Fence
-
Enter the number of days that the system uses in conjunction with the time fence rule to determine how the forecast is used. Enter the number of days after the start date when the time fence rule changes from the first rule to the second rule.
For example, if the planning fence rule is S, the generation start date is 01/03/05, and the planning time fence is three days, the system plans using customer demand through 01/06/05. Beginning on 01/07/05, the system plans using the forecast.
Note:
The system does not count the generation start date; that is, the day after the generation start date is day 1.For manufactured items, the system counts working days, as defined in the calendar in the JD Edwards EnterpriseOne Shop Floor Management system. For purchased items, the system counts calendar days.
- Freeze Fence
-
Enter the number of days from the generation start date within which the system does not generate action messages.
For example, if the generation start date is 01/03/05, and the freeze time fence is three days, the planning system does not generate messages with required dates that are before or equal to 01/06/05.
Note:
The system does not count the generation start date; that is, the day after the generation start date is day one.For manufactured items, the system counts working days, as defined in the calendar in the JD Edwards EnterpriseOne Shop Floor Management system.
For purchased items, the system counts calendar days.
- Message Display Fence
-
Enter the number of days after the generation start date within which the system should display order messages.
For example, if the generation start date is 01/01/05, and the message time fence is 30 days, the system displays messages with dates before or equal to 01/31/05. The system does not display messages with dates of 02/01/05 or later. However, the planning horizon for orders continues past this date and is reflected in available-to-promise totals.
Note:
The system does not count the generation start date; that is, the day after the generation start date is day one.For manufactured items, the system counts working days, as defined in the calendar in the JD Edwards EnterpriseOne Shop Floor Management system.
For purchased items, the system counts calendar days.
- Suppress MRP Messages (suppress material requirements planning messages)
-
Specify whether you want the system to suppress MRP messages. You can specify 0 or 1, regardless of whether the item is defined as MRP or Demand Flow. Values are:
0: Suppress MRP messages.
1: Do not suppress MRP messages.
- Issue and Receipt
-
Specify a user-defined code from UDC table (43/IR) that indicates whether an item is received at the time of inventory issues or whether the system uses the Receipt Routing Movement and Disposition program (P43250). Values are:
0: The system does not perform any actions.
1: The system receives an item when an inventory issue occurs.
2: The system uses the P43250 program when an inventory issue occurs.
- Replenishment Hours
-
Enter the time that is required before a consuming location has a replacement kanban available from its supplying location.
This value is used only for kanban card processing in the JD Edwards EnterpriseOne Shop Floor Management system.
- MFG Leadtime Quantity (material requirements planning leadtime quantity)
-
Enter the quantity that determines the leadtime level for a manufactured item. Each of the routing steps for the item are extended by this quantity. For the system to calculate the leadtime level, the quantity in this field must be a value other than zero.
- Leadtime Level
-
Enter a value that represents the leadtime for an item at its assigned level in the production process, as defined on Plant Manufacturing Data. The system uses this value to calculate the start dates for work orders using fixed leadtimes. Level leadtime is different for purchased and manufactured items:
Purchased: The number of calendar days that are required for the item to arrive at the branch/plant after the supplier receives the purchase order.
Manufactured: The number of workdays that are required to complete the fabrication or assembly of an item after all the components are available.
You can enter level leadtime manually on the Plant Manufacturing tab of the Additional System Information form, or you can use the Leadtime Roll up program to calculate it. To calculate level leadtime using the Leadtime Roll up program, you must first enter a quantity in the Manufacturing Leadtime Quantity field in the F4102 table.
- Leadtime Manufacturing
-
Enter the total number of days that are required to build an item from its lowest level components to the final assembly. This value is the total of the level leadtimes for all manufactured items, plus the highest manufacturing leadtime for all its components.
If all components are purchased, the manufacturing leadtime equals the item's level leadtime. Purchased item leadtimes are not included in the calculation of manufacturing leadtimes.
You can enter the manufacturing leadtime manually, or you can have the system calculate it when you run the Leadtime Roll up program.
- Leadtime Per Unit
-
Enter the total number of hours that are required to build one unit as specified on the routing. This value is factored by the time basis code.
You can enter this value manually or you can have the system calculate it when you run the Leadtime Roll up program. The system overwrites this value when you run the Leadtime Roll up program.
The system uses this field to calculate start dates for work orders when you use variable leadtimes.
- Leadtime Cumulative
-
Enter the total number of days that are required to build an item from its lowest level components to the final assembly. The system calculates the value differently for manufactured and purchased items.
Manufactured: The total of all level leadtimes for all manufactured items, plus the highest cumulative leadtime of all its components.
Purchased: The item's level leadtime. Purchased item leadtimes are included in the calculation of cumulative leadtimes.
You can enter this value manually, or you can have the system calculate it when you run the Leadtime Roll up program.
- Fixed/Variable
-
Enter a user-defined code from UDC table (H41/MS) that determines whether the system uses fixed or variable leadtimes. This value works in conjunction with the value from either the Level Leadtime field or the Leadtime Per Unit field. Values are:
F: The system calculates work order start dates using the value from the Leadtime Level field.
V: The system calculates work order start dates using the value from the Leadtime Per Unit field.
- Drawing Size
-
Enter a code that represents the engineering drawing size. For example:
A: A-size drawing
D: D-size drawing
- Last Revision No (last revision number)
-
Enter a subset to the drawing number. The subset provides an additional description of the drawing and is useful if the system uses an engineering drawing as a reference for this item.
- Drawing Number
-
Enter an engineering drawing number. This number might be the same as the part or item number.
3.2.15.2 Grade and Potency
Select the Grade and Potency tab.
- Grade/Potency Pricing
-
Enter a user-defined code from UDC table (41/05) that groups several items that contain the same requirements for the Stock Valuation system. Valuation methods are set up by item or pool. The items that are assigned to the pool use the pool's designated valuation methods for extracting and valuing the inventory.
- Potency Control
-
Enter a value that specifies whether you control the item by potency. Values are:
N: Do not control the item by potency.
Y: Control the item by potency.
- Standard Potency
-
Enter the percentage of active ingredients that are normally found in an item.
- From Potency and Thru Potency
-
Enter a value that indicates the minimum and maximum potency or percentage of active ingredients that are acceptable for an item.
The system displays a warning message if you try to purchase or issue items that do not meet the minimum acceptable potency or exceed the maximum acceptable potency. The system does not allow you to sell items that do not meet the minimum acceptable potency or exceed the maximum acceptable potency.
- Grade Control
-
Enter a code that indicates whether you control the item by grade.
N: Do not control the item by grade.
Y: Control the item by grade.
- Standard Grade
-
Enter a user-defined code from UDC table (40/LG) that represents the normal grade for an item.
- From Grade and Thru Grade
-
Enter user-defined codes from UDC table (40/LG) that indicate the minimum and maximum grades that are acceptable for an item.
The system displays a warning message if you try to purchase or issue items with grades that do not meet the minimum grade or exceed the maximum grade. The system does not allow you to sell items with grades that do not meet the minimum grade or exceed the maximum grade.
3.2.15.3 Service/Warranty
Select the Service/Warranty tab.
- Cost Type
-
Enter a user-defined code from UDC table (30/CA) that designates the item. Values include:
A1: Material
B1: Labor
X1: Freight
X2: Travel
- Return Policy
-
Enter a user-defined code from UDC table (17/RT) that specifies whether to return the part with the claim.
- Create Equipment Master Record
-
Specify whether the system creates an equipment record for an item when you run the Equipment Master Update program (R17024). The system creates the equipment record during the update only if you activate this option for the item.
3.2.15.4 Supply Chain Planning
Select the Supply Chain Planning tab.
- Constraints Flag
-
Enter a user-defined code from UDC table (42/AC) that specifies whether to include an item in Supply Chain Planning (SCP). Values are:
Blank or 0: Do not include the item.
1: Include the item.
- Sellable Item
-
Specify whether an item is sellable. Use the Update Sellable Flag program (R41900) to update this field for multiple items.
3.2.15.5 Blend Management
Select the Blend Management tab.
- Operational Threshold
-
Enter the minimum and maximum threshold values for the active ingredient of an additive that you use in the JD Edwards EnterpriseOne Blend Management system. Threshold information is not required. You can use operational thresholds, cumulative thresholds or both.
The system compares this value with the quantity of active ingredient in the current operation and issues a warning if the quantity is below the minimum value or above the maximum value in an active operation. For actual or closed operations, the system generates an error.
You enter the operational or the cumulative threshold values using a unit of measure from the Blend Management Unit of Measure UDC table (31B/UM).
- Cumulative Threshold
-
Enter the minimum and maximum cumulative threshold values for the active ingredient of an additive that you use in the JD Edwards EnterpriseOne Blend Management system. The system compares this value with the PPM quantity of the accumulated additives for the operation and issues a warning if the quantity is below the minimum value or above the maximum value in an active operation. For actual or closed operations, the system generates an error.
3.2.15.6 Demand Flow®
Select the Demand Flow® tab.
- Demand Flow® Product
-
Select whether an item is an end item for Demand Flow. An item can be added to a mixed model family only if you select this option.
- Total Product Cycle Time
-
Enter a value that represents the calculated work content through the longest path of the process or processes that are required to build a product. The value is in the scenario unit of measure (hours, minutes, seconds, or whatever was used in the scenario).
- Primary Line
-
Enter a number that you have previously set up in the F30006 table to define which product line primarily produces the end item. You can define detailed work center operations within the line or cell.
- Explode BOM(explode bill of material)
-
Select whether the BOM is expanded by one subordinate level. For example, if you select this option at level one, the system displays the children at level two. The children for level two do not appear unless you select this option for level two end items, and so on.
The functionality of this option applies only when the item is a Demand Flow item and you are performing BOM explosion using the Volume Design and Product Synchronization program (PF30L201). Normal BOM explosion remains as it is in base manufacturing.
3.3 Entering Branch/Plant Information
This section provides an overview of branch/plant information, lists prerequisites, and discusses how to:
-
Set processing options for the Item Branch Plant program (P41026).
-
Assign items to a branch/plants.
-
Assign a primary location to an item.
-
Assign a secondary location to an item.
-
Enter classification codes for branch/plants.
-
Enter tax information.
-
Locate item sources.
-
Enter item reorder quantities.
-
Enter branch/plant manufacturing information.
-
Set processing options for Item Branch Duplication program (P41015).
-
Duplicate item information for multiple branch/plants.
3.3.1 Understanding Branch/Plant Information
Information about an item might differ from warehouse to warehouse. For example, taxes might be applicable to an item in one warehouse but not in another. You might also have different quantity requirements for items depending on the warehouse. After you enter master information for an item, you can assign the item to warehouses or branch/plants. You can then configure the item information for each branch/plant. You can also specify the item locations within the branch/plant and item processing information.
You enter item information for a branch/plant in the Item/Branch Plant program (P41026). Most fields on Item/Branch Plant Info. form are identical to those on the Item Master Revisions form. The system uses the default values from the Item Master Revisions form. You can enter item information for a single branch/plant or copy existing item information and duplicate it for multiple branch/plants.
Branch/plants can represent anything from warehouses to stores to trucks. You can define separate rules in each branch/plant, which enables you to separate divisions of universal items for which you can implement unique rules, costs, prices, and so forth. After you establish a branch/plant, you can further define it by identifying locations, such as zones, aisles, bins, and lots. By establishing item locations, you can use the information to:
-
Verify specific locations.
-
Display item descriptions.
-
Review available quantities.
-
Review lot statuses.
You can also define locations by classifying them into groups that accommodate:
-
Consignment items.
-
Items requiring rework or repair.
-
Returned items.
-
Special items belonging to a particular customer.
If you have item information that applies to items in multiple branch/plants, you can enter item information for one branch/plant and then duplicate the information, such as costs, prices, and units of measure for as many as 10 other branch/plants by using either of these programs:
-
Item Branch Duplication (P41015) program to select individual items for duplication.
-
Item Branch Duplication (R41826) batch program to define criteria for items that you want to duplicate.
Both of these programs use the F41015 table during processing and send a message to the Employee Work Center when the duplication process is complete.
After you enter item information for a specific branch/plant, the system creates a record in the F4102 table. Every JD Edwards EnterpriseOne system that retrieves item information searches for the item branch/plant information before searching the item master information.
3.3.1.1 Item Locations
After you assign an item to a branch/plant, you can indicate multiple locations in which the item resides. For each branch/plant, you assign:
-
A primary location.
A primary location is required. The system prompts you for the primary location immediately after you assign an item to a branch/plant. The system usually processes an item through its primary location. For example, when you receive an item, the system assigns the item to its primary location unless you specify a secondary location.
-
Multiple secondary locations.
Secondary locations are optional. You can also assign secondary locations to an item when you enter branch/plant information. The system automatically assigns a secondary location if you enter a location other than the primary location for an item when you receive it.
In addition to assigning locations to an item and branch/plant, you can assign multiple lot numbers to each location. You can enter lot numbers manually when you enter item locations or when you receive the items.
You can change the primary location for an item. However, if any of these soft commitments exist, they need to be cleared before you change the primary location:
-
Quantity Soft Committed (PCOM)
-
Quantity on Backorder (PBCK)
-
Quantity on Purchase Order (PREQ)
-
Other on Work Order Receipt (QWBO)
-
Quantity Other Purchasing 1 (OT1A)
-
Quantity Work Order Soft Commit (FUN1)
-
Secondary Quantity Soft Committed (SCMS)
-
Secondary Quantity on Purchase Order (SREQ)
-
Secondary Quantity on Work Order (SQWO)
To delete a primary location, you must first change it to a secondary location. You cannot delete locations that contain quantities.
If you specify location control on the System Constants form, you can assign an item to only those locations that are set up on the Branch/Plant Location Master form. If you do not specify location control, you can assign an item to any location.
If you use license plate processing in the JD Edwards EnterpriseOne Warehouse Management system, you activate functionality at the branch/plant level and can specify whether to automatically create a license plate number for an item or item dimension group in a specific unit of measure.
When you enter a location for an item, the system creates a record in the F41021 table.
3.3.1.2 Country of Origin
Enter a code (00/CN) that identifies the country in which the item originates. This information is useful to organizations that must periodically separate inventory by country of origin.
|
Note: The system disables the Country of Origin Required checkbox when you identify an item as bulk. |
3.3.1.3 Blend Management
When you set up additive items with threshold information for JD Edwards EnterpriseOne Blend Management, you must set up the operational and cumulative threshold information for active ingredients in the Item Branch/Plant program as well. When you enter additive operations, the system retrieves the threshold information from the Item Branch table.
|
See Also: |
3.3.2 Prerequisites
Before you complete the tasks in this section, you must:
-
Set up the origin of imported items in UDC table (41/L9).
-
Set up customs codes in UDC table (41/L0).
3.3.3 Forms Used to Enter Branch/Plant Information
| Form Name | FormID | Navigation | Usage |
|---|---|---|---|
| Work With Item Branch | W41026E | Inventory Master/Transactions (G4111), Item Branch/Plant | Review item branches. |
| Item/Branch Plant Info. | W41026A | On the Work With Item Branch form, click Add. |
|
| Primary Location | W41026B | This form appears automatically after you assign an item to a branch/plant on the Item/Branch Plant Info. form. | Assign a primary location to an item. |
| Work With Item Locations | W41024B | On the Work With Item Branch form, select Location Revisions from the Row menu. | Review item locations. |
| Location Revisions | W41024A | On the Work With Item Locations form, click Add. | Assign a secondary location to an item. |
| Category Codes | W41026G | On the Work With Item Branch form, select Category Codes from the Row menu. | Enter classification codes for branch/plants.
Note: Depending on how you set the processing options, this form may appear automatically after you assign an item to a branch/plant on the Item/Branch Plant Info. form. |
| Quantities | W41026C | On the Work With Item Branch form, select Quantities from the Row menu. | Enter item reorder quantities. |
| Additional System Info (additional system information) | W41026D | On the Work with Item Branch form, select Addl System Info. from the Row menu. | Enter branch/plant manufacturing information. |
| Work With Item Branch Duplication | W41015A | Inventory Advanced Technical Ops (G4131), Item/Branch Duplication | Duplicate item information for multiple branch/plants. |
3.3.4 Setting Processing Options for Item Branch Plant (P41026)
Processing options enable you to specify the default processing for programs and reports.
3.3.4.1 Process
These processing options specify whether the system displays additional Item Branch forms when you add or change information on the Item Branch/Plant Info. form.
- 1. Category Codes
-
Specify whether to display the Category Codes form when you add or change information. Values are:
Blank: Do not display.
1: Display.
- 2. Quantities
-
Specify whether to display the Quantities form when you add or change information. Values are:
Blank: Do not display.
1: Display.
- 3. Additional System Information
-
Specify whether to display the Additional System Information form when you add or change information. Values are:
Blank: Do not display.
1: Display.
- 4. Item Profile Revisions
-
Specify whether to display the Item Profile Revisions form when you add or change information. Values are:
Blank: Do not display.
1: Display.
- 5. Cost Revisions
-
Specify whether to display the Cost Revisions form when you add or change information. Values are:
Blank: Do not display.
1: Display.
- 6. Price Revisions
-
Specify whether to display the Price Revisions form when you add or change information. Values are:
Blank: Do not display.
1: Display.
- 7. Unit of Measure
-
Specify whether to display the Unit of Measure form when the unit of measure conversions are at the branch level and you are adding or changing information. Values are:
Blank: Do not display.
1: Display.
3.3.4.2 Versions
If you leave either of the following processing options blank, the system uses version ZJDE0001.
- 1. Summary Availability (P41202)
-
Specify the version of the P41202 program to use.
- 2. Item/Location Information (P41024)
-
Specify the version of the P41024 program to use.
- 3. Apparel Item Balance Purge (RCW34)
-
Specify the version that the system uses to access the Style Item Balance Purge program (RCW34). If you leave this processing option blank, the system uses version XJDE0001.
3.3.4.3 Interop
- 1. Transaction Type
-
Specify a user-defined code from UDC table (00/TT) that identifies the default transaction type, such as an invoice or a sales order. You can enter a transaction type or select one from the Select User Define Code form.
If you leave this processing option blank, the system does not perform export processing.
- 2. Before/After Image Processing
-
Specify when the system creates a record of a transaction. Values are:
Blank: Create a record of a transaction after changes.
1: Create two records. The system creates one record before changes and one record after changes.
3.3.5 Assigning Items to Branch/Plants
Access the Item/Branch Plant Info. form.
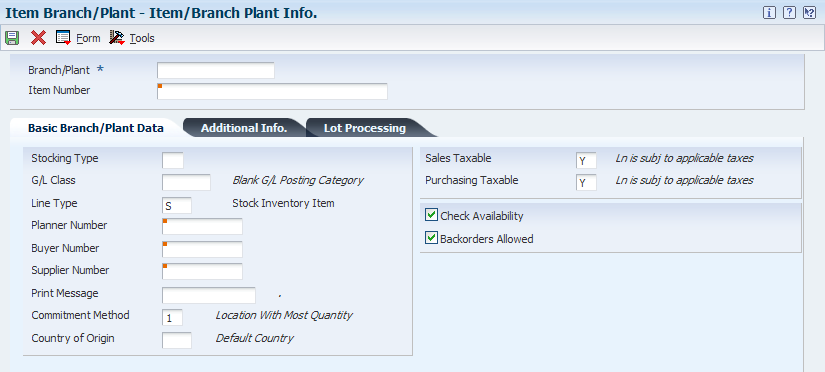
- Branch/Plant
-
You must enter a branch/plant number that is set up in the F41001 table.
3.3.6 Assigning a Primary Location to an Item
Access the Primary Location form.
- Location
-
Enter the area in the warehouse where you receive inventory. The format of the location is user defined, and you enter the location format for each branch/plant.
- Lot/Serial
-
Enter a number that identifies a lot or a serial number. A lot is a group of items with similar characteristics.
3.3.7 Assigning a Secondary Location to an Item
Access the Location Revisions form.
To assign a secondary location to an item, enter the location and lot/serial information.
3.3.8 Entering Classification Codes for Branch/Plants
Access the Category Codes form.
You can group items with similar characteristics so that you can work with the entire group at the same time.
3.3.9 Entering Tax Information
Access the Item/Branch Plant Info. form.
- Sales Taxable
-
Enter a code from UDC table (H00/TV) that indicates whether the item is subject to sales tax when you sell it. The system calculates tax on the item only if the customer is also taxable.
- Purchasing Taxable
-
Enter a code from UDC table (H00/TV) that indicates whether the item is subject to sales tax when you purchase it. The system calculates tax on the item only if the supplier is also taxable.
3.3.10 Locating Item Sources
Access the Item/Branch Plant Info. form.
You can locate the country in which an item originates and the preferred supplier for an item. Locating these sources enables you to distinguish items based on a country or supplier. You specify this information when you enter branch/plant information for an item.
- Supplier Number
-
Enter a user-defined name or number that identifies an address book record. You can use this number to locate and enter information about the address book record. If you enter a value other than the address book number (AN8), such as the long address or tax ID, you must precede it with the special character that is defined in the Address Book constants. When the system locates the record, it returns the address book number to the field.
For example, if address book number 4100 (Total Solutions) has a long address TOTAL and an * distinguishes it from other entries (as defined in the Address Book constants), you could type *TOTAL into the field, and the system would return 4100.
- Country of Origin
-
Enter a code from UDC table (00/CN) that identifies the country in which an item originates. This information is useful to organizations that must periodically separate their inventory by source. You can specify your home country as the default value in UDC table (00/CN).
3.3.11 Entering Item Reorder Quantities
Access the Quantities form.
You can specify the minimum, maximum, and normal reorder quantities for an item. You can also specify the level of stock at which reordering takes place. The system uses these values in the JD Edwards EnterpriseOne Requirements Planning system.
- Reorder Quantity
-
Enter the estimated reorder quantity for an item. You can enter this quantity if the system does not have enough sales history to accurately calculate a reorder quantity.
- Maximum Reorder Qty (maximum reorder quantity) and Minimum Reorder Qty (minimum reorder quantity)
-
Enter the maximum and minimum order quantities for an item. You can calculate the quantity on factors other than usage, such as perishability, storage capacity, and so forth.
- Reorder Point
-
Enter a quantity for an item that specifies when replenishment occurs. Typically, this occurs when the total quantity on hand plus the quantity on order fall to or lower than a specified quantity. You can enter this quantity, or the system can calculate the quantity if a sufficient sales history is available.
- Multiple Order Quantity
-
Enter a multiple for rounding up planned order quantities in MPS/MRP. The system rounds up the planned order quantity to the nearest multiple that you enter in this field.
- Units Per Container
-
Enter the standard quantity of containers that you use in the manufacturing process, typically in a repetitive manufacturing environment. This quantity determines the number of bar code labels that you will need for shipping and modifies order release quantities.
- Safety Stock
-
Enter the quantity of stock that is kept on hand to cover high-side variations in demand.
3.3.12 Entering Branch/Plant Manufacturing Information
Access the Additional System Info. form.
For each item, you can define manufacturing information that is specific to each branch/plant, including:
| Type of information | Description |
|---|---|
| Requirements planning information | Enter information about inventory shrinkage in order to plan for the quantity that you need to replace due to shrinkage. |
| Leadtime information | Enter leadtime information to calculate the time frames that are necessary to assemble or manufacture an item. |
| Engineering information | Enter reference information about the drawing plans for items. |
Most of the items on Plant Manufacturing Data tab are identical to those on Manufacturing Data. The system uses the default values that you specified on Manufacturing Data.
- Shrink Factor
-
Enter a fixed quantity or percentage that the system uses to determine inventory shrinkage for an item. If you are entering a percentage, enter 5 percent as 5.00 and 50 percent as 50.00.
The system increases the planned order quantity by this amount in MPS/MRP/DRP generation. The shrink factor method that you specify for the item determines whether the shrink factor is a percentage or a fixed quantity.
- Shrink Factor Method
-
Enter a value that determines whether the shrink factor that you enter for this item is a percentage or a fixed quantity. Values are:
%: Percentage of order or requested quantity.
F: Fixed amount to be added to quantity.
- Issue and Receipt
-
Enter a code that indicates whether an item is received at the time of inventory issues or whether the system uses the Receipt Routing Movement and Disposition program (P43250). Values are:
0: The system does not perform any actions.
1: The system receives an item when an inventory issue occurs.
2: The system uses the P43250 program when an inventory issue occurs.
- Replenishment Hours
-
Enter the time that is required before a consuming location has a replacement kanban available from its supplying location.
This value is used only for kanban card processing in the JD Edwards EnterpriseOne Shop Floor Management system.
- Setup Labor
-
Enter the standard setup hours that you expect to incur in the normal completion of this item. This value is not affected by crew size.
- Queue Hours
-
Enter the total hours that an order is expected to be in queue at work centers and moving between work centers.
The system stores this value in the F4102 table. You can calculate this value using the Leadtime Roll up program, or you can enter it manually. When you run the Leadtime Roll up program, the system overrides manual entries and populates the table with calculated values.
- Time Basis
-
Enter a code from UDC table (30/TB) that indicates how machine or labor hours are expressed for a product. Time basis codes identify the time basis or rate to be used for machine or labor hours that are entered for every routing step. Examples are 25 hours per 1,000 pieces and 15 hours per 10,000 pieces. You can maintain the time basis codes in Time Basis Codes.
The system uses the values in the Description-2 field for costing and scheduling calculations. The description is what the code represents, but is not used in calculations.
- ECO Number (engineering change order number)
-
Enter the number that is assigned to an engineering change order.
- ECO Reason (engineering change order reason)
-
Enter a code from UDC table (40/CR) that identifies the reason for the engineering change order.
- ECO Date (engineering change order date)
-
Enter the date of the engineering change order.
- Item Revision Level
-
Enter the revision level for an item. If you enter a revision level in this field, verify that the revision level of the routing for an item matches the revision level on the bill of material for the item.
- Kanban Item
-
Identify an item as a kanban item.
3.3.13 Setting Processing Options for Item Branch Duplication (P41015)
Processing options enable you to specify the default processing for programs and reports.
3.3.13.1 Defaults 1
- Branch One through Branch Six
-
Specify the branch/plants to which you want to duplicate the items.
3.3.13.2 Default 2
- Branch Seven through Branch Ten
-
Specify the branch/plants to which you want to duplicate the items.
3.3.13.3 Process
Enter 1 to duplicate the file. If you leave this processing option blank, the system will not duplicate the file.
- Cost Ledger File (F4105)
-
Specify whether to duplicate the F4105 table.
- Base Price File (F4106)
-
Specify whether to duplicate the F4106 table.
- UOM Conversion Factor (F41002)
-
Specify whether to duplicate the F41002 table.
- Bulk Depot/Product Information (F41022)
-
Specify whether to duplicate the F41022 table.
- Item Profile (F46010)
-
Specify whether to duplicate the F46010 able.
- Item Unit of Measure Definition (F46011)
-
Specify whether to duplicate the F46011 table.
- Item Branch Master-Service/Warranty Extension (F41171)
-
Specify whether to duplicate the F41171 table.
3.3.14 Duplicating Individual Items for Multiple Branch/plants
Access the Work With Item Branch Duplication form.
Figure 3-13 Work With Item Branch Duplication form
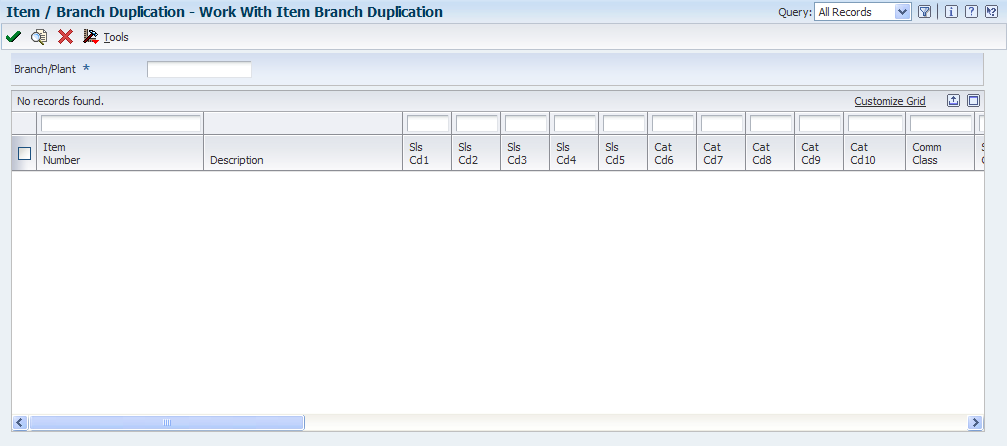
Description of "Figure 3-13 Work With Item Branch Duplication form"
When you duplicate item information, the system does not duplicate the primary location for an item. The system uses the blank location that you have set up for the branch/plant to which you are duplicating information.
3.3.15 Reviewing the Item/Branch Dup-Batch Report
Select Inventory Advanced-Technical Ops (G4131), Item/Branch Dup-Batch.
If you use the Item/Branch Dup-Batch (R41826) program to select individual items for duplication, you can set processing options to display up to four search fields to enable you to locate items for a particular branch/plant.
For matrix-controlled items, use the R41826 program to copy information about the matrix parent item to all children that you have chosen for the system to generate in the matrix. The system creates records in these tables for the children in the matrix:
-
F4101
-
F4102
-
F41021
-
F4105
-
F4106
-
F41002
3.4 Entering Segmented Items
This section provides an overview of segmented items and discusses how to:
-
Create a template for segmented items.
-
Enter segmented items.
3.4.1 Understanding Segmented Items
Many industries have base products that differ from other base products because of packaging components, packaging processes, other attributes, or other differences that can cause costing structures to differ. Each variation of the product is usually a unit that is used for order entry, and it may have:
-
Manufacturing data
-
Inventory management information
-
Forecasts
-
Pricing rules
-
Preferences
You can use segments to accommodate these types of items, for example:
-
Polo shirts with segments of size and color.
-
Fruit drinks with segments of flavor, packaging, and type.
A segmented item can have up to 10 identifying characteristics or attributes.
3.4.2 Forms Used to Enter a Segmented Item
| Form Name | FormID | Navigation | Usage |
|---|---|---|---|
| Work With Templates | W410014A | Inventory Master/Transactions (G4111), Template Master | Review templates. |
| Template Master Revisions | W410014B | On the Work With Templates form, click Add. | Create a template for segmented items. |
| Item Master Revisions | W4101A | On the Work With Item Master Browse form, click Add. | Enter segmented items. |
3.4.3 Creating a Template for Segmented Items
Access the Template Master Revisions form.
Figure 3-14 Template Master Revisions form
Description of "Figure 3-14 Template Master Revisions form "
You create one or more templates for entering segmented items. If the same template is not applicable for all the segmented items, create a template for each type and name each template appropriately.
After you have created a template, you can attach it to Item Master Revisions form if you select the appropriate processing options on the Defaults and Process tabs of the Item Master program (P4101).
- Template
-
Enter a template name that you can use when entering items on the Item Master Revisions form. This name is case-sensitive. If you use any capital letters in the template name when you add it, you must enter those letters in capitals whenever you search for or attach the template to the Item Master Revisions form.
- No Separators
-
Select this check box if separators are not used in this template and all 25 character spaces can be allotted to the segmented item number.
Note:
You must also leave the Segment Separator Character field in the Branch/Plant Constants program (P41001) blank. - Length Used
-
Enter a running total of the number of spaces, including separators, that are used in all the segments.
3.5 Working with Matrix and Parent Items
This section provides overviews of matrix and parent items and matrix order entry, lists prerequisites, and discusses how to:
-
Set processing options for Matrix Items (P4101E).
-
Review matrix items.
-
Set processing options for Matrix Order Entry (P41902).
-
Order matrix items.
3.5.1 Understanding Matrix and Parent Items
In the Consumer Packaged Goods (CPG) industry, products often have a number of variations though they share the same basic properties. For example, the inventory might contain a beverage such as bottled water. However, customers demand a number of variations in the attributes of bottled water, including flavored water, plain water, carbonated water, plastic bottles of water, and glass bottles of water. Bottled water is available in six packs, 12 packs, and cases. Additionally, differently sized bottles are available. However, the bottled water remains the same in its basic properties, such as requirements for storage conditions, shipping, and pricing.
When you define segments in the Template Master program (P410014), you can specify the segment values to use when generating children for the matrix and how the child items appear in the matrix.
You must enter a parent item in the Item Master program (P4101) to create all of the variations (child items) of the parent item. You enter a parent item just as you would any other item in the inventory, except that you specify a template and indicate that the item is matrix-controlled or not matrix-controlled. The system uses this information to display forms that enable you to add all variations of the parent item. Select values for each segment that you defined in the template to define the attributes for the child items. The combined values that you select identify all of the variations of the parent item. As you continue the item entry process, the system displays all variations of the parent item so that you can review all of the child items to be created and remove those child items that you do not want the system to create when you run the Item Branch Duplication - Batch Selection program (R41826).
Run the R41826 program to create the child items and optionally populate the matrix with all of the variations of the parent item that you have created and chosen. If you run the R41826 program, you from having to enter individual items for each separate combination of attributes. You can also set the processing options appropriately, the system can also copy item cost, item price, and unit of measure conversion information to selected branch/plants.
See Duplicating Individual Items for Multiple Branch/plants.
3.5.2 Understanding Matrix Order Entry
The Matrix Order Entry (P41902) program enables you to create purchase orders and sales orders for matrix items. You also can access existing sales orders or purchase orders to order quantities of a matrix item. When you enter a sales order or purchase order, you can access the P41902 program, which also enables you to:
-
Review all of the possible variations (child items) of the parent item.
-
Review the on-hand and available quantities, provided that you have set the processing option in the Matrix Order Entry program.
-
Order quantities for the child items that you select (if you have already ordered quantities, you can update the quantities before placing the order again).
When you are working with an existing sales order or purchase order, you also can review both segmented item availability and summary availability. This information helps you review available quantities before you enter an order for matrix items. When you enter a sales order or purchase order for a matrix item, the system automatically creates order detail lines for the child items that you have chosen.
You can use the Matrix Maintenance (P41903) program to rearrange the sequence or modify the column headings in the matrix and to add items to the matrix. The information that you specify in the P41903 program determines how the matrix appears when you enter a sales order or purchase order for matrix items.
3.5.3 Prerequisites
Before you complete the tasks in this section, you must:
-
Complete the Segment Separator Character field if you want to use all 25 characters; otherwise, this information is populated in the Branch/Plant Constants program (P41001).
-
Set the appropriate processing options for the matrix version to be used in the Item Branch Duplication - Batch Selection (R41826) program to copy item cost, item price, and unit of measure conversion information.
-
Create a template that contains the product attributes.
-
To enter orders, set the appropriate processing option in the Sales Order Entry (P4210) or the Purchase Orders (P4310) programs.
3.5.4 Forms Used to Work with Matrix and Parent Items
| Form Name | FormID | Navigation | Usage |
|---|---|---|---|
| Work With Matrix Items | W4101EC | Inventory Master/Transactions (G4111), Matrix Item | Review matrix items. |
| Item Master Revisions | W4101A | On the Work With Matrix Items form, click Add. | Set up matrix items. |
| Work With Matrix Headings | W41903A | Inventory Advanced - Technical Ops (G4131), Matrix Maintenance | Review matrices. |
| Matrix Heading Maintenance | W41903B | On the Work With Matrix Headings form, select a record. | Revise matrices. |
| Customer Service Inquiry | W4210E | Sales Order Processing (G4211), Sales Order Detail | Review customer service inquiries. |
| Sales Order Header | W4210G | Click OK on the Customer Service Inquiry form. | Revise sales order header. |
| Sales Order Detail Revisions | W4210A | Click Add on the Sales Order Header form. | Revise sales order details. |
| Matrix Order Entry | W41902A | On the Sales Order Detail Revisions form, select Matrix Order from the Row menu. | Order matrix items. |
3.5.5 Setting Processing Options for Matrix Items (P4101E)
Processing options enable you to specify default processing for programs and reports.
3.5.5.1 Versions
If you leave either of the following processing options blank, the system uses version ZJDE0001.
- 1. Item Master (P4101)
-
Specify the version of P4101 to use.
- 2. Item Segment Selection (P410015)
-
Specify the version of P410015 to use.
3.5.6 Reviewing Matrix Items
Access the Work With Matrix Items form.

If you are working with the Matrix Order Entry (P41902) program, the value in this field specifies the defined organization of the matrix items. You can enter order amounts in this field during sales or purchase order entry. If you access the Matrix Order Entry program from the Work with Matrix Items form, the system displays the available items within the matrix item. A value of 1 in this field indicates the combination of items that is available in the parent matrix item.
3.5.7 Setting Processing Options for Matrix Order Entry (P41902)
Processing options enable you to specify the default processing for programs and reports.
3.5.7.1 Display
- 1. Display quantities
-
Specify whether to display quantities. Values are:
Blank: Do not display quantity on hand or available items.
1: Display quantity on hand.
2: Display quantity available.
3: Display both.
3.6 Entering Item Cost Information
This section provides an overview of item cost information and discusses how to:
-
Set processing options for Cost Revisions (P4105).
-
Assign a cost level to an item.
-
Assign a cost method and cost to an item.
-
Enter manufacturing setup cost information.
3.6.1 Understanding Item Cost Information
You must provide cost information for items in order to track inventory costs. Cost information determines:
-
Whether the system maintains one overall cost for the item or a different cost based on branch/plant.
-
Which cost method the system uses to track inventory costs.
-
Which cost method the system uses for purchase orders.
You can also add prorated setup costs for manufacturing.
For each cost method that you assign to an item, you must also specify a cost. For example, to use the last-in cost method for an item, you must enter an initial cost for that cost method. The system updates the last-in cost based on the cost of the item as of the last receipt date.
The JD Edwards EnterpriseOne Inventory Management system, with its variety of cost bases, can also help you maintain appropriate valuation of the inventory. Various methods of valuation can help you take into account differences in value resulting from:
-
Age
-
Changing costs
-
Design changes
-
Technology changes
The system stores inventory cost records in the Cost Ledger File (F4105).
3.6.1.1 Item Cost Update
You can change the amount for any cost method at any time. For example, if you change the amount for the cost method that you use to track costs of goods sold, the system applies the new amount to the on-hand quantity of the item and creates journal entries to record the difference between the old and the new amounts.
Certain programs update the amount for cost methods 01 through 08. For example, the system updates the following amounts in this way:
-
For last-in, or cost method 01, the system interactively updates this amount based on the last cost of the item at the time of receipt.
-
For weighted average, or cost method 02, the system calculates and updates this amount by adding transaction quantities together, adding transaction costs together, and dividing the total cost by the total quantity. You cannot use the weighted average cost method (02) for the sales/inventory cost method with stocking type C or R.
-
For actual cost, or cost method 09, the system calculates the cost of the product that is built on a work order or rate schedule based on the actual hours that are used and the actual quantity of parts that are issued. The system updates the cost based on the most current information. You cannot use actual cost method (09) for the sales/inventory cost method with stocking type C or R.
The system also updates these costs:
-
Last-in, purchasing, and lot costs are updated by the PO Receipts program (P4312).
-
Purchasing cost is updated by the Voucher Match program (P4314).
If you create additional cost methods, you must update their amounts manually.
You can delete a cost method for an item if it is no longer applicable. If you try to delete the sales, inventory, or purchasing cost method, the system displays a warning message. The system does not delete the cost method, but assigns a zero cost for the cost method.
3.6.2 Forms Used to Enter Item Cost Information
| Form Name | FormID | Navigation | Usage |
|---|---|---|---|
| Item Master Revisions | W4101A | On the Work With Item Master Browse form, select Item Revisions from the Row menu. | Assign a cost level to an item. |
| Work With Item Cost | W4105B | Select a record, and select Cost Revisions from the Row menu on the Work With Item Master Browse form.
Select a record, and select Cost Revisions from the Row menu on the Work With Item Branch form. |
Review the cost methods of an item. |
| Cost Revisions | W4105A | On the Work With Item Cost form, select a record. | Assign a cost method and cost to an item. |
| Additional System Information | W4101C | On the Work With Item Master Browse form, select Addl System Info. from the Row menu. | Enter manufacturing setup cost information. |
3.6.3 Setting Processing Options for Cost Revisions (P4105)
Processing options enable you to specify the default processing for programs and reports.
3.6.3.1 Process
- Standard Cost
-
Specify whether to change the standard cost. Values are:
Blank: Change.
1: Do not change.
3.6.3.2 Interop
- Transaction Type
-
Specify a user-defined code from UDC table (00/TT) that specifies the transaction type for the interoperability transaction. If you leave this processing option blank, outbound interoperability processing is not performed.
3.6.3.3 Flex Acct
- Flex Accounting
-
Specify whether to use flexible accounting. Values are:
Blank: Do not use flexible accounting.
1: Use flexible accounting.
3.6.4 Assigning a Cost Level to an Item
Access the Item Master Revisions form.
The cost level of an item determines:
-
Whether the system maintains costs at the lot, location, branch/plant, or master level.
-
The method that you use to locate the item to assign cost methods and enter item costs.
- Inventory Cost Level
-
Enter a code that indicates whether the system maintains one overall inventory cost for the item, a different cost for each branch/plant, or a different cost for each location and lot within a branch/plant. The system maintains inventory costs in the F4105 table. Values are:
1: Item level.
2: Item/Branch level.
3: Item/Branch/Location level.
- Purchase Price Level
-
Enter a code that indicates which table the system uses to retrieve the cost for an item when you enter a purchase order. Values are:
1: Use the supplier/item price from the F41061 table.
2:Use the supplier/item/branch price from the F41061 table.
3: Use the inventory cost from the F4105 table. This cost is based on the inventory cost level and the purchasing cost method that you specify for the item.
The first two codes are applicable only if you set up supplier costs in the JD Edwards EnterpriseOne Procurement system. If you do not set up supplier costs, the system uses the inventory cost as the default for the purchase order.
3.6.5 Assigning a Cost Method and Cost to an Item
Access the Cost Revisions form.
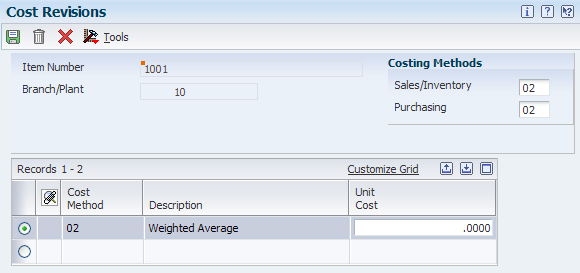
You can enter cost methods for items when you enter either item master information or item branch information. For example, you can use the weighted average cost method to determine the cost of goods that is sold for an item, and the last-in cost method to determine the item's unit cost for purchase orders.
The system provides predefined cost methods. You can add your own cost methods to UDC table (40/CM), although the cost methods 01 through 19 are reserved.
If you do not enter an item cost for the cost methods that you assign to sales, inventory, or purchasing, the system displays a warning message. If you ignore the warning, the system assigns a zero cost for the cost method.
- Sales/Inventory
-
Enter a code from UDC table (40/CM) that indicates the cost method that the system uses to calculate the cost of goods that is sold for the item. Cost methods 01–19 are reserved.
If you maintain costs at the item level, the system retrieves the default value for this field from the data dictionary. If you maintain costs at the item and branch/plant level, the system retrieves the default value from Branch/Plant Constants (P41001) program.
- Purchasing
-
Enter a code from UDC table (40/CM) that indicates the cost method that the system uses to determine the cost of the item for purchase orders. Cost methods 01–19 are reserved.
If you maintain costs at the item level, the system retrieves the default value for this field from the data dictionary. If you maintain costs at the item and branch/plant level, the system retrieves the default value from Branch/Plant Constants (P41001) program.
- Cost Method
-
Enter a code from UDC table (40/CM) that specifies the basis for calculating item costs. Cost methods 01–19 are reserved.
- Unit Cost
-
Enter an amount for each cost method. When you review costs for the item, the system displays only those methods for which you entered an amount.
3.6.6 Entering Manufacturing Setup Cost Information
Access the Additional System Information form.
Figure 3-18 Additional System Information form
Description of "Figure 3-18 Additional System Information form"
If you use JD Edwards EnterpriseOne manufacturing systems, you can prorate setup costs for an item based on the quantity of the item that you plan to produce.
- Accounting Cost Qty(accounting cost quantity)
-
Enter an amount that the system uses in the Cost Roll up program to determine the allocation of setup costs. The system totals the setup costs and divides the sum by this quantity to determine a unit setup cost. The default value is 1.
3.7 Entering Sales Price Information
This section provides an overview of sales price information and discusses how to:
-
Assign price levels and price list groups to an item.
-
Enter item prices.
3.7.1 Understanding Sales Price Information
If you use the JD Edwards EnterpriseOne Sales Order Management system with the JD Edwards EnterpriseOne Inventory Management system, you must provide sales price information for each item. You can have a different sales price for each unit of measure and currency in which you sell an item. You can also specify the effective dates for each sales price.
To change an item's price level after you have entered prices, you must use Sales Price Level Conversion.
You can assign price groups to items on the Item Master Revisions or Item Branch/Plant Info. forms. The system stores sales prices in the F4106 table.
3.7.2 Forms Used to Enter Sales Price Information
| Form Name | FormID | Navigation | Usage |
|---|---|---|---|
| Item Master Revisions | W4101A | Inventory Master/Transactions (G4111), Item Master | Assign price levels and price list groups to an item. |
| Work With Preference Base Price | W4106J | On the Work With Item Master Browse form, select a record and then select Price Revisions. | Review item prices. |
| Preference Hierarchy Selection | W40073F | On the Work With Preference Base Price form, click Add. | Select item and customer groups. |
| Base Price Revisions | W4106K | On the Preference Hierarchy Selection form, select the item and customer group. | Enter item prices. |
3.7.3 Assigning Price Levels and Price List Groups to an Item
Access the Item Master Revisions form.
The sales price level of an item determines:
-
Whether the system maintains prices at the lot, location, branch/plant, or master level.
-
How you locate the item to assign price methods and enter item price.
- Sales Price Level
-
Enter a code that indicates whether the system maintains standard sales prices for an item, different sales prices for each branch/plant, or different sales prices for each location and lot within a branch/plant. The system maintains sales prices in the F4106 table. Values are:
1: Item level.
2: Item/Branch level.
3: Item/Branch/Location level.
- Kit/Configurator Pricing Method
-
Enter a code that determines how the system calculates the price for kit items or configured items. Values are:
Blank: Use for items that are neither kit items nor configured items.
1: The system accumulates the base prices of components with the configured price adjustments, and then discounts the total.
2: The system accumulates the base price of the parent item with the configured price adjustments, and then discounts the total.
3: The system accumulates the configured price adjustments, and then discounts the total.
4: The system accumulates the individually discounted price of the components with the configured price adjustments.
Note:
Only configured price adjustments are included in the calculation for a configured item. Also, the system discounts costs only if you are using the JD Edwards EnterpriseOne Advanced Pricing system from Oracle.This is an example of how the system uses the various methods:
Parent Item: 125
Component A: 50
Component B: 100
Configured Cost Adjustment 1: 15
Configured Cost Adjustment 2: 10
Advanced Price Discount: 10 percent
Methods:
1: 50 + 100 = 150 + 15 + 10 = 175 − 17.50 = 157.5
2: 12 + 1510 = 150 − 15 = 135
3: 15 + 10 + 25 − 2.5 = 22.5
4: (50 − 5) + (100 - 10) = 135 + 15 + 10 = 160
3.7.3.1 Additional Info
Select the Additional Info. tab.
- Item Price Group
-
Enter a code from UDC table (40/PI) that identifies an inventory price group for an item.
Inventory price groups have unique pricing structures that direct the system to incorporate discounts or markups on items on sales and purchase orders from the JD Edwards EnterpriseOne Sales Order Management system. The discounts or markups are based on the quantity, monetary amount, or weight of the item ordered. When you assign a price group to an item, the item takes on the same pricing structure defined for the inventory price group.
You must assign an inventory price group to the supplier or customer, as well as to the item, for the system to interactively calculate discounts and markups on sales orders and purchase orders.
- Basket Reprice Group
-
Enter a code from UDC table (40/PI) that identifies a price group for an item.
Basket reprice groups have unique pricing structures that direct the system to incorporate discounts or markups for items on sales orders. The discounts or markups are based on the quantity, monetary amount, or weight of the item that is ordered. When you run the Order and Basket Level Pricing program (R42750), the system identifies ordered items that belong to a common basket reprice group and applies the appropriate discounts or markups to the price of each item.
- Order Reprice Group
-
Enter a code from UDC table (40/PI) that identifies a price group for an item.
Order reprice groups have unique pricing structures that direct the system to incorporate discounts or markups for items on sales orders. The discounts or markups are based on the item quantity, monetary amount, or weight on the sales order as a whole. When you run the Standard Order/Basket Reprice procedure, the system identifies ordered items that belong to a common order reprice group and implements the appropriate discount as a flat amount in a new discount line for the order.
3.7.4 Entering Item Prices
Access the Base Price Revisions form.

Enter sales prices for an item by entering an amount for the unit of measure, currency, and effective dates for which the price is applicable. You also can enter a currency code for a price if you use multiple currencies.
- Unit Price
-
Enter the list or base price to be charged for one unit of this item. In sales order entry, you must set up all prices in the F4106 table.
- Credit Price
-
Enter credit orders in the JD Edwards EnterpriseOne Sales Order Management system. To enter a credit order, use a line type for which the Reverse Sign Flag (RSGN) is set to Y in the F40205 table. The system stores all credit prices in the F4106 table.
- Percentage
-
Select this check box if the factor value is a multiplier (percent) when applied to an order's price.
- Amount
-
Select this check box if the factor value is an additional/deductible amount when applied to an order's price.