4 Working with Localizations for Japan
This chapter contains the following topics:
-
Section 4.1, "Understanding Bank ID and Bank Account Validation"
-
Section 4.2, "Understanding Accounts Receivable Draft Processing in Japan"
-
Section 4.3, "Understanding the Create Payment Control Groups Process for Japan"
-
Section 4.6, "Making Payments Using the Densai Process (Release 9.1 Update)"
-
Section 4.7, "Paying Vouchers Using the Automatic Payment Process"
-
Section 4.8, "Processing Densai Payments for Japan (Release 9.1 Update)"
-
Section 4.13, "Generating the Consumption Tax Report for Japan"
-
Section 4.14, "Converting Fixed Assets to a Different Depreciation Method"
4.1 Understanding Bank ID and Bank Account Validation
A bank identification (ID) number identifies the bank with which you have established an account. The bank ID number is included in the customer information that you remit for processing accounts receivable drafts and EFT payments.
You activate bank ID validation routines by setting up the localization country code in your user profile:
Completing the Localization Country Code field on the User Profile Revisions form causes the system to search for a bank ID validation routine, but the validation routine to use is not specified. For example, if you specify Japan in the Localization Country Code field, you can still validate bank IDs for other countries. When you use the Bank Account Cross-Reference program (P0030A), the system uses the value in the Country field on the Mailing tab on the Address Book Revision form to determine which validation to use for the address book record.
The system validates bank code numbers and bank branch codes when you enter bank IDs into the Bank Account Cross-Reference or the Bank Account Information (P0030G) program. The system identifies the customers whose bank information is invalid with an error message.
You can check for missing bank information for customers by running the Bank Account Exception Report (R00314).
The system validates account and bank identification information throughout the draft process:
| Process | Function |
|---|---|
| A/R Batch Draft Creation (R03B671) | The system prints an error report that lists customers with missing or invalid bank information. You can review the list to correct or update the bank information before you generate the drafts. |
| Draft Remittance (R03B672) | When you remit drafts, the system validates bank information again and includes the drafts for all of the specified customers in the electronic bank file. The system prints an error report that lists the customers with missing or invalid bank information. |
4.1.1 Bank ID Validation Overrides
You can override bank ID validation for a specific country by adding the country code to UDC 70/BI. The system does not run bank ID validation routines for countries listed in this UDC table.
4.2 Understanding Accounts Receivable Draft Processing in Japan
In Japan, banks assign a draft number to all drafts. All queries regarding drafts refer to this bank-assigned draft number. Businesses are required to include the bank-assigned draft number on all draft reporting.
Bank-assigned draft numbers are alphanumeric codes that are not generated by JD Edwards EnterpriseOne software. You can input and revise this number manually. You can also use this number to inquire on drafts in the system.
Use the Reference field to input the draft number. The Reference field is alphanumeric and cannot include any blanks, special characters, or punctuation marks.
The Reference field is included in these programs:
-
Enter Our Drafts (P03B602)
-
Enter Customer Drafts (P03B602)
-
Draft Inquiry (P03B602)
-
A/R Draft Remittance Magnetic Tape Format program (R03B672T)
To access the Reference field, locate a draft and click Select. Select Additional Information from the Form menu on the Drafts Entry form.
4.3 Understanding the Create Payment Control Groups Process for Japan
You must set up a unique version of the Create Payment Control Groups program to process accounts payable drafts for Japan. Set up the data selection for the version to specify the payment instrument for drafts or bank transactions. To specify the draft payment instrument, select user-defined code D. To specify the bank transaction payment instrument, select user-defined code Q.
Use the processing options for the new version to specify an override bank account number. The system uses the override account number as the short account ID of the draft payables account to which the drafts will be posted.
Set up the data selection for the version to specify your payment instrument for Japanese drafts and the original bank account number on the voucher records.
4.3.1 Processing Bank Transfers
You must also set up a unique version of the Create Payment Control Groups program to process accounts payable bank transfers for Japan. Set up the data selection for the version to specify the payment instrument for bank transfers.
When you run the Create Payment Control Groups program for bank transfers, the system:
-
Calculates the appropriate bank charges and consumption tax for each transfer.
-
Creates a separate pay item for each transfer to represent the bank charge, consumption tax, and adjustment amounts:
-
Pay item 997 represents the bank charge amount.
-
Pay item 998 represents the consumption tax amount.
-
Pay item 999 represents any adjustment amount.
-
-
Reduces the total payment amount for the transfer by these amounts.
-
Prints a report listing the bank charges.
Note:
If you use accounts payable bank transfers for Japan, the system reserves voucher pay items 997, 998, and 999. You cannot use these voucher pay items in the base JD Edwards EnterpriseOne Accounts Payable system.
When you process accounts payable bank transfers for Japan, the system creates these journal entries for each transfer:
-
Normal journal
-
Bank charge journal
-
Consumption tax journal
-
Bank charge adjustment journal
To void the bank transfer, you must void all of the associated journals entries.
4.4 Working with Kagami Statements
This section provides an overview of Kagami statements and discusses how to:
-
Print Kagami statements.
-
Set processing options for Kagami Invoice Statement - Japan (R03B5001JP).
4.4.1 Understanding Kagami Statements
In Japan, bank transfers are the most commonly used method of payment. Japanese banks charge a fee for each transfer that a business requests. To help customers avoid excessive bank charges, a monthly summarized invoice, or Kagami, is issued as the general billing procedure for Japanese businesses.
Businesses that use monthly summarized invoicing do not issue invoices for every goods delivery. Instead, businesses establish a monthly cutoff date with the customer and issue one invoice that summarizes all of the customer's business transactions for the prior month.
Kagami statements include this information:
-
Bill to name and address for the customer.
-
Billing period.
Although billing periods vary by customer, the beginning of the period must be the day after the last cutoff date. The end of the previous period is the cutoff date.
-
Open amount as of the cutoff date.
The open amount is summarized by sales, cash receipts, adjustments, and so on.
-
Detailed information, such as invoice number, item number, and price, from each sales order.
4.4.2 Prerequisite
Verify that you have a next number set up for the summarized invoice number in the JD Edwards EnterpriseOne Accounts Receivable system. For this verification, use the next number for the Statement No. (statement number) field.
4.4.3 Printing Kagami Statements
To print Kagami statements, follow the A/R statement process, specifying Kagami Invoice Statement Japan (R03B5001JP) in the Print Program processing option of a co of the XJDE0002 (Statement Refresh with Draft) version of the Statement Print with Draft program (R03B500X).
4.4.4 Setting Processing Options for Kagami Invoice Statement - Japan (R03B5001JP)
Processing options enable you to specify the default processing for programs and reports.
4.4.4.1 Print
Use these processing options to customize defaults for Kagami Invoice Statement Print - Japan (R03B01JP).
- 1. Aging Information
-
Specify whether to print aging information. Values are:
Blank: The system does not print aging information.
1: The system prints aging information.
- 2. Account Summary
-
Specify whether to print the account summary. Values are:
Blank: The system prints the account summary.
1: The system does not print the account summary.
- 3. Invoice Date
-
Specify whether to print the invoice date. Values are:
Blank: The system does not print the invoice date.
1: The system prints the invoice date.
- 4. Statement Number
-
Specify whether to print the statement number. Values are:
Blank: The system does not print the statement number.
1: The system prints the statement number.
- 5. Remit to Address
-
Specify whether to print the remit to address. Values are:
Blank: The system does not print the remit to address.
1: The system prints the remit to address
- 6. Tax Information
-
Specify whether to print tax information on the invoice document level.
Values are:
Blank: The system does not print the tax information.
1: The system prints the tax information.
- 7. Sales Information
-
Specify whether to print sales information on the invoice. You can specify that the system prints information from the Sales Order Detail table (F4211) or from the Sales Order History table (F42119). Values are:
Blank: The system does not print sales information.
1: The system prints sales information from the F4211 table.
2: The system prints sales information from the F42119 table.
3: The system prints sales information from the F4211 table if it exists. If no data exist in the F4211 table, the system prints sales information from the F42119 table.
- 8. Kagami Summary
-
Specify whether to print the Kagami summary. Values are:
Blank: The system does not print the Kagami summary.
1: The system prints the Kagami summary.
4.4.4.2 Process
Use this processing option to customize invoice records when printing the Kagami invoice statement.
- 1. Invoice Record
-
Specify whether to summarize each invoice record. Values are:
Blank: The system does not summarize each invoice record.
1: The system summarizes each invoice record.
4.5 Calculating Withholding for Japan
This section provides an overview of the withholding process for Japan and discusses how to:
-
Run the Calculate Withholding - Japan report.
-
Set processing options for Calculate Withholding - Japan (R7500090).
-
Set processing options for Country Specific Processing Options - Japan (P04580JP).
4.5.1 Understanding the Withholding Process
The Calculate Withholding - Japan (R7500090) program calculates the withholding for Japan, updates the status of the existing pay item, and creates these additional pay items:
-
A negative pay item for the withholding amount with the same payee, pay status, and due date as the original voucher pay item.
-
A positive pay item for the withholding amount using the tax authority in the supplier master record.
You can specify a different tax authority in the Tax Authority for A/P processing option.
If you leave the Withheld Pay Status Code processing option blank, the system assigns a pay status of H (hold) to pay items for tax authorities, thus enabling you to accumulate withholdings and pay them on a periodic basis.
You use the Withholding Tax Basis processing option to specify whether to calculate the withholding amount based on the gross amount or the taxable amount. If you use the taxable amount to calculate the withholding amount, the system returns an error for any pay item that does not have a taxable amount and does not process that pay item.
To calculate the correct withholding amounts for both taxable and non-taxable amounts, you must run the Calculate Withholding - Japan program twice: once, using the gross amount; and again, using the taxable amount. You can use data selection to select only non-taxable transactions when you run the Calculate Withholding - Japan program using the gross amount, and then run the Calculate Withholding - Japan program using the taxable amount for all remaining transactions. Or, you can run the Calculate Withholding - Japan program using the taxable amount, enabling the program to generate errors for all non-taxable transactions; and then run the Calculate Withholding - Japan program using the gross amount to calculate the withholding amount for those transactions.
The system stores the withholding information in the Withholding Tax Detail - Japan (F750411) table.
Additional results to consider are:
-
If you change the default pay status of the original pay item, the system changes the default pay status for the negative pay item.
-
The negative pay item offsets the amount of the original pay item when you process the original and negative pay items for payment.
4.5.2 Prerequisites
Before you complete the tasks in this section:
-
Set up your suppliers with a payment instrument and withholding tax authority.
-
Set the processing options for Country Specific Processing Options - Japan (P04580JP) using the Interactive Versions program.
-
Set the processing options for Calculate Withholding - Japan (R7500090), including the withheld record due date and the rounding.
4.5.3 Running the Calculate Withholding - Japan Report
Select Japanese Localization (G75J), Calculate Withholding - Japan.
4.5.4 Setting Processing Options for Calculate Withholding - Japan (R7500090)
Processing options enable you to specify the default processing for programs and reports.
4.5.4.1 Process
- 1. Release Pay Status Code
-
Enter a value from the Payment Status Codes (00/) UDC to specify the pay status that the system assigns to the voucher to be released for payment. If you leave this processing option blank, the system uses A.
- 2. Withheld Pay Status Code
-
Enter a value from the Payment Status Codes (00/) UDC to specify the pay status that the system assigns to the withheld pay item. If you leave this processing option blank, the system uses H for the default value.
- 3. Withheld Record Due Date
-
Assign the due date to the withheld pay item. If you leave this processing option blank, the system assigns the voucher's due date.
- 4. Rounding
-
Specify the method of rounding. Values are:
Blank: Round to the nearest integer.
1: Round down.
2: Round up.
Examples of rounding down:
Amount of 1,500.15 is rounded to 1,500.00.
Amount of 1,500.65 is rounded to 1,500.00.
Example of rounding up:
Amount of 1,500.15 is rounded to 1,501.00.
- 5. G/L Offset
-
Enter the GL offset AAI PC to assign to the withheld pay item. This offset should represent the withholding account.
Note:
Do not use code 9999. It is reserved for the post program and indicates that offsets should not be created. - 6. G/L Bank Account
-
Assign the GL bank account to the withheld pay item. If you leave this processing option blank, the system assigns the bank account from AAI item PB.
4.5.4.2 Taxes
- 1. Tax Authority for A/P Withholding
-
Enter an override tax authority that the system assigns to the Alt Payee (Alternate Payee) field in the withholding entry. If you leave this processing option blank, the system retrieves the tax authority from the address book record of the supplier.
4.5.5 Setting Processing Options for Country Specific Processing Options - Japan (P04580JP)
Processing options enable you to specify the default processing for programs and reports.
4.5.5.1 Defaults
- 1. Tax Authority Search Type
-
Enter a value from the Search Type (01/ST) UDC table to identifies the type of address book record the system finds when you conduct a search.
4.6 Making Payments Using the Densai Process (Release 9.1 Update)
This section provides an overview of the Densai user number setup for Japan and discusses how to enter the Densai user number.
4.6.1 Setting Up the Densai User Number
You use the User Number for Supplier Account - Japan program (P75J300A) to enter or modify the Densai user number for suppliers. To enter or modify the Densai user number for bank accounts, you use the User Number for Bank Account - Japan program (P75J300G). The Densai user number is a nine-digit number that the system stores in the Tag file for Densai User Number table (F75J3001).
4.6.2 Forms Used to Enter the Densai User Number
| Form Name | Form ID | Navigation | Usage |
|---|---|---|---|
| DENSAI User Number For Supplier Account - JAP | W75J300AB | From P0030A, click Add on the Work With Bank Accounts By Address form. Enter the address book number for a supplier and select Regional Info from the Form menu on the Set Up Bank Accounts By Address form. | Enter the Densai user number for a supplier. You can also edit the existing Densai number.
When you want to delete the Densai number for a supplier, you can clear the value in the field and save. The system updates the Densai number with a blank value. |
| DENSAI User Number For Bank Account - JAPAN | W75J30GA | From P0030G, click Add on the Work With G/L Bank Accounts form. Enter a bank account number and select Regional Info from the Form menu on the Set Up G/L Bank Account form. | Enter the Densai user number for a bank account. You can also edit the existing Densai number.
When you want to delete the Densai number for a bank account, you can clear the value in the field and save. The system updates the Densai number with a blank value. |
4.6.3 Entering the Densai User Number
Access the Densai User Number for Supplier Account - JAP form.
Figure 4-1 Densai User Number for Supplier Account - JAP form
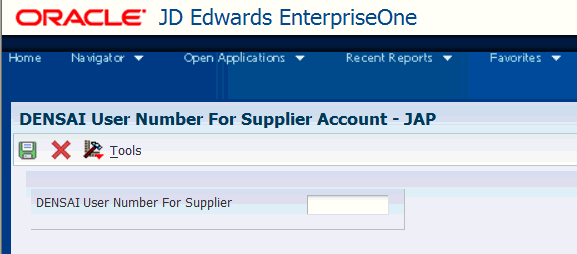
Description of ''Figure 4-1 Densai User Number for Supplier Account - JAP form''
- DENSAI User Number For Supplier
-
Enter the nine-digit Densai number for the supplier. You can also edit or modify the existing Densai number. When you save the changes, the system updates the record in the F75J3001 table.
Access the DENSAI User Number for Bank Account - JAP form.
Figure 4-2 DENSAI User Number for Bank Account - JAP form
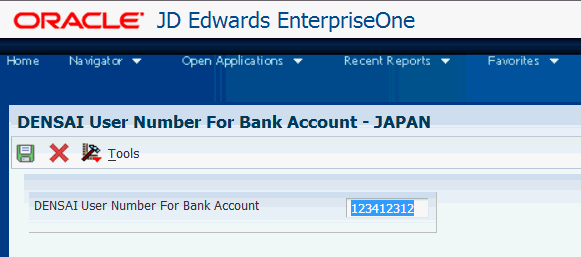
Description of ''Figure 4-2 DENSAI User Number for Bank Account - JAP form''
- DENSAI User Number For Bank Account
-
Enter the nine-digit Densai number for the bank account. You can also edit or delete the existing Densai number. When you save the changes, the system updates the record in the F75J3001 table.
4.7 Paying Vouchers Using the Automatic Payment Process
This section provides an overview of the automatic payment process, lists prerequisites, and discusses how to view payments and close drafts for the maturity-designated payments.
4.7.1 Understanding the Automatic Payment Process
Before you process automatic payments, you assign payment print programs to payment instruments. You also review and revise, if necessary, the processing options for the formats used by the print programs. The payment print program that you assign to a payment instrument launches the version of the payment format when you process payments. For example, P04572JF launches the R04572JF program. To make changes to the processing options for the payment formats, access them from the Batch Versions program (P98305), entering R instead of P in the first position of the name of the payment format program. The processing options further define the format of each component of a payment instrument.
4.7.1.1 Automatic Payment Process
The automatic payment process comprises these steps:
-
Create the payment group to organize vouchers that can be paid together.
You use the Create Payment Control Groups program (R04570) to create payment groups. The program creates a document (payment) with a document type of P1 and a pay status of D.
-
Write the payments to print them or co them to a bank tape.
You use the Work With Payment Groups program (P04571) to write payments.
-
Update the payments to update the F0411 table to create transaction records of your payments and your payment register.
You use the Work With Payment Groups program to update payments.
-
Review the payments.
You can review payments generated by the Create Maturity-designated Payment Bank tape - Japan program (R04572JF) using the Japan Maturity-designated Payments - Inquiry program (P75J4260).
-
Post the payment.
4.7.1.2 Writing and Updating the Payment for the Maturity-Designated Payment Format
When you run the Write process in the automatic payment process, the system runs the Create Maturity-designated Payment Bank tape - Japan program if you specified this program as the payment print program. The system also runs the Maturity-designated Payment bank Transfer Paper – Japan program (R04573JF) if you specified this program as the attachments program. The system:
-
Prints the payment records to the A/P Payment Tape table (F04572OW).
-
Prints a report that shows the records processed.
-
Prints the attachments for the maturity-designated payment format.
When you run the Update process in the automatic payment process, the system runs the standard A/P Auto Payments - Update Driver (R04575) and A/P Auto Payment Register - Drafts (R04576N) programs to generate a PDF report showing the records that were processed.
4.7.2 Prerequisites
Before you run the automatic payment process for Japanese payments:
-
Verify that these UDC tables are set up with appropriate values:
-
00/
-
04/PA
-
04/PP
-
-
Verify that an AAI exists for the maturity-designated payment if you are using that format.
For example, if MD is the payment instrument, set up an AAI for PDMD.
-
Set the processing options for the payment format and attachments program that you use.
-
Specify the appropriate print format as the payment print program.
You can set up the print program as a default value in the Payment Instrument Defaults program (P0417) or by using a menu option (Row menu, Controls) in the Work with Payment Groups program (P04571).
4.7.3 Forms Used to View the Payment Details and Close Drafts for Maturity Designated Payments
| Form Name | Form ID | Navigation | Usage |
|---|---|---|---|
| Japan Maturity-designated Payment – Inquiry Selection | W75J4260A | Japanese Localization (G75J), Japan Maturity-designated Payment – Inquiry Selection | View Japanese drafts and payments.
Use the Select option on the Row menu to change the pay status from D (draft accepted) to # (draft selected) so that you can post the draft. Note: You can use a partial account ID with an asterisk (*) to search for the drafts and payments. You can also locate records by searching using the payment instrument. |
4.8 Processing Densai Payments for Japan (Release 9.1 Update)
This section provides an overview of the print programs for Densai and discusses how to:
-
Set processing options for Payment Print Program for Densai - Japan (R04572JD).
-
Set processing options for Attachment Print Program for Densai - Japan (R04573JD).
4.8.1 Understanding the Print Programs for Densai
When you run the Work With Payment Groups program (P04571) to write payments while processing automatic payments and the document type is P1 for Japan processing, the system automatically runs the Payment Print Program for Densai - Japan and Attachment Print Program for Densai - Japan programs. When you run the Payment Print Program for Densai - Japan program, the system:
-
Retrieves the data from A/P Payment Processing - Header (F04571), A/P Payment Processing - Summary (F04572), A/P Payment Processing - detail (F04573), and Tag file for Densai User Number (F75J3001) tables, and stores the payment records to the A/P Payment Tape table (F04572OW).
-
Prints a report that shows the processed records.
-
Prints the output in the Densai payment format, which are fixed text and XML. The system uses the BI Publisher to generate the XML output.
-
Prints the attachments for the Densai payment in the PDF format.
-
Runs the Japan Densai - R04572JD- Errors program (R045001) whenever the system does not generate XML due to errors in the Payment Print Program for Densai - Japan program. The Japan Densai - R04572JD- Errors report displays the number of errors in the Payment Print Program for Densai - Japan program. You need to refer to the work center to know the error details.
When you run the Attachment Print Program for Densai - Japan program, the system prints the attachment for the Japan Densai payment format.
WARNING:
Before you run the print programs for Densai, you must ensure that the value in the Summarized Pay Item processing option for the Create Payment Control Groups (R04570) report is blank. If you run the print programs for Densai with a value in the Summarized Pay Item processing option and if the summary records exist in F04573, the system doubles the summarized amount, which is incorrect.