13 Managing Data Sources
This section contains the typical data source management tasks you can perform with Oracle CEP Visualizer, including:
For more information, see Section 9.4, "Data Source Management".
13.1 Viewing and Editing a Data Source
This section describes:
13.1.1 How to View a Data Source Configuration
Using the Oracle CEP Visualizer, you can view the data source configuration for a selected Oracle CEP server.
To view a data source configuration:
-
In the left pane, click the Domain > Server node, where Domain refers to the name of your Oracle CEP domain and Server refers to the name of the server instance.
-
In the right pane, click the DataSource tab.
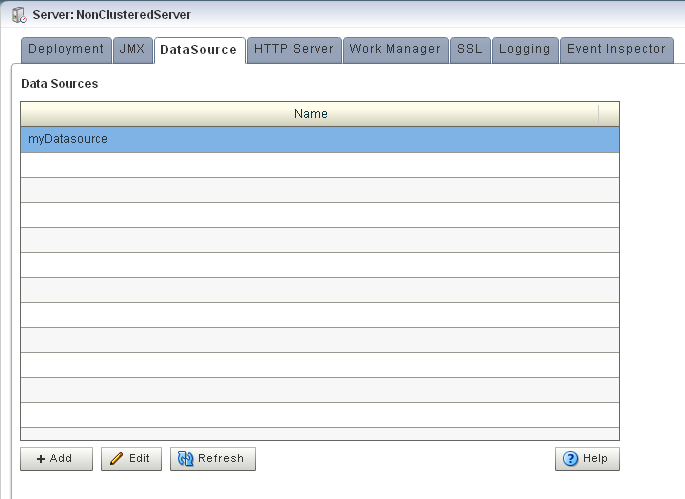
The DataSource tab appears as Figure 13-1 shows.
13.1.2 How to Edit Data Source Configuration
Using the Oracle CEP Visualizer, you can edit the data source configuration for a selected Oracle CEP server.
To edit data source configuration:
-
In the left pane, click the Domain > Server node, where Domain refers to the name of your Oracle CEP domain and Server refers to the name of the server instance.
-
In the right pane, click the DataSource tab.
The DataSource tab appears as Figure 13-2 shows.
-
In the Data Sources table, select the data source you want to edit by clicking on its name.
-
Click Edit.
The Datasource dialog appears as Figure 13-3 shows.
-
Click the Data Source tab.
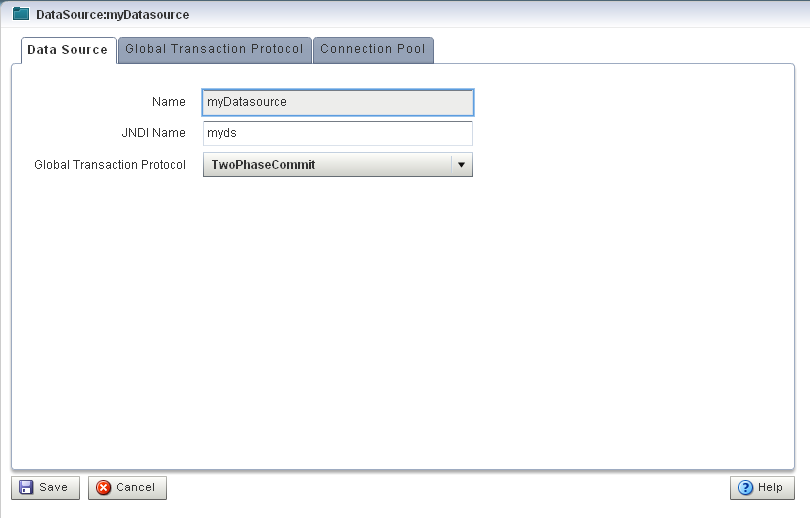
The DataSource tab appears as Figure 13-3 shows.
Figure 13-3 Edit Datasource: Data Source Tab
Description of "Figure 13-3 Edit Datasource: Data Source Tab"
-
Configure the DataSource tab as Table 13-1 describes.
Table 13-1 Edit Datasource: Data Source Parameters
Parameter Description NameThe name for this data source configuration.
JNDI NameJNDI path to where this data source will be bound. This is the name your Oracle CEP application uses to look up the data source in JNDI.
Global Tx ProtocolSelect the protocol for Oracle CEP to use for the transaction branch when processing a global transaction:
-
OnePhaseCommit(Default) -
TwoPhaseCommit -
LoggingLastResource -
EmulateTwoPhaseCommit -
None
-
-
Click the Global Tx Protocol tab.
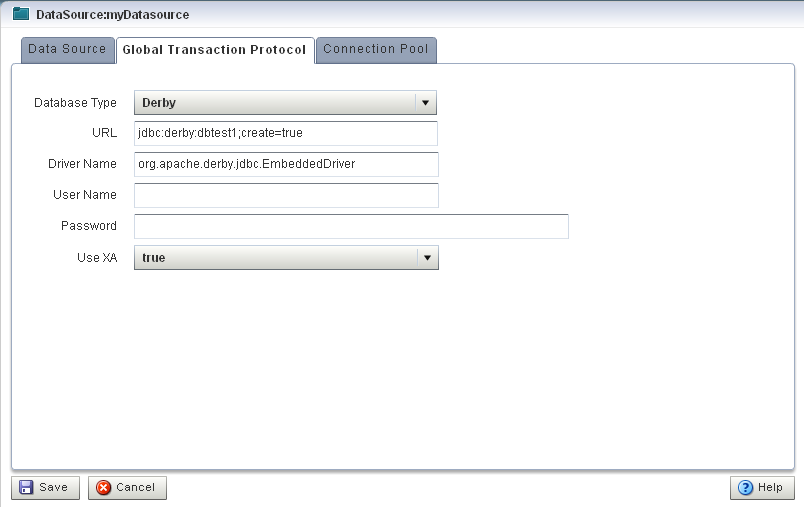
The Global Tx Protocol tab appears as Figure 13-4 shows.
Figure 13-4 Edit Datasource: Global Tx Protocol Tab
Description of "Figure 13-4 Edit Datasource: Global Tx Protocol Tab"
-
Configure the Global Tx Protocol tab as Table 13-2 describes.
Table 13-2 Edit Datasource: Global Tx Protocol Parameters
Parameter Description Database TypeSelect the type of JDBC driver to use:
-
Derby -
Oracle -
SQL Server 2005 -
Other
URLSpecify the database connection URL appropriate for your database. This URL includes the name of the database, the host and port of the computer on which the database server is running, and so on. Oracle CEP populates a default URL for database types it provides.
Driver NameSpecify the name of the driver for the selected database type. Oracle CEP automatically populates the driver name for types it provides.
User NameSpecify database user account name that you want to use for each connection in the data source.
PasswordSpecify database user password that you want to use for each connection in the data source
Use XASpecify whether or not to use distributed transactions:
-
true: enable distributed transactions. -
false: disable distributed transactions.
-
-
Click the Connection Pool tab.
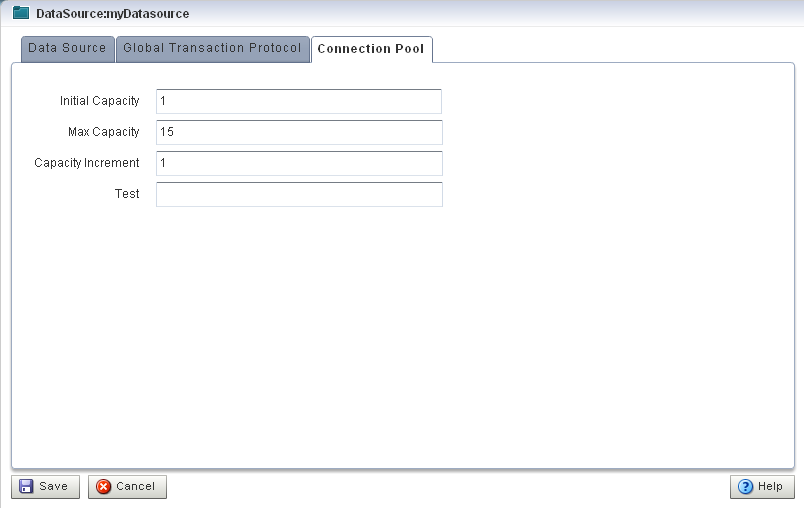
The Connection Pool tab appears as Figure 13-5 shows.
Figure 13-5 Edit Datasource: Connection Pool Tab
Description of "Figure 13-5 Edit Datasource: Connection Pool Tab"
-
Configure the Connection Pool tab as Table 13-3 describes.
Table 13-3 Edit Datasource: Connection Pool Parameters
Parameter Description Initial CapacitySpecify the number of physical connections to create when creating the connection pool.
Max CapacitySpecify the maximum number of physical connections that this connection pool can contain.
Capacity IncrementSpecify how many connections to add when all the connections in the connection pool are in use and the connection pool receives a new connection request.
TestEnter the name of a small table to use in a query if you want to test the database connection before handing it to the requesting application. The standard query is
select 1 fromtable_name. If you prefer to use a different query as a connection test, enterSQLfollowed by a space and the SQL code you want to use to test database connections. -
Click Save.
The datasource is updated in the Oracle CEP server configuration.
13.2 Adding a Data Source
You can add a data source using the Oracle CEP Visualizer.
13.2.1 How to Add a Data Source Configuration
Using the Oracle CEP Visualizer, you can add the data source configuration for a selected Oracle CEP server.
To add a data source configuration:
-
In the left pane, click the Domain > Server node, where Domain refers to the name of your Oracle CEP domain and Server refers to the name of the server instance.
-
In the right pane, click the DataSource tab.
The DataSource tab appears as Figure 13-6 shows.
-
Click Add.
The New Datasource dialog appears as Figure 13-7 shows. There are three accordion tabs:
-
Data Source: use this tab to identify the data source and specify whether or not to use a global transaction protocol.
-
Global Tx Protocol: use this tab to specify connection properties and whether or not to use XA.
-
Connection Pool: use this tab to specify connection pool properties.
-
-
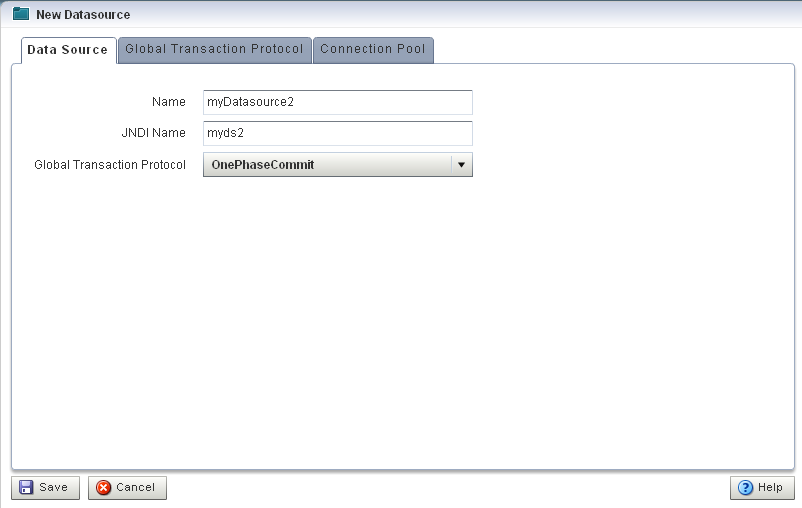
Click the Data Source tab.
The DataSource tab appears as Figure 13-7 shows.
Figure 13-7 New Datasource: Data Source Tab
Description of "Figure 13-7 New Datasource: Data Source Tab"
-
Configure the DataSource tab as Table 13-4 describes.
Table 13-4 New Datasource: Data Source Parameters
Parameter Description NameThe name for this data source configuration.
JNDI NameJNDI path to where this data source will be bound. This is the name your Oracle CEP application uses to look up the data source in JNDI.
Global Tx ProtocolSelect the protocol for Oracle CEP to use for the transaction branch when processing a global transaction:
-
OnePhaseCommit(Default) -
TwoPhaseCommit -
LoggingLastResource -
EmulateTwoPhaseCommit -
None
-
-
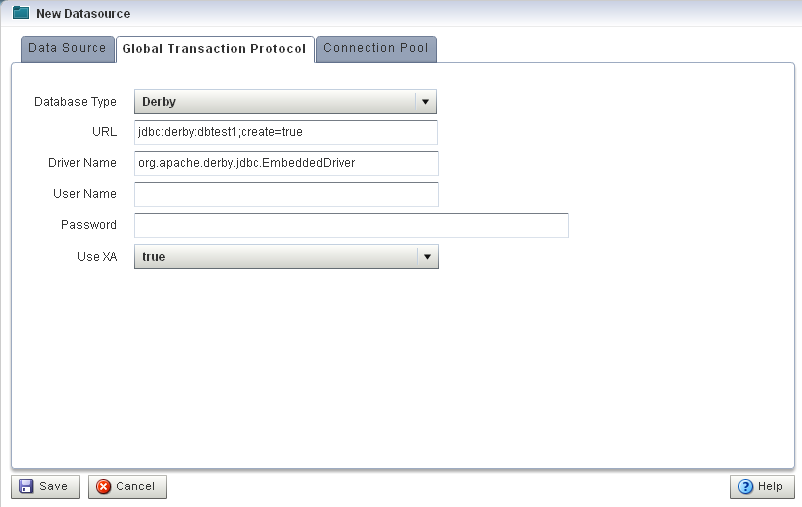
Click the Global Tx Protocol tab.
The Global Tx Protocol tab appears as Figure 13-8 shows.
Figure 13-8 New Datasource: Global Tx Protocol Tab
Description of "Figure 13-8 New Datasource: Global Tx Protocol Tab"
-
Configure the Global Tx Protocol tab as Table 13-5 describes.
Table 13-5 New Datasource: Global Tx Protocol Parameters
Parameter Description Database TypeSelect the type of JDBC driver to use:
-
Derby -
Oracle -
SQL Server 2005 -
Other
URLSpecify the database connection URL appropriate for your database. This URL includes the name of the database, the host and port of the computer on which the database server is running, and so on. Oracle CEP populates a default URL for database types it provides.
Driver NameSpecify the name of the driver for the selected database type. Oracle CEP automatically populates the driver name for types it provides.
User NameSpecify database user account name that you want to use for each connection in the data source.
PasswordSpecify database user password that you want to use for each connection in the data source
Use XASpecify whether or not to use distributed transactions:
-
true: enable distributed transactions. -
false: disable distributed transactions.
-
-
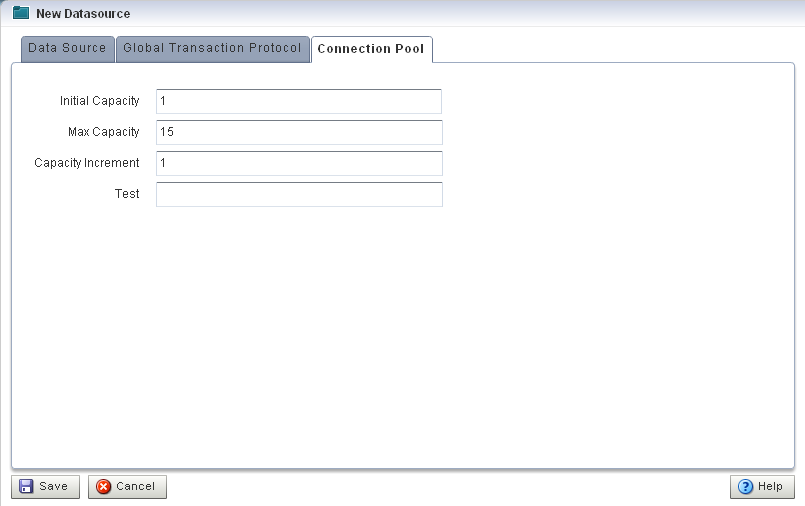
Click the Connection Pool tab.
The Connection Pool tab appears as Figure 13-9 shows.
Figure 13-9 New Datasource: Connection Pool Tab
Description of "Figure 13-9 New Datasource: Connection Pool Tab"
-
Configure the Connection Pool tab as Table 13-6 describes.
Table 13-6 New Datasource: Connection Pool Parameters
Parameter Description Initial CapacitySpecify the number of physical connections to create when creating the connection pool.
Max CapacitySpecify the maximum number of physical connections that this connection pool can contain.
Capacity IncrementSpecify how many connections to add when all the connections in the connection pool are in use and the connection pool receives a new connection request.
TestEnter the name of a small table to use in a query if you want to test the database connection before handing it to the requesting application. The standard query is
select 1 fromtable_name. If you prefer to use a different query as a connection test, enterSQLfollowed by a space and the SQL code you want to use to test database connections. -
Click Save.
The new datasource is added to the Oracle CEP server configuration.
