9 Upgrading Foundation Pack
This chapter discusses how to upgrade Oracle Application Integration Architecture Foundation Pack 11g Release 1 (11.1.1.2.0) to Foundation Pack 11g Release 1 (11.1.1.4.0).
This chapter includes the following sections:
9.1 Overview of the Upgrade Script
As a part of upgrading Oracle Application Integration Architecture (AIA) Foundation Pack 11g Release 1 (11.1.1.2.0) to Foundation Pack 11g Release 1 (11.1.1.4.0), the upgrade script also handles the following specific tasks.
-
Runs UpgradeSchema.sql, located in $AIA_HOME/Infrastructure/LifeCycle/sql, to update the Foundation Pack 11g Release 1 (11.1.1.2.0) database schema to the Foundation Pack 11g Release 1 (11.1.1.4.0) database schema.
This schema update increases the size of the following columns:
-
AIA_DEPLOY_ATTRIBUTE_VALUES.GROUP_NUMBER
-
AIA_SERVICE_ELEMENTS.SERVICE_ELEMENT_TYPE
This schema update adds the following universal unique identifier (UUID)-related table columns:
-
PROCESS_UUID column added to the AIA_OER_PROCESSES table
-
TASK_UUID column added to the AIA_OER_TASKS table
-
TASK_BOM_UUID column added to the AIA_OER_TASK_BOMS table
UUIDs are used to uniquely identify projects in Project Lifecycle Workbench.
-
-
Runs the UpgradeUUID.sh utility, located in $AIA_HOME/Infrastructure/LifeCycle/PLWImExport, to add actual UUID values to the Foundation Pack 11g Release 1 (11.1.1.4.0) database that was updated to include UUID-related table columns.
If you have performed a clean upgrade and need to copy Project Lifecycle Workbench data from your existing Foundation Pack 11g Release 1 (11.1.1.2.0) instance to your new Foundation Pack 11g Release 1 (11.1.1.4.0) instance, see Section 9.4, "Copying Project Lifecycle Workbench Data to a New Foundation Pack 11g Release 1 (11.1.1.4.0) Instance."
9.2 Upgrade and Verify Oracle SOA Suite Environment
We require that you upgrade your Oracle SOA Suite 11g environment to Oracle SOA Suite 11g Release 1 (11.1.1.4.0) before you upgrade Foundation Pack 11g Release 1 (11.1.1.2.0) to 11g Release 1 (11.1.1.4.0).
For information about performing a Oracle SOA Suite upgrade, see "Developing an Upgrade Strategy" in Oracle Fusion Middleware Upgrade Planning Guide.
Once you have completed the Oracle SOA Suite upgrade, perform the following validations to ensure that the upgraded domain is functional.
To verify that the updated Oracle SOA Suite domain is functional:
-
Verify that the Oracle Enterprise Manager console for the domain is available: http://<admin server hostname>:<admin server port>/em.
-
Verify that the node manager is reachable from the Oracle WebLogic Server Administration Console: http://<admin server hostname>:<admin server port>/console. Browse to Environment, Machines, <machine corresponding to your node manager>. Select the Monitoring tab. Select the Node Manager Status tab to view the status.
-
Verify that the SOA server can be restarted from the Oracle WebLogic Server Administration Console: http://<admin server hostname>:<admin server port>/console. Browse to Environment, Servers. Select the Control tab. Attempt to stop and start the <soa_server>.
If each of these validations return positive results, your domain upgrade to Oracle SOA Suite 11g Release 1 (11.1.1.4.0) is ready to support an upgrade to Foundation Pack 11g Release 1 (11.1.1.4.0).
9.3 Performing the Upgrade
The process of upgrading Foundation Pack 11g Release 1 (11.1.1.2.0) to Foundation Pack 11g Release 1 (11.1.1.4.0) consists of the stages discussed in this section.
This section includes the following topics:
9.3.1 Copying Foundation Pack 11g Release 1 (11.1.1.4.0) Files to AIA_HOME
To copy Foundation Pack 11g Release 1 (11.1.1.4.0) files to AIA_HOME using the AIA Installer:
-
Download Foundation Pack 11g Release 1 (11.1.1.4.0).
-
Unzip the downloaded installer zip file.
-
Browse to <Installer_Unzip_Location>/aiafp/Disk1.
-
Ensure that the SOA server has been stopped before proceeding to the next step.
-
Execute the following command to launch the AIA Installer for upgrade:
./runInstaller -invPtrLoc <soa_Home>/oraInst.loc -jreloc <location of the jre
specific to your operating system. This directory should have /bin/java>
Note:
At the end of this procedure, a backup of $AIA_HOME/AIAMetaData will have been made in $AIA_HOME/AIAFPUpdates/Update_AIAFP11114/backup. -
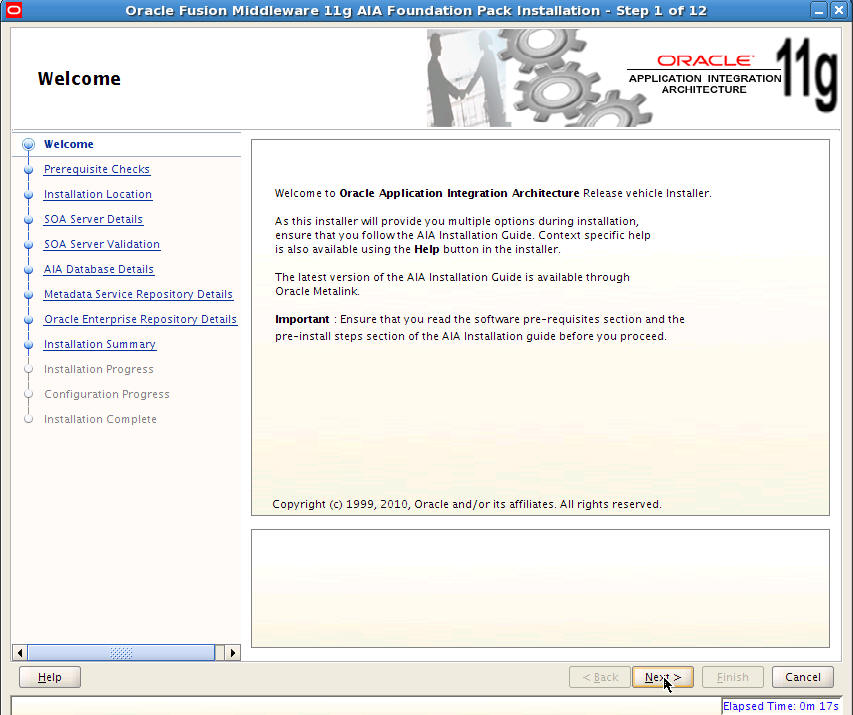
The Welcome page displays, as shown in Figure 9-1. Click Next.
-
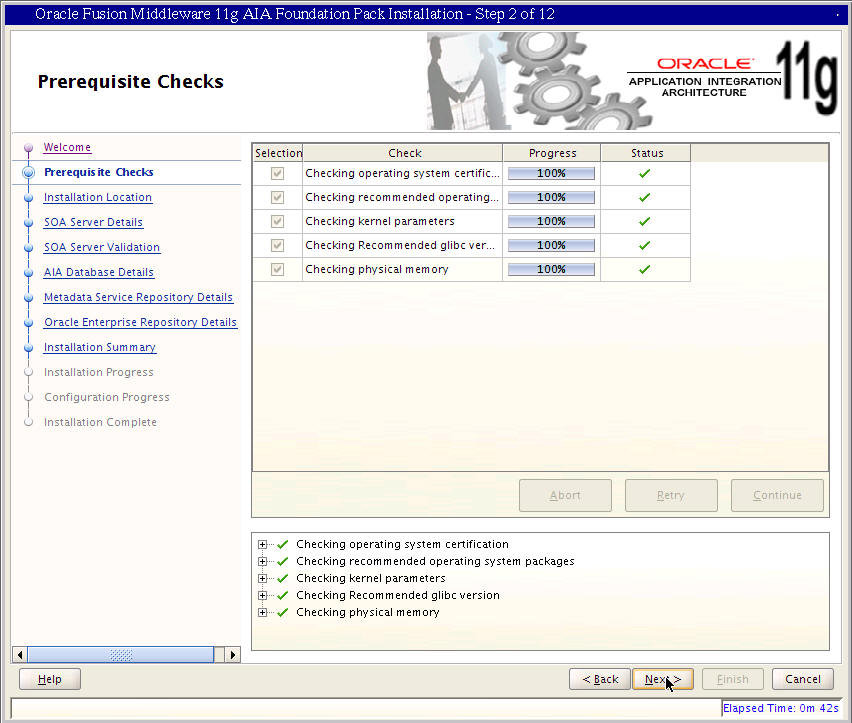
The Prerequisites page displays, as shown in Figure 9-2. Verify that upgrade prerequisites have been made. Click Next.
-
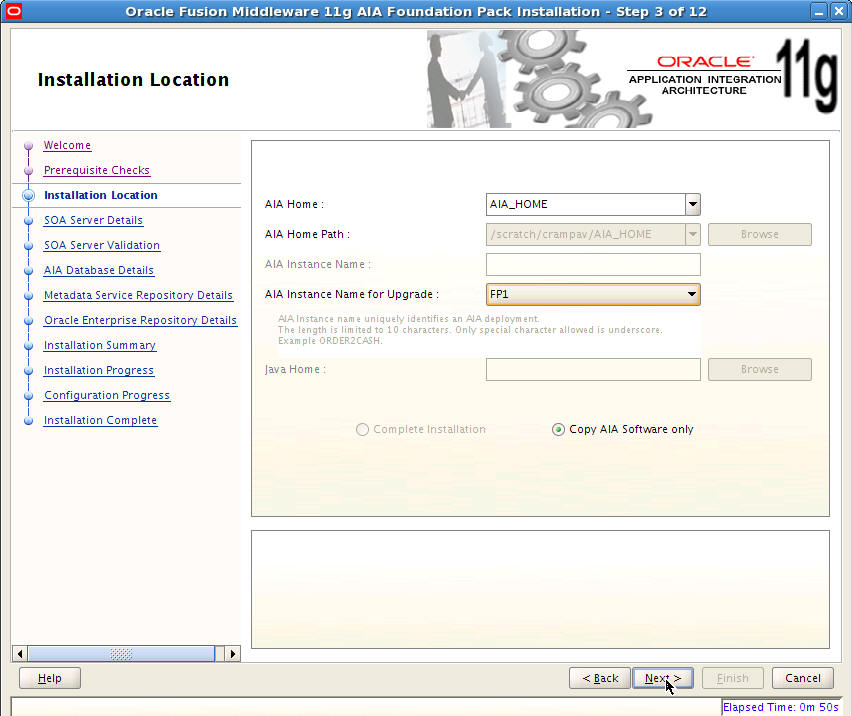
The Installation Location page displays, as shown in Figure 9-3. In the AIA Home field, specify the existing AIA_HOME. In the AIA Instance Name for Upgrade field, select the AIA_INSTANCE that you want to upgrade. Click Next.
-
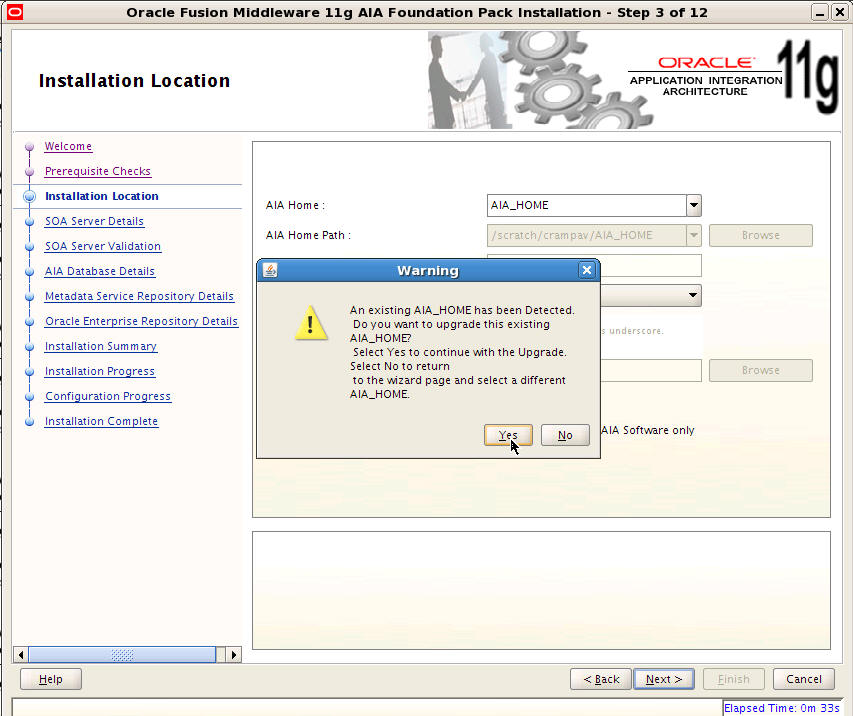
The Home not empty warning message displays, as shown in Figure 9-4. Click Yes to confirm that you want to continue with upgrading your existing AIA_HOME to Foundation Pack 11g Release 1 (11.1.1.4.0). Click Next.
-
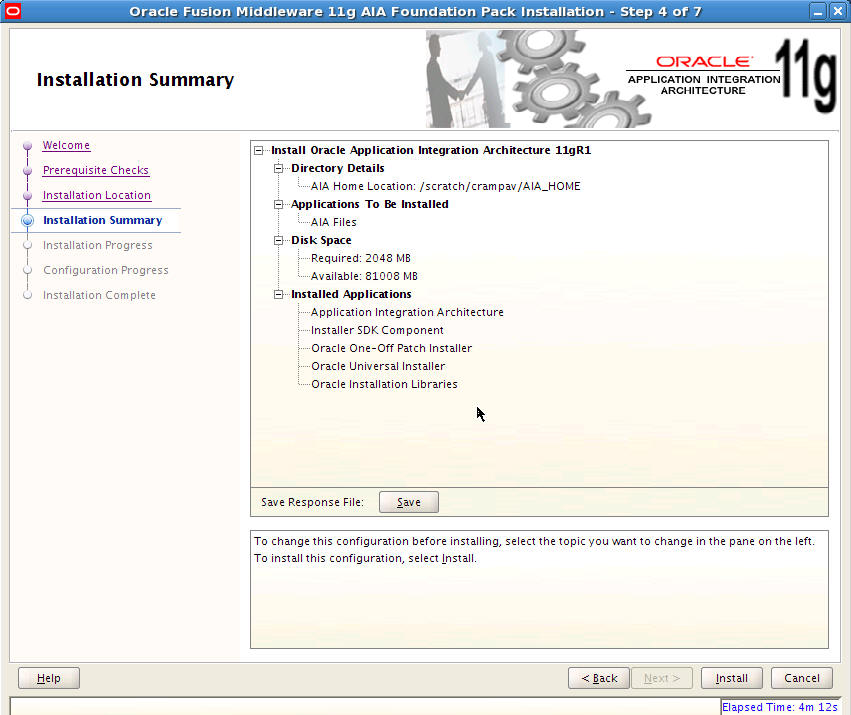
The Installation Summary page displays, as shown in Figure 9-5. Verify your upgrade value selections. Click Install to proceed with copying files.
-
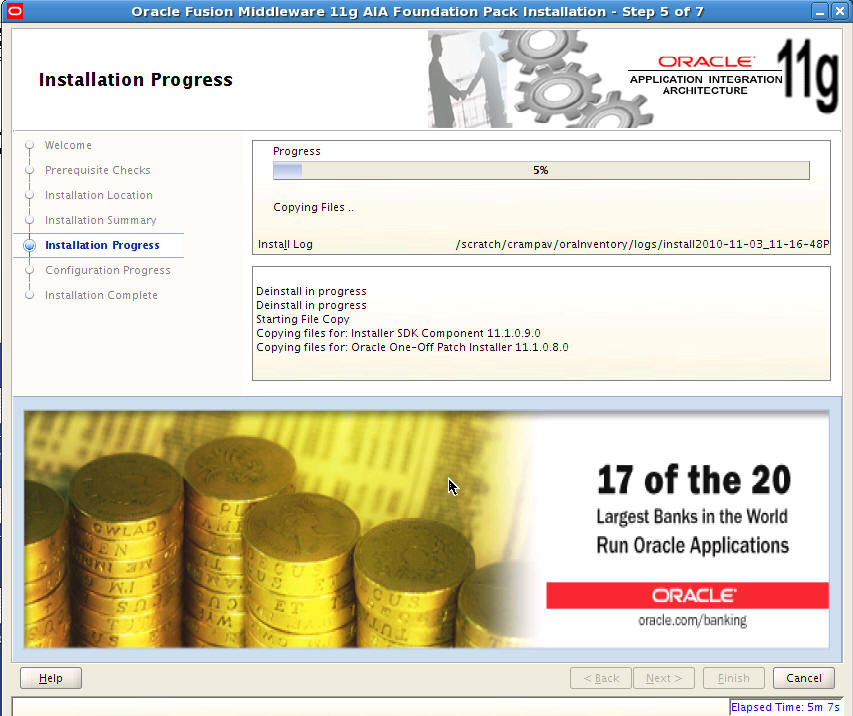
The Installation Progress page displays, as shown in Figure 9-6.
-
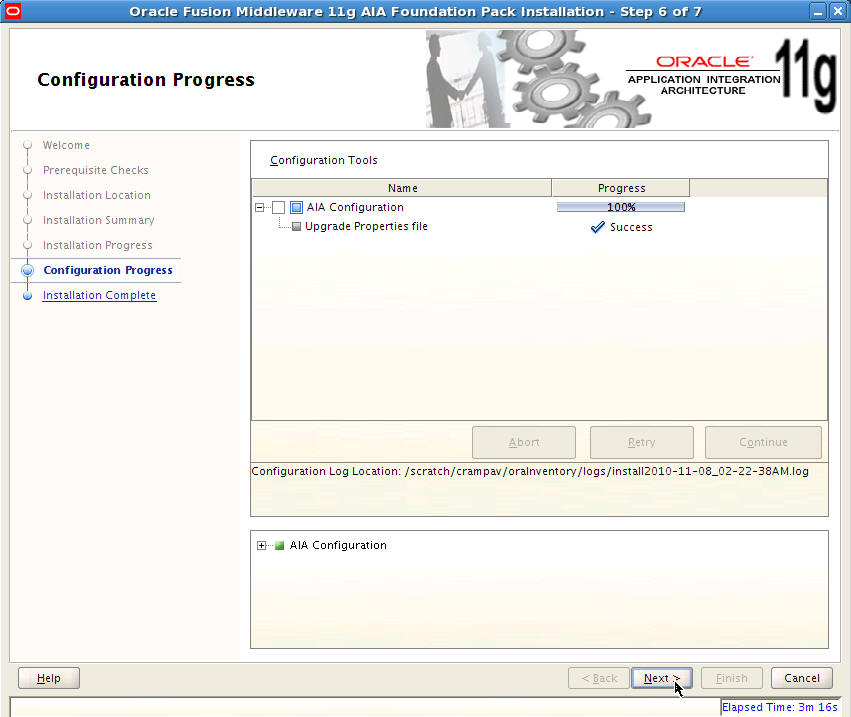
When all files have been copied, the AIA Installer updates the AIAInstallProperties.xml file with an updated version, as shown in Figure 9-7. Click Next.
-
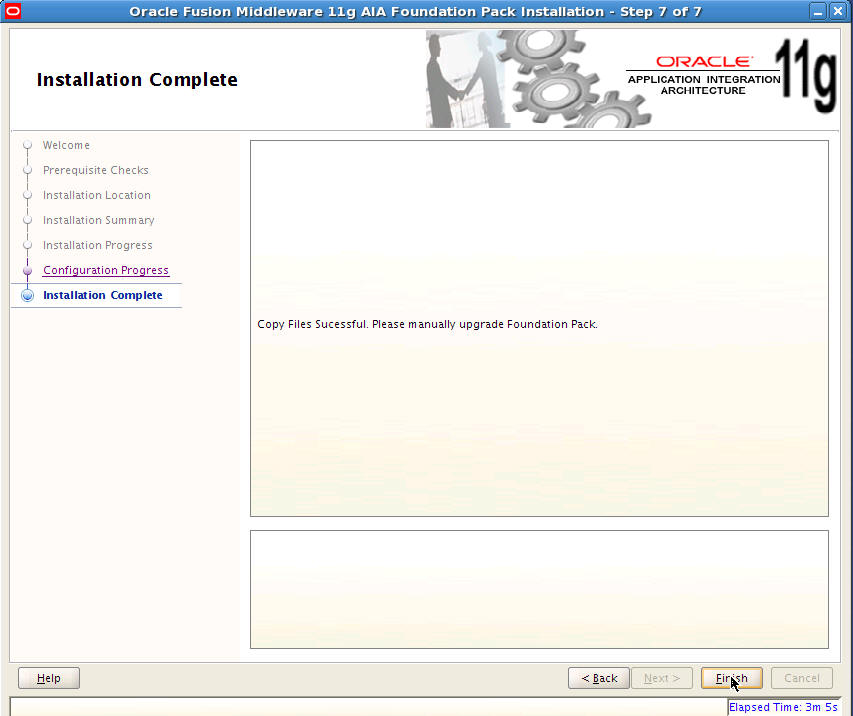
The Installation Complete page displays, as shown in Figure 9-8. Click Finish to exit the AIA Installer.
9.3.2 Updating the AIA Environment
To update the AIA environment:
-
Source aiaenv.sh from <AIA_HOME>/aia_instances/<aia_instance>/bin.
-
Browse to the <AIA_HOME>/AIAFPUpdates/Update_AIAFP11114/config folder.
-
Execute the following script:
ant -f UpdateEnvironment.xml
9.3.3 Running the EOL Upgrade Utility
The Enterprise Object Library (EOL) Upgrade Utility upgrades the latest EOL with customizations made to the previous EOL.
After running, the EOL Upgrade Utility generates the following reports:
-
EOLMergeUtility_AutoLog_<TimeStamp>.log
Captures all automated (trivial) merges.
-
EOLMergeUtility_ManualActionLog_<TimeStamp>.log
Captures all conflicts and the manual actions the user must perform.
-
EOLMergeUtility_DetailedLog_<TimeStamp>.log
Captures a detailed merge report, including post-merge validations.
The reports are generated in a default location of ${AIA_INSTANCE}/logs/EOLUpgrade.
To generate these reports to a different directory, perform the following task before running the utility.
To define your own EOL Upgrade Utility report generation location:
-
Browse to the <AIA_HOME>/AIAFPUpdates/Update_AIAFP11114/config folder.
-
Open EOLUpgradeUtility.xml in edit mode.
-
Modify the last argument of the Java task to reflect the desired report generation location.
<arg value="<Desired Location of the Report>"/>
To run the EOL Upgrade Utility:
We recommend running the utility using the following two-step process.
-
Run the EOL Upgrade Utility in Report mode.
In Report mode, reports are generated and the utility does not perform the merge. Refer to these reports to preview the changes that will be made when you run the utility in Upgrade mode to perform the actual merge.
Once you have run the utility in Report mode, we suggest that you perform all of the changes suggested in the generated EOLMergeUtility_ManualActionLog_<TimeStamp>.log before running the utility in Upgrade mode.
For information about how to address manual changes suggested in the EOLMergeUtility_ManualActionLog_<TimeStamp>.log, see "Step 5: Review the Output File" in Oracle Fusion Middleware Migration Guide for Oracle Application Integration Architecture.
-
Source aiaenv.sh from the <AIA_HOME>/aia_instances/<aia_instance>/bin.
Note:
Sourcing aiaenv.sh is required as the file has been updated during steps covered in Section 9.3.2, "Updating the AIA Environment" and some environment variables must be set again. -
Browse to the <AIA_HOME>/AIAFPUpdates/Update_AIAFP11114/config folder.
-
Execute the following script
ant -f EOLUpgradeUtility.xml
-
-
Run the utility in Upgrade mode to perform the actual merge process.
If you have already addressed the manual changes suggested in the EOLMergeUtility_ManualActionLog_<TimeStamp>.log report generated in step 1, the report should not contain any issues after running the utility in Upgrade mode. This will indicate that the merge was completed successfully.
-
Access the <AIA_HOME>/AIAFPUpdates/Update_AIAFP11114/config folder.
-
Open the EOLUpgradeUtility.xml file in edit mode.
-
To run the utility in Upgrade mode, modify the
<arg value="report"/>argument of the Java task as follows:<arg value="upgrade"/>
-
Save the file.
-
Access the <AIA_HOME>/AIAFPUpdates/Update_AIAFP11114/config folder.
-
Execute the following script:
ant -f EOLUpgradeUtility.xml
-
9.3.4 Running the Upgrade Script
Perform the following steps to upgrade to Foundation Pack 11g Release 1 (11.1.1.40).
To run the upgrade script delivered with Foundation Pack 11g Release 1 (11.1.1.4.0):
-
Ensure that the SOA server is running.
To start the SOA server, access the Oracle WebLogic Server Administration Console: http://<admin server hostname>:<admin server port>/console. Browse to Environment, Servers. Select the Control tab. Start the <soa_server>.
-
Browse to $AIA_INSTANCE/config.
-
Open the AIAInstallProperties.xml file in edit mode.
-
Add the following code under the XPath /properties/fp/server. If you are unclear regarding the XPath, see the AIAInstallProperties.xml template located in $AIA_HOME/AIAFPUpdates/Update_AIAFP11114/templates and perform this update as shown in the template.
-
For a single node:
<jndiurl>t3://<managedserverhostname>:<managedserverport></jndiurl>
-
For clustering, provide the required information for all nodes, using a comma as a delimiter:
<jndiurl>t3://<managedserverhostname1>:<managedserverport1>,
<managedserverhostname2>:<managedserverport2>,<managedserverhostname3>:
<managedserverport3>, ...... </jndiurl>
-
-
Browse to $AIA_INSTANCE/AIAMetaData/config.
-
Open the AIAConfigurationProperties.xml file in edit mode.
-
Add the following SystemConfiguration Properties under the comment line
<!- System configuration properties ->:<Property name="Routing.ActiveRuleset">DEFAULT</Property> <Property name="O2C.EnablePriceListMapping">false</Property>
-
Search for the ModuleConfiguration with the name ErrorHandler. In the ErrorHandler ModuleConfiguration, perform the following steps:
-
Change property name EH.UID to EH.USERNAME.
-
Change property name EH.PWD to EH.PASSWORD.
For security reasons, change the value of EH.PASSWORD to fp.server.password.
-
Add the following properties:
<Property name="EH.B2B.HOSTNAME">$managedserverhostname$</Property>
<Property name="EH.B2B.PORT">$managedserverport$</Property>
For a single node, add:
<Property name="EH.JNDIURL">t3://<managedserverhostname>:
<managedserverport>
</Property>
For clustering, provide the required information for all nodes using a comma as a delimiter:
<Property name="EH.JNDIURL">t3://<managedserverhostname1>:
<managedserverport1>,<managedserverhostname2>:<managedserverport2>,
<managedserverhostname3>:<managedserverport3>, ...... </Property>
-
Change the property FROM.EMAIL.ID value from Email:AiaAdmin@oracle.com to Email:AiaAdmin@server.com.
-
-
Source aiaenv.sh from <AIA_HOME>/aia_instances/<aia_instance>/bin.
-
Browse to the <AIA_HOME>/AIAFPUpdates/Update_AIAFP11114/config folder.
-
Execute the following script:
ant -f UpdateAIAFP11114.xml
-
Because you are manually invoking the AIA Installation Driver (AID), you are prompted for an administrator username and password. Provide valid credentials.
-
Validate the upgrade.
-
Access the Oracle Enterprise Manager (http://<admin server hostname>:<admin port>/em /) and log in using the valid credentials.
-
Navigate to Farm. Expand Farm_soa_domain, SOA, soa infra in the left panel. Navigate to Deployed Composites in the main panel and verify that you can view the following composites:
AIAB2BErrorHandlerInterface
AIAB2BInterface
ReloadProcess
AIAAsyncErrorHandlingBPELProcess
AIAReadJMSNotificationProcess
AIAErrorTaskAdministrationProcess
-
Navigate to the AIA Home Page (http://<managed server hostname>:<managed server port number>/AIA/) and log in using valid credentials. Navigate to the Composite Application Validation System, Project Lifecycle Workbench, and the AIA setup pages. Verify that the UI tabs for each application are accessible.
-
9.4 Copying Project Lifecycle Workbench Data to a New Foundation Pack 11g Release 1 (11.1.1.4.0) Instance
Perform this procedure only if you have performed a clean upgrade and need to copy Project Lifecycle Workbench data from your existing Foundation Pack 11g Release 1 (11.1.1.2.0) instance to your new Foundation Pack 11g Release 1 (11.1.1.4.0) instance.
Caution:
If you have performed an in-place upgrade from Foundation Pack 11g Release 1 (11.1.1.2.0) to Foundation Pack 11g Release 1 (11.1.1.4.0), do not to perform this procedure.To copy Project Lifecycle Workbench Data from an existing Foundation Pack 11g Release 1 (11.1.1.2.0) instance to a new Foundation Pack 11g Release 1 (11.1.1.4.0) instance:
-
Run PLWExport.sh to export projects from the Foundation Pack 11g Release 1 (11.1.1.2.0) database.
For more information about running PLWExport.sh, see "How to Export Seed Data" in Oracle Fusion Middleware Developer's Guide for Oracle Application Integration Architecture Foundation Pack.
-
Point the Foundation Pack 11g Release 1 (11.1.1.2.0) installation to the 11g Release 1 (11.1.1.4.0) database.
To do this, you will change the JNDI URL, login username, and password values in the Foundation Pack 11g Release 1 (11.1.1.2.0) installation to point to the 11g Release 1 (11.1.1.4.0) database:
-
Locate AIAInstallProperties.xml in $AIA_INSTANCE/config. This file stores the JNDI URL value. Change the
<jndiurl>value to point to the Foundation Pack 11g Release 1 (11.1.1.4.0) database.Example 9-1 <jndiurl> Value in AIAInstallProperties.xml
<fp> <version>11.1.1.4.0</version> <server> <adminhostname>sdc60026sems.us.oracle.com</adminhostname> <adminport>7001</adminport> <domainname>soa_domain</domainname> <username>weblogic</username> <password>weblogic#1</password> <servertype>Server</servertype> <soaserver>soa_server1</soaserver> <soaserverhostname>sdc60026sems.us.oracle.com</soaserverhostname> <soaserverport>8001</soaserverport> <jndiurl>t3://sdc60026sems.us.oracle.com:7001 </jndiurl> </server> </fp> -
To encode and store the JNDI login username and password values, run AIALifeCycleEncode.sh. For example:
$AIALifeCycleEncode.sh -user <user name> -type jndi
Enter the password value when prompted.
Ensure that you include
-type jndiso that, specifically, the JNDI username and password values are encoded and stored. The encoded JNDI username and password are stored in the Key and Properties files in $AIA_INSTANCE/.configuration. -
To encode and store the Project Lifecycle Workbench database login username and password values, run AIALifeCycleEncode.sh. For example:
$AIALifeCycleEncode.sh -user <PLW database user name>
Enter the password value when prompted.
Specifically, database username and password values are encoded and stored. The encoded Project Lifecycle Workbench user name and password are stored in the Key and Properties files in $AIA_INSTANCE/.configuration.
-
-
Run PLWImport.sh to import the projects you exported from the Foundation Pack 11g Release 1 (11.1.1.2.0) database in step 1.
For more information about running PLWImport.sh, see "How to Import Seed Data" in Oracle Fusion Middleware Developer's Guide for Oracle Application Integration Architecture Foundation Pack.
-
Access the Project Lifecycle Workbench to verify the data import.
For more information about using the Project Lifecycle Workbench, see "Working with Project Lifecycle Workbench" in Oracle Fusion Middleware Developer's Guide for Oracle Application Integration Architecture Foundation Pack.
