To configure a DSN on macOS, you can either use the command-line
utility (myodbc-installer), edit the
odbc.ini file within the
Library/ODBC directory of the user, or use
the ODBC Administrator GUI.
The ODBC Administrator is included in OS X v10.5 and earlier; users of later versions of OS X and macOS need to download and install it manually.
To create a DSN using the myodbc-installer utility, you only need to specify the DSN type and the DSN connection string. For example:
$> myodbc-installer -a -s -t"DSN=mydb;DRIVER=MySQL ODBC 8.4 Driver;SERVER=mysql;USER=username;PASSWORD=pass"
To use ODBC Administrator:
For correct operation of ODBC Administrator, ensure that the
/Library/ODBC/odbc.inifile used to set up ODBC connectivity and DSNs are writable by theadmingroup. If this file is not writable by this group, then the ODBC Administrator may fail, or may appear to work but not generate the correct entry.There are known issues with the macOS ODBC Administrator and Connector/ODBC that may prevent you from creating a DSN using this method. In that case, use the command line or edit the
odbc.inifile directly. Existing DSNs or those that you created using the myodbc-installer tool can still be checked and edited using ODBC Administrator.
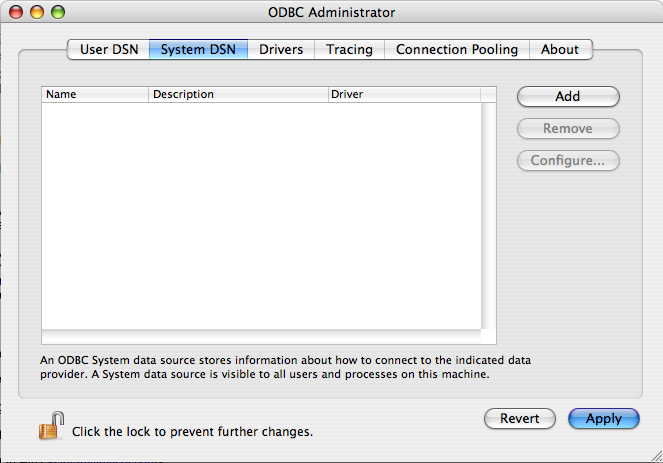
Open the ODBC Administrator from the
Utilitiesfolder in theApplicationsfolder.From the
ODBC Administratordialog, choose either the User DSN or System DSN tab and click .Select the Connector/ODBC driver and click .
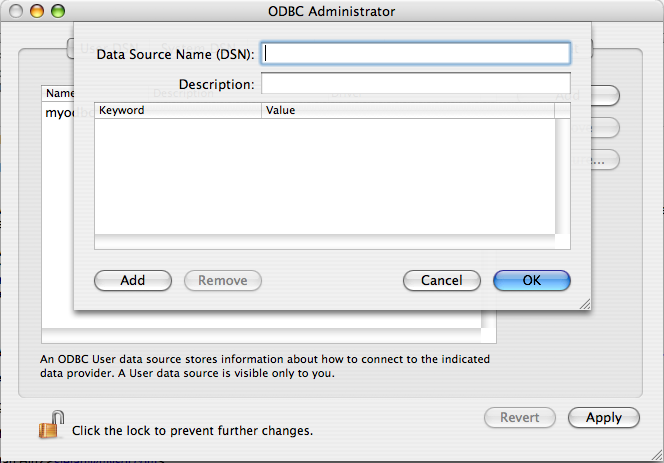
You will be presented with the
Data Source
            Name
(DSN) dialog. Enter theData Source Nameand an optionalDescriptionfor the DSN.
Click to add a new keyword/value pair to the panel. Configure at least four pairs to specify the
server,username,passwordanddatabaseconnection parameters. See Section 5.2, “Connector/ODBC Connection Parameters”.Click to add the DSN to the list of configured data source names.
A completed DSN configuration may look like this:
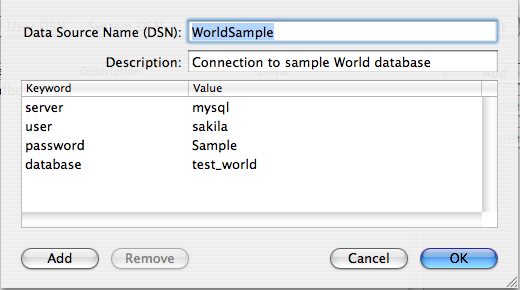
You can configure other ODBC options in your DSN by adding further keyword/value pairs and setting the corresponding values. See Section 5.2, “Connector/ODBC Connection Parameters”.