Managing Items and Locations
About Managing Items and Locations
Depending on your authorization, you have access to options on the right-click menu that enable you to do the following:
-
To view the attributes of an item, location, or other objects (known generically as members)
-
To create, edit, and delete items, locations, or other objects
-
To perform additional operations on members, as defined within your implementation
Permissions are set separately for each level and potentially for each user.
Where to Work with Items and Locations
The right-click menu is available in different areas of a worksheet:
-
In the Members Browser
-
In the worksheet table, if promotions are currently displayed there
Interaction with Corporate Systems
If you change or add items or locations, you should be aware of how Oracle Demantra interacts with your corporate systems. Oracle Demantra periodically imports data about sales, items, and locations from your other systems. Each time data is imported into your system, the changes you have made to the levels are overwritten, depending on the kind of change.
-
You should edit or delete existing members only if you are expecting the same change to occur in the imported data, and you need to see the change right away within Oracle Demantra for some reason.
-
If you add members, they will be kept when data is imported.
Viewing the Attributes of an Item or Location
To view the attributes of an item or location
-
In your worksheet, find an area that is currently displaying the type of object you want to work with; see Where to Work with Items and Locations.
-
Right-click an object and click View (for example, View Ship to).
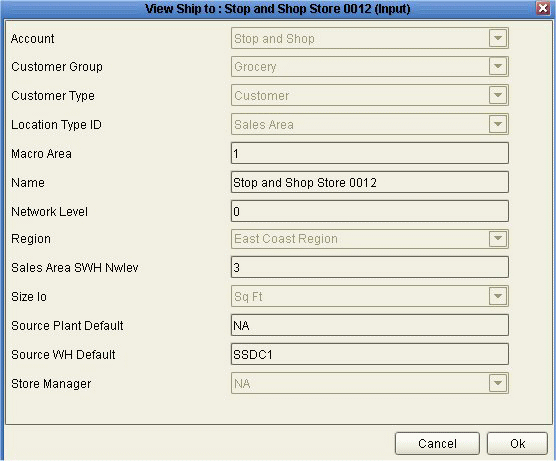
Oracle Demantra displays a dialog box like the following:

The attributes shown in red are required. These include the Name attribute and all immediate parents of this member. Depending on your implementation, not all attributes are editable.
Creating an Item or Location
In the current release, you can create a member, but you cannot display it in your worksheet.
To create an item or location
-
In your worksheet, find an area that is currently displaying the type of object you want to work with; see Where to Work with Items and Locations.
-
Right-click an object and then select New (for example, New SKU).
Oracle Demantra displays a window where you specify the name of the new member, as well as its parent levels and other attributes.
-
For Name, specify a unique name.
-
The rest of the fields prompt you for values of attributes associated with this level; the fields shown in red are required. The specific attributes you see depend upon your configuration.
-
Click Create.
-
Click Data > Update to save your changes.
Note: You cannot see the new member in the Members Browser, because the Members Browser displays only item-location combinations that exist and that have sales.
Modifying an Item or Location
You can modify a member by changing its name, the parent members to which it belongs, and any visible attributes.
To modify an item or location
-
In your worksheet, find an area that is currently displaying the type of object you want to work with; see Where to Work with Items and Locations.
-
Right-click an object and then select Edit (for example, Edit SKU). Then make changes as needed; see Creating an Item or Location for details.
-
Click Finish.
-
Click Data > Update to save your changes.
-
Click Data > Rerun to display the changes.
See also About Managing Items and Locations.
Deleting an Item or Location
-
In your worksheet, find an area that is currently displaying the type of object you want to work with; see Where to Work with Items and Locations. Note that you cannot delete objects from within the worksheet table.
-
Right-click an object and click Delete (for example, Delete SKU).
-
Oracle Demantra prompts you to confirm the action. Click Yes or No.
See also About Managing Items and Locations.
Opening an Item or Location in Another Worksheet
Depending on how your system has been configured, you may be able to open a worksheet that is filtered to show only data relevant to the member from which you started.
The specific options are usually different for each aggregation level in your system.
To open an item or location in another worksheet
-
In your worksheet, find an area that is currently displaying the type of object you want to work with; see Where to Work with Items and Locations.
-
Then do one of the following:
The worksheet appears in a new window or tab, depending on how you are currently viewing the worksheets.
Note: Depending on how this worksheet is defined, it is filtered in one of two ways:
-
Filtered by member, that is, filtered to show the item or location from which it was launched, aggregating across all combinations
-
Filtered by combination, that is filtered to show the specific combination from which it was launched
Using Other Right-Click Menu Options
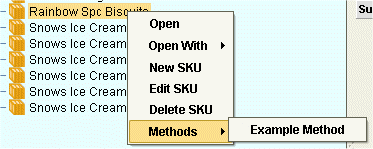
Depending on your implementation, the right-click menu may include a Methods submenu that includes additional options created by your implementors:

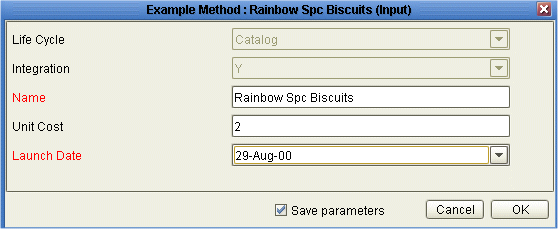
When you click one of these options, Oracle Demantra displays a dialog box like the following:

Select the Save parameters check box if you want to save the attribute changes to the database when the method is run.
For information on any such menu items, please contact your implementors or your designated Oracle Demantra system administrator.