Role Based Security
This chapter covers the following topics:
- Overview of Role Based Security Access
- Setting Up Role Based Access Control
- Creating User Defined Privileges
- Viewing and Defining User Groups
- Viewing and Defining Roles
- Viewing and Assigning Roles
Overview of Role Based Security Access
Role based access is used to control security access for sites, site attributes, hierarchies, and hierarchy attributes. Create access for sites and hierarchies is controlled by assigning a responsibility to a user with the appropriate create function included in the responsibility’s menu. View and Edit access for sites, hierarchies, and their attributes is granted to the users as a role assignment.
Data access security controls are enforced through all user interfaces in Oracle Site Hub, including but not limited to the Hierarchy Workbench transactions, Web Services, import interfaces, Public APIs, and Web ADI for import/export of sites. Role based security setups for User Groups, Roles, and Role Assignments are viewed and defined in the Role Security tabbed region of the Site Administrator responsibility.
Role Based Viewing and Editing Ability
Role based access security enables you to restrict viewing or updating specific attributes to maintain the confidentiality of site information. You can set privileges for a group of attributes within the appropriate sites.
Attribute security is enforced on all attributes of an attribute group based on the user defined view and edit privileges associated at the attribute group level. Privileges are defined using the Form Function window in the context of the site or hierarchy object.
The following fields are provided in the Attribute Group Details page to employ role based access security:
-
View: This privilege enables users to view attribute groups associated to their roles.
-
Edit: This privilege enables users to edit attribute groups associated to their roles.
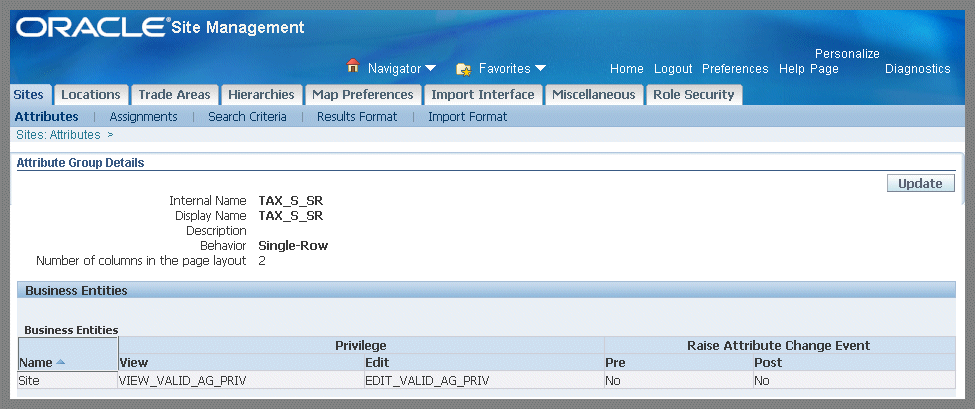
Edit and view rights are separate privileges grouped together in a user role, and granted to each user or user group in role assignments. The following behavior occurs when role based access security is set up in your environment:
-
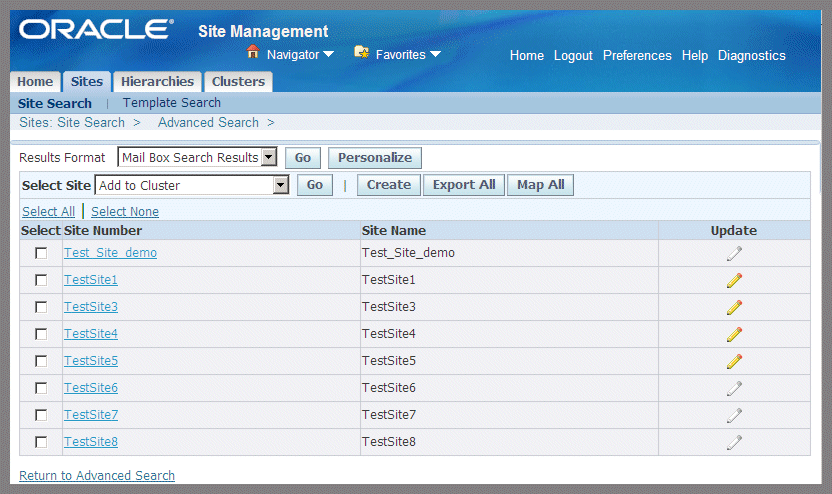
A user having edit privilege also needs view privilege to be able to edit the record. If only view privilege is granted, sites and hierarchies cannot be created or edited. For records where view and edit privileges are not granted—the Update and Create buttons icons are disabled on Sites, Templates, Hierarchies, and Clusters pages.
-
If Privilege fields are left unassigned for an attribute group, role based security is not enforced for the attributes belonging to the attribute group. All users can view and edit the attribute values of that attribute group.
-
If only the edit privilege is assigned and the view privilege is left blank; all users can view attribute values of the attribute group. However, update is restricted to users having edit privileges assigned.
-
Attribute fields are visible to users or groups with view privilege for a particular attribute group, otherwise the entire attribute group is hidden to the user. If a user does not have view privilege for any of the attributes on a page, the entire page is not visible to that user.
-
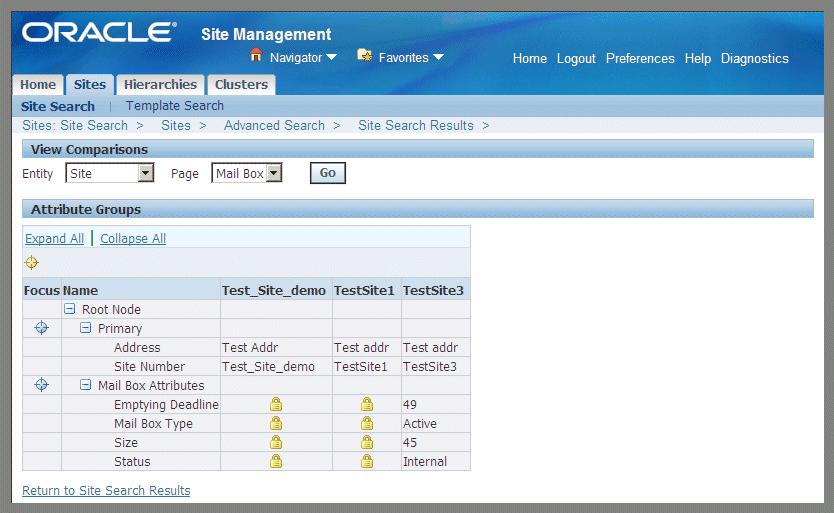
When performing Simple and Advanced Search functions, Viewing Comparisons, Site Map displays, and Hierarchy Workbench transactions—attribute fields are visible when users have view privilege for particular attribute groups, otherwise a lock icon appears.
-
Users must have view privilege in order to add sites and hierarchies to Favorites records; and to add sites to cluster records.
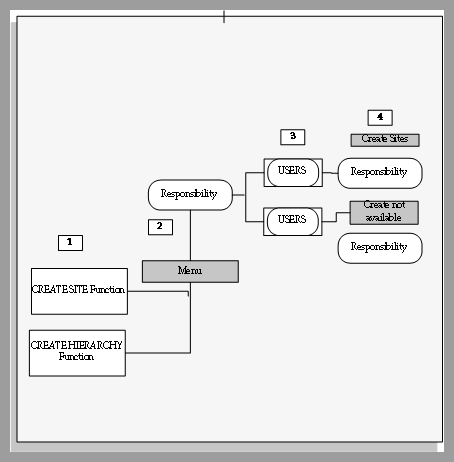
Role based access control uses function based security for the two supported Site Hub create functions, Create Site and Create Hierarchy. Users who can Create Sites or Create Hierarchies must have a responsibility assigned to their application user account, including the Create functions as part of the assigned menu. The Site Management User responsibility menu, shipped with the product, includes these functions. If you would not like certain users to be able to create Sites or hierarchies, create new responsibility excluding the relevant Create functions and assign the responsibility to those user accounts.
The following graphic displays the Create function behavior for menus and responsibilities for sites and hierarchies:
-
The following Create functions are provided and supported:
-
Creating new sites: RRS_CREATE_SITE
-
Creating new hierarchies: RRS_CREATE_HIER
-
-
You can add or remove these functions from menus associated to responsibilities. Use the Responsibilities window in the System Administrator responsibility to create new responsibilities and manage menu exclusions.
You can add or remove create functions from a user responsibility to control Create Site and Create Hierarchy abilities.
-
Users are uniquely identified by a username. Users can be assigned the relevant responsibility, that may include or exclude the Create functions. Use the Users window in the System Administrator responsibility to create new and manage existing application users.
-
This enables you to control the visibility of Create buttons to a specific set of users in your organization, and block other users.
Function security for creating sites and hierarchies, once setup, applies to all interfaces supported within Site Hub including the Site tabbed region, Hierarchy tabbed region, Hierarchy Workbench, Web ADI based upload, and Web Services.
Role Based Access Behavior in the Hierarchy Workbench
In the Hierarchy Workbench, view privilege is required to display hierarchy and it’s attributes. To be able to edit a hierarchy, both view and edit privileges are required:
-
Adding a parent to a site, or adding a child node to a site, are edits to the hierarchy—not to the site.
-
If view and edit hierarchy rights are not granted, you cannot add a site to the hierarchy by searching for it. However, if you access to a hierarchy including privileges for viewing the site, only the site name is visible in the hierarchy and there is no link available for either display of attributes or update.
However, if such a site exists in another hierarchy where the user has view access, that user has the ability to drag the site records from that hierarchy to another hierarchy where they have edit privileges.
-
Although, the system does not allow the user to view such site details, you can prevent this behavior by not granting view access to users for specific hierarchies having non-accessible sites to the users.
Related Topics
Setting Up Role Based Access Control
Viewing and Defining User Groups
Setting Up Role Based Access Control
Role based access control provides security for objects in Site Hub to manage secure data. The ability to view, edit and perform certain actions is determined by a user's role and associated privileges. See: Overview of Role Based Security Access
To implement role based access security, perform the following tasks:
| Task | Description | Required? |
|---|---|---|
| Set Profile Options | Set the following profiles to enable and govern role based access control:
|
Yes |
| Define Users | Defined in the Users window; individuals are uniquely identified by a username, see: Users Window, Oracle E-Business Suite System Administrator's Guide - Security |
Yes |
| Define User Groups | You can group multiple users requiring the same access. | No |
| Set Up Create Functions | You can add or remove create functions from menus associated to responsibilities to control page level security and the menu exclusions. | No |
| Creating User Defined Privileges | User defined privileges are tailored to control security for interactions in your organization. | No |
| Define Roles | A role is a collection of privileges assigned to a person or group. Several seeded roles and privileges are provided. | Yes |
| Assign Roles | Role assignment determines actions a user can perform. | Yes |
Roles and Privileges
A role is a collection of privileges; privileges define access. Roles group privileges for assignment to a user or group of users at an aggregate level, defining functions a user is allowed. Users can be assigned multiple roles which cumulatively describe the functions of the job. For example, you can set specific users who are allowed to view financial data for each site.
You assign roles to site and hierarchy objects. You can group multiple employees requiring the same level of privilege. Role based access security provides the ability to:
-
Assign Site Hub roles at specific levels
-
Specify default roles for all sites or hierarchies in an organization
-
Create user groups based on similar functional interactions
Site Hub provides several seeded roles and privileges; you can also create roles and privileges to fit the custom needs of your organization.
Seeded Roles and Privileges
The seeded roles and privileges provide the basic view and edit access in role based security. The following is the list of seeded roles and privileges in Site Hub:
| Object | Role | Privilege |
|---|---|---|
| Site | Site Author | View Site |
| Site | Site Author | Edit Site |
| Hierarchy | Hierarchy Author | View Hierarchy |
| Hierarchy | Hierarchy Author | Edit Hierarchy |
Note: The roles based access security feature does not secure attributes for location and trade area group user attributes.
Note: Edit and View rights are separate, that is, a user having edit site privilege would not be able to view a site if view site privilege is not granted.
Creating User Defined Privileges
You can create custom roles and user defined privileges to control functional interactions to govern security for attribute groups. If there are multiple attribute groups in a particular page, only those attribute groups you are granted view privilege appear in the page. For example:
-
You want to collaborate securely to share information between internal departments and external contractors.
-
Roles are created for Site Market Manager and Location Engineer.
-
The Site Market Manager has view and edit privileges for specific site attribute groups such as the Site Brand, Location, and Site Purpose.
-
The Location Engineer can view and edit the Location attribute, but can only view the Site Brand and Site Purpose attribute groups.
Privileges are also called functions. Define user defined privileges related to a Site or Hierarchy in the Form Functions window in the System Administrator responsibility. These functions show up as privileges in Site Hub setup pages. See: Form Functions Window, Oracle E-Business Suite System Administrator's Guide - Security
To create user defined privilege for site and hierarchy objects
-
Navigate to the Form Functions window.
-
In the Description tabbed region, enter the Function name.
-
Enter the User Function Name and Description describing this function.

-
In the Properties tabbed region, select the Subfunction value in the Type field.
-
In the Region tab, select the Site Hub data object for this function. Choices are Site or Hierarchy.

-
Save your work.
The functions defined in this window are now available as privileges in Site Hub. Privileges of View and Edit in the attribute group definition (create and update pages) use these defined functions. These privileges are available to be assigned to roles.
Viewing and Defining User Groups
Roles are granted to users or user groups in the context of the data to be secured. A role security group is an assemblage of users with similar functional areas. Groups facilitate role assignments for multiple employees with the same level of access and privilege.
To search and view role security user groups
-
Navigate to the Groups page.
-
Enter the full or partial name of the group, and select Go.
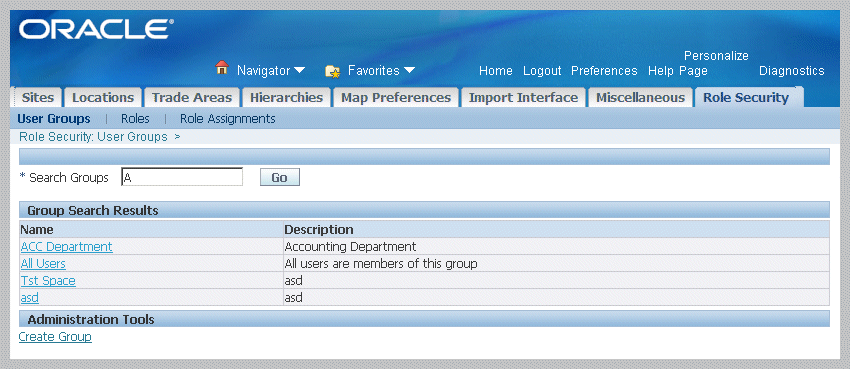
All applicable records fitting your search criteria appear in the Group Search Results region; records are listed by Name and Description.
To create a group
Select Create Group in the Administrative Tools region of the User Groups page.
-
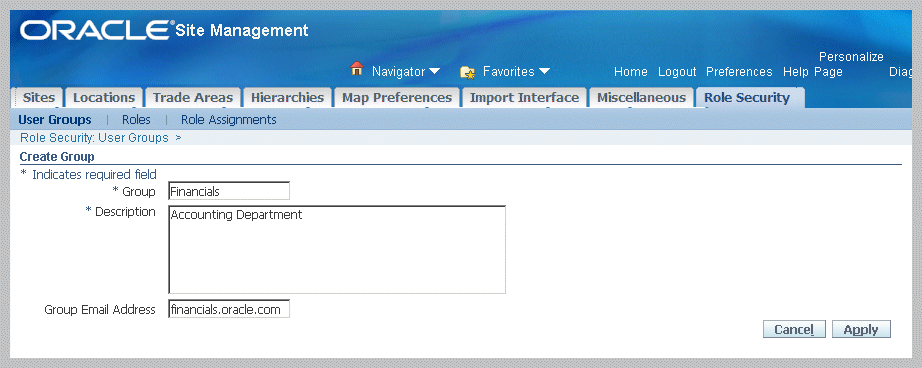
On the Create Group page, enter values in the following fields:
-
Group, the unique name for this role user group for users with similar functions.
-
Description of this group.
-
Group Email Address.
-
-
Save your work.
Groups cannot be deleted. The user creating a user group is defaulted as a member, but can be removed.
To view and edit group details
Select the group Name link in the Group Search Results region.
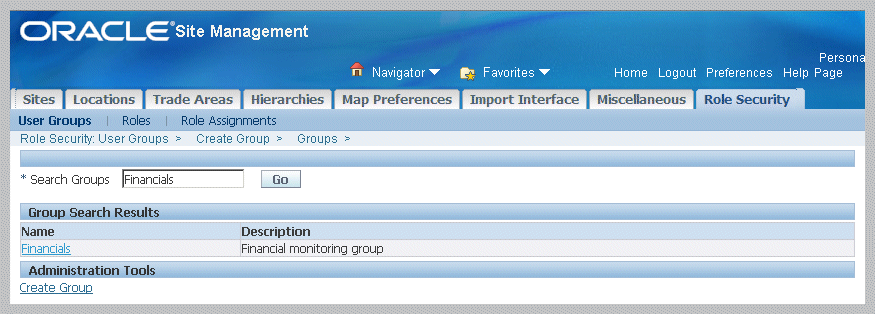
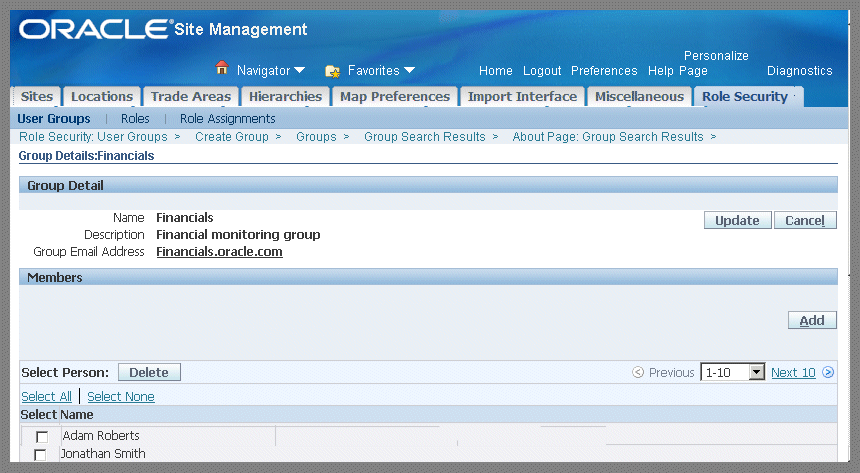
The Group Detail page appears and consists of two regions:
-
Group Detail displays Name, Description, and Email information
-
Members displays the individuals in the group
-
-
To remove members from the group, select the check box in the Select Name column for members you want to remove, and choose Delete.
-
Select Add to add new users to this group.
-
The Search page appears. Search by entering a word or partial word in the Person or User Name fields, and select Go.
All applicable records fitting your search criteria appear.
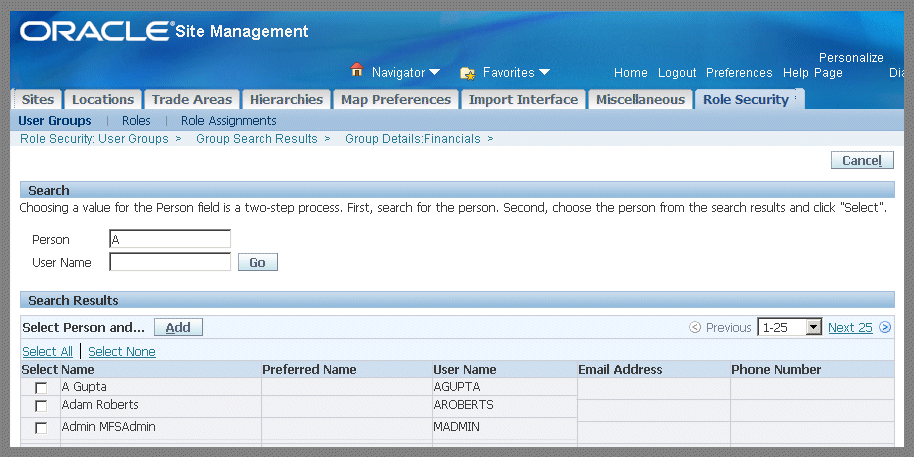
-
Select the Name records you want to add in the Select check boxes, and choose Add.
-
To edit user group information, on the Group Details page, select Update. The Edit Group page appears.
You can change data in all fields: Group, Description, and Group Email Address.
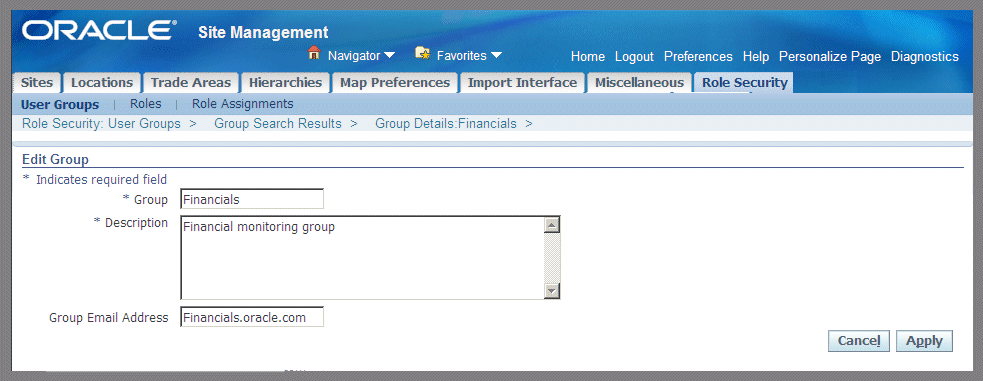
-
Select Apply to save your work.
Viewing and Defining Roles
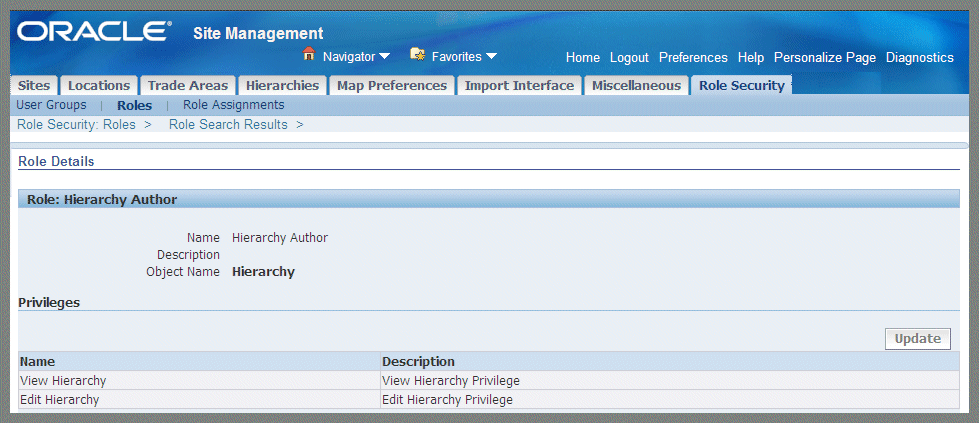
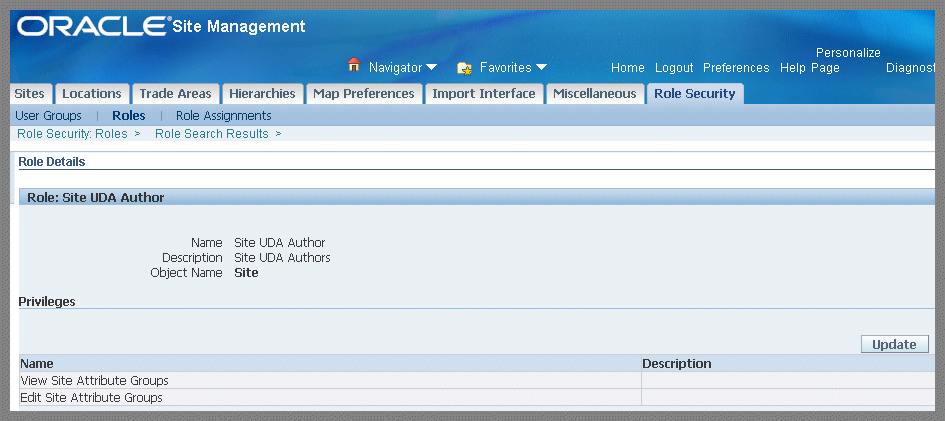
A role is a collection of privileges assigned to a person or group based on functional tasks. For example, you may want to set specific users to see potential sites or site financial data. Roles can be assigned at particular levels for sites and hierarchies in an organization. The Roles page enables you to create, search, and manage role definitions. Two seeded roles are provided in Site Hub: Site Author and Hierarchy Author. These roles cannot be deleted or updated by users.
To search and view security roles
-
Navigate to the Roles page and enter the full or partial name of a role in the Search field.
-
Select a value in the Object name field, choices are Site or Hierarchy.
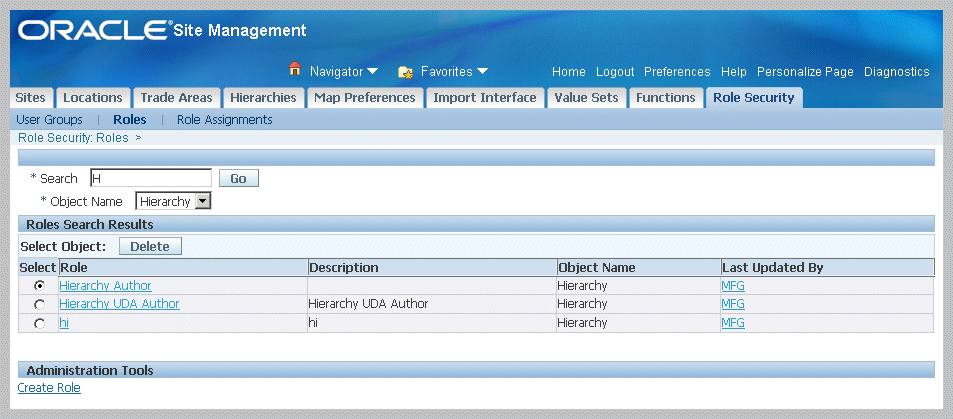
All records fitting your search criteria appear in the Role Search Results region. This region displays data on Role, Description, Object Name, and Last Updated By. You can update or delete records from this page.
Note: Only roles without assignments can be deleted.
-
Select a link in the Last Updated By field to view the details of the user who created or updated the record.
The Person page displays information for the user login including Name, Title, Phone, Fax, Username, and Company Name.
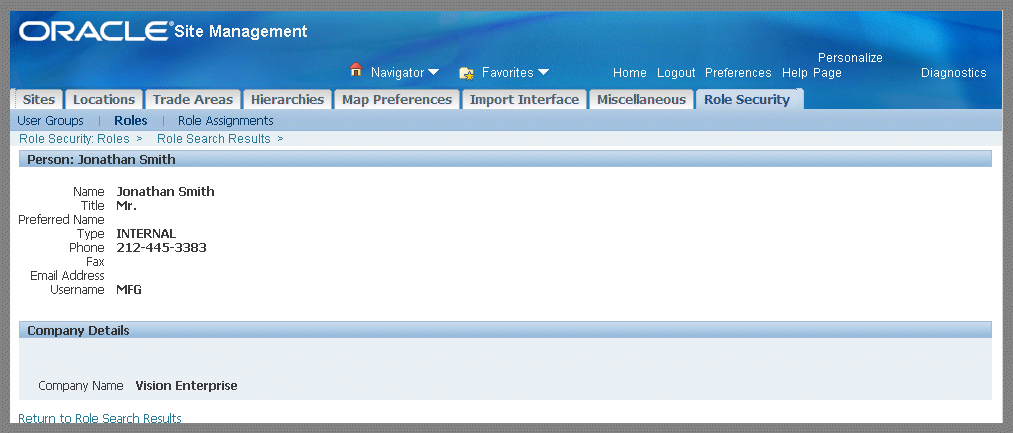
-
In the Role Search results region, select Role links to view the Role Details page for a particular record. The Role Details page also shows the privileges assigned to a role.
To create a user role
-
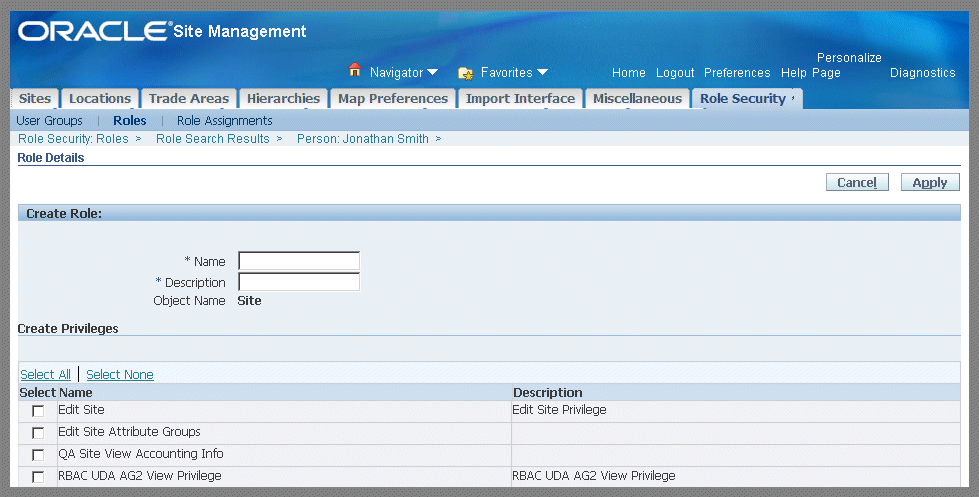
Select Create Role on the Roles page to display the Create Role page.
-
Select a value in the Object Name field, choices are Site or Hierarchy.

-
Select Next to navigate to the Role Details page.
-
On the Role Details page, enter unique values in the Name and Description fields.
-
In the Create Privileges region, select the privileges allowed for this role in the check box column.
-
Select Apply to save your work.
To edit a user role
-
On the Roles Details page, select Update to edit this role record.
Note: The two seeded roles, Site Author and Hierarchy Author, cannot be deleted or updated.
-
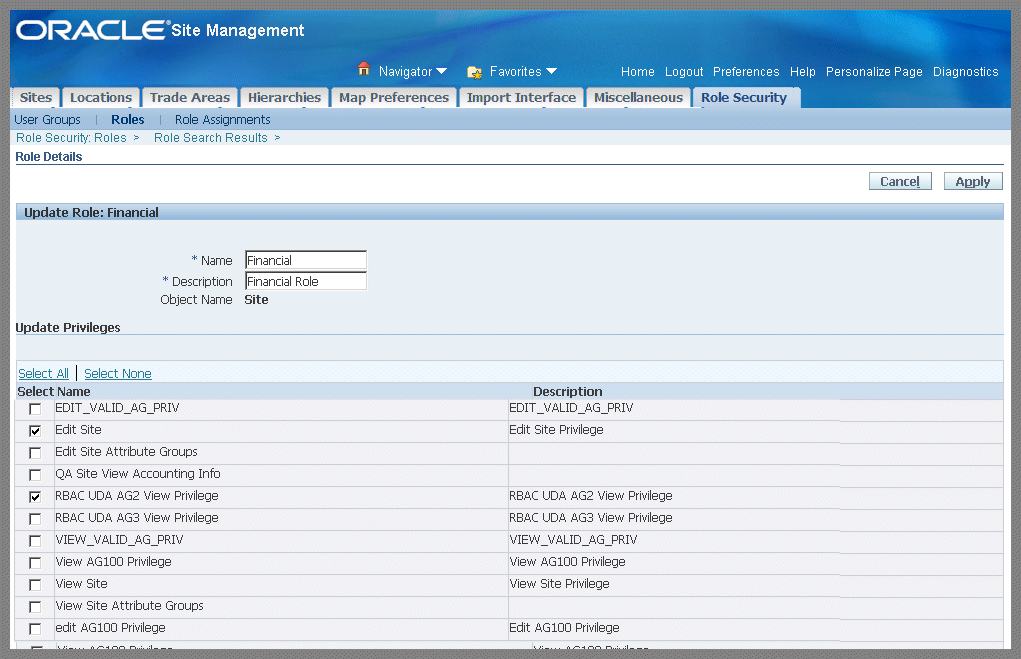
The Update Role page appears and enables you to change the Name and Description values. Add or delete privileges by marking or deselecting the appropriate check boxes.
-
Select Apply to save your work.
Viewing and Assigning Roles
Role assignments are granted to users or user groups in the context of defining security for that data object. Role assignment is the final step towards defining which users have access to what objects (site or hierarchy), what roles (a group of privilege), and at what level (one specific object or objects meeting a certain criteria).
By grouping privileges into roles, users can be assigned multiple roles which cumulatively describe the functions for the job. For example, a Facilities Manager may have privileges to edit site data, view and edit property/leases, view asset data - but not to create asset data.
The profile options RRS:Auto Assign Site Author Role and RRS:Auto Assign Hierarchy Author Role are used to grant View and Edit privileges. This profile option is usually set to a value of Yes at Site level, unless there is a need to tightly control View and Edit access of sites. See: Profile Options
Based upon your site and hierarchy setups and data values, role assignments may seem to conflict. Understanding your data and defining role assignments is an important aspect of controlling data access. For example:
-
You may have a role assignment defined that allows a user to view sites of a specific brand.
-
The same user has another role assignment that allows him to view all active sites.
The second role assignment grants access to all active sites, irrespective of the site brand, potentially conflicting with the first role assignment where want to restrict access to sites of other brands. As long as any of the role assignments grant access to a user for a site or hierarchy, the user will have access to those objects.
To search and view role assignments
-
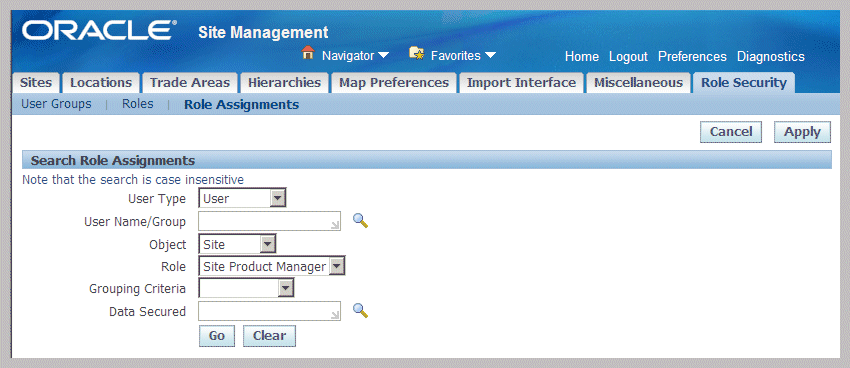
Navigate to the Role Assignments page.
All existing role assignments appear on the page. You can filter the output by selecting search criteria in the Search Role Assignments region.
-
Optionally choose the following values for your search:
-
User Type
Choices are User or User Group. You can select an individual user or the user group role which includes the members.
-
User Name/Group
If you selected User as the User Type, you have the option to select an individual. Or you can select a group name if the User Type is a User Group.
-
Object
Data object choices in Site Hub are either Hierarchy or Site.
-
Role
You can narrow your search by selecting a specific role.
-
Grouping Criteria
Values for grouping criteria are for site objects are: All Sites, Site, Site Brand, Site Type, and Site Purpose.
Values for grouping criteria for hierarchy objects are: All Hierarchies, Hierarchy, and Hierarchy Purpose.
-
Data Secured
Values are populated depending on the Grouping Criteria.
-
-
Select Go to see the results of your search.

To delete role assignment records
-
In the Role Assignments region of the Role Assignments page, choose the records you want to remove in the Select check box.
-
Select Delete.
-
Select Apply to save your work.
To assign roles to users or user groups
-
In the Role Assignments region of the Role Assignments page, select Add Another Row.
-
In the User Type field, choose an individual user or the user group role which includes the members. Values are User or User Group.

-
In the User Name/Group field, if you selected User as the User Type, you have the option to select an individual. If the User Type is a User Group, select a User Group value.
-
Select a data Object, choices are either Hierarchy or Site.
-
Select a value in the Role field.
-
Select a value in the Grouping Criteria field.
-
Seeded values for grouping criteria available for site objects:
-
All Sites—role assignment is applicable to all sites.
-
Site—role assignment is applicable to a specific site.
-
Site Brand
-
Site Type
-
Site Purpose
-
-
The seeded values for grouping criteria available for hierarchy objects:
-
All Hierarchies
-
Hierarchy
-
Hierarchy Purpose
-
-
-
In the Data Secured field, select a value. Available Data Secured values are determined depending on the value in the Grouping Criteria field.
For example:
-
View Site and Edit Site privileges are given to user Jonathan Smith, for all the sites with a site purpose of Distribution Facility.
-
If you chose the Site Purpose value, the value available in the Data Secured field is Distribution Facility for user Jonathan Smith.
Note: The associated Identifier value appears if the Grouping Criteria value selected is Site. The identifier value will always be Site Number; all other Grouping Criteria values do not have an Identifier value.
-
-
If this assignment is granted for a definite time period, enter the applicable date range definitions in the Start Date and End Date fields.
-
Select Apply to save your work.