Project Definition
This chapter covers the following topics:
- Assigning Project Parameters
- WIP Accounting Classes
- Seiban Number Wizard
- Defining Seiban Numbers
- Creating a Project with Lot Type Seiban Numbers
- Modifying an Existing Project with Lot Type Seiban Numbers
Assigning Project Parameters
You need to associate a project number or a seiban number with a Planning Group, a Cost Group, and a Default WIP Accounting Class.
To set up project parameters
-
Select the desired parameter option. The options are as follows:
-
Project- Select this option to setup one project across all organizations.
-
Organization- Select this option to setup multiple projects for one organization.
-
-
Optionally, check Do not ask me in the future, if you do not want this window to appear again.
Note: Checking this box sets the profile option PJM: Parameter Form View By Option
-
Choose OK.
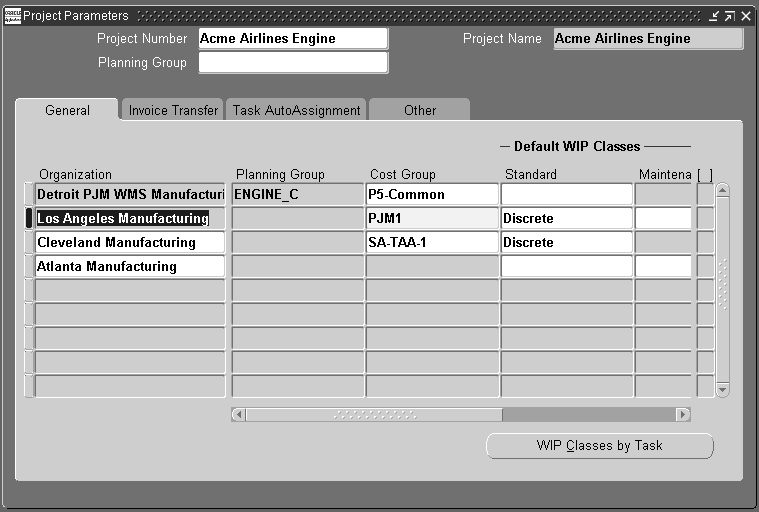
Note: If you chose to set project parameters by organization instead of project, the organization appears in the main heading, and different projects appear in the tabbed regions of the window.
-
Enter the project or seiban number you want to associate with a planning group. If you are updating an existing assignment, query the existing record and make the necessary changes.
-
Select the desired project or organization.
-
Select a planning group if applicable.
If you plan material requirements by a group of projects, rather than by each individual project, you need to define a planning group and to assign all the projects to this planning group. If you plan material requirements only by a single project, you do not need to associate the project with any planning group. You can also associate a project to a single planning group.
For more information about planning groups. See: Defining Planning Group Lookups, in Oracle Master Scheduling/MRP User's Guideand Oracle Supply Chain Planning User's Guide..
-
Select a Cost Group.
When you enter a project, the Cost Group field is enabled. You must select a Cost Group from the list of valid Cost Groups for a project.
Note: If you set project parameters by organization instead of project, the organization appears in the main heading, and different projects appear in the tabbed regions of the window.
The list of values includes the Common Cost Group and the user defined cost groups. The list of user defined cost groups includes only those cost groups with valid accounts and with Project selected in the Cost Group window. Weighted average costing for Inventory and WIP is maintained at the Cost Group level. Therefore, if you want to keep weighted average costing at the project level, you must assign the project to its own Cost Group. See: Overview of Average Costing, Oracle Cost Management User's Guide and Overview of Standard Costing, Oracle Cost Management User's Guide.
-
Optionally enter a WIP Accounting Class.
You can choose any WIP accounting class associated with the selected cost group in the WIP Accounting Classes for Cost Groups window in Cost Management.
When you create project jobs or complete work order-less schedules for a project, the default WIP accounting class is defaulted if an accounting class, based on the assembly item category set, cannot be found. You can override it, but only with another accounting class assigned to the cost group. See: Associating WIP Accounting Classes with Categories, Oracle Cost Management User's Guide .
Note: When you create a project WIP job either manually or through MRP, the system checks if you assigned a default WIP accounting class to this WIP job's item category and cost group in the Default WIP Accounting Classes for Categories window. If you have, the program uses this WIP accounting class for the job. If you have not, the program uses the WIP accounting class you entered for the project.
-
Enter the project effective from/to date if applicable.
You can setup effective dates for a project in an inventory organization. The project, project-task and Project Parameter start/end dates are validated in various project document definitions through the use of a Project Manufacturing API. The system generates warnings when the exceptions are encountered during the definition of the document or request. You can create extensions to this API to include business specific rules.
-
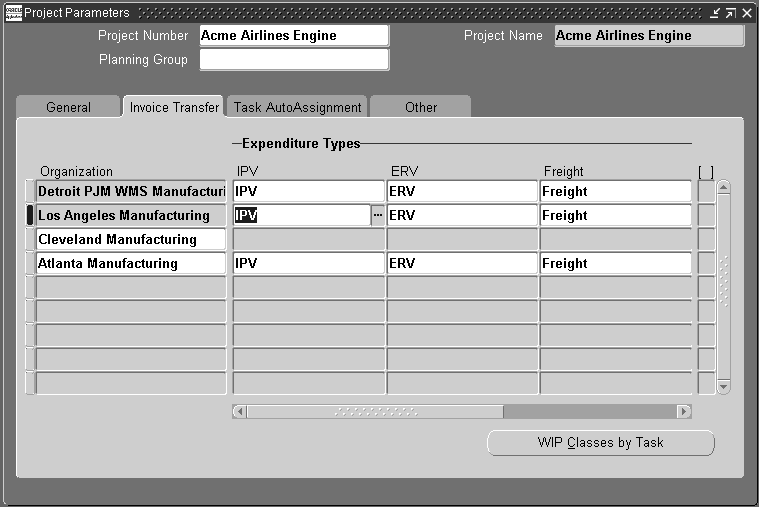
Select the Invoice Transfer tab.
-
Enter an expenditure type for IPV.
This field is mandatory in a Project Manufacturing organization, if you selected the Transfer to PA IPV option. You can use the default IPV expenditure type or modify it to choose any one of expenditure types associated with expenditure type class Inventory.
If a variance generates when approving an inventory or a shopfloor (outside processing) related invoice, the Invoice Charge transfer process uses the IPV expenditure type, IPV amount, IPV account, and the Expenditure Organization you have defined to transfer the IPV amount for the project to Oracle Projects.
For outside processing, choose an expenditure type that is associated with the expenditure type class of Work in Process.
-
Enter an expenditure type for ERV.
This field is mandatory in a Project Manufacturing organization, if you selected the Transfer to PA ERV option. You can use the default ERV expenditure type or modify it to choose any one of expenditure types that has been associated with the expenditure type class Inventory.
If a variance generates when approving an inventory or a shopfloor (outside processing) related invoice, the ERV transfer process uses the ERV expenditure type, ERV amount, ERV account, and the Expenditure Organization you defined to transfer the ERV amount for the project to Oracle Projects.
For outside processing, choose an expenditure type that is associated with the expenditure type class of Work in Process.
-
Enter an expenditure type for Freight.
This field is mandatory in a Project Manufacturing organization, if you selected the Transfer to PA Freight option. You can use the default Freight expenditure type or modify it and choose any one of expenditure types associated with the expenditure type class Inventory.
If you use receipt based matching for your invoice, and freight is entered on the distribution when approving an inventory or shopfloor (outside processing) related invoice, the invoice charge transfer process uses the freight expenditure type defined in the Project Parameters window. It also uses the freight amount and freight account from Oracle Payables, and the expenditure organization from the purchase order to transfer the freight amount for the project to Oracle Projects.
For outside processing, choose an expenditure type that is associated with the expenditure type class of Work in Process.
-
Enter an expenditure type for Tax.
This field is mandatory in a Project Manufacturing organization, if you selected the Transfer to PA Tax option. You can use the tax expenditure type that has defaulted from the PJM Org Parameter window or modify it and choose any one of expenditure types associated with the expenditure type class Inventory.
The method you choose to match tax to your invoiced items determines which expenditure type is assigned to the tax you enter on the Payables Invoice window. You can allocate tax at the line match level or you can enter tax as an invoice distribution line and manually allocate it to item distributions.
If you allocate tax at the match to line level as described below, tax entered on the invoice is charged to the IPV expenditure type:
-
You can select the option of matching the supplier invoice to the purchase order or purchase order receipt on the shipments form of the purchase order. When you enter the Payables invoice, you select the same matching method that you chose on the purchase order.
-
On the Match to Purchase Order window of Invoice Entry, you can check the Allocate check box next to each matching line to allocate tax, freight, and miscellaneous charges to the matched lines.
-
Tax matched to a purchase order or receipt line on this form is designated as an invoice price variance - the difference between the tax amount allocated on the invoice and the tax entered on the purchase order line. In Oracle Projects you see the Invoice Price Variance expenditure type on the transaction for tax allocated on the invoice.
If you allocate tax at the invoice distribution line level as described below, tax entered on the invoice is charged to the tax expenditure type:
-
You can select the same matching method on the invoice as you selected on the purchase, but do not check the Allocate check box.
-
You can enter a new distribution line for tax on the Invoice Distributions window and choose Allocate.
-
You can manually allocate the tax to any of the item distribution lines.
Tax matched on this form is designated as a tax and is charged to the tax expenditure type which you set up on the Project Parameters window.
-
For outside processing, choose an expenditure type that is associated with the expenditure type class of Work in Process.
-
-
Enter an expenditure type for Miscellaneous charge.
This field is mandatory in a Project Manufacturing organization, if you selected the Transfer to PA Miscellaneous option. You can use the default Miscellaneous expenditure type that has defaulted or modify it and choose any one of expenditure types associated with the expenditure type class Inventory.
If a distribution generates for Tax when performing receipt based matching for an inventory or shopfloor (outside processing) related invoice, the Invoice Charge transfer process uses the ERV expenditure type, the miscellaneous amount and account from invoice distributions, and the expenditure type from the purchase order to transfer the miscellaneous amount for the project to Oracle Projects.
For outside processing, choose an expenditure type that is associated with the expenditure type class of Work in Process.
-
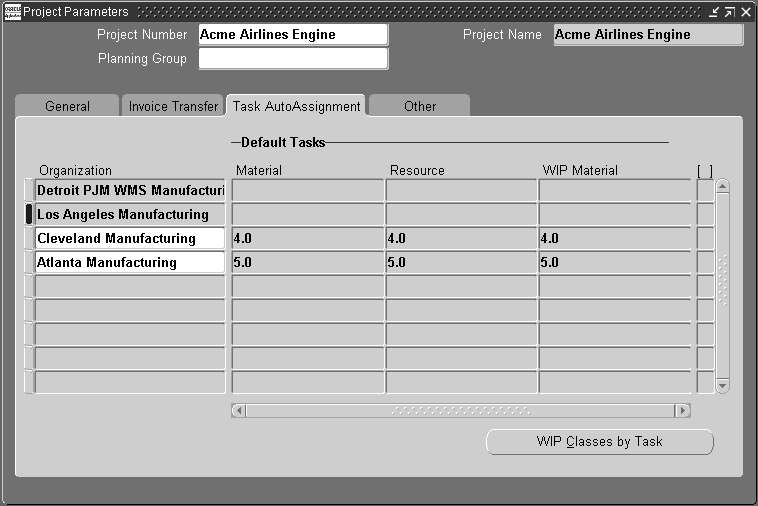
Select the Task AutoAssignment Tab.
-
Enter a Material Task if necessary.
-
Enter a Resource Task if necessary.
-
Enter a WIP Material task if necessary.
-
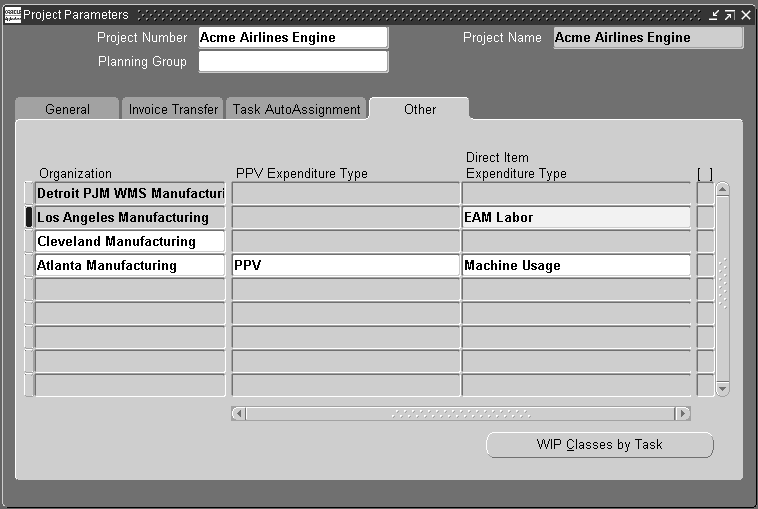
Select the Other Tab.
-
Enter a Purchase Price Variance (PPV) Default Expenditure Type. This field is updateable only if you are in an organization that uses standard costs.
-
Enter a Direct Item Default Expenditure Type. This field is updateable only if you are in an Enterprise Asset Management enabled organization.
-
Save your work.
Related Topics
Overview of Task Auto Assignment
Project Manufacturing Parameters
Creating an Organization, Using Oracle HRMS - The Fundamentals
Task Auto Assignment FlexSequence
Expenditure Types, Oracle Projects Implementation Guide
WIP Accounting Classes
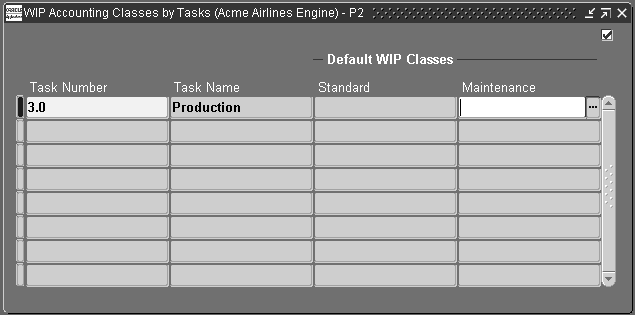
You can set a Default WIP Accounting Class for Maintained Work Orders at the task level.
To set WIP accounting classes at the task level
-
Navigate to the WIP Accounting Classes by Tasks window.
-
Select a Task Number from the list of values.
-
Select the discrete WIP accounting class from the list of values in the Standard field if applicable.
-
Select the desired Maintenance task from the list of values. This field is available only if the organization is Enterprise Asset Management enabled.
Related Topics
WIP Accounting Class Defaults, Oracle Work in Process User's Guide
Defining Project Cost Groups, Oracle Cost Management User's Guide
Seiban Number Wizard
Oracle Project Manufacturing provides you with the capability to define a reference number, and link demand and supply entities to this number in Oracle Order Management, Oracle Purchasing, Oracle Master Scheduling/MRP, Oracle Work In Process, Oracle Inventory, and Oracle Quality. This reference number can be used to represent the contract number, Seiban Number, or any identifier that needs to be listed on the supply or demand entities.
When you install Oracle Project Manufacturing, you may choose to implement the product with or without Oracle Projects. When you implement Oracle Project Manufacturing without Oracle Projects, you track the manufacturing activities and corresponding costs by Project. Tasks are not available, and you cannot define a Work Breakdown Structure.
The Seiban Number Wizard enables you to define Seiban numbers, and to create or to modify projects using top-level task structures. For example, use the Seiban Number Wizard is used for project creation in Lot Type Seiban environments.
Seiban Number Generation Process Flow
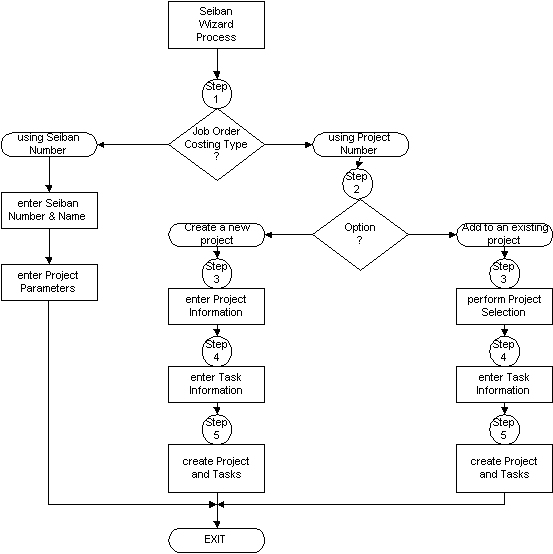
Creating a Project with Lot Type Seiban Numbers
Defining Seiban Numbers
-
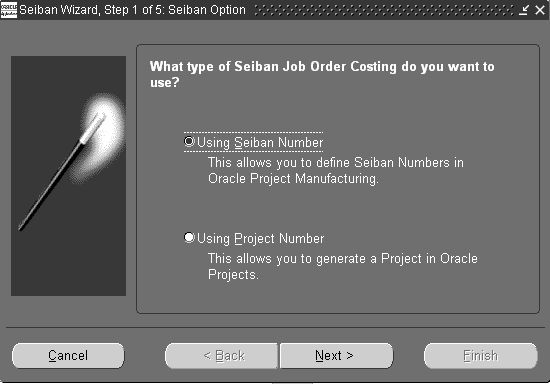
Navigate to the Seiban Wizard.
-
Select Using Seiban Number.
-
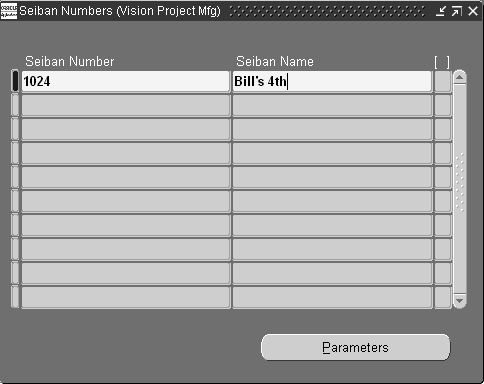
Select Next. The Seiban Numbers window is displayed.
-
Enter a Seiban number and name unique within an Operating Unit.
-
Save your work.
-
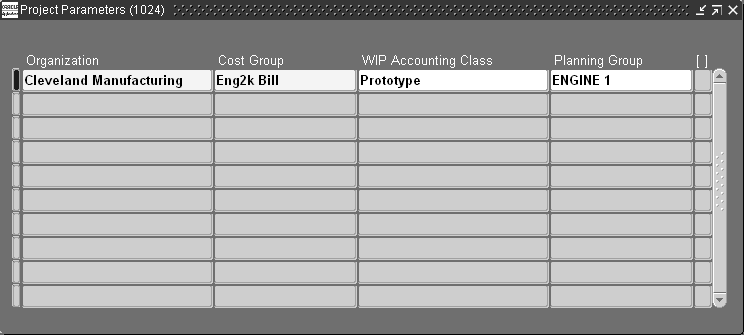
Optionally, choose Parameters to navigate to the Project Parameters window.
-
In the Project Parameters window, select the Organization. The list contains that have project level control.
-
Optionally, select values for the following fields:
-
Cost Group, if you are using Average as your costing method.
-
WIP Accounting Class
-
Planning Group
-
-
-
Save your work.
Related Topics
Creating a Project with Lot Type Seiban Numbers
Modifying an Existing Project with Lot Type Seiban Numbers
Creating Projects, Oracle Projects Fundamentals
Creating a Project with Lot Type Seiban Numbers
You can use the new project and tasks in Oracle Projects and Oracle Project Manufacturing. You can use the Seiban Number Wizard to generate a project structure with only top-level tasks. This is typically used in a lot-type Seiban environment but is also usable in a non-Seiban environment.
All conditions related to Oracle Projects integration apply.
Prerequisite
-
Define a project template. See:
Defining Project Templates, Oracle Projects Implementation Guide.
Project Templates, Oracle Projects Fundamentals User Guide.
To define a project with lot type seiban numbers
-
Navigate to the Seiban Wizard window.
-
Select Using Project Number.
-
Choose Next.
-
Select Create a New Project.
-
Choose Next.
-
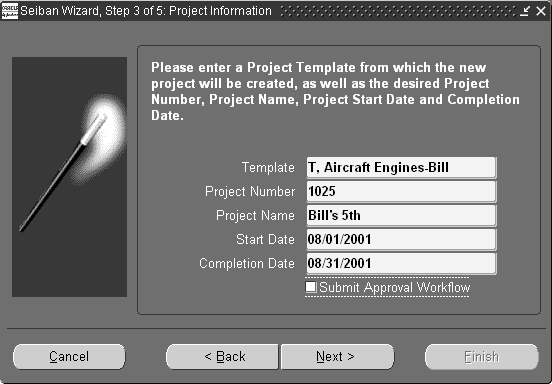
Select a template.
-
Enter the following:
-
Project Number
-
Project Name
-
Start Date of the project
-
Completion Date of the project
-
-
-
Optionally, check the Submit Approval Window.
-
Choose Next.
-
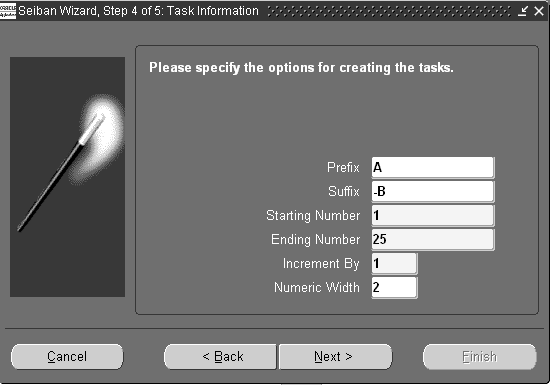
Enter the following:
Parameter Meaning Example Prefix (optional) All tasks the Seiban Wizard generates begin with this value. A Suffix (optional) All tasks the Seiban Wizard generates end with this value -B Starting Number The first task generated. 1 Ending Number This is the last task that could be generated. The actual ending task number depends on the increment parameter you select. 25 Increment by Generate task numbers increment by this value. If this value is 1 then the tasks would be 1, 2, 3, and so on. Numeric Width (optional) This value causes leading zeros to appear before the task number, ensuring a fixed length for the task numbers. If you do not specify a value, there will be no leading zeros. If this value is 2 then the tasks listed above would be 01, 02, 03, and so on. The list of tasks generated in this example would be A01-B, A02-B, A03-B, and so on.
-
Choose Next.
-
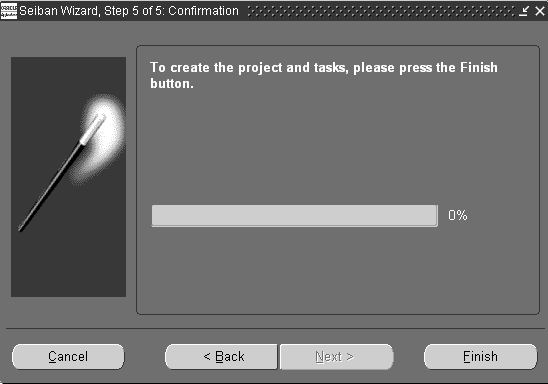
Choose Finish.
Related Topics
Modifying an Existing Project with Lot Type Seiban Numbers
Modifying an Existing Project with Lot Type Seiban Numbers
To modify a project with lot type Seiban numbers
-
Navigate to the Seiban Wizard.
-
Select Using Project Number.
-
Select Next.
-
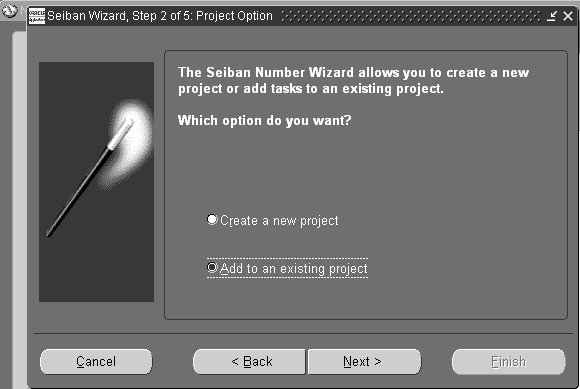
Select the Add to an existing project.
-
Choose Next.
-
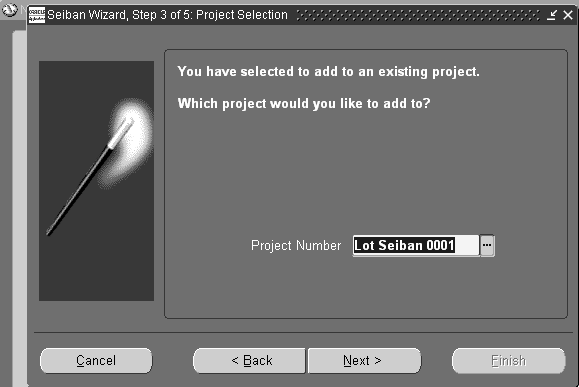
Select a Project Number.
-
Choose Next.
-
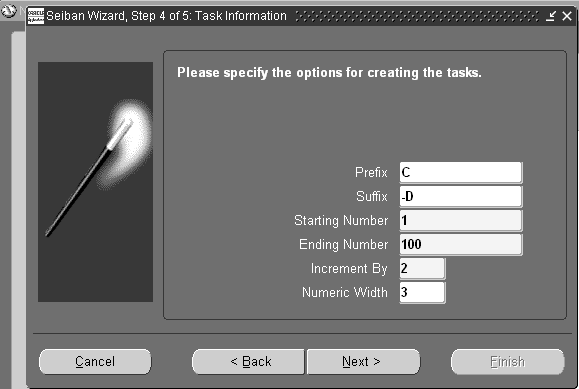
Enter the following:
Parameter Meaning Example Prefix (optional) All tasks the Seiban Wizards generates begin with this value. C Suffix (optional) All tasks the Seiban Wizard generates end with this value -D Starting Number The first task generated. 1 Ending Number This is the last task that could be generated. The actual ending task number depends on the increment parameter you select. 100 Increment by Generated task numbers increment by this value. If this value is 2 then the tasks would be 1, 3, 5, and so on. Numeric Width (optional) This value causes leading zeros to appear before the task number, ensuring a fixed length for the task numbers. If you do not specify a value, there will be no leading zeros. If this value is 3 then the tasks listed above would be 001, 003, 005, and so on. The list of tasks generated in this example would be C001-D, C003-D, C005-D, and so on.
-
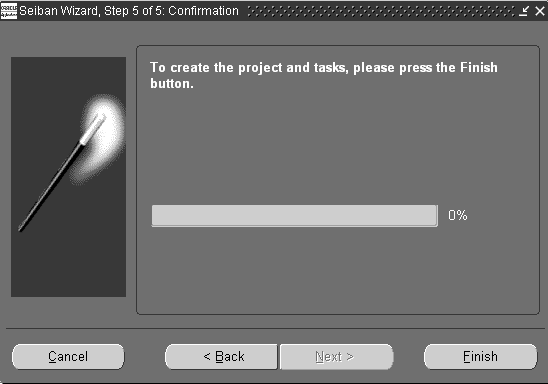
Choose Next.
Related Topics