| Oracle® Communications ASAP Order Control Application User's Guide Release 7.2 E18881-01 |
|

 Previous |
 Next |
| Oracle® Communications ASAP Order Control Application User's Guide Release 7.2 E18881-01 |
|
Previous |
Next |
The Order Control Application (OCA) is a Java-based GUI that communicates with the OCA Service Request Processor (SRP) server. OCA is commonly used to perform fallout management; however, you can also use it to perform Oracle Communications ASAP work order queries and submit new ASAP work orders.
The OCA is available as a stand-alone application or as an applet that can be run in a browser and embedded in an HTML Web page.
For information on installation and configuration, contact your system administrator or refer to ASAP Installation Guide.
You can extend the functionality contained in the ASAP OCA client to support your business requirements.
To open OCA as a standalone application:
Double-click the OCA icon on your desktop.
The Logon dialog box appears.
In the Name field, enter your name.
In the Password field, enter your password.
|
Note: The first time you log in to OCA, the user name is ASAP_admin and the password is password_ASAP_admin. Users with the appropriate access privileges can change the default user name and password using the WebLogic Console. |
Click OK.
The OCA Console window appears.

Expand the OCA Console window to display informational and error messages.

The OCA Console window is the point of access to all OCA functions.
To start OCA as an applet:
Open a Web browser and enter the following:
http://hostname:port/Environment_ID/OCA
where:
hostname is the name of the server where Oracle WebLogic Server is running for ASAP.
port is the port number where Oracle WebLogic Server is running for ASAP.
Environment_ID is the ASAP environment. An ASAP system can have multiple ASAP instances with multiple environments.
The OCA Web Client Configuration screen appears.

Ordinarily, there will only be one registered server session. In the event that multiple server sessions are available, select the appropriate servers that you want to use, and optionally configure the session parameters. Any given OCA client can have sessions to multiple OCA SRP servers, distributed over one or more ASAP instances.
In the Server Session Configuration section, you can modify the following fields:
Table 1-1 Server Session Configuration Fields
| Field | Description |
|---|---|
|
Idle Timeout |
Maximum idle time, in minutes, after which the OCA SRP server terminates the OCA client connection. Set to 0 to disable this feature. |
|
Events Supported |
The flag should be set to false when connecting to servers on the HP10.20 platform. Events are not supported on this platform. |
|
Max Open Windows |
The number of detail windows a user can have open at one time |
|
Language Code |
Language code for the language in which translatable information is returned to and displayed by the client. If applied, all translatable fields are shown in the OCA client native language, as specified by the LANGUAGE variable. |
Click Launch Selected Server Sessions.
The following security warning appears. This is a MetaSolv-specific digital certificate.

Click Grant this session (this certificate will appear on subsequent accesses) or Grant always if you want to grant this session until the certificate expires and is no longer valid.
The Logon dialog box appears.

In the Name field, enter your name.
In the Password field, enter your password.
Click OK, which starts the OCA applet.
The OCA Console window provides access to the following functions:
Work Order Query: The Work Order Query window enables you to:
Predefine work order search criteria.
Set work order search criteria.
Manage work order fallout.
Before starting a search, all search criteria is checked for valid values. If the values are not valid, the search is not initiated.
New Work Order: You create and submit new work orders to the ASAP system using the New Work Order window. In addition to work order header information (work order ID, date, priority and operation), this dialog box includes the following tabs:
CSDL Information: You can add, update, and delete Common Service Description Layers (CSDLs). When you update a CSDL, you must add the required CSDL parameters.
Work Order Details: You can specify more information for the work order, including rollback if the work order fails, Atomic Service Description Layer (ASDL) retries, external system ID, among others.
Global Parameters: You can add and delete global work order parameters.
User Work Order Properties: You can define work order properties specific to the work order.
Order Entry Wizard: The Order Entry Wizard guides you through the entry of required CSDL and global work order parameters based on predefined templates.
Audit Log : You can view a log of work order events using the Audit Log. The Audit Log window displays all user-generated changes to work orders, as well as system-generated events.
Work orders can fail due to a number of factors. Failed work orders must be analyzed to determine the cause of the failure.
The Events function of the OCA contains:
Events Management: Through the Event Management dialog box, you can subscribe or unsubscribe to work order notifications based on event type. You can subscribe to multiple event types.
Events Message Board: Through the Event Message Board window, you can track the progress of a work order through the ASAP system without having to poll ASAP for results. The Events Message Board displays work order events occurring on the ASAP system according to the criteria defined in the Event Management dialog box. After the work order is submitted, the events appear on the Events Message Board as it is provisioned in ASAP.
Your system administrator uses the WebLogic Console to manage user and group security.
|
Note: ASAP Administrators can set password policies and can change user passwords at any time using the Change Password Utility Java Server Page (JSP), provided that the system uses the WebLogic Server as the user security repository. For more information, refer to the "Configuring the Change Password Utility Page" section in ASAP System Administrator's Guide. |
To change your password:
In the OCA Console, select Security, then select Change Password.
The Change Password dialog box appears.
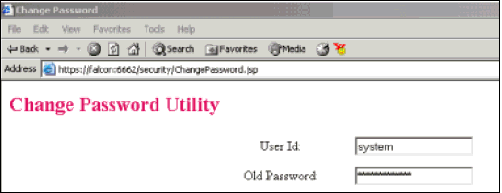
In the Old Password field, enter your current password.
In the New Password field, enter your new password.
In the Confirm Password field, enter your new password again.
Click OK.
A confirmation message appears.
You can select either the MM/dd/yyyy or dd/MM/yyyy date format.
The date format affects the way date values are entered and displayed in the OCA client including in work order headers, the Work Order Query window and its results, the Work Order Release dialog box, audit logs, report generation dialog boxes, and in standard ASAP reports.
Changes to the time format apply to the Calendar tool use (for time range selection in the Work Order Query, Audit Log, and New Work Order windows).
To change the date or time formats:
In the OCA Console, from the File menu, select Date Format and the appropriate date format option.

In the OCA Console, from the File menu, select Time Format and the appropriate time format option.

Select AM_PM TIMEZONE if you want times specified using a 12-hour clock with an AM or PM designation. Select TIMEZONE if you want time specified using a 24-hour clock.
|
 Copyright © 2012, Oracle and/or its affiliates. All rights reserved. Legal Notices |
|