| Oracle® Argus Insight Cognos Installation Guide, Release 6.0 E18251-01 |
|
 Previous |
 Next |
Use the following procedure to configure Cognos Security:
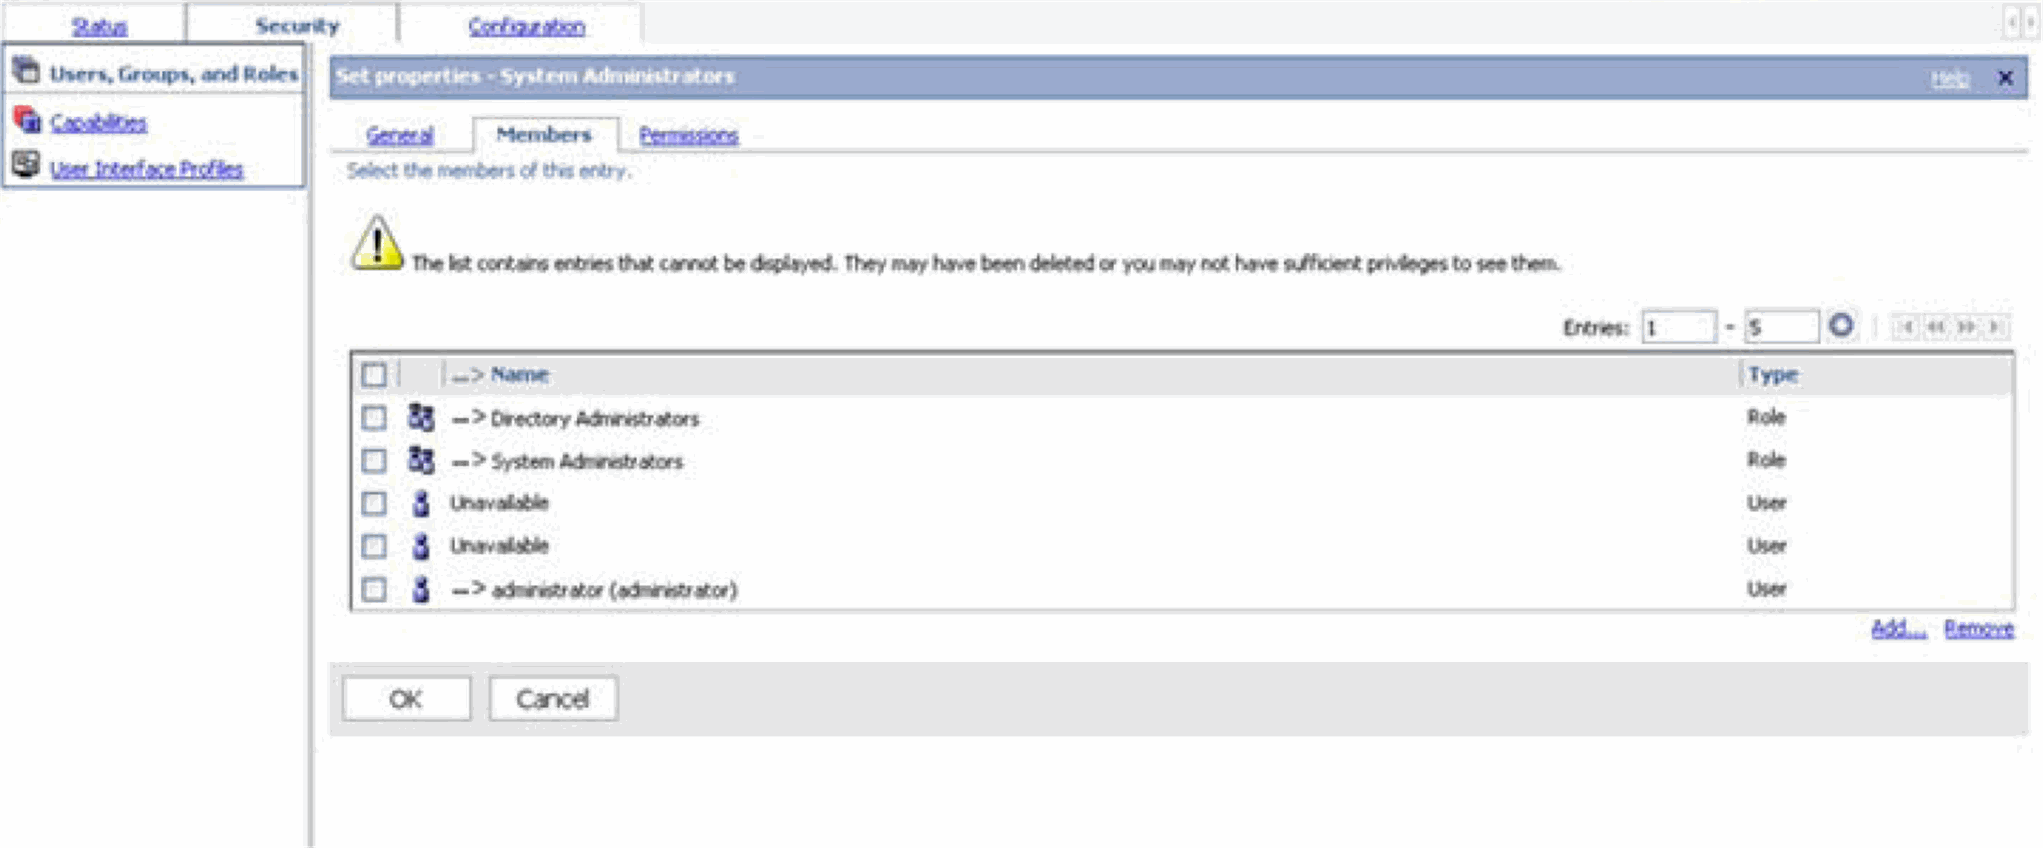
Set up an Administrator user in the Cognos environment. An administrative user is an Insight user who is part of system administrator role.
|
Note: Set up an Administrator user in the Cognos environment. An administrative user is an Insight user who is part of system administrator role. |
Log in to Argus Insight as the Administrator.
Go to Admin tools.
When the system opens the following dialog box, enter the value for Cognos Admin User in the Value field. Click OK. and Cognos Admin Password respectively.
When the system opens the following dialog box:
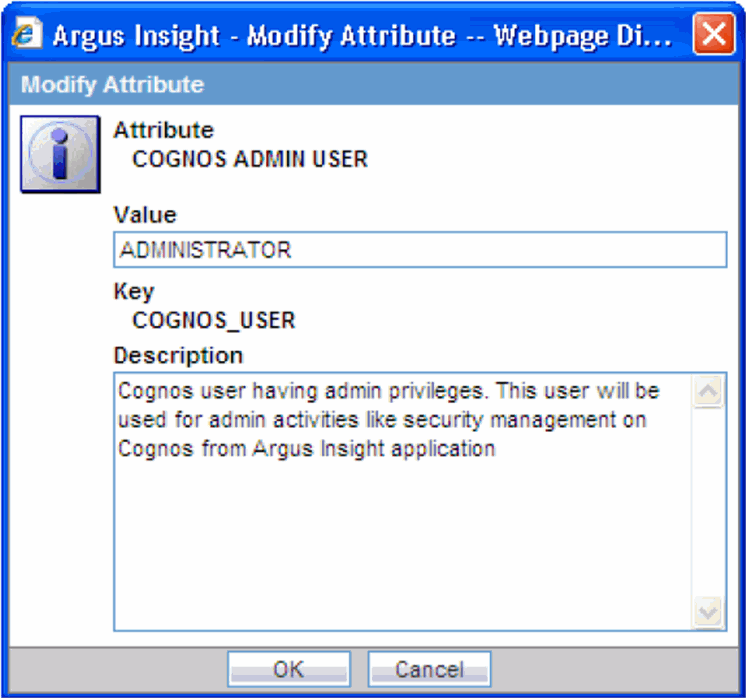
Type the Administrator Password in the Value field.
For verification, type the Administrator Password in the Confirm Password field.
Click OK.
Before configuring Cognos User Role Name, verify that the following List Maintenance entries are configured.
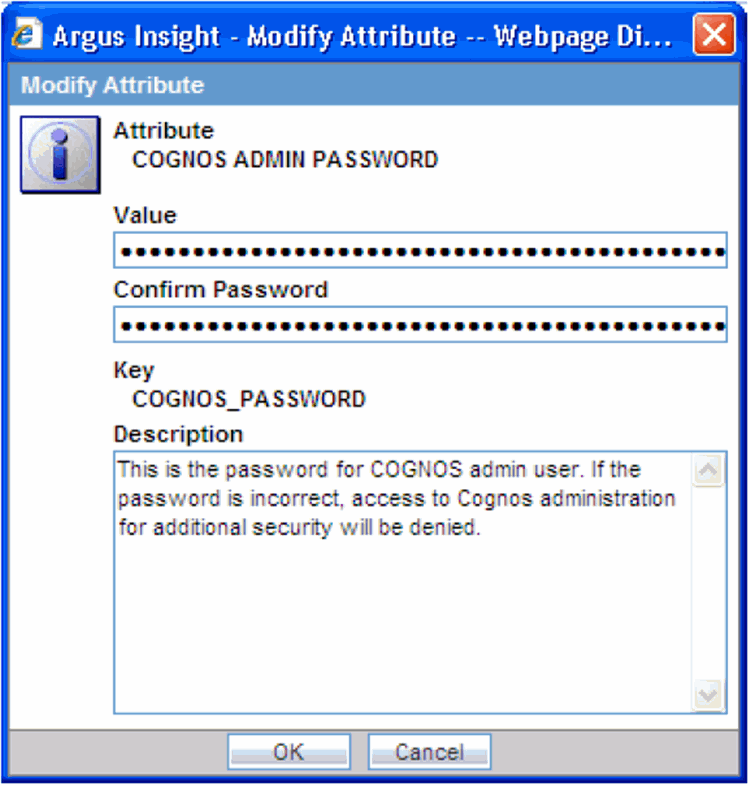
COGNOS SERVER
COGNOS ADMIN USER
COGNOS ADMIN PASSWORD
This role will have all rights required to run various parts of Argus Insight application. All Insight users will become part of this role during their first login.
When the system opens the following dialog box, type the Cognos User Role Name you want to create in Cognos environment in the Value field. Click OK.
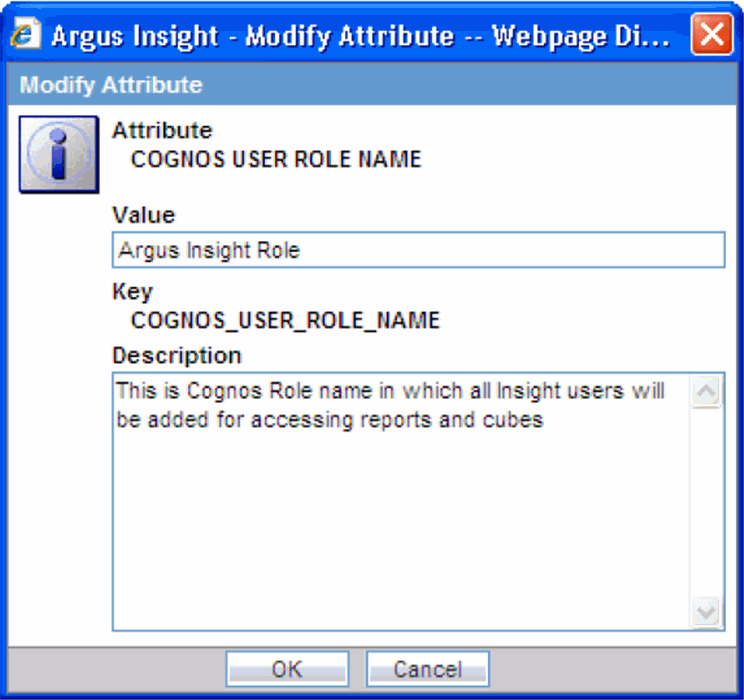
The system adds the newly configured role to Analysis Users, Query User, and Author roles.
This section contains instruction for integrating the LDAP authentication with Argus Insight and Cognos. Follow the installation procedures in the order in which they appear.
Use the following procedure to configure the Active Directory on the Cognos 8 server.
Go to Cognos server and open the Cognos configuration.
Add a NameSpace under Security->Authentication and select the Type as Active Directory.
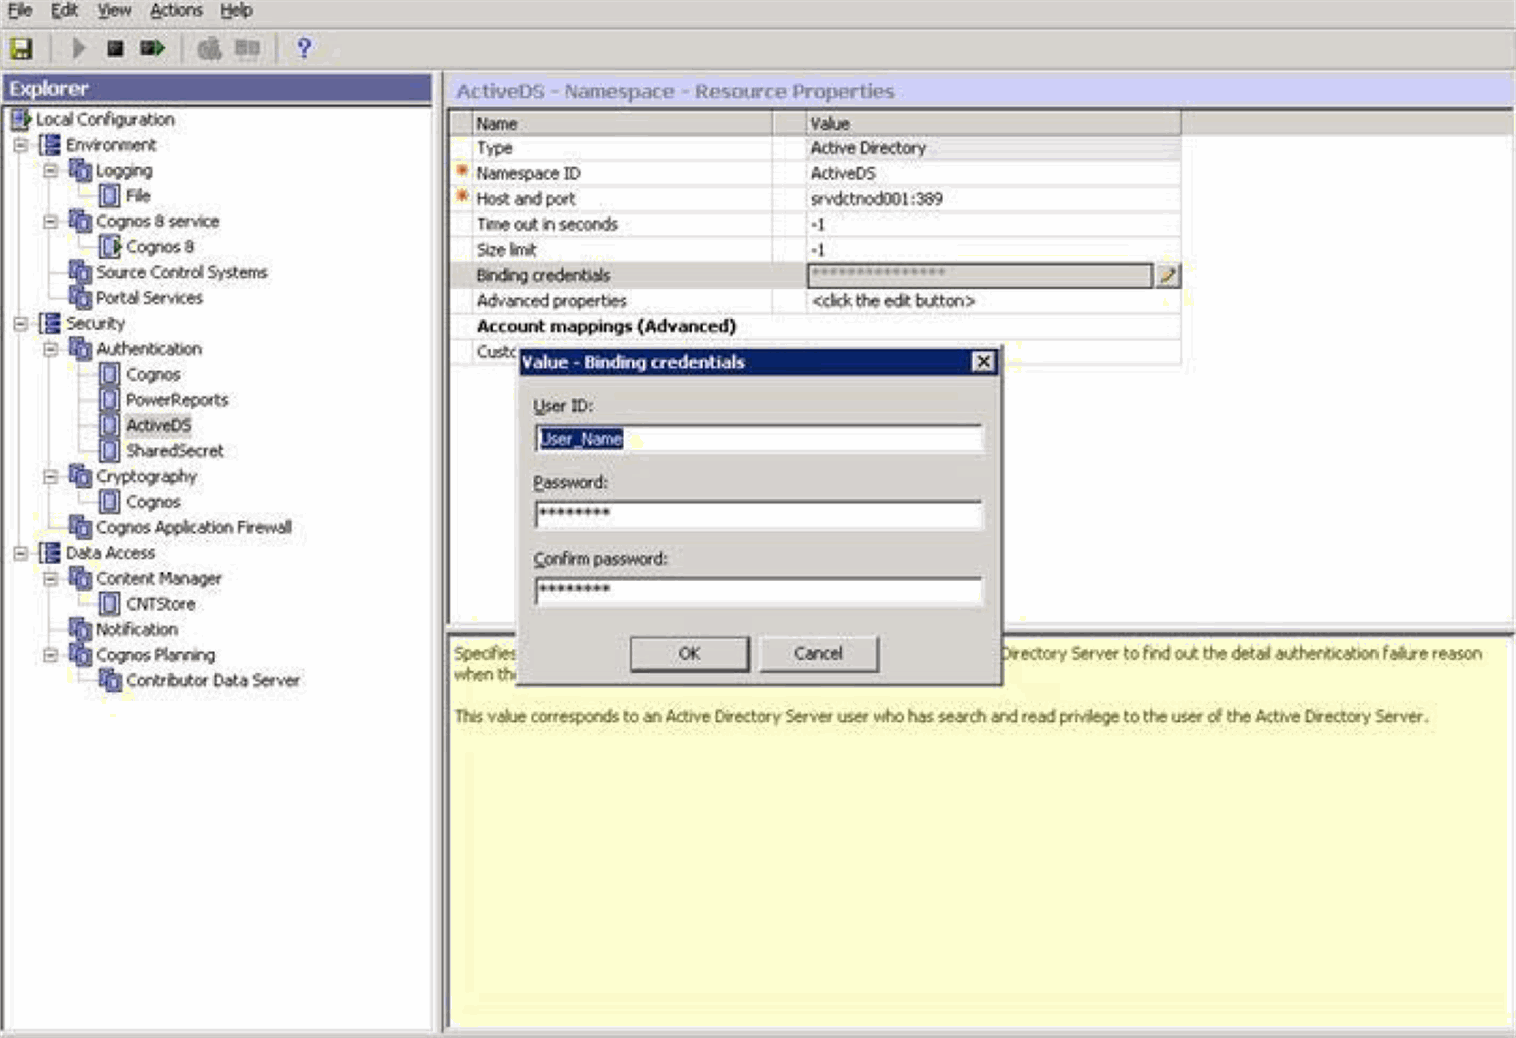
Configure the Active Directory NameSpace.
Provide the Bind credentials, save the configuration, and restart the Cognos service.
Click Modify and set the value to 1.
Use the following procedure to configure LDAP for Active Directory.
Configure SunOne on Cognos 8 server.
Go to Cognos server and open the Cognos configuration.
Add a NameSpace under Security->Authentication and select the Type as LDAP.
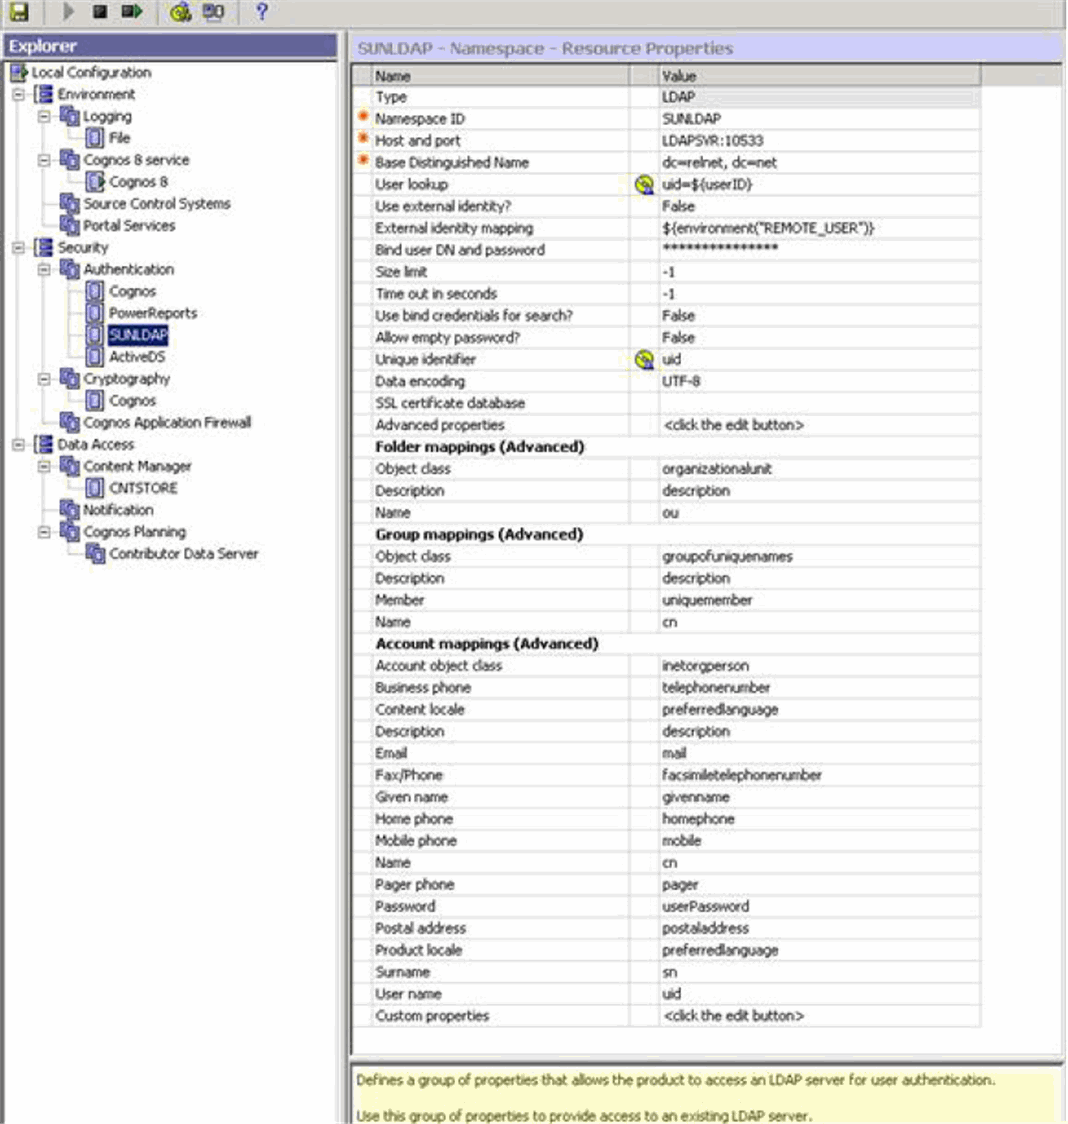
Configure the SunOne NameSpace.
Enter NameSpaceID, Host and Port, Base Distinguish Name, user lookup as "uid=$(user ID)" and unique identifier as "uid" as shown above. No need to enter any bind credentials.
Save the Cognos configuration and restart the Cognos service.
Go to Tools > List Maintenance > LDAP.
Select "Cognos LDAP Name Space Configuration" and click Modify.
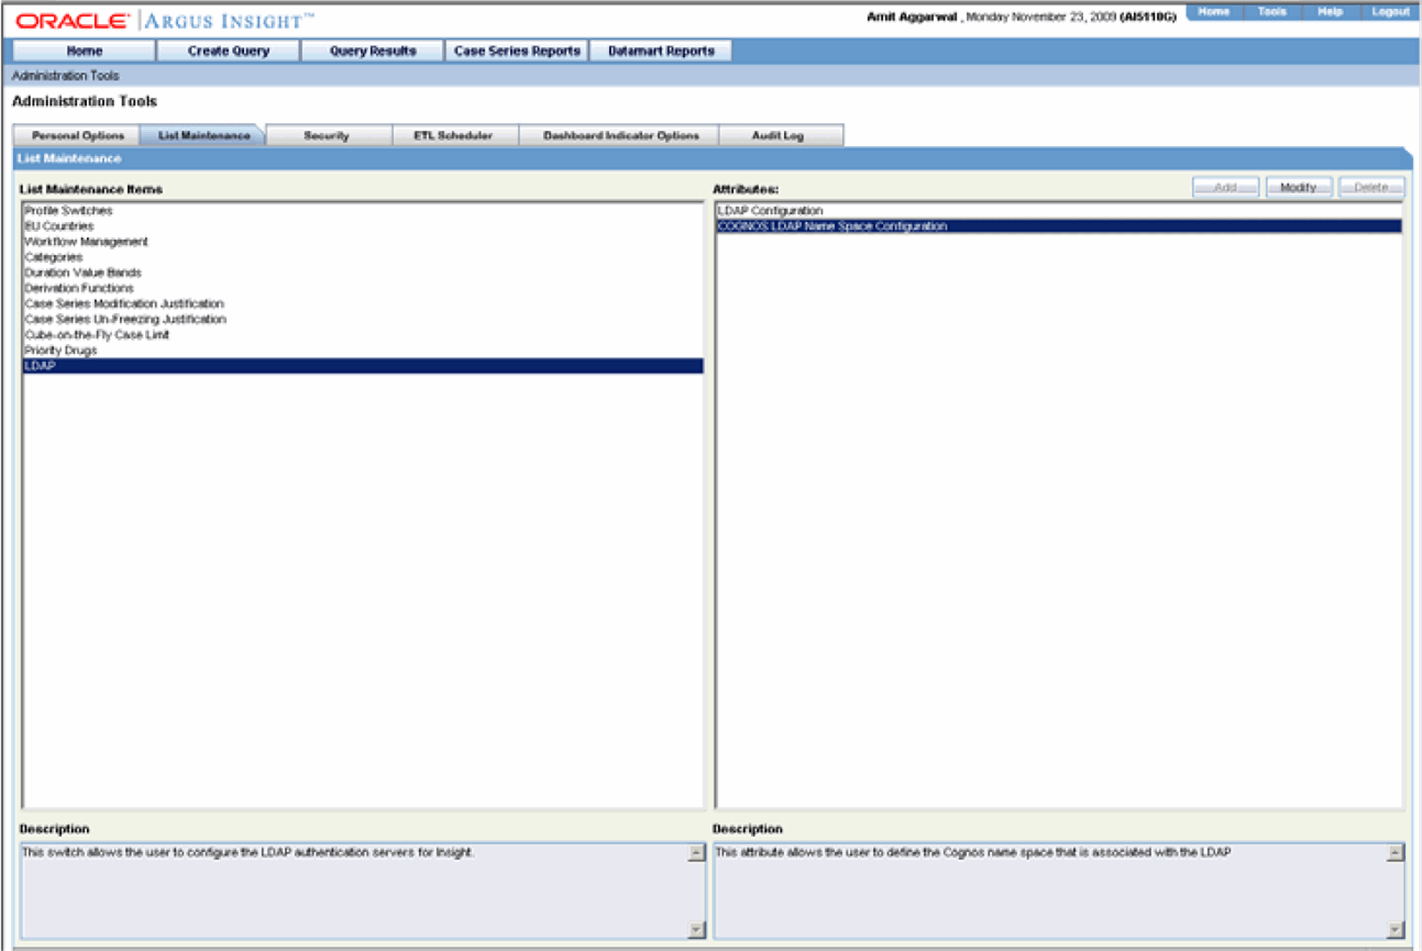
When the system opens the following dialog box, click Add.
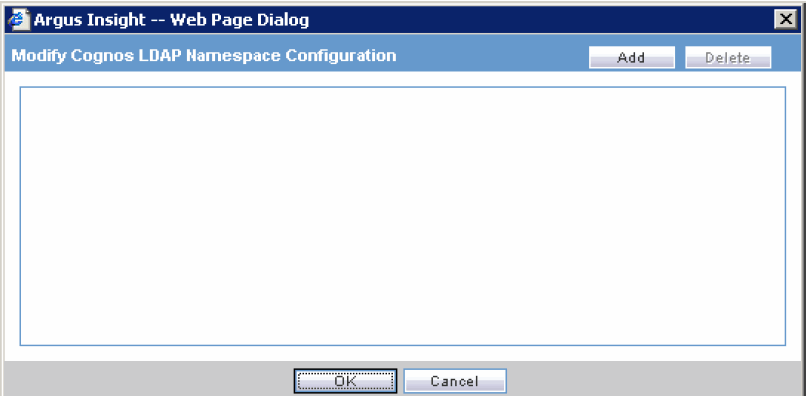
When the system opens the following dialog box:
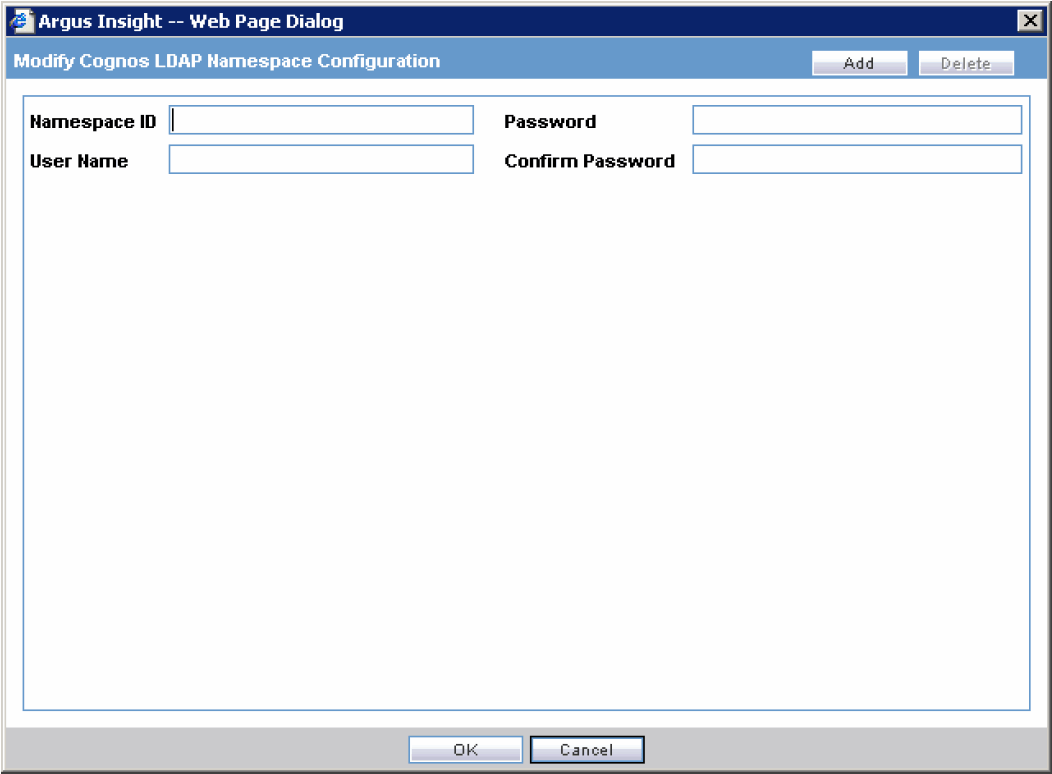
Type the namespace ID in the Namespace ID field.
This is the namespace identifier for Active Directory or SunOne (which ever you have configured in Cognos)
Type the user name in the User Name field.
This is a Cognos and Insight user that is part of a configured LDAP namespace in Cognos and is a Cognos administrator.
Type the Password in the Password field.
This is the password for the configured Cognos administrator user.
For verification, type the password in the Confirm Password field.
Click OK to save the Cognos LDAP Name Space configuration.
Use the following procedure to set up the LDAP configuration in Argus Insight.
Go to Tools > List Maintenance to open the List Maintenance tab.
When the system opens the List Maintenance tab, select LDAP in the left pane.
Select LDAP Configuration from the right pane of the tab. Click Modify.
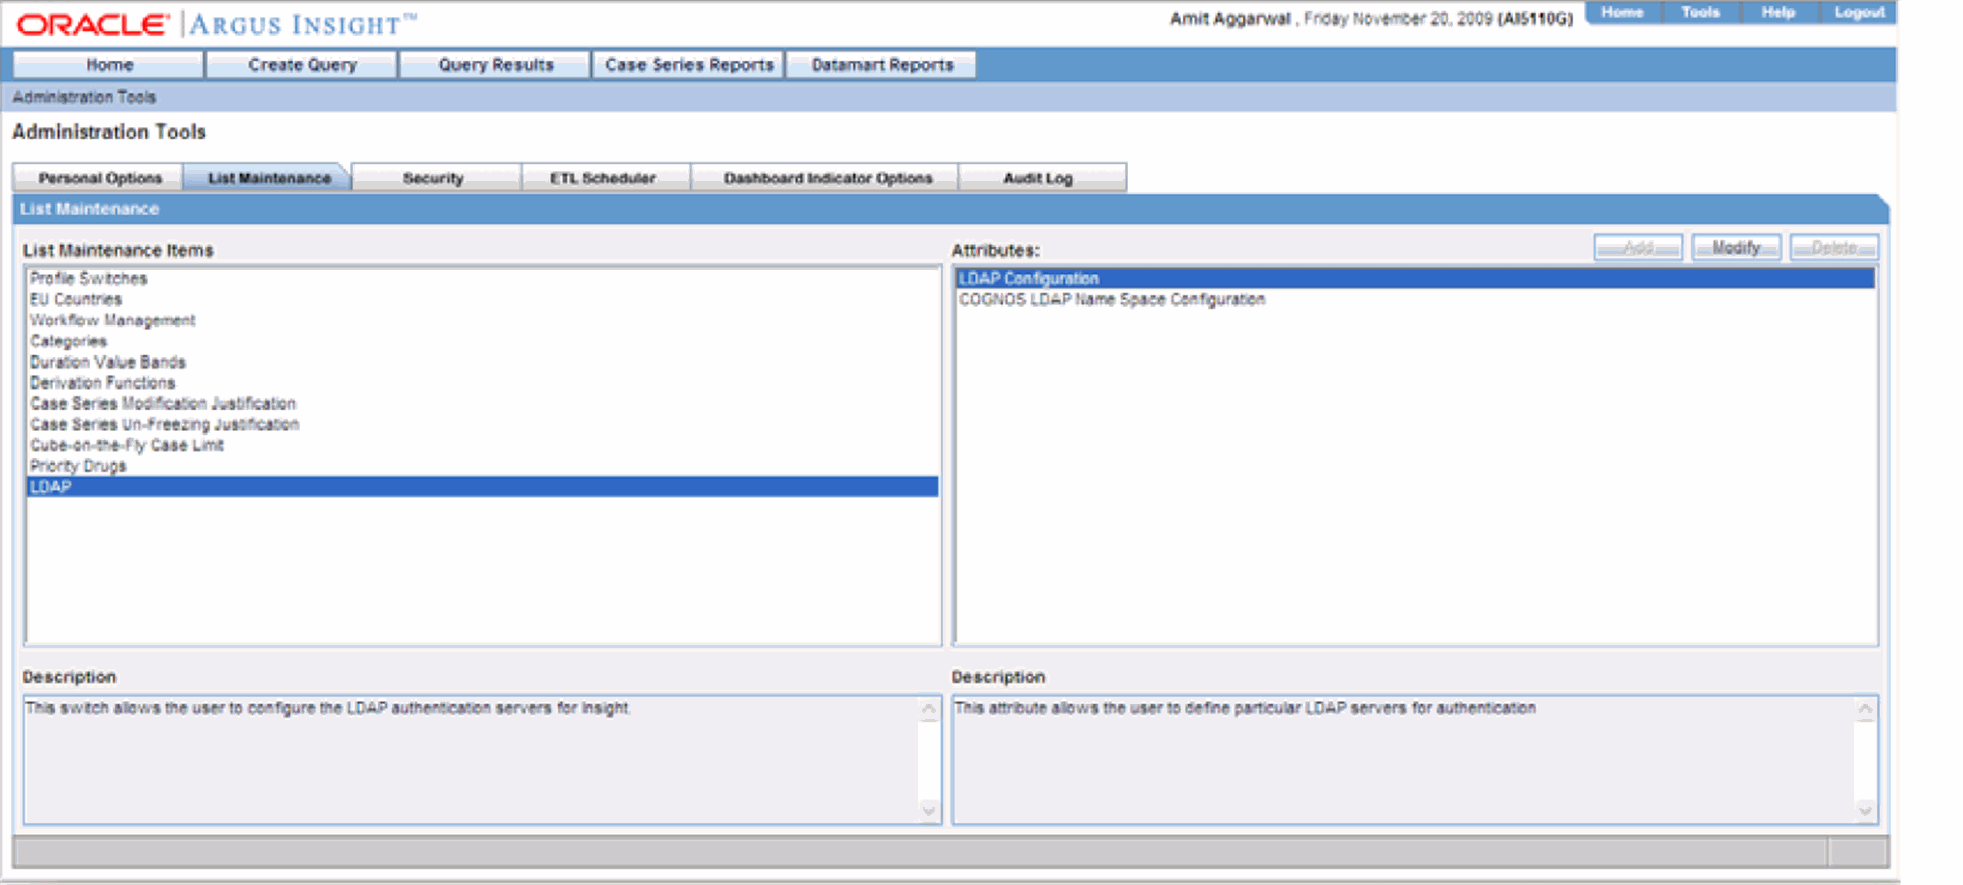
When the system opens the following dialog box:
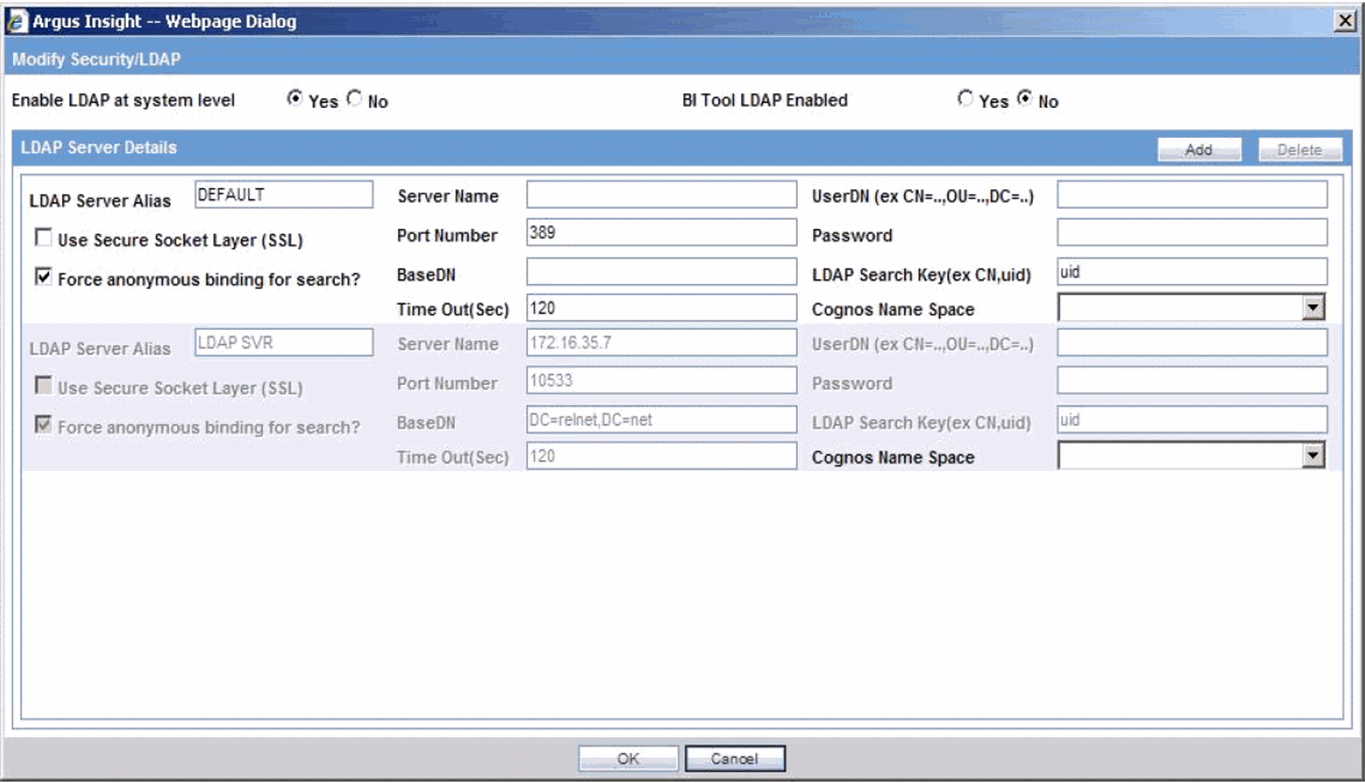
Locate the Enable LDAP at system level field and click the Yes option button.
Click Add.
|
Note: All the LDAP configuration imported from Argus Safety via ETL is in read-only mode. |
When the system opens the following dialog box, set the parameters.
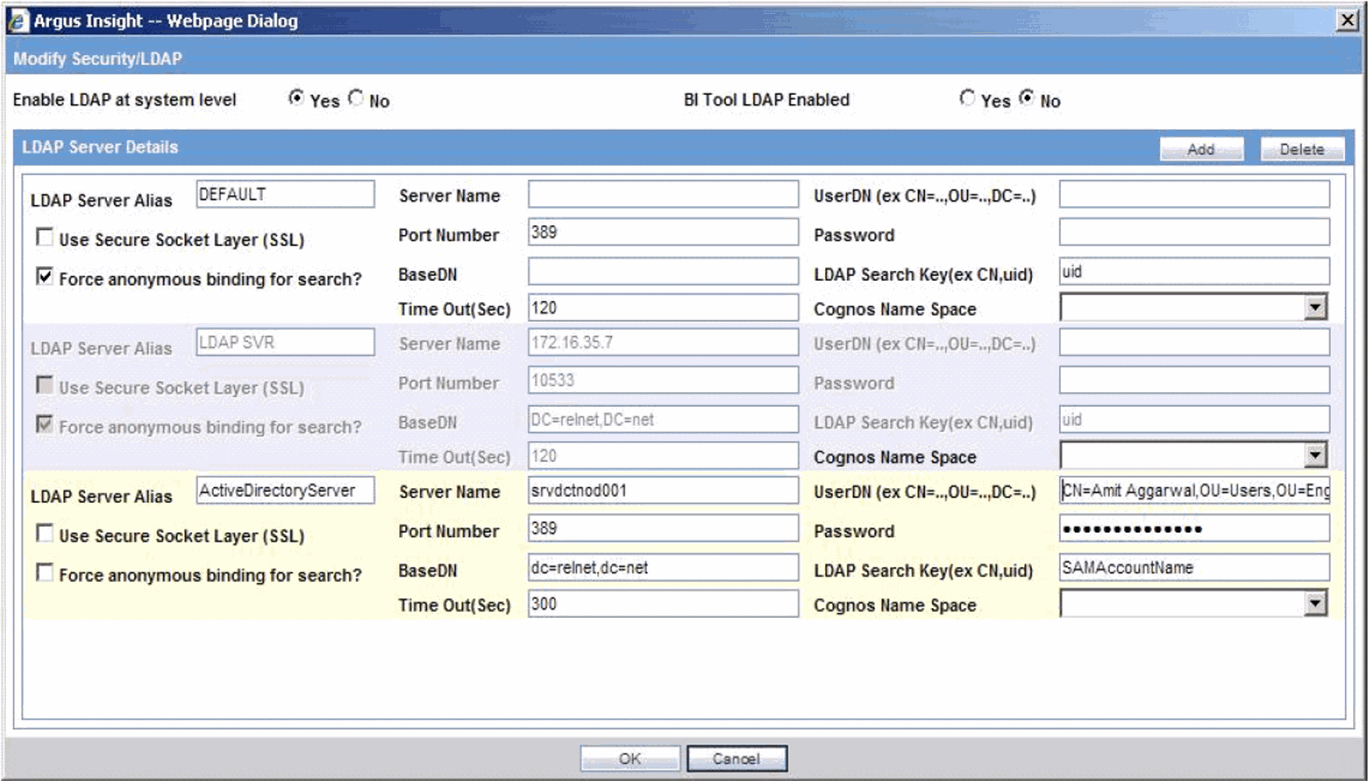
The following table lists and describes the parameters.
| Parameter Name | Description |
|---|---|
| LDAP Server Alias | Enter a unique name to identify the LDAP server configuration. |
| Server Name | Enter the name of the LDAP server. |
| Port Number | Enter the LDAP server port number. |
| BaseDN | Enter the Base DN for configured LDAP server (distinguish Name). |
| Time Out(Sec) | Enter a value for LDAP search timeout. |
| UserDN(ex. CN=..,OU=..,DC=..,): | Enter the complete UserDN for the LDAP search user. Argus Insight uses this user to search for users in the complete LDAP directory for authentication. |
| Password | Enter password for the LDAP search user. |
| LDAP Search Key(ex. CN,uid): | Enter SAMAccountName for Active Directory Server
Enter uid for SUNONE server This value can CN also based on LDAP server configuration |
|
Note:
|
This section provides information about the following:
This topic has instructions on importing the content repository to the database.
Log on to the Cognos 8 Server as an Admin user.
Start Internet Explorer.
Enter the URL in the following format and press Enter:http://< Cognos 8 Server>/cognos8
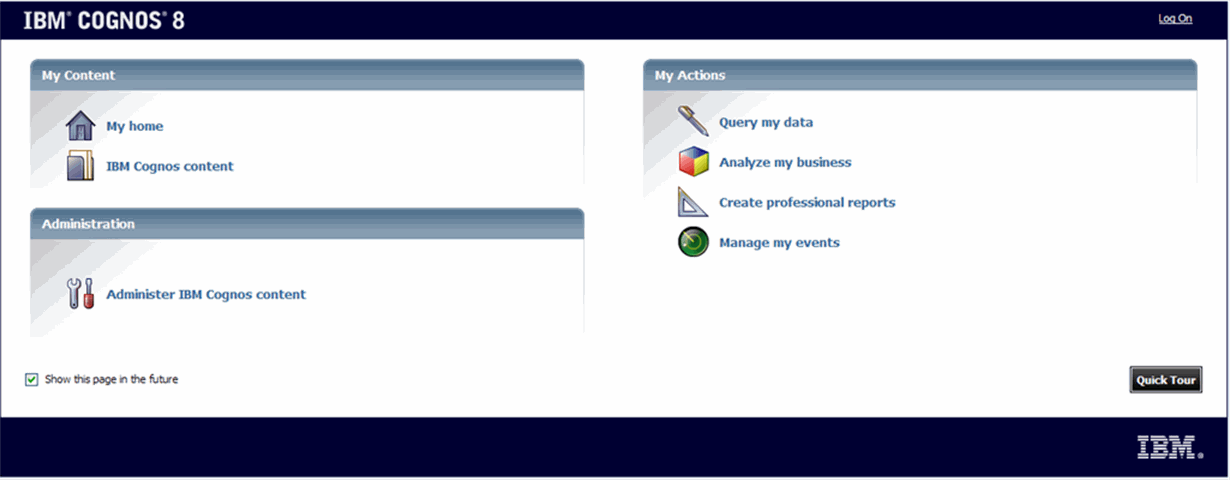
When the system opens the following window, click Administer IBM Cognos Content.
|
Note: If your security settings on the server do not permit you to view the Cognos connection, add the site URL (http://<Cognos 8 Server>/cognos8) to the list of local intranet sites. |
When the system opens the IBM Cognos Administration window, click the Configuration tab.
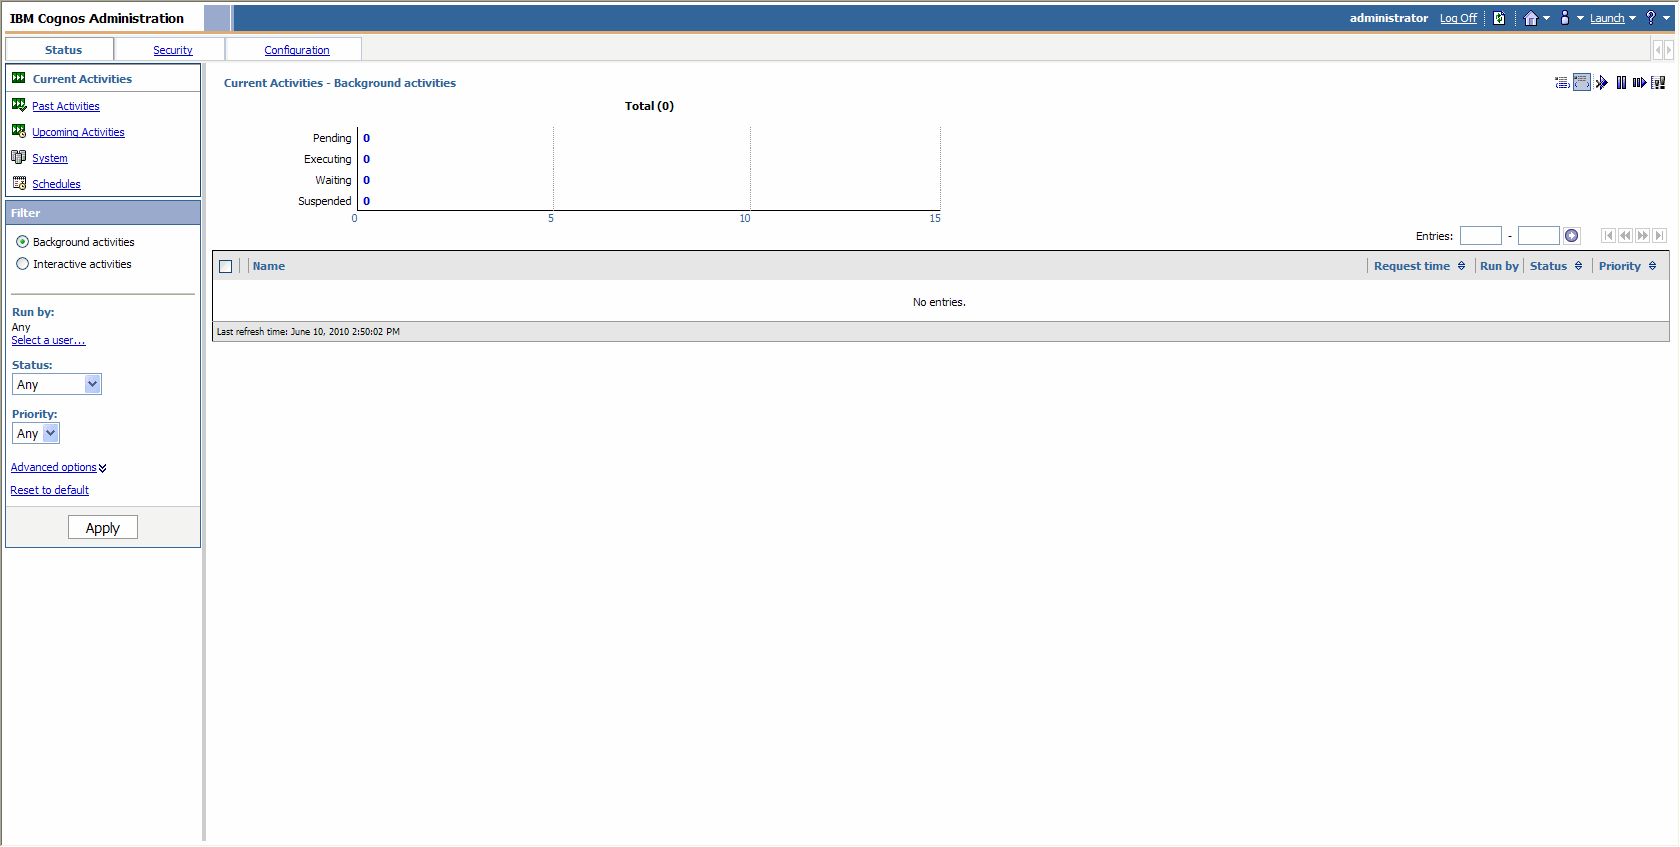
When the system opens the Data Source Connection window, click PRMART.

When the system opens the following window, click More link to the right of the PRMART link.

When the system opens the following window, click View signons.

When the system opens the following window, click the More link.

When the system opens the following window, click Set properties.

When the system opens the following window, click the Signon tab.
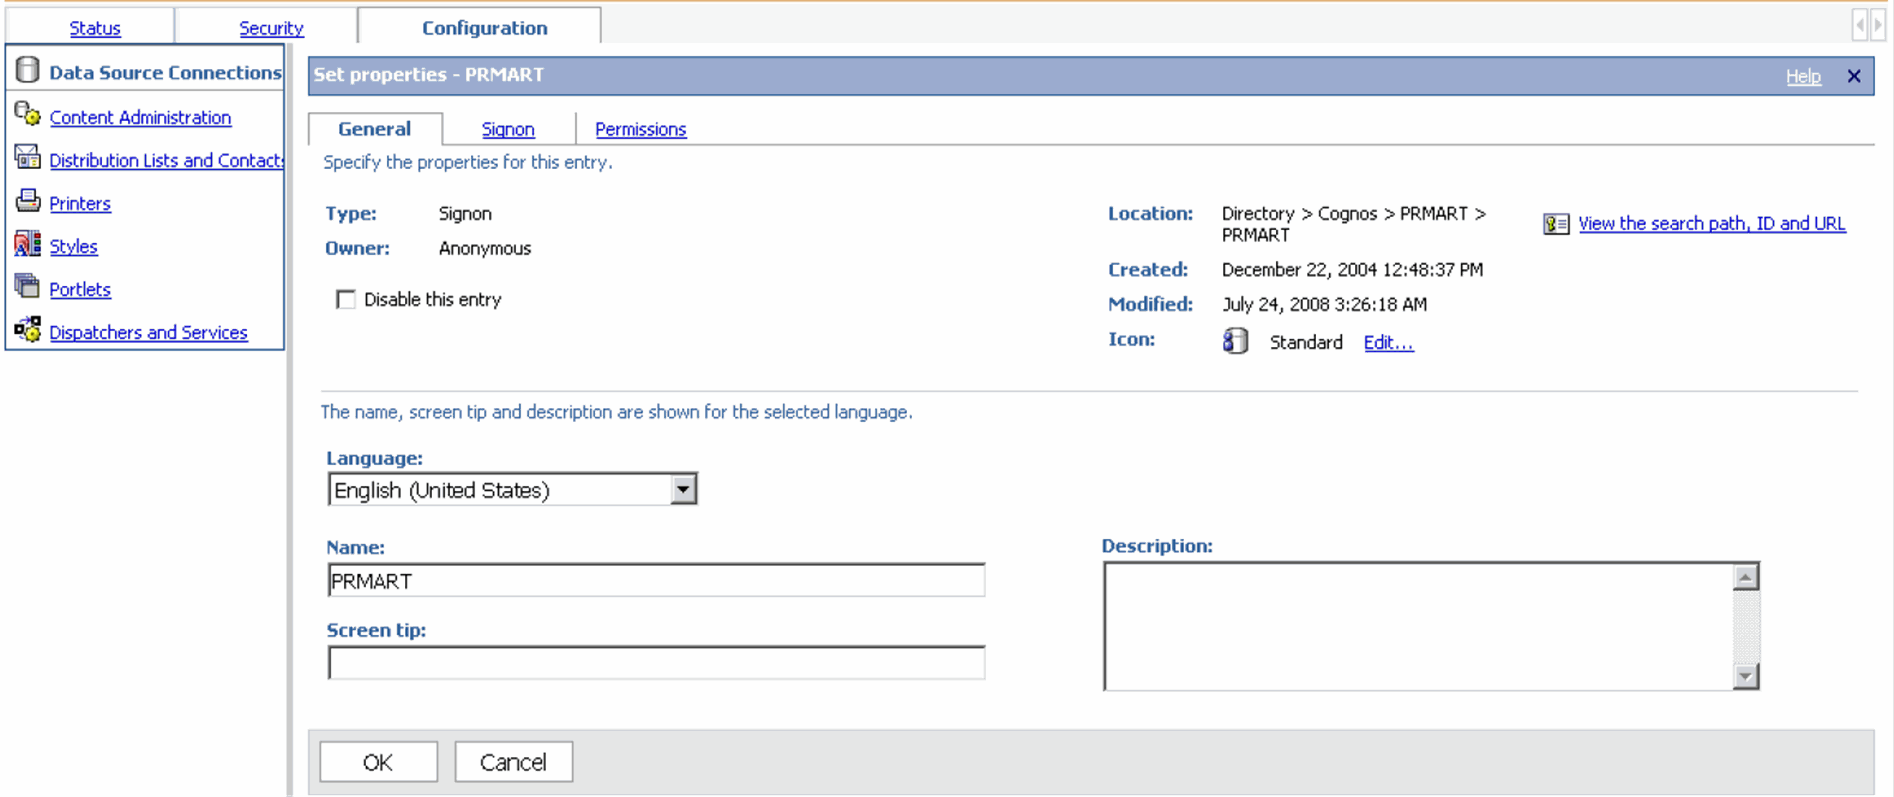
When the system opens the following window, click Edit the signon . . . .

When the system opens the following window:
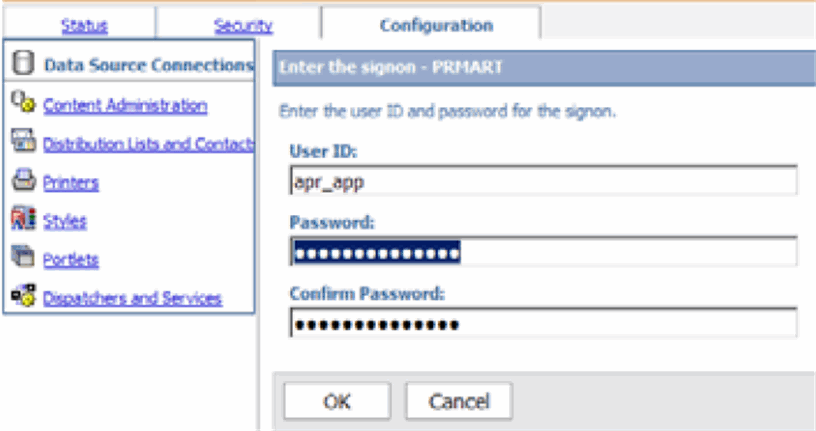
Type APR_APP user ID in the User ID field.
Type the APR_APP user password in the Password field.
For verification, type the password in the Confirm Password field.
Click OK to set the password.
When the system opens the following window, click OK.

When the system opens the following window, click the PRMART link.

When the system opens the following window, click More . . . ..

When the system opens the following window, click Set properties.

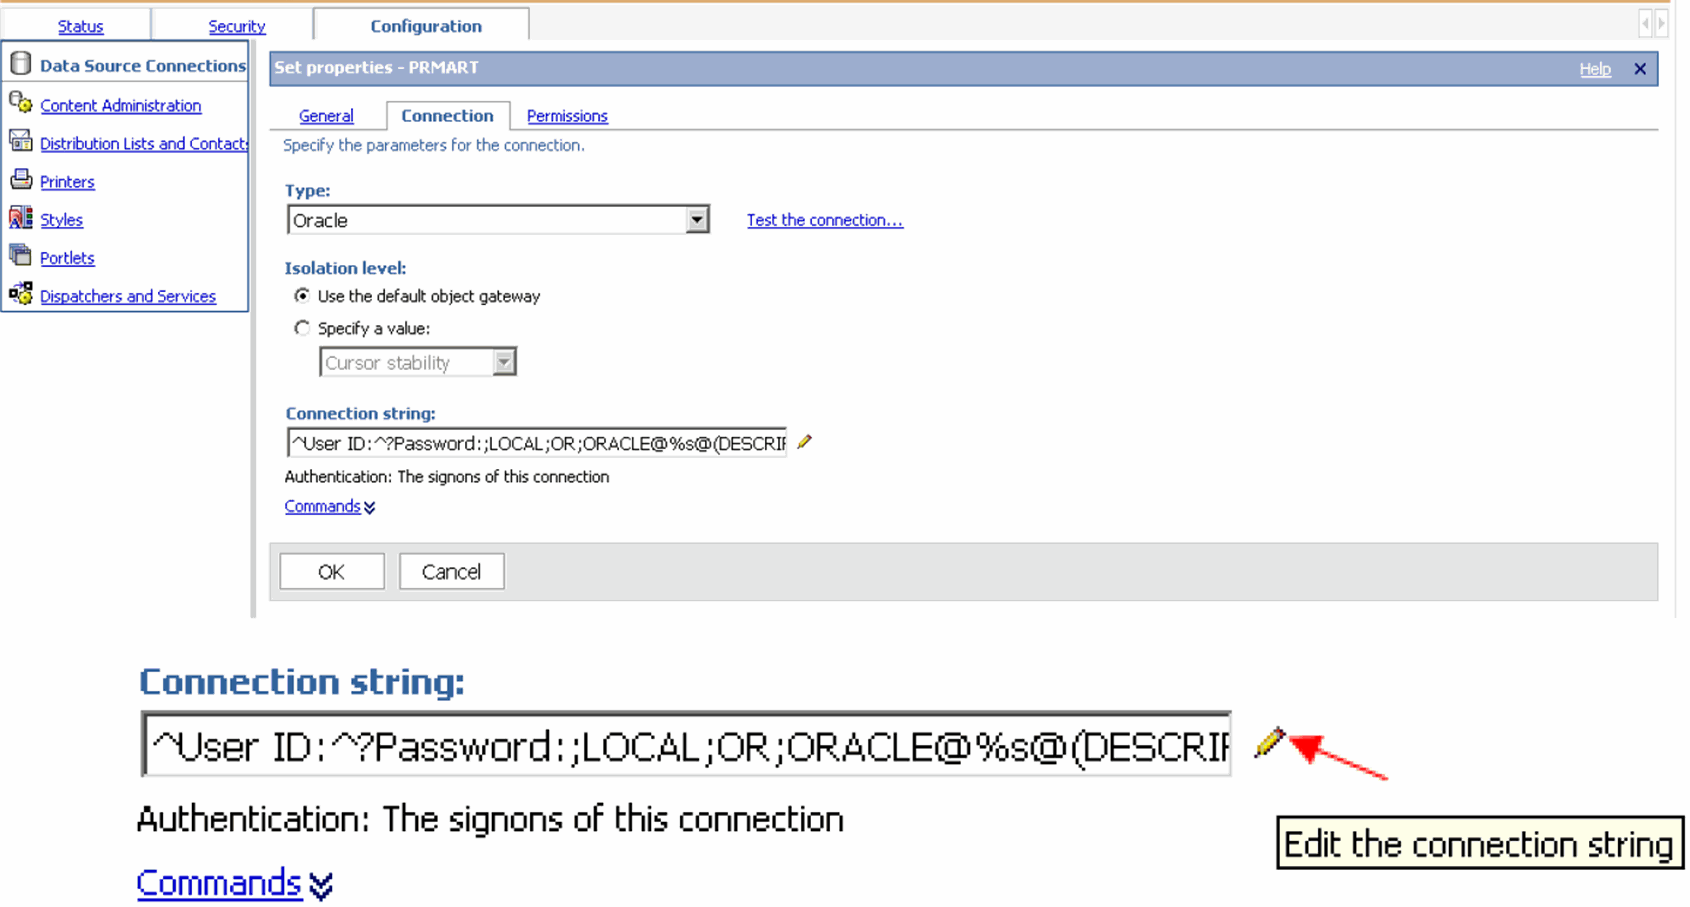
When the system opens the following window, click the Connection tab.
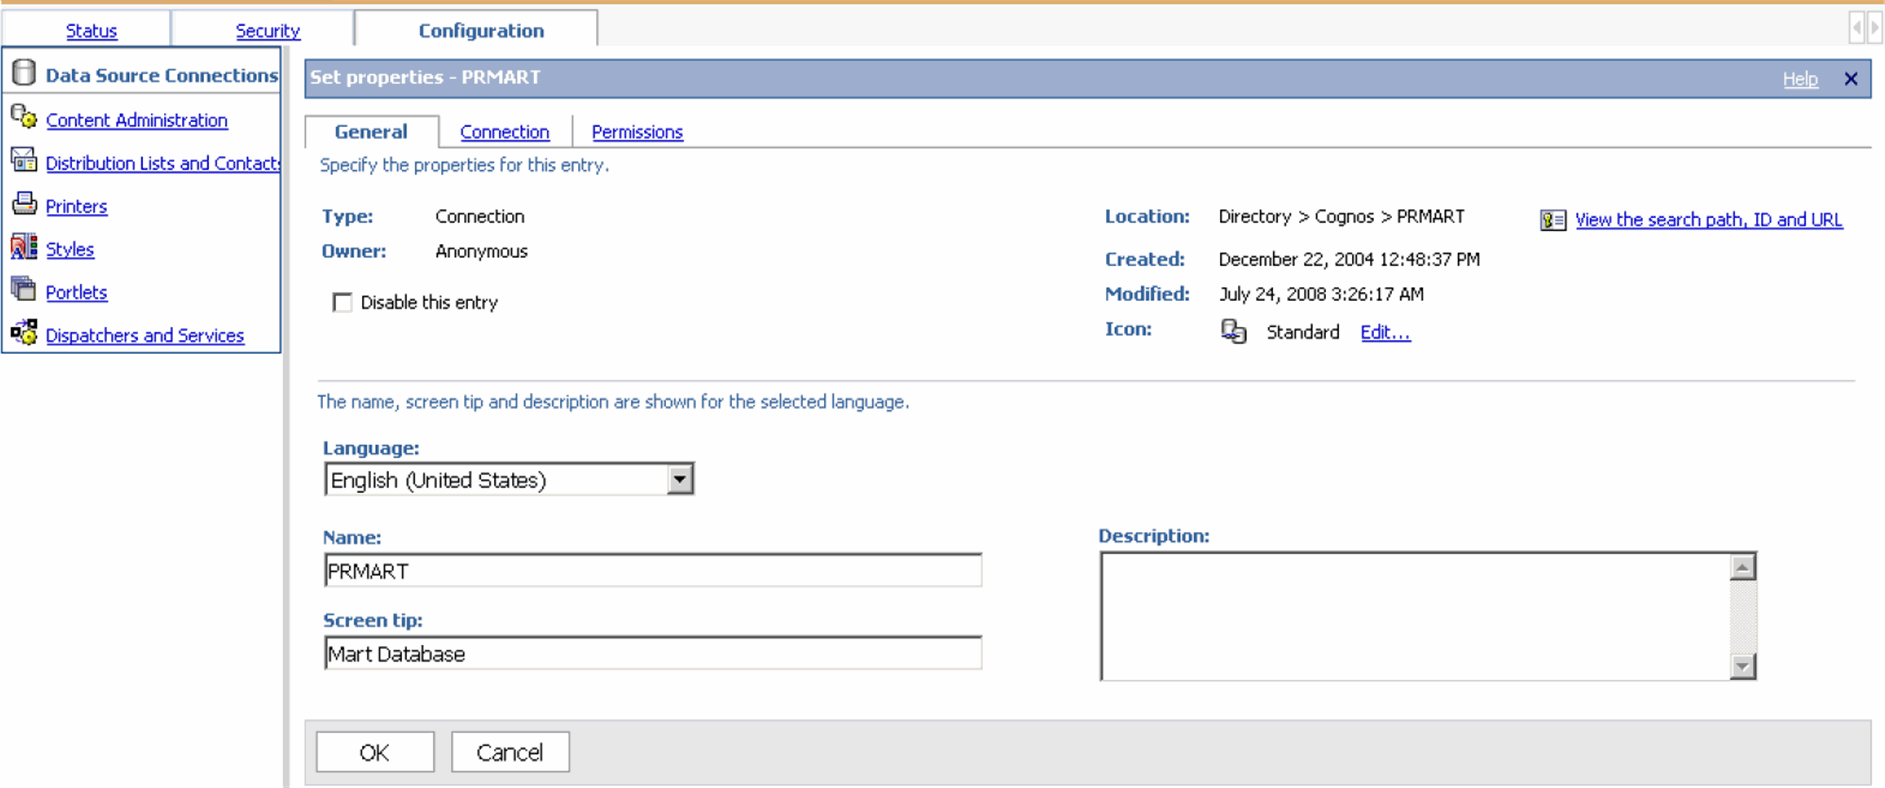
When the system opens the following window, click the pencil icon to edit the connection string.
In the SQL*Net connect string, set the following:
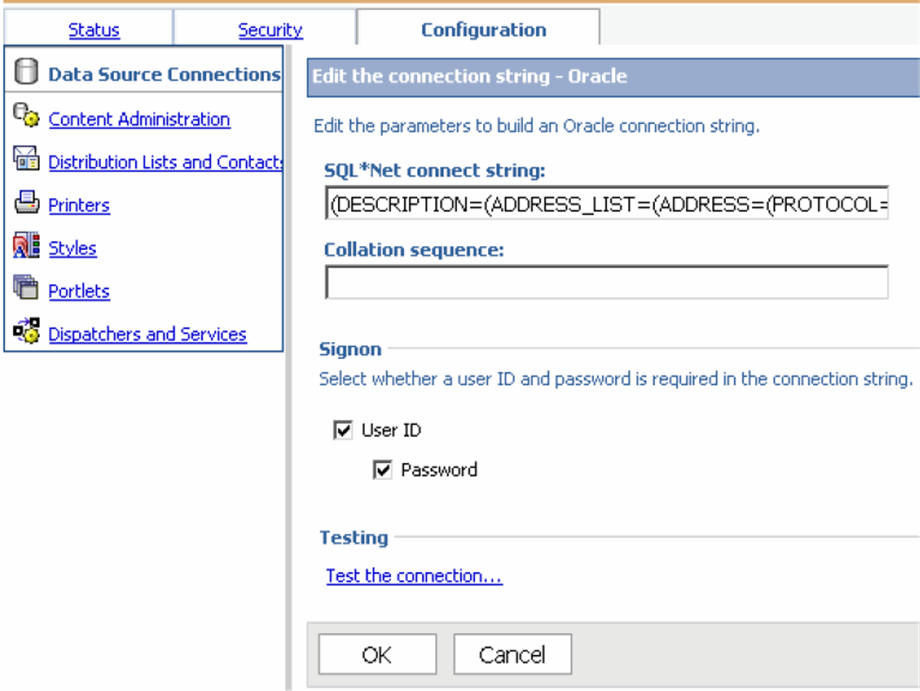
Set the Host as the Argus Insight Database Server Name.
Set the Port as the Argus Insight Database Port Number
Set the Service_Name as the Argus Insight Database Instance Name.
Click Test the connection.
When the system opens the following window, click Test.
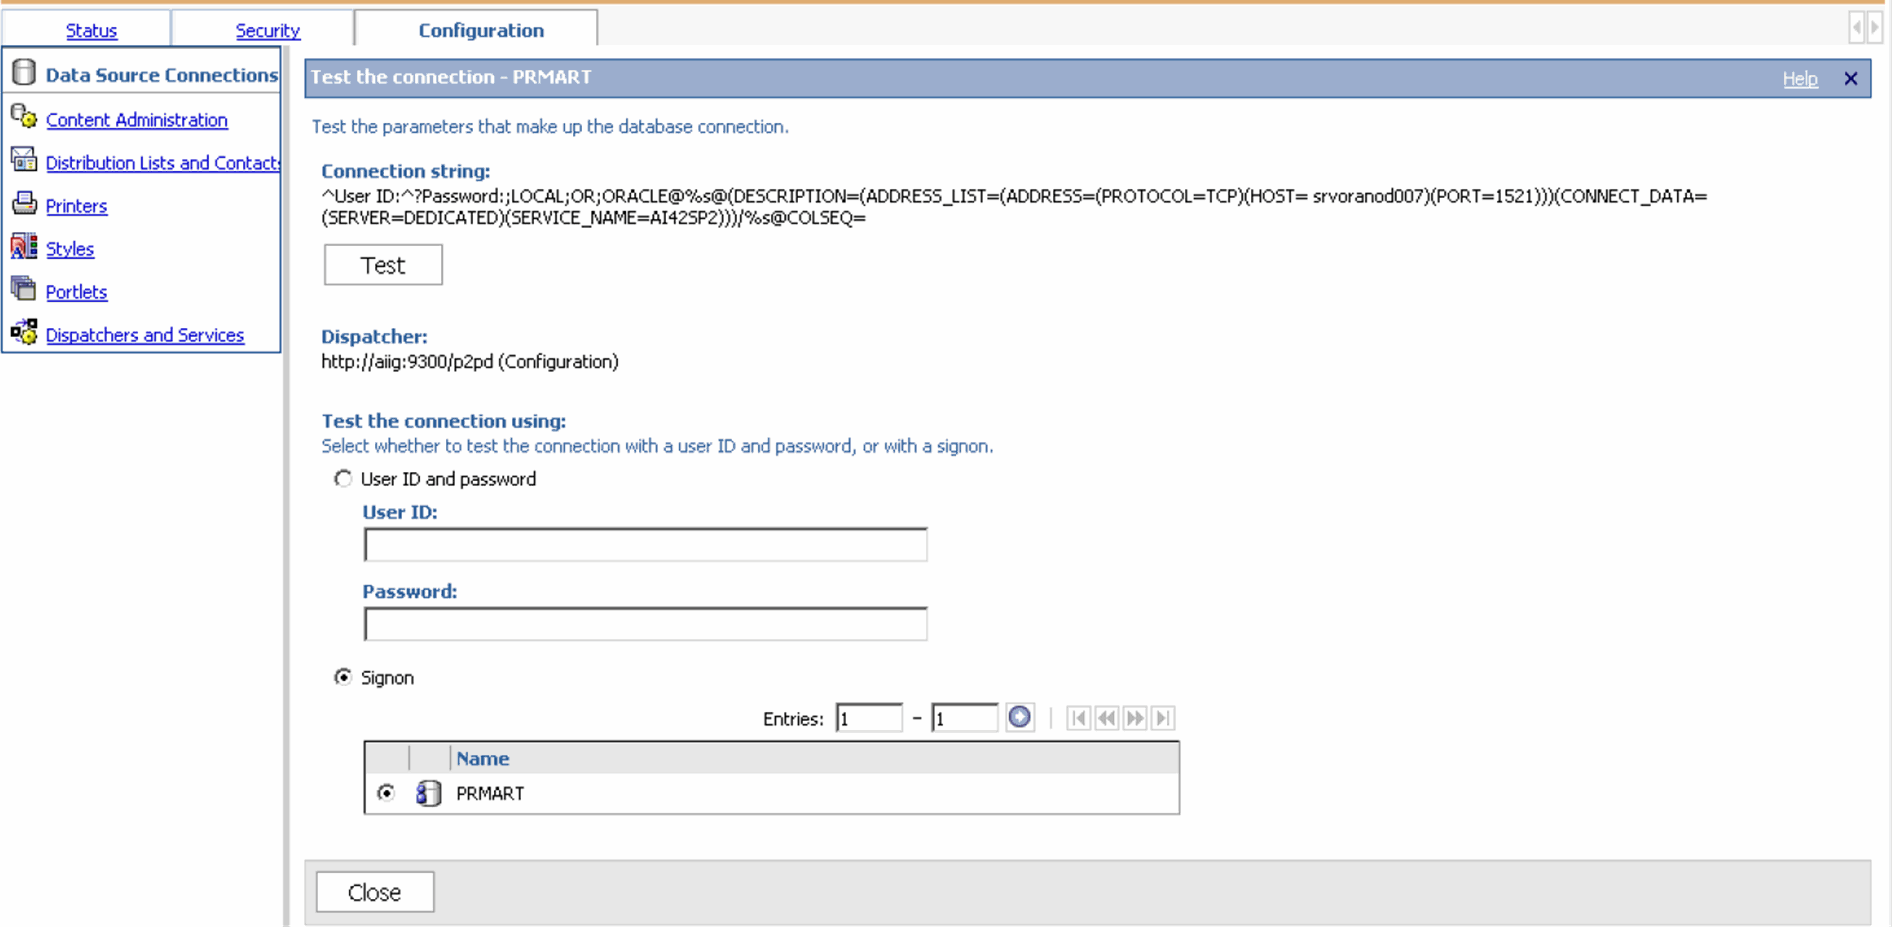
When the system opens the following window, click Close.

Click Close on the screen that gets displayed.
Click OK.
Click OK on the screen that gets displayed.
This topic has instructions on changing the Cubes Connection Path:
Use the following procedure for Changing the Cube Path in DataSource (Not Required for Cognos Series 7 customers). Make the following changes to all the cubes present in the datasource directory except PRMART.
Log on to the Cognos 8 Server as an Admin user.
Start Internet Explorer.
Enter the URL in the following format http://<Cognos 8 Server>/cognos8. Press Enter.
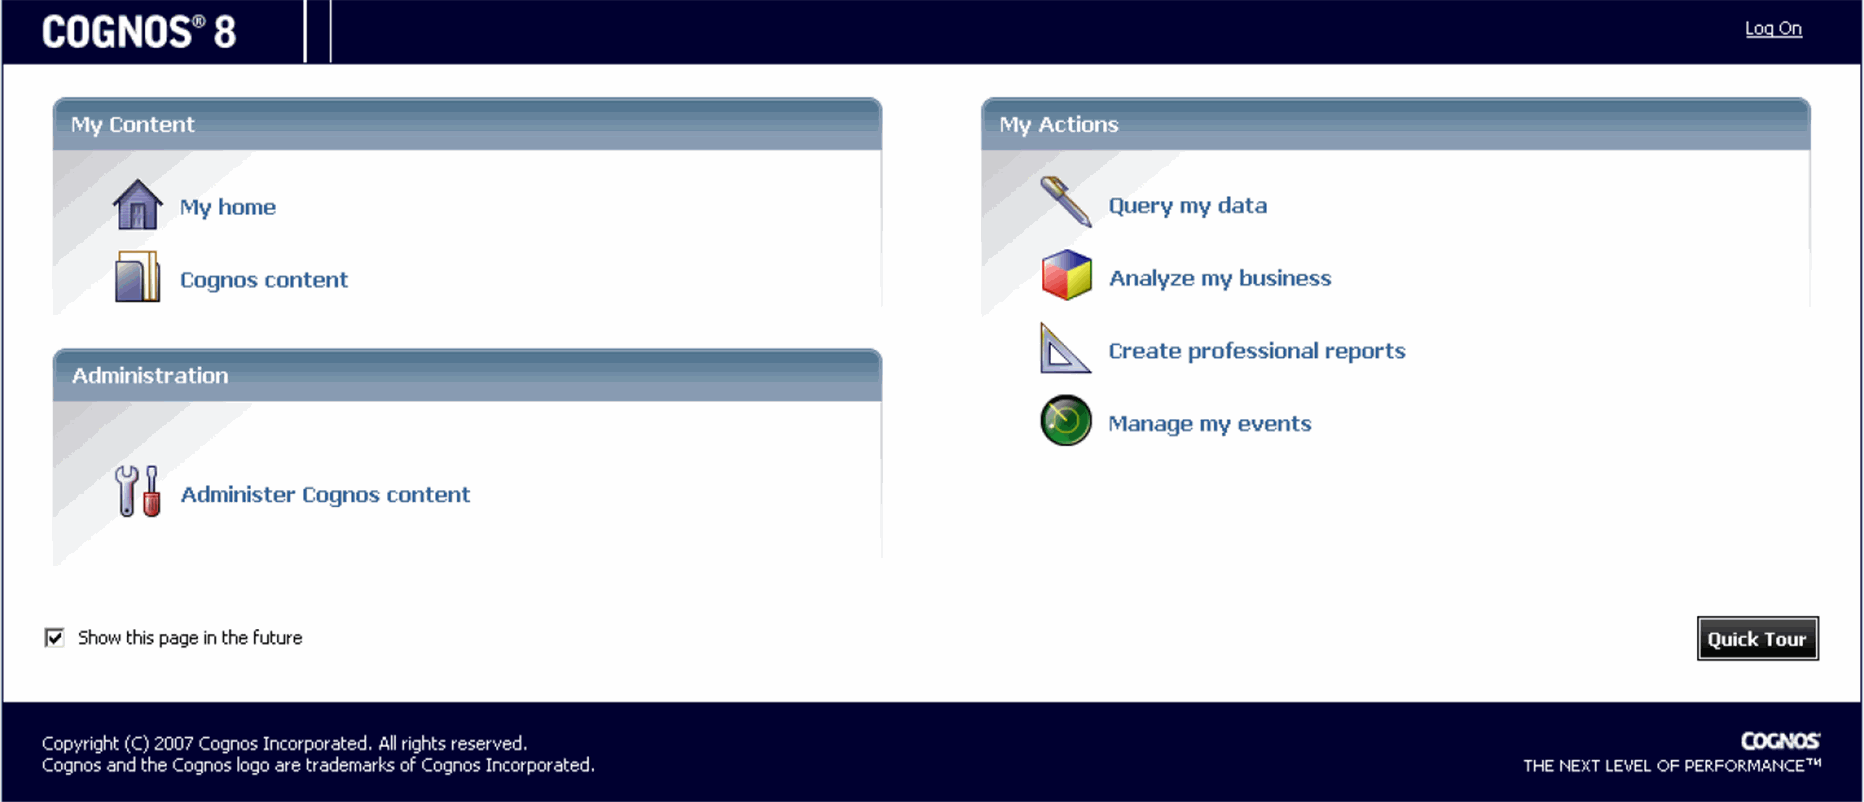
When the system opens the following window, click Administer Cognos content.
|
Note: If your security settings on the server do not permit you to view the Cognos connection, add the site URL (http://<Cognos 8 Server>/cognos8) to the list of local intranet sites. |
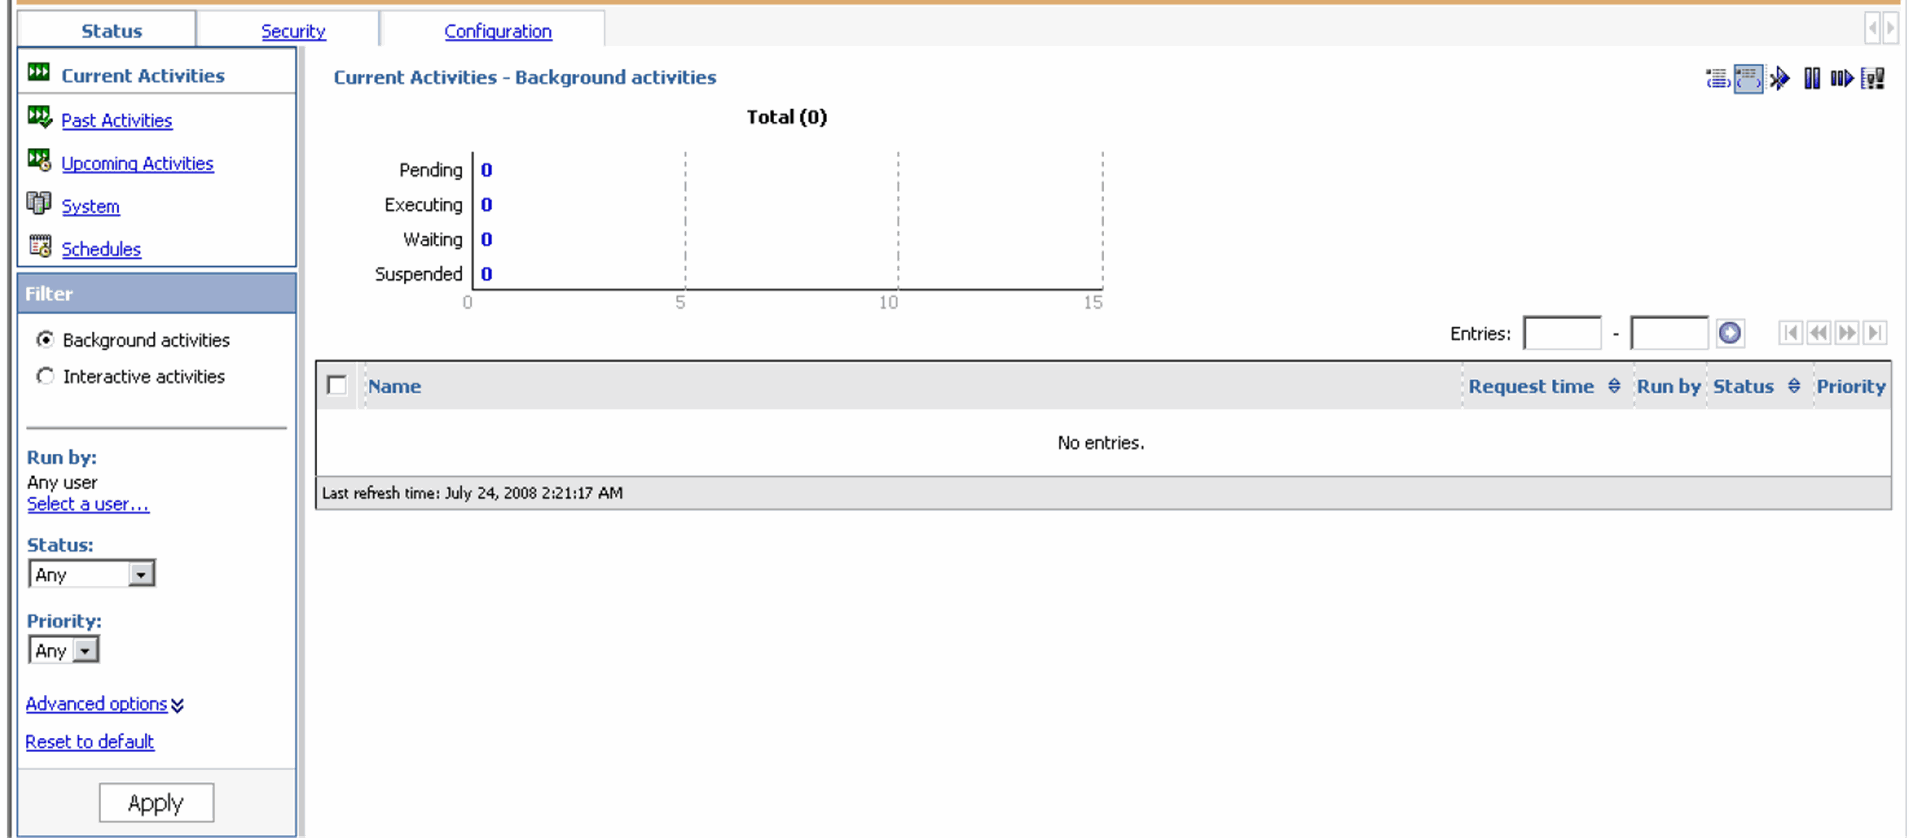
When the system opens the Cognos Administration window, click the Configuration tab.
When the system opens the Data Source Connection window, click a Cube Name.

Click the Cube Name (such as Administration Statistics).
Click the More . . . link.
When the system opens the following window, click Set properties.

Click the Connections tab.
When the system opens the Connections tab:
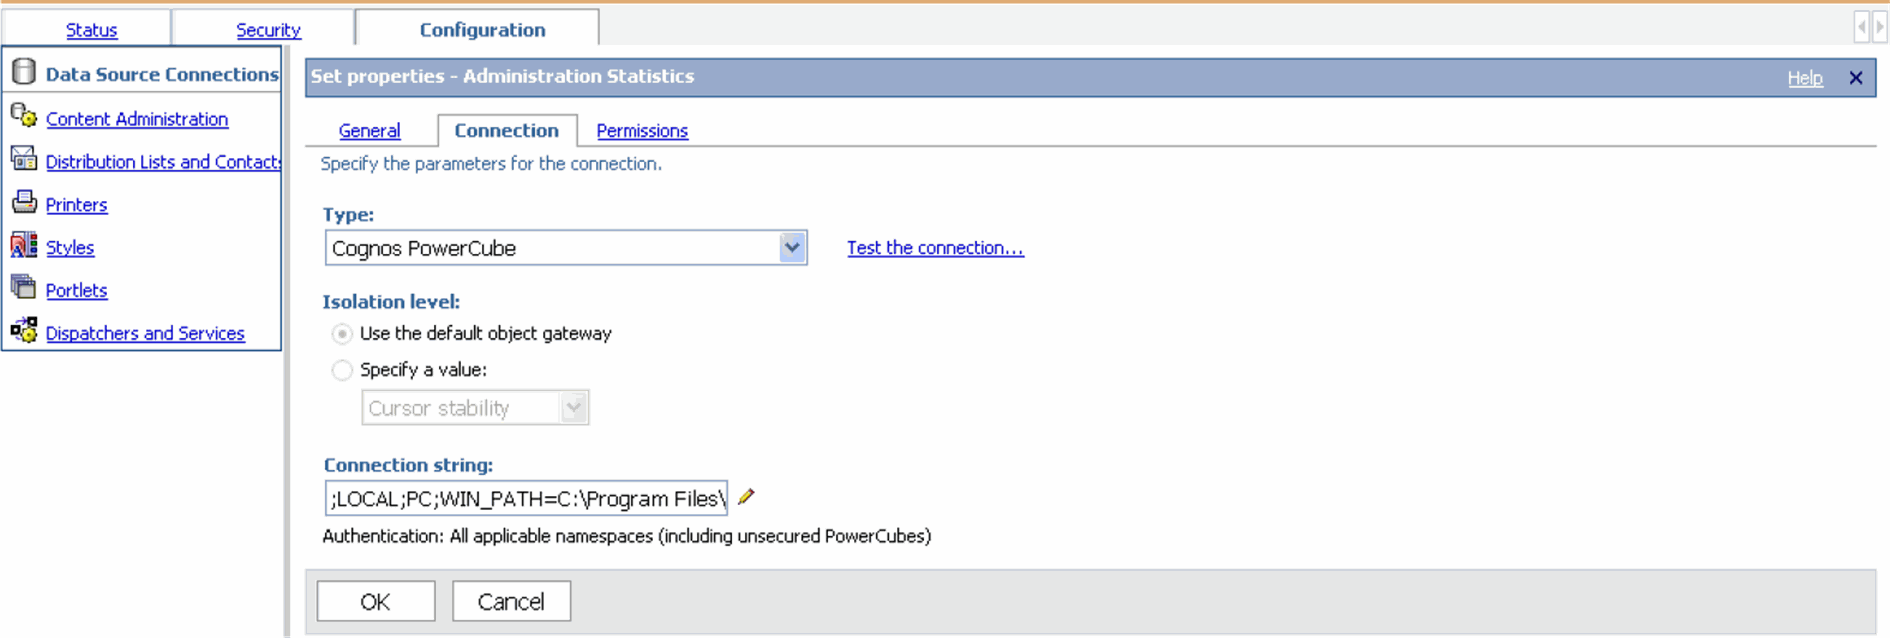
Edit the Connection String for the cube (Give the path of your installation directory).
Click the pencil icon to edit the Connection String
When the system opens the following window:
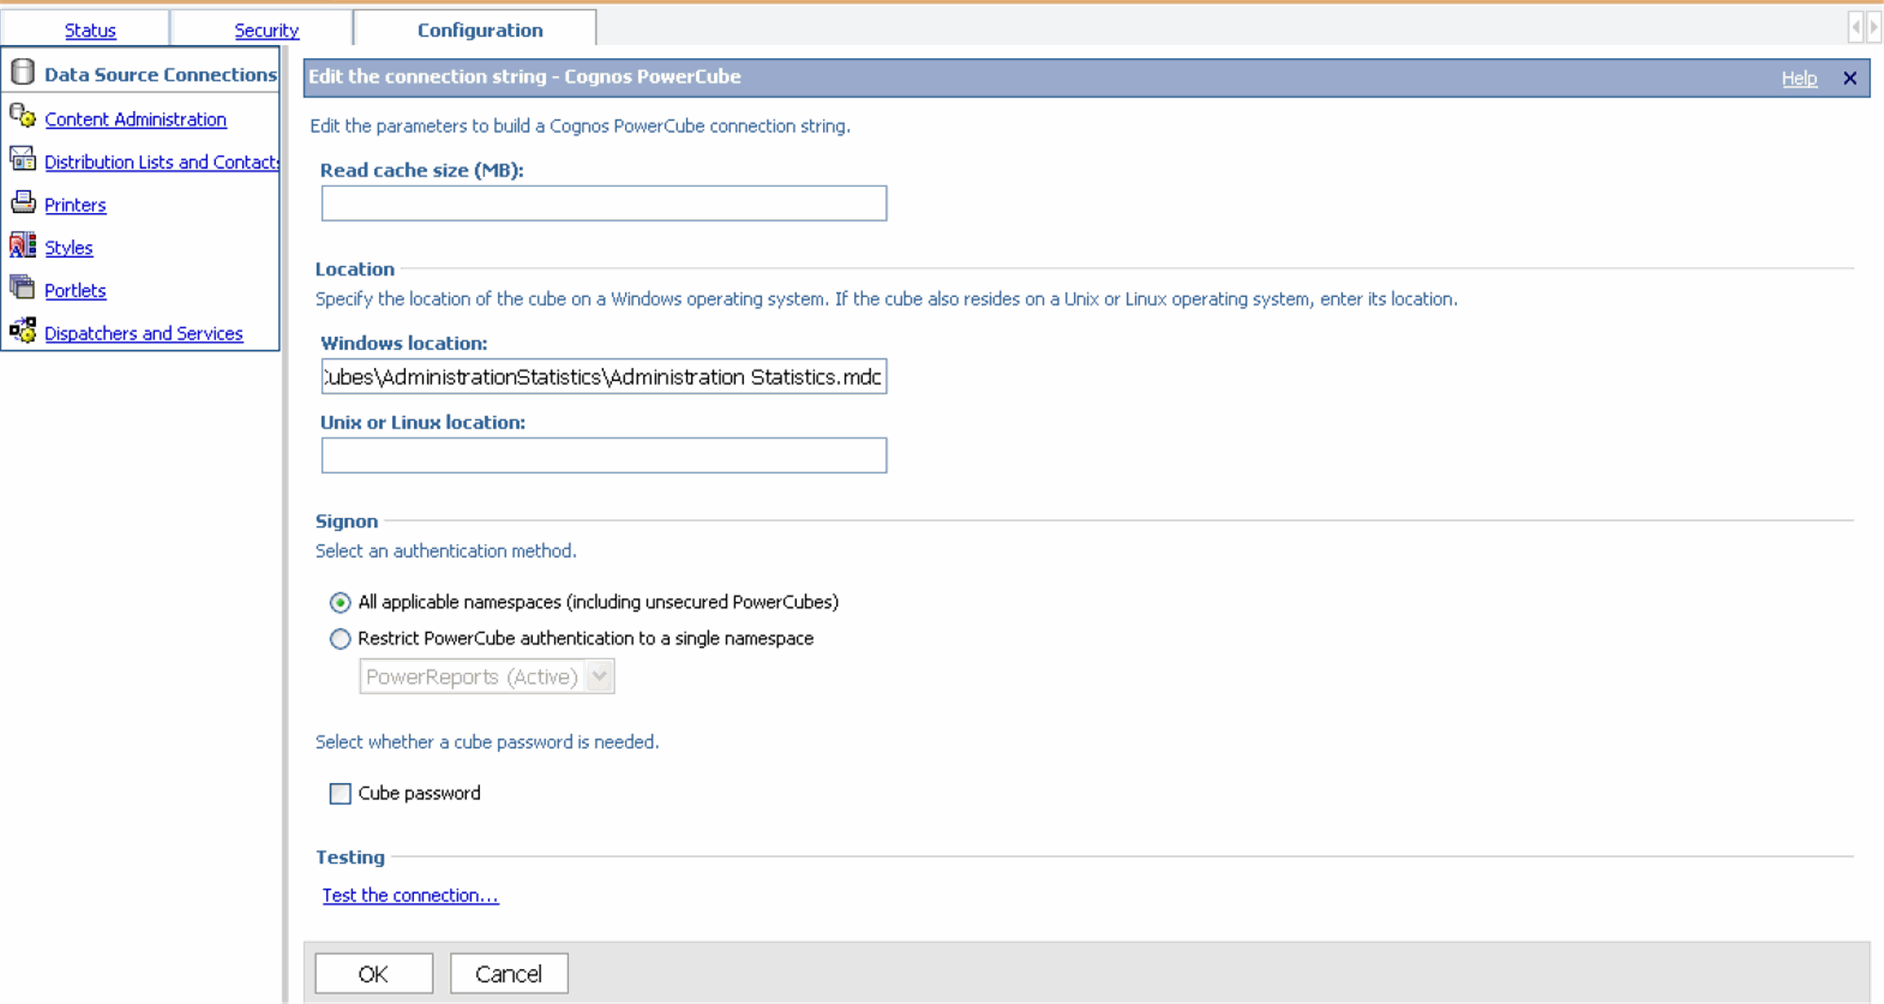
In the Windows Location, enter the following path <Argus Insight installation Directory>/ArgusInsight/Cognos/PPES/<Cube Folder Name>/<CubeName>.mdc
Click Test the connection.
Click OK to apply the changes.
Use the following procedure to activate the PowerReports Namespace.
Open the Cognos 8 configuration.
Go to Start > Programs > Cognos 8 > Cognos Configuration.
When the system opens the Cognos Configuration window, select Security>Authentication>Cognos.
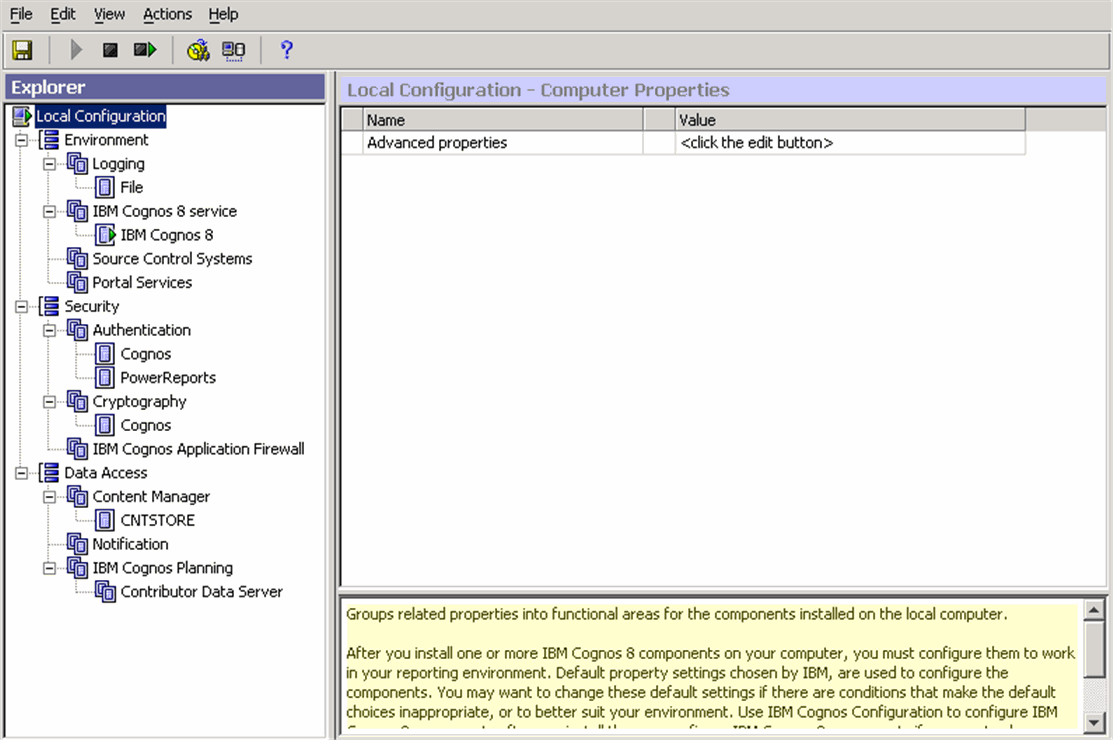
When the system opens the following window, go to the right pane and set Allow Anonymous access? to False.
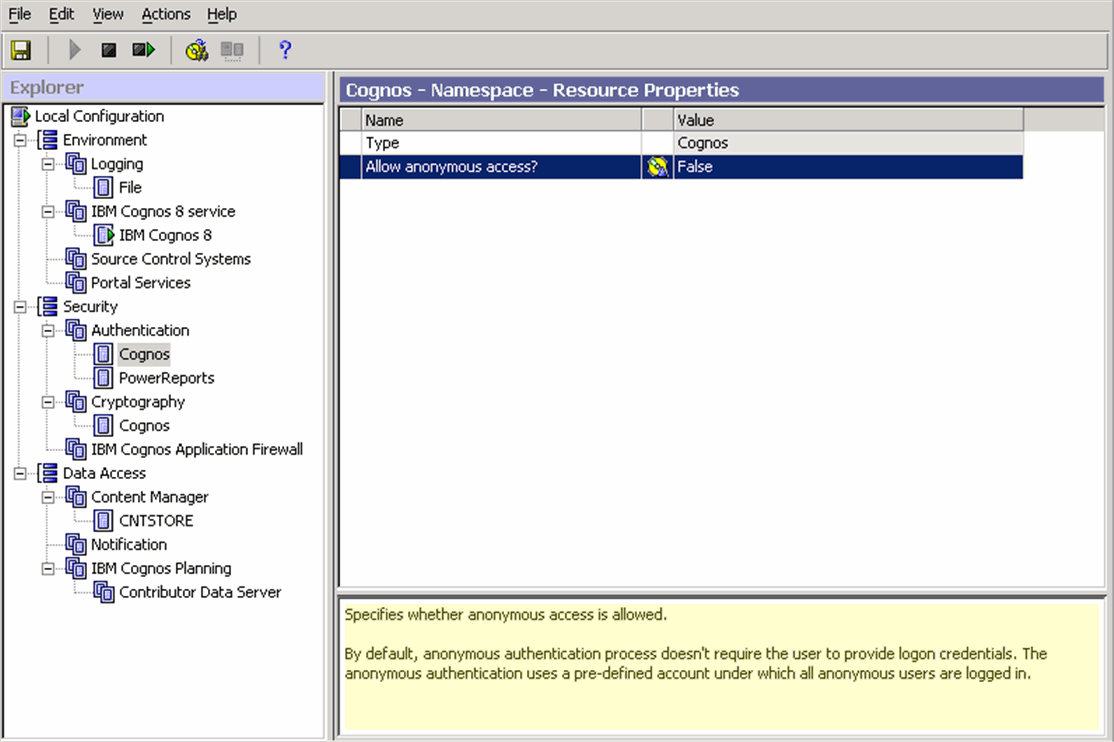
Click Actions > Restart to restart the Cognos 8 service.
When the system opens the confirmation dialog box, click Yes to save the modified configuration settings. Click Yes.

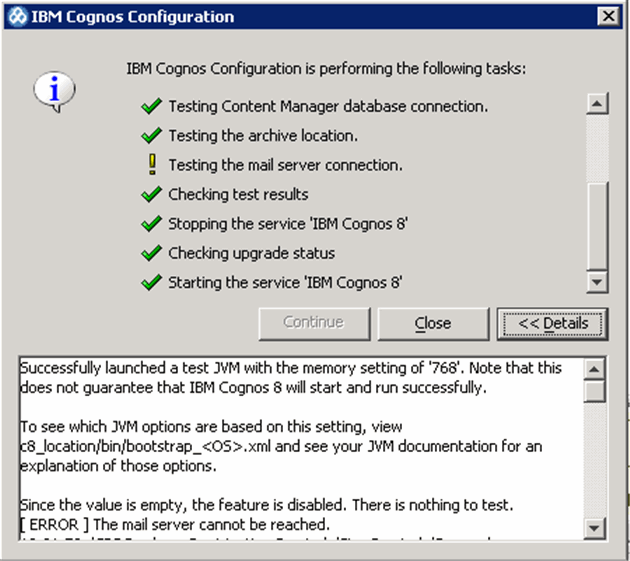
If any warnings exist, the following screen may appear during the Cognos service restart. If the warnings appear to be the result of a mail server connection failure, click OK to ignore the warnings and continue.

Ignore the warning if it appears due to mail server connection failure, as shown in the following dialog box.
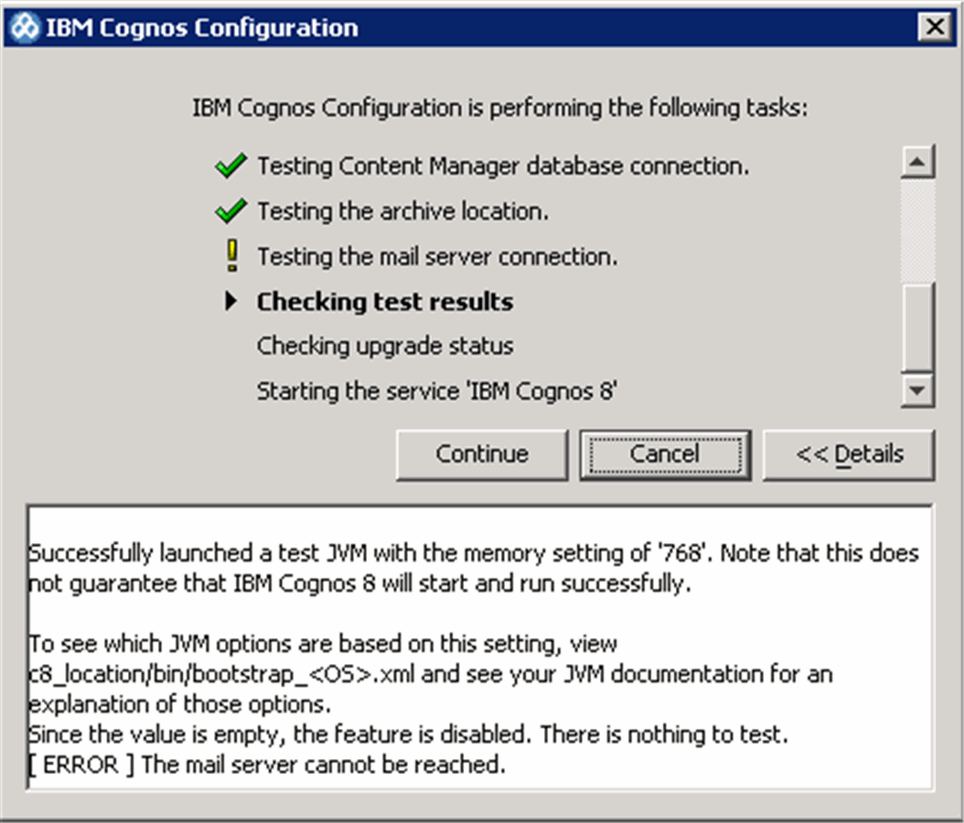
Click Continue to ignore the Mail Server Connection Warning displayed above. If the warning(s) appear due to reasons other than mail server connection failure, please check your configuration again.
When the system opens the following dialog box, click Close to exit the Cognos configuration.
