 Read more...
You will use the Create Session Bean wizard to create a new EJB 3.0 session bean and
the source editor to add a method to the bean class.
Then you will create a sample Java client and add code to the client to call the business method.
To test, you will run the session bean, and then run the Java client in the IDE's runtime service.

| Purpose | Duration | Application |
|---|---|---|
This tutorial shows you how to create and test a simple EJB session bean.
To see the complete application you will create, click the Download button to download a zip of the final application,
and then unzip it in your JDeveloper mywork folder. |
20 minutes |  |
-
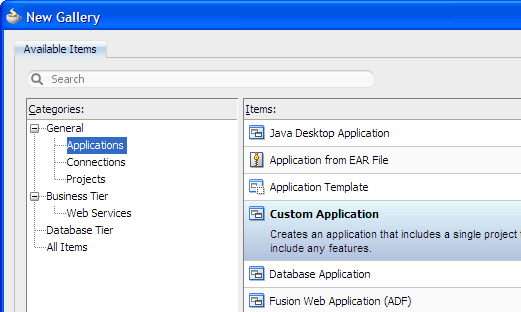
From the main menu, choose File > New. In the New Gallery, expand the General category and select Applications. Then in the Items list, select Custom Application and click OK.
-
To follow along with the example, enter
SessionEJBas the application name.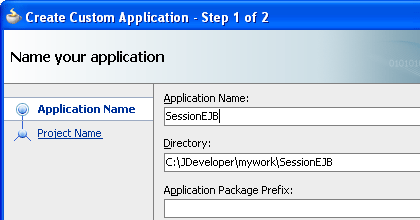
Accept the defaults and click Finish.
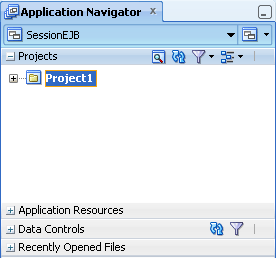
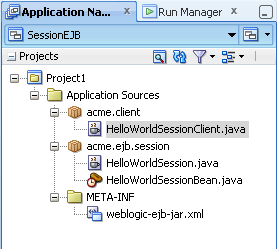
The Projects panel in the Application Navigator should look like this:
 Read more...
At the same time, it keeps track of your projects and all
environment settings.
Read more...
At the same time, it keeps track of your projects and all
environment settings.Based on prebuilt templates, a JDeveloper application allows you to specify a predefined type of environment, depending on the type of application you want to create (web application, Java application, and so on). Application templates provide you with a quick way to create the project structure for standard applications with the appropriate combination of features already specified. The application template also filters the work you do in JDeveloper such that the choices available are focused only on the features you are working with.
In this tutorial, you will use the Custom Application template, which makes available objects associated with all the features that JDeveloper supports in a single project.
Once you have created an application using a suitable template, you can still add new projects to the application and specify what features are to be included. To do this, in the Application Navigator, right-click the application name and choose New Project. In the New Gallery, you can select any type of project in the Items list.
 Read more...
The project or projects in the application define the associated features.
A JDeveloper project, which is used to logically group files that are related, keeps track of the source files, packages, classes, images, and other elements that your program may need. Projects manage environment variables such as the source and output paths used for compiling and running your program. Projects also maintain compiler, runtime, and debugging options so that you can customize the behavior of those tools per project.
You can add multiple projects to your application to easily access, modify, and reuse your source code. Different projects might contain files representing different tiers of a multi-tier application, for instance, or different subsystems of a complex application. These files can reside in any directory and still be contained within a single project.
 Read more...
Projects are displayed as the top level in the hierarchy in the
Application Navigator. The Custom Application template that you used for your application creates one project using a default project name
(or the project name you entered).
In the Application Navigator you can collapse and expand any panel. You adjust the size of panels by dragging the splitter between two panels. To group and sort items in the Projects panel, use the
JDeveloper has the capability of recognizing many different file types, displaying each in its appropriate viewer or editor when you double-click the file in the Application Navigator. Closing an application or project closes all open editors or viewers for files in that application or project and unloads the files from memory.
Note: Nodes in italics in the Application Navigator mean that the elements have not yet been saved. A project node is bold when a file in the project is selected.
From the main menu, choose Application > Show Overview. The Application Overview window opens in the editor window area.
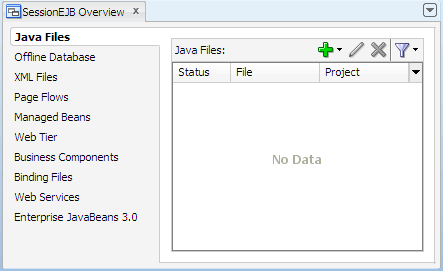
All objects that you create within JDeveloper appear in the Application Overview file summary pages, arranged by object type. As you create new files and artifacts, you can view them filtered by status and project.
You can optionally close the Application Overview window, since you will not be using it to create objects for this application.
-
In the Application Navigator, select the project you just created and choose File > New > Business Tier > EJB > Session Bean to launch the Create Session Bean wizard. Then click OK.

-
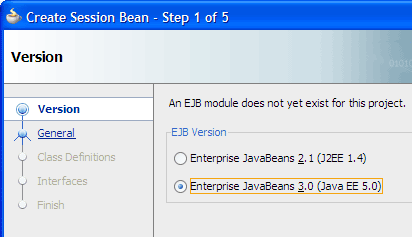
On step 1 of the wizard, Version, select Enterprise JavaBeans 3.0 (Java EE 5.0), and click Next.
-
On step 2, General, enter
HelloWorldSessionas the EJB name to follow along with the example. Make sure Stateless and Container are selected. Confirm that Generate Session Facade Methods is not selected. Click Next.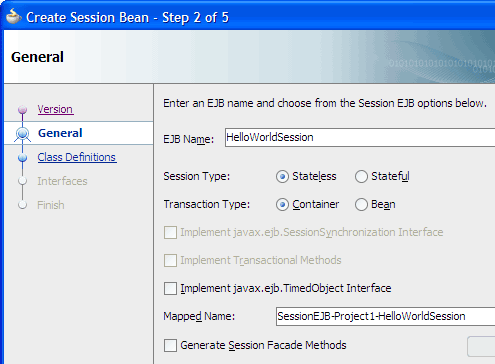
On step 3, Class Definitions, enter
acme.ejb.session.HelloWorldSessionBeanas the bean class name, and click Next.
Changing the package name in the Bean Class field will put all the session bean information in its own package. Partitioning your EJBs in different packages can be less confusing when there are many components in a project.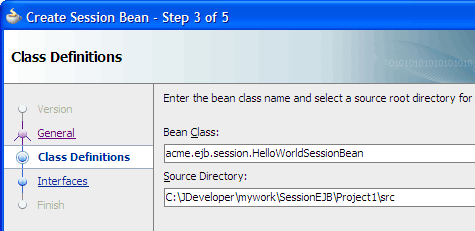
-
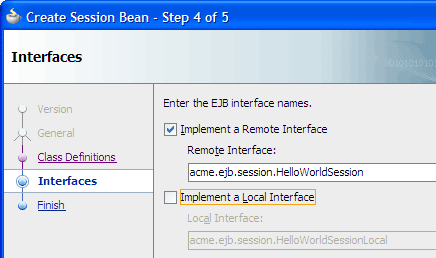
On step 4, Interfaces, select Implement a Remote Interface and deselect Implement a Local Interface. Click Finish.
Click
 Save All
to save your work.
When you complete the steps for creating your session bean, the Application Navigator should look similar to this: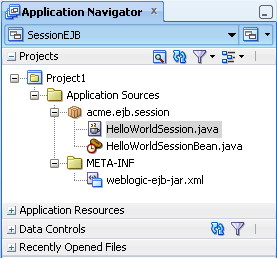
HelloWorldSessionBean.java: This file is the bean class. The bean class implements the business methods of the bean and contains annotations that can be used to specify bean types, different attributes such as transaction or security settings, O-R mapping and injection of environment or resource references.
HelloWorldSession.java: This is the remote interface. The remote interface is used by client applications that run in a separate virtual machine (VM), such as Java clients. (A local interface is used by clients that run in the same VM, such as Web clients. Since this application uses only a Java client, a local interface does not need to be generated.) The interface files are automatically kept in sync and you should not need to change them.
 Read more...
When a client wants to execute a method in a session bean, the EJB container creates an instance of that session bean.
The lifetime of the session bean is equivalent to the client session.
In the example, the EJB name you specify will become the name of the session bean. You will create a stateless session bean that implements a HelloWorld business method, hosted in an EJB container. A stateless session bean does not maintain state across business method calls. This means any instance of stateless beans can be used by any client at any time. A stateful session bean is associated with a specific client, and maintains state across multiple method invocations made by the same client.
 Read more...
Which interfaces you choose to generate depends on the type of client. If the client is running in the same virtual machine
(VM), a local interface is the best choice. If the client is running a separate VM, a remote interface is required.
Web clients run in the same VM, while Java clients run in a different VM. In the example, you will be creating a Java client,
so you only need to generate the remote interface.
 Read more...
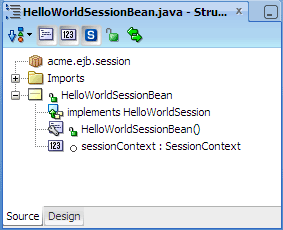
If you select HelloWorldSessionBean.java in the Application Navigator, the Structure window should look similar to this:
If not already open, in the Application Navigator double-click
 HelloWorldSessionBean.java to open the bean class file in the source editor.
-
In the source editor, add code to create a "Hello world" method, after:
  public HelloWorldSessionBean() {

  }
Copy and paste the following code: In the Structure window for HelloWorldSessionBean.java, right-click
 sayHello(String)
and choose Enterprise JavaBeans (EJB) >
Properties.
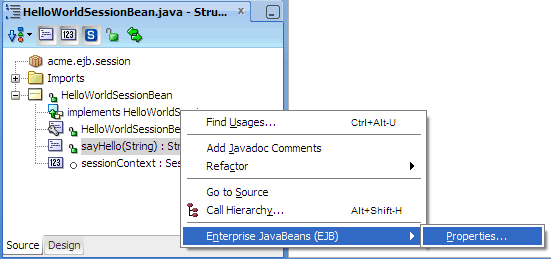
In the Bean Method Details dialog, select Expose through Remote interface, and click OK.
The interface is local if the client will run in the same JVM as the EJB 3.0 container. If the client is running a separate VM, a remote interface is required. The remote interface exposes services to Java clients. When you select the checkbox to expose thesayHello()method through the remote interface, the appropriate method signature will be added to the remote interface file.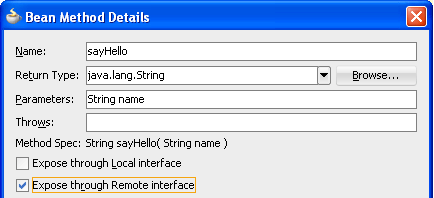
Click
 Save All
to save your work.
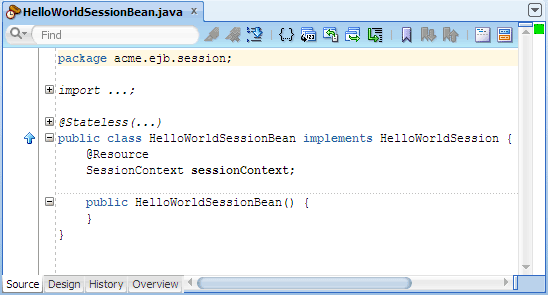
When you complete the steps for adding a bean method and exposing the method through a remote interface, the source editor should look similar to this: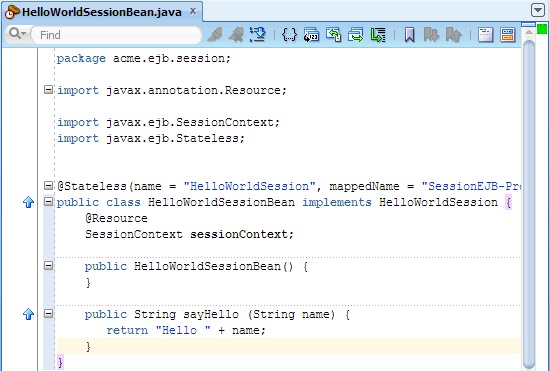
 Read more...
The method code you will add is a simple "Hello world" method that accepts an input String, and returns the text "Hello" plus the input String. You will expose the method to a remote interface.
While you can add a new method using the source editor, you can also use JDeveloper's dialogs to create methods declaratively. When you create a new method declaratively, JDeveloper generates the method code in the bean class. Then you use the source editor to add the business code to the method.
return "Hello " + name;
}
 Read more...
In the Bean Method Details dialog when you selected the checkbox to expose the
sayHello() method through the remote interface,
the appropriate method signature was added to the remote interface file. If you double-click
HelloWorldSession.java
to open the remote interface in the editor, you will see the sayHello() method signature: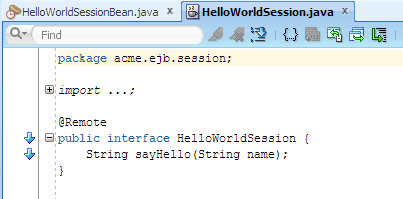
The
@Remote annotation specifies that the HelloWorldSession interface is a remote interface.
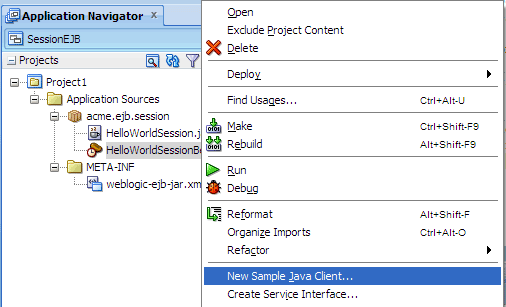
In the Application Navigator, right-click
 HelloWorldSessionBean.java and choose New Sample Java Client.
In the Create Sample Java Client dialog, enter
acme.client.HelloWorldSessionClientin the Client Class Name field to create the client in a separate package in the project. Make sure IntegratedWebLogicServer is selected in the Application Server Connection dropdown list, then click OK.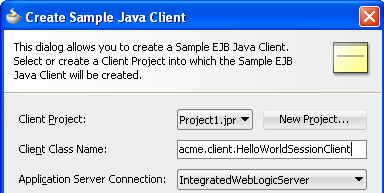
-
In the source editor for HelloWorldSessionClient.java, add code that calls the method you created previously. After:
  HelloWorldSession helloWorldSession =
  (HelloWorldSession)context.lookup("<mapped_name>#<bean_class_name>");
Copy and paste the following line: -
Rebuild the project by choosing Build > Rebuild <project_name> from the main menu. You should see a
Successful compilationmessage in the Messages Log window.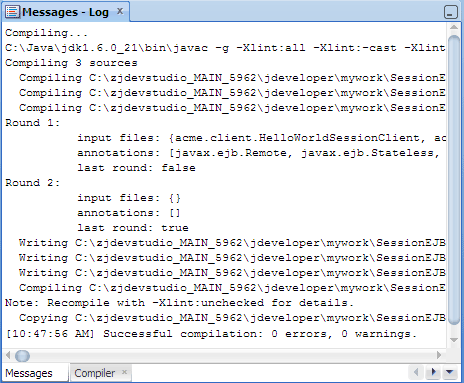
In the Application Navigator, start the integrated server by right-clicking
 HelloWorldSessionBean.java and
choosing Run.
If the Create Default Domain dialog displays, enter the default password, for exampleweblogic1, in the Password and Confirm Password fields, then click OK.
When you run the session bean, JDeveloper displays a few messages in the Running Log window, and then displays a message to indicate Integrated WebLogic Server has started and the application has been deployed to the integrated server: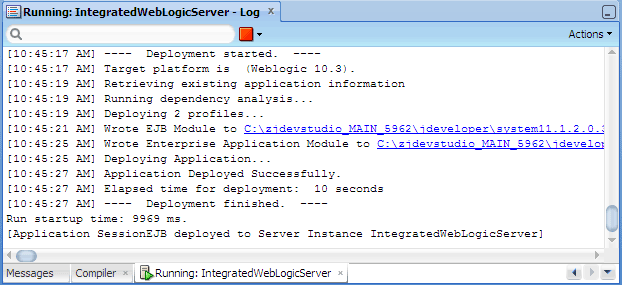
When the application has been deployed to the integrated server, in the Application Navigator right-click
 HelloWorldSessionClient.java and choose Run.
When you run the Java client, the output Hello world appears in the Project1.jpr Log window:
-
To stop the session bean, click
 Terminate in the main toolbar and choose the application bound instance SessionEJB
from the dropdown menu.
 Read more...
JDeveloper automatically generates methods on the sample Java client for every service exposed in the session bean's remote interface.
You will use the source editor to add code in the generated Java sample client to call the business method you created earlier. You will then run the integrated server and the Java client.
 Read more...
Putting your client files in a separate package is a good practice because it simplifies navigation in large projects.
You have the option of connecting to JDeveloper's Integrated WebLogic Server. By default, JDeveloper automatically configures an integrated server named Integrated WebLogic Server that references a user-specific instance of Oracle WebLogic Server bundled with the IDE. Integrated WebLogic Server is a Java EE runtime service for packaged archive deployment. Based on zero-copy deployment, Integrated WebLogic Server lets you run and test an application and its projects as a Java EE application in a Java EE container. No special connection setup is required to use Integrated WebLogic Server.
After generating the sample Java client, you will add code in the generated client file to call the
sayHello method you created earlier.
 Read more...
- Use JDeveloper wizards and dialogs to create an application and project.
- Create a new EJB 3.0 session bean.
- Use the source editor to add a method to the bean class.
- Create a sample Java client.
- Building a JPA Application
- Getting Started with the JDeveloper IDE
- User's Guide for Oracle JDeveloper
- Java EE Developer's Guide for Oracle ADF

