| C H A P T E R 3 |
|
Preparing for Mass Storage Drivers Delivery |
This chapter contains instructions on preparing the necessary mass storage drivers media for Windows Server installation.
Depending on the delivery method selected in Chapter 2, use one of the procedures listed in TABLE 3-1 to prepare the mass storage drivers.
For the Diskette Local or Diskette Remote delivery method, you need to create a diskette containing the mass storage drivers before proceeding with the Windows installation.
Ensure that the following system configurations and materials are readily available:
Follow the procedure in the section that corresponds with the system you are using to create the diskette.
You can use Windows to create a driver diskette.
1. Copy the driver files from the Tools and Drivers CD onto the system that you will use to create the driver diskette:
a. Insert the Tools and Drivers CD into the Windows system with a CD device connected in the advised manner, if necessary (see TABLE 2-2).
b. Copy the files into a directory on the Windows system.
2. Insert a writeable diskette into the floppy drive.
4. Right-click the drive where you inserted the diskette.
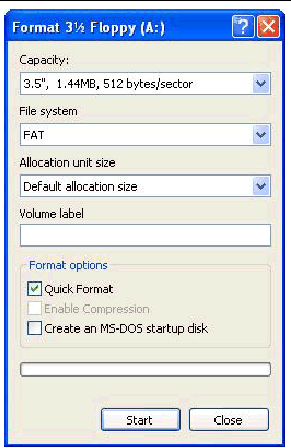
The Format 3 1/2 Floppy dialog box appears.
FIGURE 3-1 Format 3 1/2 Floppy Dialog Box

6. Specify the settings to format the diskette, and click Start.
Quick Format is an acceptable format for this process.
7. Once the formatting is complete, click Close.
8. Navigate to the files folder in the location where the extracted files reside.
9. In the Edit menu, click Select All.
10. Pressing and holding the left mouse button, drag and drop the selected files onto the diskette drive.
The mass storage drivers diskette is created.
11. Proceed to Chapter 4.
If you are using a Linux or Solaris system to create the driver diskette, use the following procedure.
1. Copy the driver package from the Tools and Drivers CD onto the system that you will use to create the floppy diskette.
a. Create a /tmp/files directory. Type:
b. Insert the CD into the system and mount the CD, as necessary.
c. Copy the files from the Tools and Drivers CD into the /tmp/files directory. Type:
2. Navigate to the files directory. Type:
3. Insert a writeable, formatted diskette into the diskette drive.
4. Mount the diskette to the system.
See the example below for the operating system that you are using:
5. Copy the files and folders in the files directory to the driver diskette.
See the example below that corresponds to the operating system that you are using:
6. Proceed to Chapter 4.
Copyright © 2008, Sun Microsystems, Inc. All Rights Reserved.