 How to Allocate a Device in Trusted Extensions
The Allocate Device menu item enables you to mount and allocate a device for your exclusive use. If you try to use a device without allocating it, you get the error message “Permission Denied”.
Before You Begin
You must be authorized to allocate a device.
-
Choose Allocate Device from the Trusted Path menu
Or, in Trusted CDE, open the Device Allocation Manager from the Tools subpanel in the Front Panel.
Figure 3–5 Device Allocation Icon in Trusted CDE

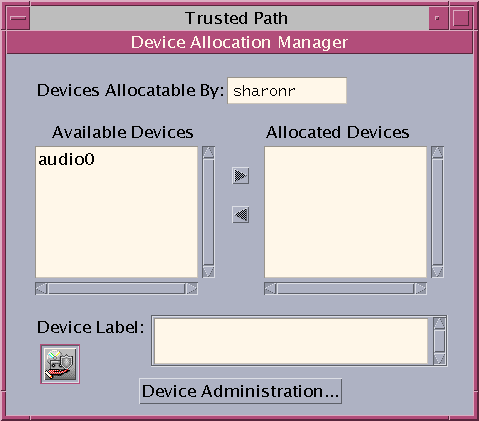
The Device Allocation Manager is displayed. In Solaris Trusted Extensions (GNOME), this GUI is called the Device Manager.
Figure 3–6 Device Allocation Manager

-
Double-click the device that you want to use.
The devices that you are permitted to allocate at your current label appear under Available Devices:.
-
audion – Indicates a microphone and speaker
-
cdromn – Indicates a CD-ROM drive
-
floppyn – Indicates a diskette drive
-
mag_tapen – Indicates a tape drive (streaming)
-
rmdiskn – Indicates a removable disk, such as a JAZ or ZIP drive, or USB hot-pluggable media
-
-
Select the device.
Move the device from the Available Devices list to the Allocated Devices list.
-
Double-click the device name in the Available Devices list.
-
Or, select the device and click the Allocate button that points to the right.
This step starts the clean script. The clean script ensures that no data from other transactions remains on the media.
Note that the label of the current workspace is applied to the device. Any data transferred to or from the device's media must be dominated by this label.
-
-
Follow the instructions.
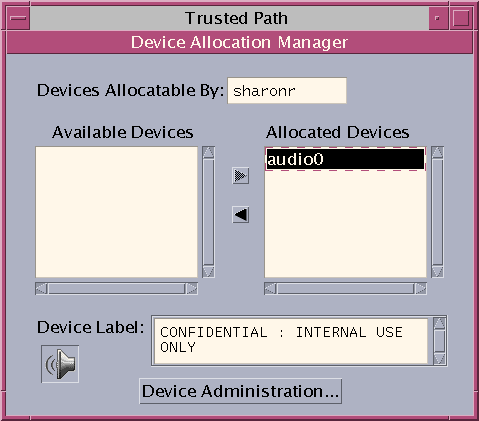
The instructions ensure that the media has the correct label. Then, the device is mounted. The device name now appears in the Allocated Devices list. This device is now allocated for your exclusive use.
Example 3–3 Loading Removable Media to Read a File System
In this example, a user wants to load information onto her system from a CD-ROM that is labeled SECRET. She is authorized to allocate the CD-ROM.
First, she creates a workspace at the label SECRET. In this workspace, she opens the Device Allocation Manager, and allocates the CD-ROM drive. Then, she inserts the CD and responds yes to the mount query.
The software mounts the CD and the File Manager appears. The current directory is set to the mount point.
Example 3–4 Loading Removable Media to Format the Media
In this example, a user wants to format a diskette to contain SECRET data. She is authorized to allocate the CD-ROM drive.
First, she creates a workspace at the label SECRET. In this workspace, she opens the Device Allocation Manager, and allocates the CD-ROM drive. Then, she inserts the CD and responds no to the mount query. The CD can now be formatted.
Example 3–5 Allocating an Audio Device
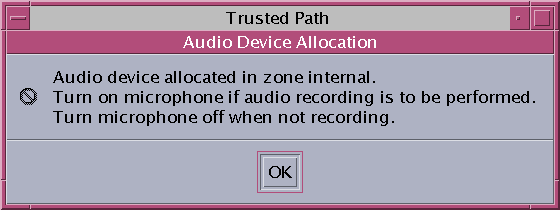
In this example, a user allocates the audio device on her system. When she moves the audio device to the Allocated Device list, the following message appears:

The device is allocated at the label Confidential : Internal Use Only. She views the label when she selects the device in the Allocated Device list.

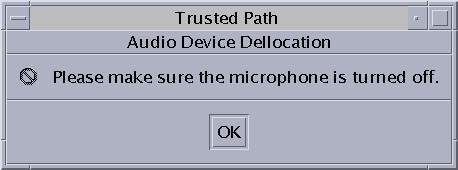
When the user is finished with the audio device, she deallocates it. The system reminds her to turn off the microphone.

Troubleshooting
If the device that you want to use does not appear in the list, check with your administrator. The device could be in an error state or in use by someone else. Or, you might not be authorized to use the device.
If you switch to a different role workspace or to a workspace at a different label, the allocated device cannot work at that label. To use the device at the new label, you need to deallocate the device at the initial label, and then allocate the device at the new label. In Trusted CDE, when you use the Occupy Workspace command from the window menu to move the Device Allocation Manager to the new workspace, the Available and Allocated Devices lists change to reflect the correct context. The Device Manager in Trusted GNOME works similarly when you move the GUI to a workspace at a different label.
If a File Manager or File Browser window does not appear, open the window manually, then navigate to the root directory, /. In this directory, navigate to the allocated device to see its contents.
- © 2010, Oracle Corporation and/or its affiliates
