Customizing Web Stack Components
After Initialization, you can customize several aspects of the Web Stack components.
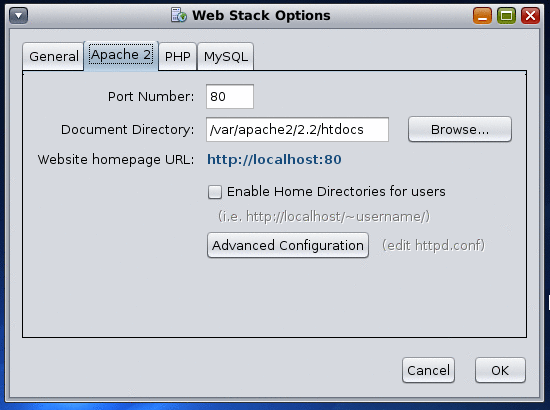
From the Launch menu, select All Applications > Developer Tools > Web Stack Admin > Options. The Web Stack Admin Options panel is displayed. The General tab enables you to configure the Servers to start automatically at system start up, or each time when you log in.

For advanced options such as to edit the configuration files, click Advanced Configuration on the Apache, MySQL, and PHP tabs.
Note –
You must restart the servers for the changes to take effect.
You can edit the httpd.conf file for Apache advanced configuration options. For information about how to configure Apache, refer to the documentation at /usr/apache2/2.2/manual/configuring.html.en.
For PHP advanced configuration, you can edit the php.ini file. For information about how to configure PHP using the php.ini file, see the documentation at /usr/php5/5.2.4/doc/html/configuration.html.
For MySQL advanced configuration, you can edit the my.cnf file available at /etc/mysql/5.0/my.cnf.
Configuring Ruby with NetBeans 6.0
OpenSolaris 2008.5 installation includes Ruby 1.8 and NetBeans 6.0. To configure Ruby with NetBeans, see http://www.netbeans.org/kb/60/ruby/setting-up.html.
Configuring Ruby on Rails
Rails is a full-stack framework for developing database-backed web applications. Rails provides a pure-Ruby development environment, to the request and response in the controller, and to the domain model wrapping the database. RubyGems is the standard Ruby package manager. On the Solaris platform, RubyGems are already loaded. Hence you can install all of Rails and its dependencies through the command-line by typing the following command as a root user:
/usr/bin/gem install rails --include-dependencies
The Ruby on Rails environment is set up for the development. You can now use the NetBeans IDE to creating a Ruby on Rails project. When you create a project, the IDE creates the same folders and files that a rails command would create. For more information about how to create Ruby on Rails project in the NetBeans IDE, see the tutorial at http://www.netbeans.org/kb/60/ruby/getting-started.html.
Working with PHP, Apache, and NetBeans
For creating a PHP application using NetBeans and to deploy the application to Apache Web Server, here is what you need to do:
 To Configure PHP, Apache, and NetBeans
-
Register Apache Web Server with NetBeans.
-
In the NetBeans IDE, select the Services tab, select Web Servers > Add Host and select Local Web Server.
-
Enter the correct path to Apache 2 configuration file.
The default path of the Apache configuration file, httpd.conf is: /etc/apache2/2.2.
-
Accept the default path for the Document Root field.
-
Click Finish.
The Apache 2 web server is listed under the Web Server node.
-
-
Create a PHP project using NetBeans.
-
Write a PHP program.
-
Right click on the project and select Run Project to view the output on a browser.
 To Enable Debug for PHP Applications
-
From the Launch menu of the Solaris operating system, select All Applications > Developer Tools > Web Stack Admin > Options.
The Options screen is displayed.
-
Select the PHP tab.
-
Select the Debug check box.
By selecting the check box you are enabling the automatic debug option for all PHP applications.
-
You are prompted to restart the server.
-
Click Restart for the change to take effect.
- © 2010, Oracle Corporation and/or its affiliates
