Connecting a Local Printer or Parallel Device
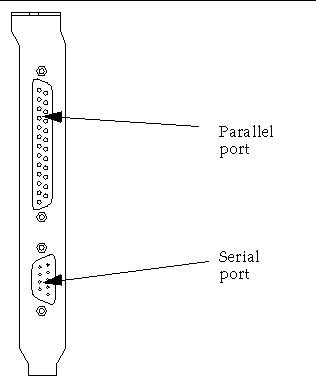
The optional add-on backplate (included with the SunPCi card) features a parallel port that you can use to connect a printer (or other parallel device) to SunPCi. Figure 4–2 shows the connectors on the add-on backplate.
Figure 4–2 Add-On Backplate Connections

If you have not already installed the add-on backplate, you will need to do so before attaching the printer. Refer to the SunPCi 1.1 Installation Guide for instructions on how to install the backplate.
Once you have installed the add-on backplate, you can attach the parallel cable to the backplate's parallel port. SunPCi's parallel port is assigned to LPT1. You can assign the printer to the printer port by using the corresponding Control Panel in Windows. For more information on setting up printing in Windows 95, refer to Chapter 5, Using SunPCi Software .
To print to the parallel port with SunPCi, simply use the Print command from your PC-based application, just as you would from a PC.
Note –
These instructions apply to a local printer that you would attach to the parallel port on your SunPCi card. For information on how to use your Solaris printer with Windows 95/NT, refer to Printing From Windows 95/NT Using Solaris Printers. For information on using USB printers, refer to Installing USB Support Software for Windows 95.
- © 2010, Oracle Corporation and/or its affiliates
