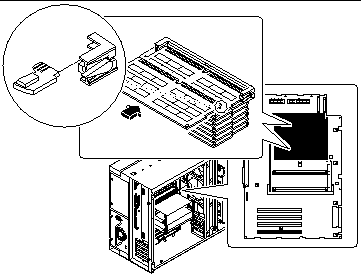
How to Install a Memory Module
Before You Begin
Dual inline memory modules (DIMMs) are made of electronic components that are extremely sensitive to static electricity. Static from your clothes or work environment can destroy the modules. Do not remove any DIMM from its antistatic packaging until you are ready to install it on the main logic board. Handle the modules only by their edges. Do not touch the components or any metal parts. Always wear a grounding strap when you handle the modules.
Complete these tasks:
For information about memory configuration, see "About Memory".
What to Do
-
Remove the new memory module from its antistatic packaging.
-
Locate the socket into which you will install the module.
See "About Memory".
Note -
Each bank used must contain four modules of equal capacity (for example, four 32-Mbyte memory modules, four 64-Mbyte modules) to function properly. Do not mix capacities within the same bank. See "About Memory".
-
Orient the module so that the small notch on the bottom corner of the module is at the same end as the socket's ejection lever.
Figure 6-6

-
Align the module with its socket until it contacts the socket evenly along the socket's length.
-
Push firmly down on both ends of the module until the bottom edge is firmly seated in the socket.
Ensure that all module contacts engage in the socket.
What Next
Complete this task to reassemble the system:
When you are ready to restart the system, be sure to run POST and OpenBoot Diagnostic tests to verify that the system functions correctly with the new parts you have just installed. You must also perform a reconfiguration boot so that your system is able to recognize the new device(s). For additional information, see:
- © 2010, Oracle Corporation and/or its affiliates
