What to Do
-
If necessary, remove the metal filler panel from the appropriate drive bay in the removable media assembly.
To release the panel, deflect its two retainer tabs through the small rectangular slots on each side of the RMA enclosure.
-
If necessary, remove the plastic filler panel from the RMA plastic cover.
On the back side of the RMA cover, push the filler panel retainer tabs inward to disengage the filler panel.
-
If you are replacing a defective drive, make sure that the jumper settings on the new drive match the settings on the old drive.
-
Slide the CD-ROM or tape drive into its drive bay.
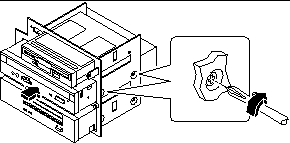
Align the two screw holes on each side of the drive with the corresponding holes in each side of the drive bay.
-
Insert and tighten the four flat-head Phillips screws that secure the drive in its bay.
There are two screws on each side that secure the drive in the RMA.
Figure 7-15

-
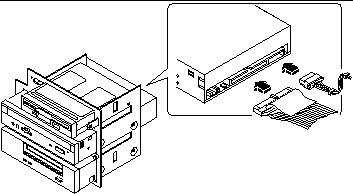
Connect the SCSI data and power cables to their corresponding connectors at the rear of the drive.
The connectors are keyed so that they install in only one way.
Figure 7-16

Note -Wide SCSI removable media devices require a 68-to-50 pin SCSI adapter. These devices only operate in narrow SCSI mode.
- © 2010, Oracle Corporation and/or its affiliates
