| Sun Fire X4140, X4240, and X4440 Servers Linux, ESX, and Solaris OS Installation Guide |
| A P P E N D I X B |
|
Configuring LSI RAID for Any Operating System from the BIOS |
If you are using an LSI 1068E host bus adapter and you want to install your OS on disks that are part of a RAID, there is an LSI RAID configuration utility that is entered from the server’s BIOS and can be used for any operating system.
1. Power off your server module and then power it back on. The BIOS screen appears. Watch for the LSI Logic Corp. screen.

2. When the BIOS screen shows the LSI Logic Corp. message, press Ctrl-C to start the LSI Logic Configuration Utility.

The first screen of the utility appears after a short delay.

3. With the LSI 1068E adapter highlighted in the first screen, press Enter.
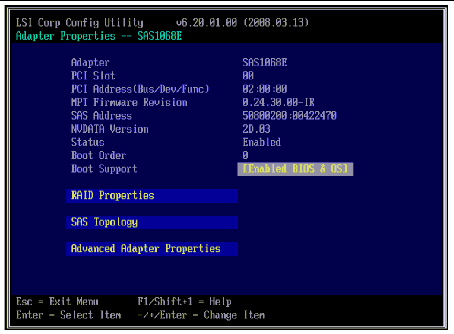
The main screen of the utility opens.

4. Use the arrow keys to select RAID Properties and press Enter.
The next screen allows you to choose the type of RAID. You can choose between RAID 1 (two mirrored disks with an optional hot spare) or RAID 1E (three or more mirrored disks with one or two hot spares).

5. Select the type of volume you want to create, in this case an IME volume.
The next screen lists the disks you can choose to include in the volume and also disks you can choose as hot-spares.
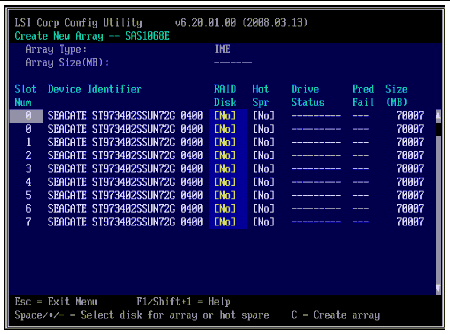
6. Use the arrow keys to highlight the [No] item in the RAID Disk column for the disks you want to include in the volume. For each such disk, press the spacebar or type the + or - key to change the [No] to [Yes].
7. Use the arrow keys to highlight the [No] item in the Hot Spr column for the disks you want to use as hot-spares. For each such disk, press the spacebar or type the + or - key to change the [No] to [Yes].
Your selections might look like this:

8. When you are satisfied with your choices, type c to create the array.
You are asked for confirmation.
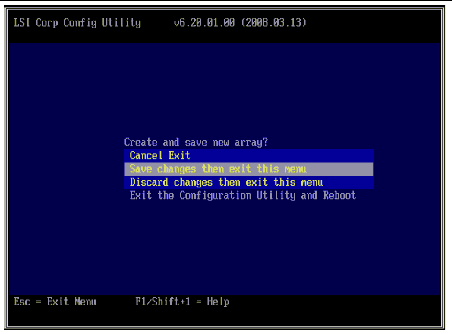
9. Select Save changes then exit this menu, and then press Enter.
The volume is created. When the utility finishes creating the volume, the main screen reappears.
10. Highlight RAID Properties and press Enter.
11. When the next screen appears, select View Existing Array and press Enter.
You see the volume you have created

12. Exit the LSI RAID configuration utility.
13. Install your OS on this RAID volume.
| Sun Fire X4140, X4240, and X4440 Servers Linux, ESX, and Solaris OS Installation Guide | 820-2397-15 |
Copyright © 2009 Sun Microsystems, Inc. All rights reserved.