Replacing the I/O Board Assembly
The I/O board assembly sits beneath the DVD drive and contains the power switch, Power LED, and external connectors for the front panel.
 To Replace the I/O Board Assembly
-
Power off the workstation using the procedure described in the section, To Power Off the Workstation.
-
Remove the left-side access panel using the procedure described in the section, To Remove the Left-Side Access Panel.
-
Remove the front bezel using the procedure described in the section, To Remove the Front Bezel.
-
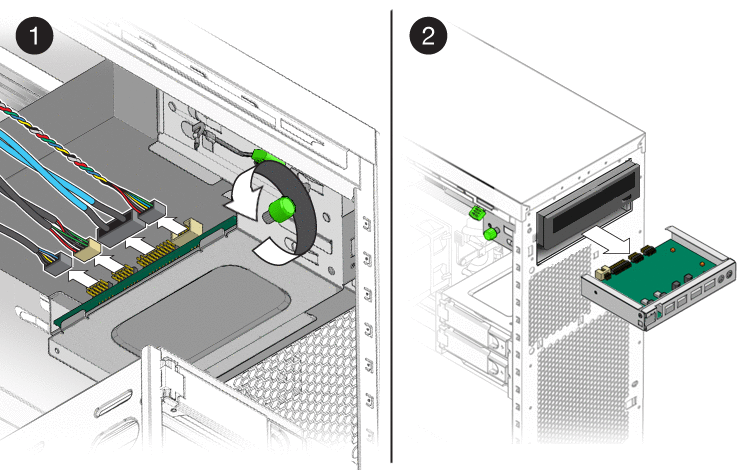
Disconnect the audio cable (J1), the USB cable (J5), the IEEE 1394 cable (J8), and the I/O cable (J12) from the back side of the I/O board.
-
Loosen the captive screw that secures the I/O board to the metal frame (see Figure 3–29).
Figure 3–29 Removing the I/O Board Assembly

-
Push the I/O board assembly out the front of the chassis.
-
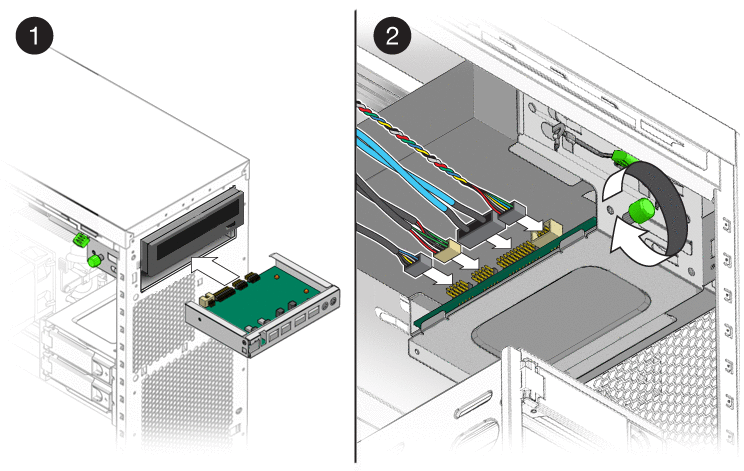
Slide the new I/O board assembly through the vacant I/O slot in the front of the workstation.
-
Align the screw hole in the I/O board assembly with the captive green retaining screw and tighten the captive screw to secure the I/O board (see Figure 3–30).
Figure 3–30 Installing the I/O Board Assembly

-
Connect the audio cable (J1), the USB cable (J5), the IEEE 1394 cable (J8), and the I/O cable (J12) from the back side of the I/o board.
-
Close the workstation and prepare for operation using the procedures described in the section, Closing the Workstation and Preparing for Operation
- © 2010, Oracle Corporation and/or its affiliates
