 To Install the DVD Drive
-
If necessary, do the following:
-
Power off the workstation (see To Power Off the Workstation).
-
Remove the left-side access panel (see To Remove the Left-Side Access Panel).
Note –You do not need to remove the front bezel to install the DVD drive.
-
Remove the DVD drive (see To Remove the DVD Drive).
-
-
Ensure that the DVD retaining lever is in the upward or disengaged position.
This prevents the retaining hooks from blocking the DVD drive when inserted.
-
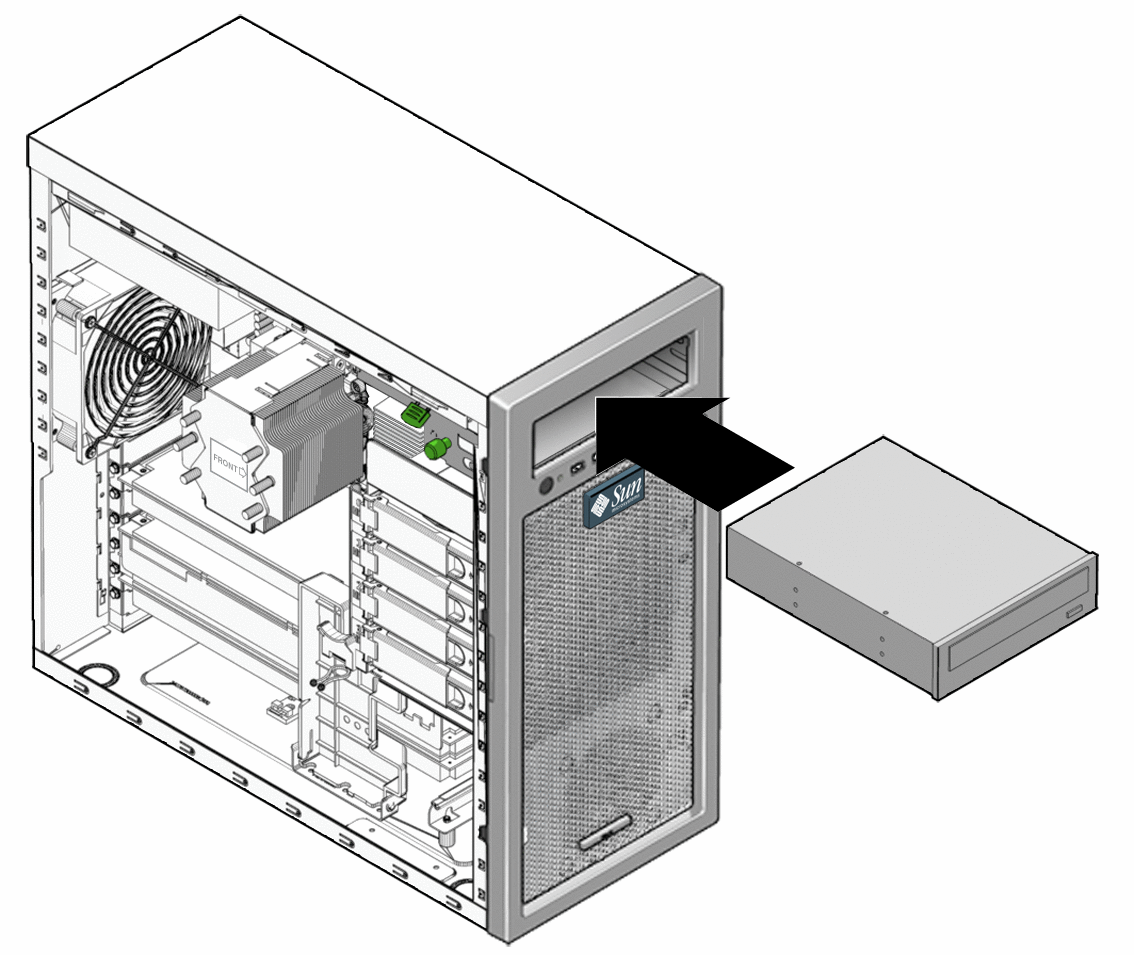
Insert the new DVD drive into the vacant DVD housing from the front of the workstation.
-
Align the locking holes in the side of the DVD drive with the slotted holes in the in the side of the DVD housing.
When the DVD is properly aligned, the front edge of the DVD drive protrudes approximately 5/8 inch (127 mm) from the front of the machine .
-
To engage the retaining hooks and lock the DVD, pull firmly downward on the green retaining clip handle.
Pulling downward and locking the DVD produces a click sound.
Figure 3–15 Installing the DVD Drive

-
Verify that the drive is secured with the retaining hooks by pulling on the front of the DVD.
-
Connect the SATA, power, and jumper cables to the back of the DVD drive (see Figure 3–13).
Refer to the cabling diagram in the service label on the side of the chassis for information about correct cable routing.
-
Close the workstation and prepare for operation using the procedures described in the section, Closing the Workstation and Preparing for Operation
- © 2010, Oracle Corporation and/or its affiliates
