|
|
| Sun ONE Meta-Directory 5.1 Configuration and Administration Guide |
Chapter 12 Configuring the Database Connector
This chapter discusses configuration factors specific to the Database Connector, which provides bi-directional synchronization between Oracle and the meta view.
The topics in this chapter are:
- Before You Begin
- Creating the Data Server
- Configuring a Connector View
- Configuration Example
- Changing Instrumentation
- Issuing Privileges
Before You Begin
Before continuing, make sure you have done the following:
- Install OCI 8.1.5 or 8.1.7.
- Create a connect string for the database.
- Create an instance of the join engine.
There are two phases in configuring the database connector:
- Creating the data server
- Configuring the connector view
Note also that special characters whitespace and hash(#) present in the oracle data are not escaped while constructing DN at the Meta View. If your data source contains these characters then you have to escape your data source by adding backslashes to these special characters.
The following sections provide procedures for these phases, as well as a configuration example. You should perform the procedures in the order presented.
Creating the Data Server
Creating the data server consists of the following tasks:
- Configuring the data server
- Running the configuration script
- Adding a connector view instance
- Adding the instance as a participating view
Configuring the Data Server
To invoke the Data Servers window
- From the Sun ONE console, double-click Server Group.
- Double-click the Join Engine object. The Sun ONE Meta-Directory window appears.
- Click the Meta-Directory object. The Join Rules window appears within the Meta-Directory Configuration tab.
- Click on the Data Servers tab. The Data Servers window appears.

To add a new database server
- Click New. The Select a Data Server Type dialog box appears.
- Select Oracle and click OK. The server type appears in the list box on the Data Servers window. Several tabs now appear at the bottom of the window that enable you to name and configure the new data server.
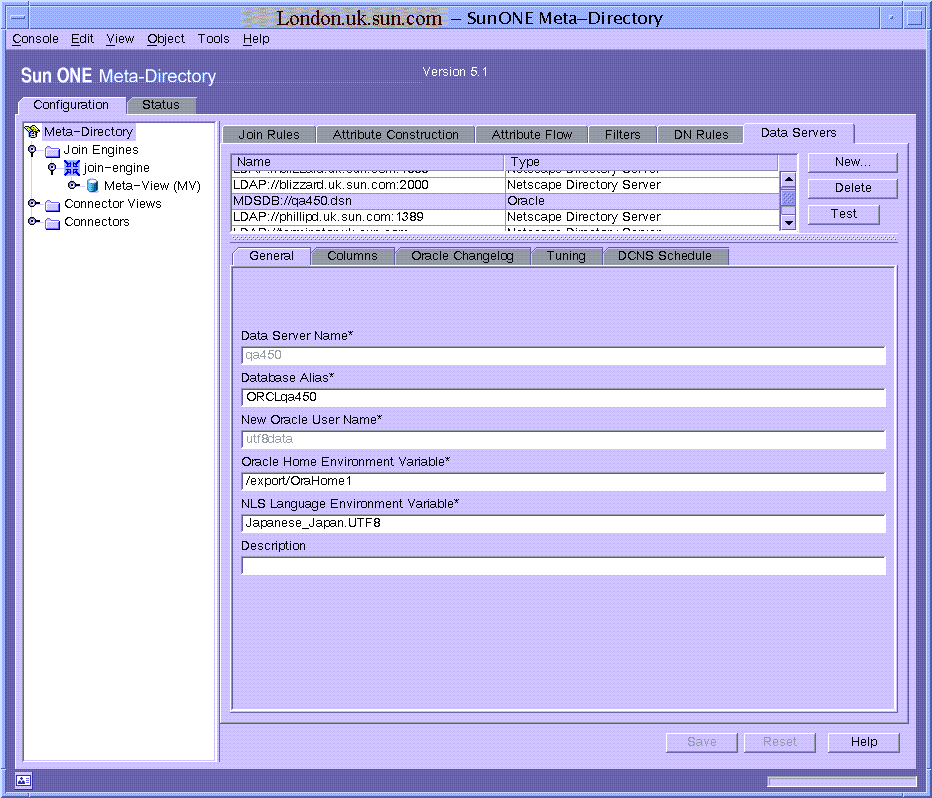
To provide data server information
- Select the server to be configured.
- From the General tab, provide information or change the defaults for the following fields:
- Click the Columns tab. The Database Credentials dialog box appears. After providing the Oracle user name and password, described in "Script Generation", the Columns window appears. The credentials remain in effect until you leave this particular data server. Note that this is not the same user described in New Oracle User Name above.
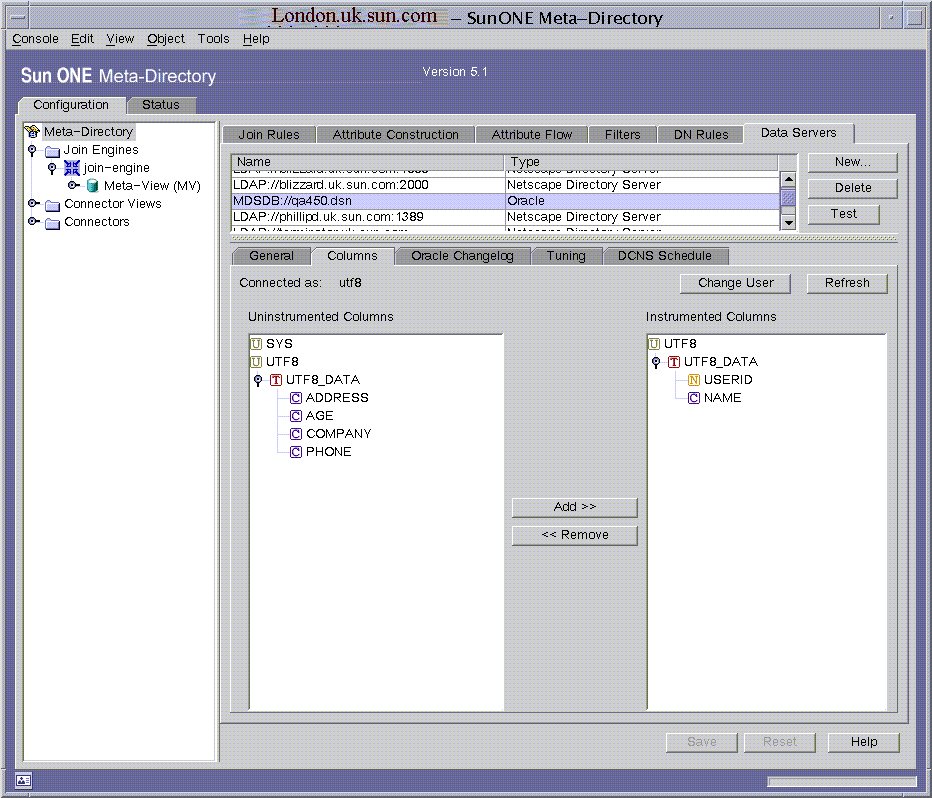
You can select columns or tables to participate in the flow to the meta view. This process of selection and setting up triggers is called instrumentation. The triggers populate the changelog tables with changes.
- Instrument by doing the following:
Select a column, table, or user from the Uninstrumented Columns list.
The icon C precedes column names, T precedes table names, and U precedes user names. An X icon precedes reserved columns that cannot be instrumented.
Selecting a table instruments all the columns that belong to the table, and selecting a user instruments all the tables that belong to the user.
Click Add, or double click on the node. Your selection now appears in the Instrumented Columns list.
One of the columns within the table you select for instrumentation must be a primary key, denoted with the letter P. If you have selected a table or column from a table for which there is no primary key, a Nominate Primary Keys dialog box appears.
Select one or more columns as the nominated key(s). As a shortcut, you can double click an un-nominated column to move it to the nominated column.
The set of nominated columns for a table must be unique for the associated row. That is, if you select FirstName and LastName as your nominated keys, there may be more than one person with the same name. A better choice would be AreaCode and PhoneNumber.
Click Add. The column or set of columns now appear in the list of nominated keys.
Click OK to close the dialog box and return to the Columns window. Note that an N icon now precedes the column you have nominated.
You can change any nominated key after clicking OK as long as the associated table isn't currently instrumented, and there are no primary keys in the table. To do so, right click on any node and select "Change nominated keys."
- Optional: If you want to change the user credentials, click Change User, then provide a new Oracle user name and password. Meta-Directory rereads the database dictionary and rebuilds the schema. You need to change credentials whenever you instrument users, tables, or columns that a different user owns.
- Click the Oracle Changelog tab to display the Changelog window. You can provide input only for a new data server. For existing data servers, you can only change the Flush Interval field.
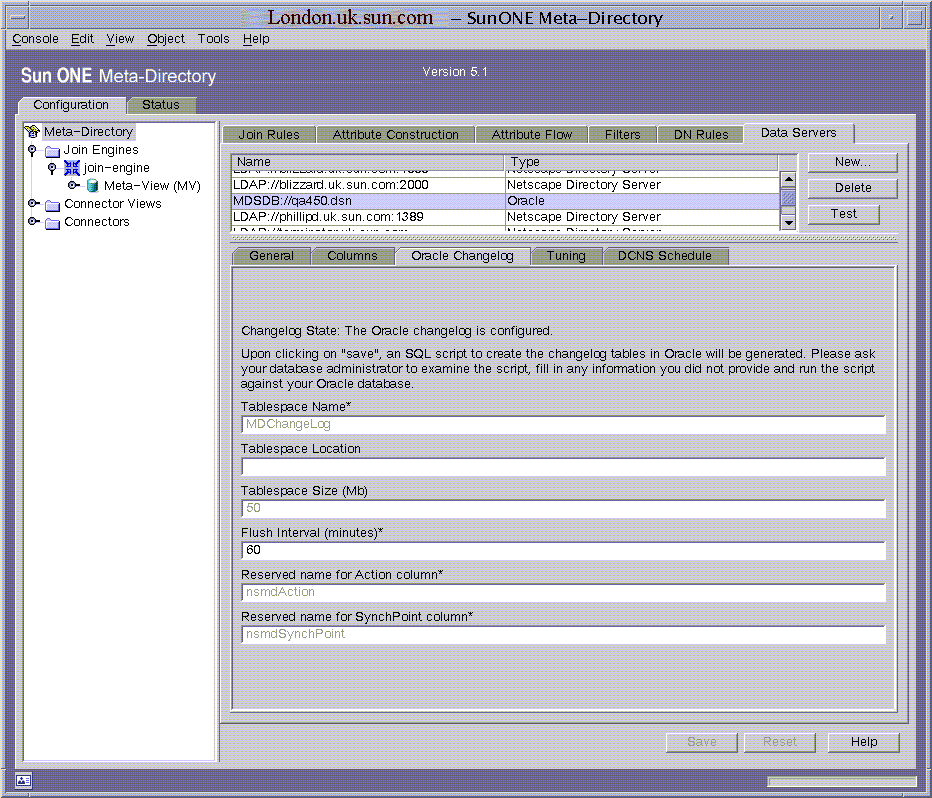
Provide information or change the defaults for the following fields:
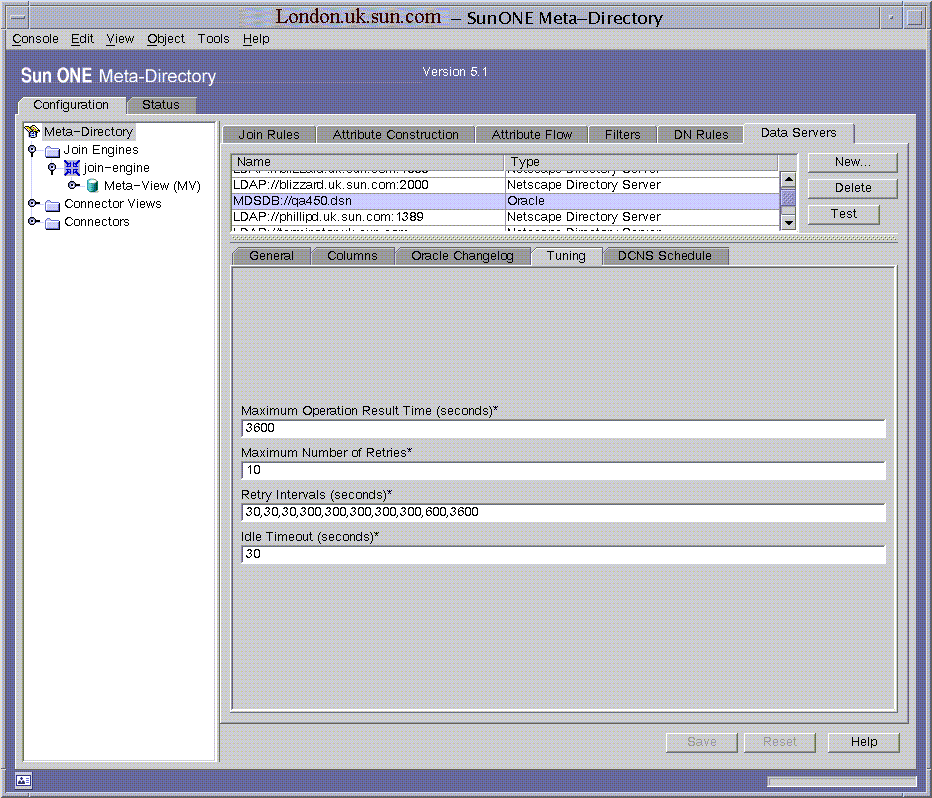
- Click the Tuning tab to display the Tuning window.
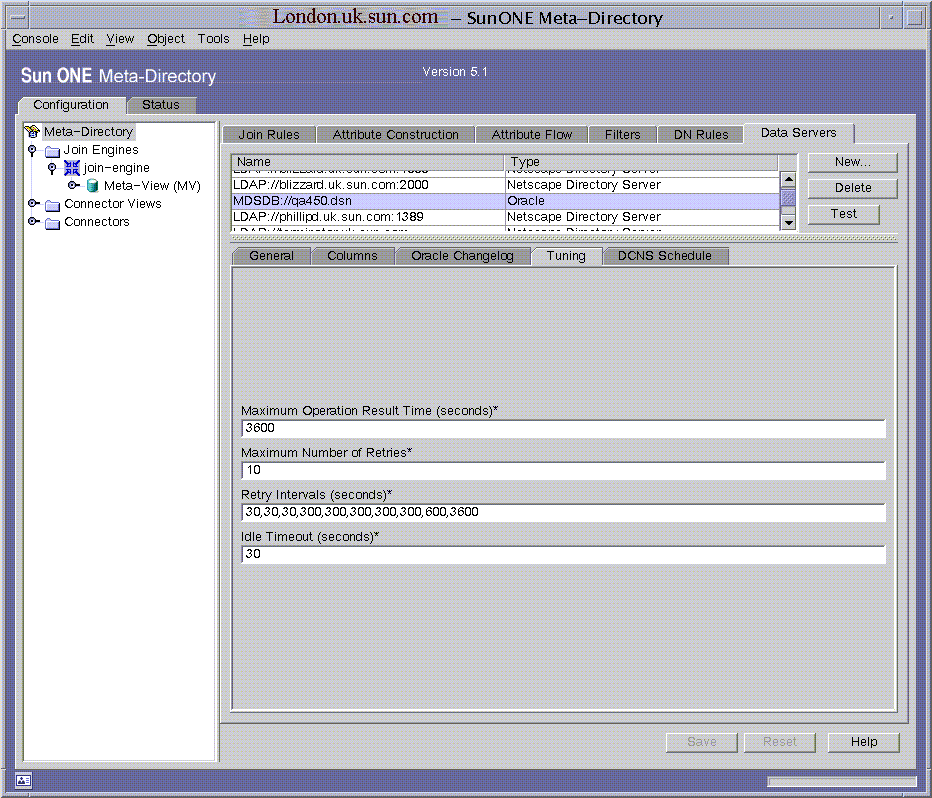
Provide information or change the defaults for the following fields:
- Click the DCNS Schedule tab to display the DCNS Schedule window.
Provide values for the following fields:
You can use either a single number or an expression as described below.
- Click Save to save the configuration. This generates a script that must be applied to the database. Privileges are required for generating and executing scripts. See "Issuing Privileges" for more information.
- Optional: Test the connection by doing the following:
A Test Connect Succeeded message appears if the connection was successful.
To delete a data server
- Select the data server you want to delete.
- Click Delete. The data server and its associated configuration disappear from the list box. A message appears that states where the script is stored.
- Ask your database administrator to execute the script to completely uninstrument the tables. When applied, the script deletes the changelog schema, changelog tablespace, and all triggers from the instrumented tables.
Running the Configuration Script
- You or your database administrator need to run the following script:
inst_dataservername.sql
The script is stored in the $NETSITE_ROOT directory.
- Ask your database administrator to check the script and replace any tokens with information (that is, $TABLE_SPACE_LOCATION$). The administrator should then run the script as the system database administrator. After the script has been generated, the administrator should confirm that all fields are present and correct.
After running the script, the table(s) become instrumented and the changelog tablespace is created.
Adding a Connector View Instance
To add the instance
- Select Connector Views from the Meta-Directory tree, then right-click. A context menu appears.
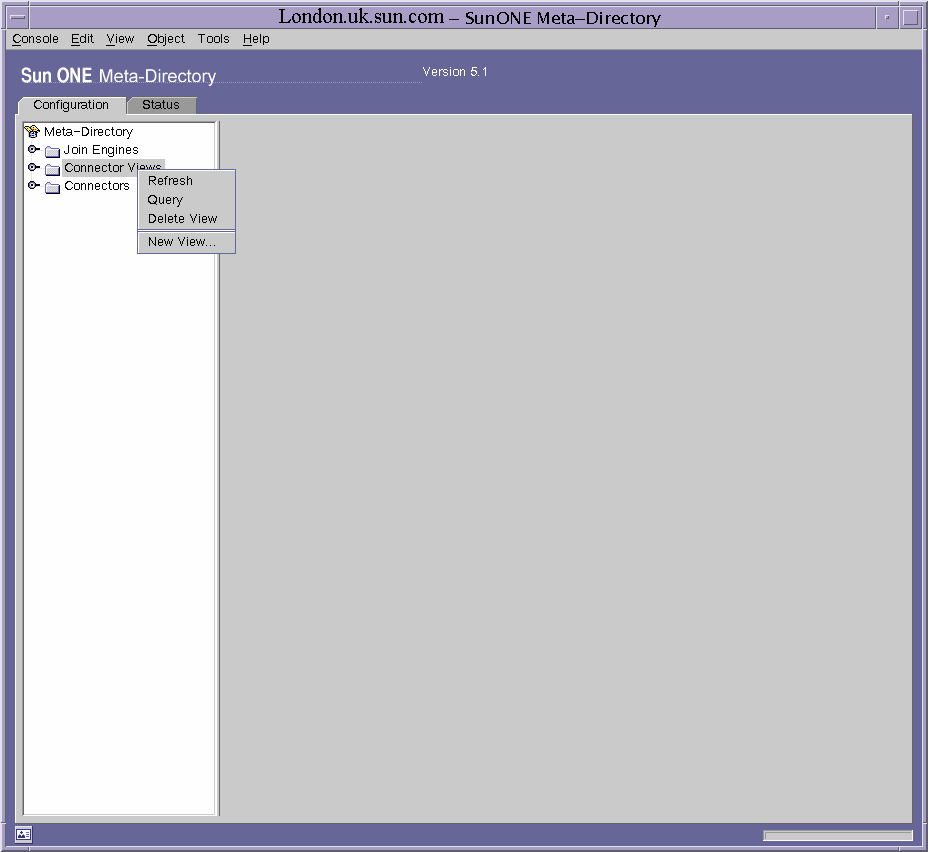
- Select New View. The New Instance Creation dialog box appears.
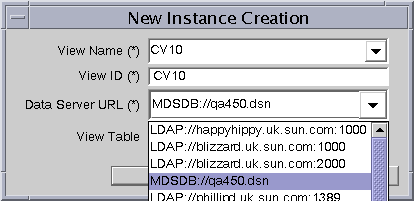
- Select the newly created data server URL from the drop-down list. An altered New Instance Creation dialog box appears.
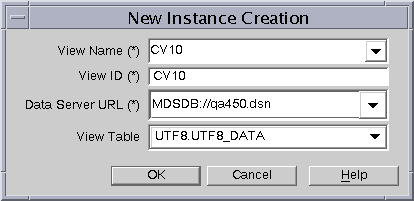
Provide information for the following fields:
- Click OK. The message "Instance Creation Succeeded" appears after the instance has been created. The main console navigation tree will redisplay.
To delete the instance
- Highlight the instance you want to delete, then right-click. A context menu appears.
- Select Delete View. The instance is deleted.
The Oracle connector view is also deleted if you delete the Oracle data server.
Adding the Instance as a Participating View
Each participating connector view has its own settings. In addition to these settings (or in place of them), each view also has settings that specify how the join engine handles the view within the meta view.
To add a participating connector view
- Right-click the Participating Views object. A context menu appears.
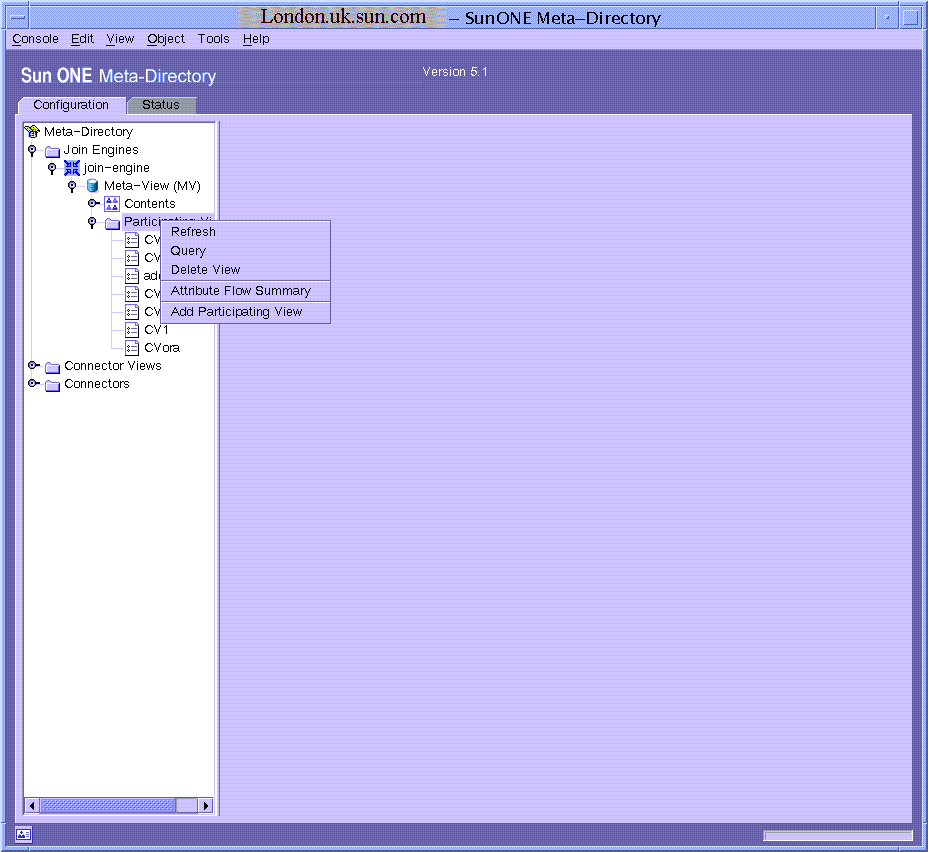
- Select Add Participating View. The Select View dialog box appears.
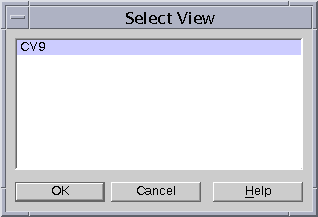
- Select the connector view you want to add or participate in a join/synchronization with the meta view.
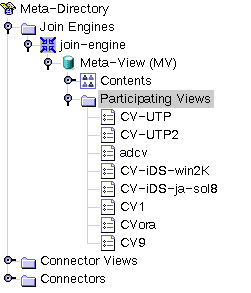
- Click OK. The view is added to the Sun ONE Meta-Directory tree as shown below.
To remove a participating connector view
- Highlight the view you want to remove, then right-click. A context menu appears.
- Select Delete View. The view is deleted.
Configuring a Connector View
Configuring the connector view consists of the following tasks:
- Creating constructed attribute rules
- Creating attribute flow rules
- Creating DN Mapping rules
- Configuring the participating connector view
- Starting the join engine
- Enabling the connector view
You can create join rules and filters, but you must minimally create the following types of rules:
- Constructed attribute
- Attribute flow
- DN mapping
After you create the rules, you can add them to the connector view and flow data. The data should flow according to these rules from the connector view (Oracle) to the meta view and vice versa.
Creating Constructed Attribute Rules
See "Constructed Attributes" for procedures on creating constructed attribute rules.
Creating Attribute Flow Rules
See "Attribute Flow Rules" for procedures on creating attribute flow rules.
Creating DN Mapping Rules
You need to carefully write the DN mapping rules for flowing data from the meta view to the connector view. You might expect these to look like rules for flowing data from the connector view to the meta view with elements of the rule reversed, but this may not be the case.
The meta view to connector view DN mapping rules typically look like the following example:
<PK col name>=%mv.<mapped attribute>
Consider an employee table EMP with FIRSTNAME, LASTNAME, EMPNO and DEPT as columns in which EMPNO is the primary key. The connector view to meta view DN mapping rules for an inetorgperson entry would typically look like:
cn=%cv.FIRSTNAME%
However, the meta view to connector view DN mapping rule would need to be:
EMPNO=%mv.employeenumber%
assuming that you have mapped employeenumber to the EMPNO column.
Therefore, you need to map primary key columns to an attribute in the directory in order to correctly map a row in the database to a single entry in the directory and vice versa.
See "Distinguished Name Mapping Rules" for procedures on creating DN mapping rules.
Creating join filters
In case of database connector, a join filter typically replaces the "WHERE CLAUSE" in the query statement. For instance
ID='%mv.uid%' and if mv.uid is say user1 the filter gets translated as "where ID='user1'".
Note that while creating join filters, the SQL datatype of the attribute has to be taken into consideration and accordingly the attribute value has to be enclosed within the SQL datatype specific enclosures. For instance if ID is of type SQL VARCHAR, then the filter should be created as ID='%mv.uid%' and if ID is of type NCHAR then the filter should be ID=n'%mv.uid%' and so on.
Configuring a Participating Connector View
See "Configuring a Participating View" for procedures on configuring a participating connector view. Note that the Group Filters window is only available for UTC-based connectors or for Sun ONE Professional Services.
Starting the Join Engine
Before you start the join engine, ensure that you have already enabled the change log in the Directory Server configuration.
To start the join engine
- Select the join-engine object from the navigation tree and right-click. A context menu appears.
- Select Start Server. A message appears stating that the server has been started.
You can also start the server from the Sun ONE Console. To do this, select the Join Engine object and right-click. Select Start Server from the context menu.
Enabling the Connector View
- From the Sun ONE Meta-Directory software window, click on the Status tab.
- Click on the Join Engine object. The Operations tab window appears.
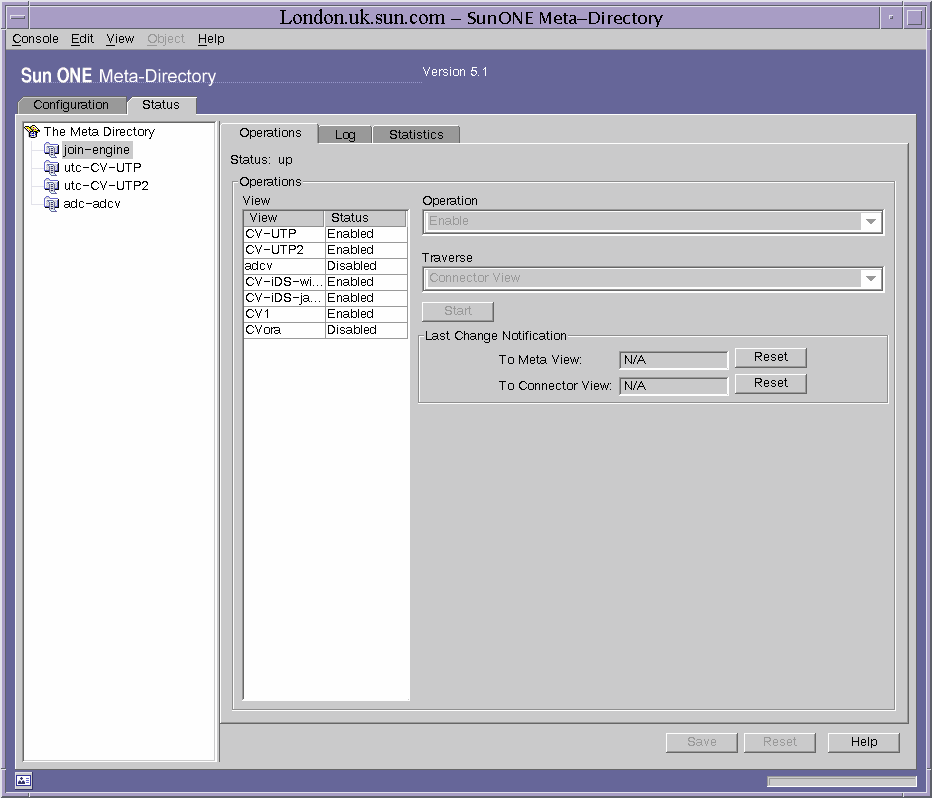
- Select the participating view you want to enable.
- Select Enable from the Operation list menu, then click Start.
This option disables the Traverse drop-down menu. You can only enable the participating view if the configuration for setting up the view is valid. Any error in the configuration automatically changes the view to a disable status.
- Select Refresh from the Operation List Window, then select either Meta View or Connector View from the Traverse menu list.
- Click Submit Request. The status changes to up.
If you are having trouble enabling the connector view, you should check whether the proper privileges have been issued. See "Issuing Privileges" for more information.
Monitoring the Connector View
You should monitor the connector view status while restarting the database on which you created the connector view. When the Oracle server is restarted while the Oracle connector view is enabled, the join engine requires about one to two minutes for rebinding to the Oracle server. You can adjust the DataAccess logs to level 1 to determine that the rebind has occurred; the logs would show SQLs being executed on the Oracle changelog. Subsequent to the rebind, all refresh/changelog operations would become effective.
It takes about a minute for Oracle to shut down. You can expect the join engine to disable the Oracle connector view if you attempt an operation, such as add, on the database during the database shutdown. In that case, you would need to explicitly enable the connector view after the database is up and running.
Configuration Example
The following example is intended as a quick reference you can use as a checklist. For complete configuration information, refer back to the earlier portions of this chapter.
Create the Data Server
- Configure the data server.
Click the Meta-Directory object, then click on the Data Servers tab. The Data Servers window appears.
Click New. The Data Server Type dialog box appears.
From the General tab, provide information for the fields.
The New Oracle User Name should not currently exist in the Oracle database.
The Oracle Home Environment Variable is the OCI root directory.
Use the default for the NLS Language Environment Variable.
Click the Columns tab. The Database Credentials dialog box appears. After providing the Oracle user name and password, the Columns window appears.
Select the columns you want to synchronize.
Select the primary key of the column to be instrumented. If no primary key exists in the column, you need to nominate a primary key.
For the remaining tabs, use the defaults.
Click Save to save the configuration.
- Run the following configuration script:
inst_dataservername.sql
The script is stored in the $server_root\bin\meta50\bin directory. This script grants privileges. For more information on privileges granted, see "Issuing Privileges".
- Add the connector view instance.
Select Connector Views from the Meta-Directory tree, then right-click. A context menu appears.
Select New View. The New Instance Creation dialog box appears.
Select the newly created data server URL from the drop-down list. An altered New Instance Creation dialog box appears.
Provide the view name, view ID, and select the table you want to synchronize.
Click OK. The message "Instance Creation Succeeded" appears after the instance has been created. The main console navigation tree will redisplay.
- Add the instance as a participating view.
Configure the Participating Connector View
- Create constructed attribute rules.
Select Configuration > Meta-Directory > Attribute Construction.
Click New Attribute, then provide a name, such as dbobjectclass, in the New Constructed Attribute dialog box.
Click OK. The new attribute appears in the Attributes list.
Select the attribute, then click New Rule. The New Constructed Attribute Rule dialog box appears.
Configure the rule, using dbobjectclass as the name. For the Attribute Construction field, enter the following string:
top;person;organizationalperson;inetorgperson
Click OK, then click Save from the Attribute Construction tab.
- Create attribute flow rules.
Select Configuration > Meta-Directory > Attribute Flow.
Click New Rule. The New Attribute Flow Configuration dialog box appears.
Provide a name of ora2mvattrflowrule.
For Direction, select To Meta View.
For Selection Criteria, click "..." to go to the Compose Condition Criteria dialog box. For Type, select Attribute. For Source, select the Oracle connector view. For Attribute, select the primary key or nominated key. For Expression, select Present. Click Insert, then OK.
Click Add. The Add Attribute Mappings dialog box appears.
Map attributes by doing the following:
For Source View, select the Oracle connector view.
For Source Objectclass, select the Oracle table.
For Destination View, select Meta View.
For Destination Objectclass, select inetorgperson.
Select one attribute from the left column, one from the right column, then click Insert. You do not need to map all attributes.
Repeat the process with these variations:
For Source Objectclass, select Constructed Attributes.
For Destination Objectclass, select inetorgperson.
Select the constructed attribute (dbobjectclass) and map it to objectclass in the right column.
Click Insert, then Close.
Click OK from the New Attribute Flow Configuration dialog box. The new rule appears in the Rules section of the Attribute Flow window.
From the Attribute Flow window, click New Set, and provide a name of ora2mvattrflowruleset in the New Set dialog box.
Select ora2mvattrflowrule and ora2mvattrflowruleset, then click Add Member. The rule appears in the Members list box.
Click Save, then select View > Refresh from the menubar.
- Create DN mapping rules.
Select Configuration > Meta-Directory > DN Rules.
Click New Rule. The New DN Mapping Rule dialog box appears.
Provide a name of ora2mvdnmap.
For Selection Criteria, click "..." to go to the Compose Condition Criteria dialog box. For Type, select Attribute. For Source, select the Oracle connector view. For Attribute, select the column mapped to the RDN. For Expression, select Present. Click Insert, then OK.
For Distinguished Name Construction, enter the RDN:
cn=%cv.ENAME%
where ENAME is a column name in the connector view (primary key or unique column). Do not repeat the RDN mapping in the attribute flow rule.
Click OK. The new rule for this DN mapping appears in the Rules list box.
Click New Set and provide a name of ora2mvdnmapset in the New Set dialog box.
Select ora2mvdnmap and ora2mvdnmapset, then click Add Member. The rule appears in the Members list box.
Click Save, then select View > Refresh from the menubar.
- Configure the participating connector view.
Select the participating Oracle connector view for the meta view. The Configuration tab appears.
For Attribute Flow, select None for To Connector, and select ora2mvattrflowruleset for To Meta View.
For Join Rules, select None for both drop-down lists.
For DN Mapping Rules, select None for To Connector, and select ora2mvdnmapset for To Meta View.
For the remaining tabs, see "Configuring a Participating View".
Click Save.
- Start the join engine.
Select the join-engine object from the navigation tree and right-click. A context menu appears.
Select Start Server. A message appears stating that the server has been started.
- Enable the connector view.
Changing Instrumentation
You can add or remove instrumentation any time after you have followed all of the procedures in this chapter to this point in the order presented.
To add instrumentation
- Click the Columns tab. The Database Credentials dialog box appears. After providing the Oracle user name and password, the Columns window appears. The credentials remain in effect until you leave this particular data server.
- Select one or more columns, tables, or users from the Uninstrumented Columns list.
- Click Add. If you selected a column, the column now appears in the Instrumented Columns list. If you selected a table, the table and its associated column(s) now appear in the Instrumented Columns list. If you selected a user, the user and its associated table(s) now appear in the Instrumented Columns list.
- Click Save.
- Run the script. The changes are now instrumented.
To remove instrumentation
- Click the Columns tab. The Database Credentials dialog box appears. After providing the Oracle user name and password, the Columns window appears. The credentials remain in effect until you leave this particular data server.
- Select one or more columns, tables, or users from the Instrumented Columns list. Note that if you select a primary key column or nominated column, the entire table will be uninstrumented.
- Click Remove.
If you selected a column, the column now appears in the Uninstrumented Columns list.
If you selected a table, the table and its associated column(s) now appear in the Uninstrumented Columns list.
If you selected a user, the user and its associated table(s) now appear in the Uninstrumented Columns list.
- Click Save. After running the script, the uninstrumented columns, tables, or users are removed and the remaining columns, tables, and users become instrumented.
Note: After changing instrumentation and running the scripts, use the "Refresh" button present in the same panel, in order to refresh the console with the latest changes in the data server. If the console is not refreshed, and further changes are made to the instrumentation, the scripts generated might be incorrect. Refreshing the console is required, if the user continues to use the same session to make multiple changes to the instrumentation (i.e he has not left the particular data server).
Issuing Privileges
Oracle privileges are required for performing the following tasks:
- Script generation
- Script execution
- Synchronization of instrumented tables
Typically, different individuals would perform each of these tasks, but one person could perform all of the tasks if preferred. The following sections explain these tasks and the associated privileges required. Contact your database administrator or refer to your Oracle server documentation set for specific questions about privileges.
Script Generation
The console reads the database dictionary to gather information about the database schema. The user can select tables and columns from this schema for instrumentation.
The user for which the console connects to Oracle must be given sufficient privileges to read the database dictionary tables. The associated user name and password are supplied to the Meta-Directory Console, which the console uses to read the data dictionary. The user name and password are not stored in Meta-Directory configuration.
Script Execution
To instrument the database, a user executes the script and has privileges to do the following:
- Create and delete the changelog user, changelog tables, and tablespaces
- Grant the changelog user privileges to insert, update, and delete rows from instrumented source tables
- Install and uninstall triggers associated with the instrumented tables
This user name and password are supplied to the tool that executes the script; they are not stored in Meta-Directory configuration, nor handled by Meta-Directory software.
Table 12-1 provides reference information for the user roles discussed above.
Synchronization of Instrumented Tables
The Meta-Directory console generates a script to instrument the tables and columns you select. The set of tables you can select for instrumentation consists of the tables you own, and those for which you have SELECT privileges. The database schema is built by querying the data dictionary, which is accessed through public synonyms (defined in data dictionary views).
For synchronization, each data server has one user (whose user name and password are in its mdsAuthenticationDetails attribute). The Meta-Directory Database Connector authenticates this user to synchronize any associated connector view. The generated script grants privileges to the changelog user to:
- Read the changelog
- Delete entries from the changelog that have already been processed
- Insert, update, and delete rows from instrumented source tables