| Skip Navigation Links | |
| Exit Print View | |

|
Sun Fire X4800 Server Service Manual |
About This Documentation (PDF and HTML)
Sun Fire X4800 Server Service Manual Overview
Sun Fire X4800 Server Overview
Front Panel Indicator Module Overview
Hard Drive and XL Bracket Assembly Overview
RAID Expansion Module Overview
Fabric Expansion Module Overview
CPU and Heatsink Assembly Overview
Network Express Module Overview
Service Processor (SP) Module Overview
SP Module Multi Port Cable Overview
Fan Module Controller Board (FB) Overview
Controlling Server Power Remotely
Removing and Installing Components
Preparing for Service and Operation
Removal and Installation Procedures
Removing and Installing a Power Supply (CRU)
Removing and Installing a Hard Drive (CRU)
Removing and Installing a Hard Drive Filler
Replacing the Hard Drive Backplane (FRU)
Adding, Removing, and Installing a CMOD (CRU)
CPU Module (CMOD) Designation and Population Rules
Removing and Installing a CMOD Filler
How to Replace the CMOD Battery (CRU)
Removing and Installing DIMMs (CRU)
Removing and Installing a RAID Expansion Module (CRU)
How to Replace the RAID Expansion Module Battery (CRU)
Removing and Installing a Fabric Expansion Module (CRU)
Replacing a CPU and Heatsink Assembly (FRU)
Removing and Installing a Fan Module (CRU)
Replacing a Fan Module Controller Board (FRU)
Removing and Installing a NEM or a NEM Filler (CRU)
Removing and Installing a PCIe EM (CRU)
Removing and Installing the Service Processor Module (CRU)
Removing and Installing the Multi port Cable
Removing and Installing the Subassembly Module (FRU)
Sun Fire X4800 Server Service Procedures, and Information
Firmware Information and Procedures
How to Access the BIOS Setup Utility
Component LED Locations and Meanings
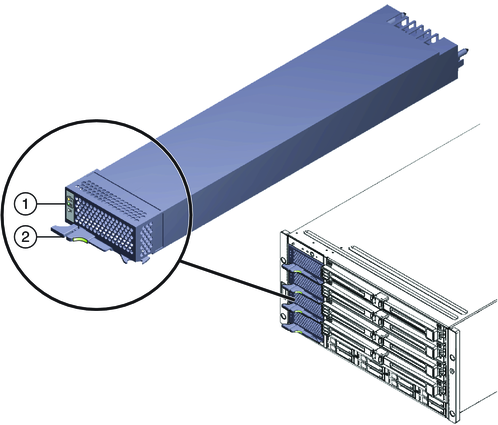
The Sun Fire X4800 server chassis has the capability for up to four 2000W hot-swap-capable, load-sharing power supplies. This configuration provides a 2+2 power redundancy. The server requires two power supplies to operate. The power supply fans assist in the cooling of the PCIe EMs and the NEMs. Airflow through power supplies is front-to-back. All four power supplies should be present for proper I/O cooling.
Each power supply has an LED panel that reports on its status and a locking lever that assists in the removal and installation of the component. If a power supply is not present, the front and back Service Action Required LEDs will light.
The AC power inlet connectors for the power supplies are located on the back side of the Subassembly module on the AC power block. When four power supplies are installed in the server (recommended configuration), the AC power must be supplied by two separate and distinct circuits.
Note - Power supplies are designated as customer-replaceable components (CRU).

| ||||||||
See also: