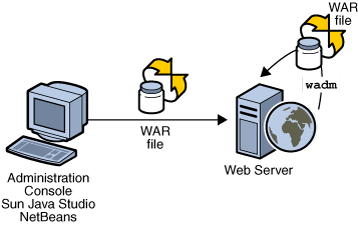
 To deploy a web application
Before You Begin
-
Identify a virtual server where you will need to deploy the web application.
-
Be sure you have either the web application archive (.war file) or know the web application path in the server.

Web applications can be deployed through wadm, Administration Console and other supported IDEs.
-
To deploy a web application, click Server Configuration and then click the Virtual Servers tab.
-
Select the virtual server in which you will need to deploy the web application.
-
Click the Web Applications tab > New button.
-
Specify the web application package.
If you need to upload a web application archive, click the Browse button and select the archive. Optionally, you can also specify a web application archive located in the server.
-
Specify the URI for your web application. The URL will be the applications context root and is relative to the server host.
-
Provide a short description about the web application.
-
Enable/Disable JSP Pre-compilation.
Enabling this directive will allow all the JSPs present in the web application to be pre-compiled to improve performance.
-
Enable the application.
When a web application state is set to be Disabled, it will not be available on request. However you can toggle this option anytime without redeploying the application to the instances.
-
Deploy the application.
Click Deploy to deploy the web application.
You can access the application with the context root specified. E.g. http://<your-server>:<port>/<URI>
Note –Using CLI
wadm> add-webapp --user=admin --password-file=admin.passwd --host=localhost
 --port=8888 --config=config1 --vs=HOSTNAME --uri=/hello /home/test/hello.war
See CLI Reference, add-webapp(1).
For large web applications, exploding the application's WAR file outside Web Server's installation directory improves Admin Server's performance. To add the web application to Web Server, use the --file-on-server option and specify the path to the application's exploded WAR file as the warfile operand.
- © 2010, Oracle Corporation and/or its affiliates
