| C H A P T E R 7 |
|
Managing Users Using the WebGUI |
This chapter describes how to do manage users using the WebGUI. It includes the following sections:
|
Note - You can also add users with the Command Line Interface (CLI), as described in Section 3.7, Managing User Accounts. |
This section explains how to add, modify and delete ILOM user accounts.
The ILOM supports up to 10 user accounts, Two of those, root and anonymous, are set by default and cannot be removed. Therefore, you can configure eight additional accounts.
Each account has an associated user name, password, and role. The roles include Administrator, which provides access to all ILOM functionality and commands, and Operator, which provides limited access to the ILOM functionality and commands. Operator and Administrator roles can be assigned separately for network and serial use.
Each user account consists of a user name, a password, and assigned network and serial roles.
The GUI includes a Network Privilege and a Serial Privilege selection.
1. Log in to the ILOM as Administrator to reach the WebGUI.
Only accounts with Administrator privileges are allowed to add, modify, or delete user accounts.
If a new user is given Administrator privileges, those privileges are also automatically granted for the command-line interface (CLI) and Intelligent Platform Management Interface (IPMI) to the ILOM.
2. From the User Management tab, select User Accounts.
The User Accounts page appears.
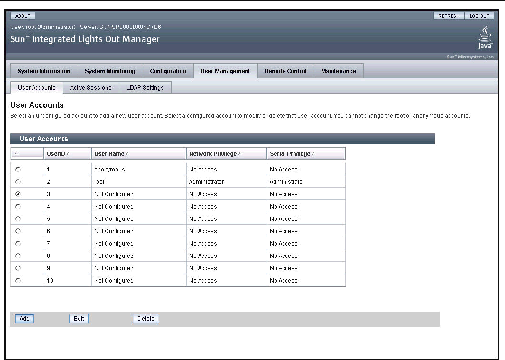
3. Select a radio button next to a user account identified as Not Configured.
If all 10 user account slots are configured, you must delete an existing user account before you can add a new user account. See Section 7.1.3, Deleting a User Account.
The Add User dialog box appears.
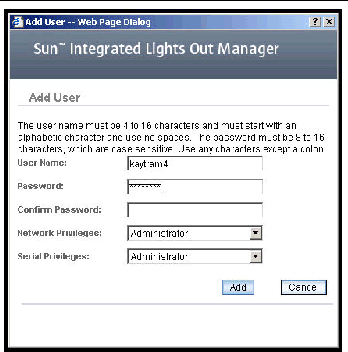
5. Complete the following information:
a. Type a user name in the User Name field.
The user name must be at least 4 characters and no more than 16 characters. User names are case sensitive and must start with an alphabetical character. You can use alphabetical characters, numerals, hyphens, and underscores. Do not include spaces in user names.
b. Type a password in the Password field.
The password must be at least 8 characters and no more than 16 characters. The password is case sensitive. Use alphabetical, numeric, and special characters for better security. You can use any character except a colon. Do not include spaces in passwords.
c. Retype the password in the Confirm Password field to confirm the password.
d. Assign network and serial privileges by selecting either Administrator or Operator in each field.
e. When you are done entering the new user's information, click Add.
The User Accounts page is redisplayed. The new user account and associated information is listed on the User Accounts page.
This section explains how to modify an ILOM user account. Modifying a user account can change the user's password, and their network and serial privileges.
|
Note - Only accounts with Administrator privileges are enabled to add, modify, or delete user accounts. |
If a new user is given Administrator privileges, those privileges are also automatically granted to the user for the command-line interface (CLI) and Intelligent Platform Management Interface (IPMI) to the ILOM
1. Log in to the ILOM as Administrator to reach the WebGUI.
2. From the User Management tab, select User Accounts.
The User Accounts page appears.
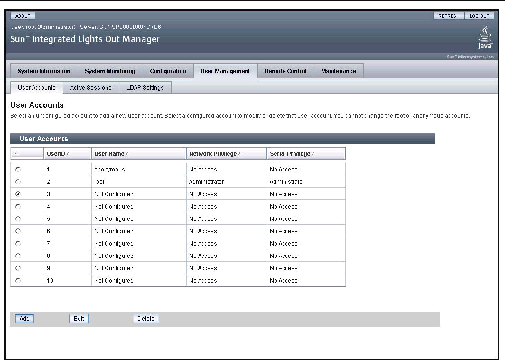
3. Select a radio button to select a user account to modify.
The Edit User dialog box appears.
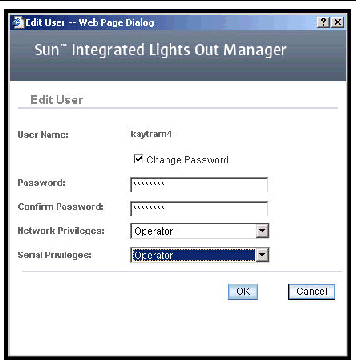
5. Modify the password if needed.
a. Select the Change Password check box if you want to change the user password. If you do not want to change the password, deselect the check box.
b. Type a new password in the Password field.
The password must be at least 8 characters and no more than 16 characters. The password is case sensitive. Use alphabetical, numeric, and special characters for better security. You can use any character except a colon. Do not include spaces in passwords.
c. Retype the password in the Confirm Password field to confirm the password.
6. Modify network and serial privileges as needed.
In the Network and Serial fields, select either Administrator or Operator.
7. After you have modified the account information, click the OK button for your changes to take effect, or click the Cancel button to return to the previous settings.
A confirmation dialog box verifies that the user account was modified successfully. The User Accounts page then is redisplayed.
This section explains how to delete an ILOM user account.
1. Log in to the ILOM as Administrator to reach the WebGUI.
2. From the User Management tab, select User Accounts.
The User Accounts page appears.
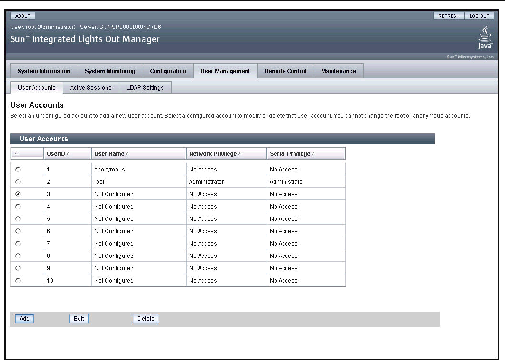
3. Select the radio button next to the user accounty you want to delete.
The confirmation dialog box appears.

5. Click the OK button to confirm the deletion, or click the Cancel button to stop the deletion.
If you click the OK button, the user account reverts to an unassigned user account.
This section explains how to view and modify the Lightweight Directory Access Protocol (LDAP) settings. You must properly configure your LDAP server before you can use LDAP authentication on the ILOM.
The Sun server supports LDAP authentication for users. LDAP is a general-purpose directory service. A directory service is a distributed database application designed to manage the entries in a directory, and to make those entries available to users and other applications. For more information, see Chapter 10.
1. Log in to the ILOM as Administrator to reach the WebGUI.
2. From the User Management tab, select LDAP Settings.
The LDAP Settings page appears.
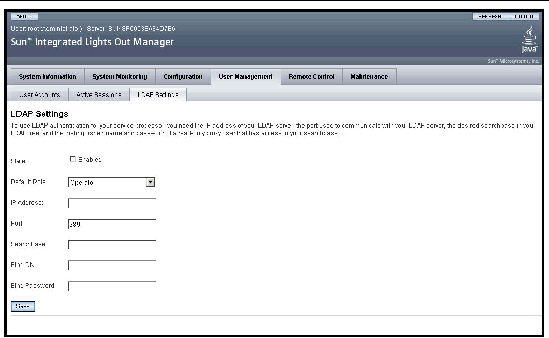
3. Complete the information in the LDAP Settings page.
Use the descriptions in the following table when completing the information.
4. Click the Save button for your changes to take effect.
Copyright © 2006, Sun Microsystems, Inc. All Rights Reserved.