Workspace Manager Menus
Workspace Manager has three default menus:
Workspace menu—also called the root menu. Displayed when the user presses mouse button 3 when the pointer is on the backdrop. The menu is associated with the mouse button through a button binding.
Window menu—the menu displayed when the user presses mouse button 1 or mouse button 3 when the pointer is on the Window menu button (upper left corner of the window frame). The menu is associated with the button by the windowMenu resource.
Front Panel menu—the menu displayed when the user presses mouse button 1 or mouse button 3 when the pointer is over the Front Panel's Window menu button.
Workspace Manager Menu Syntax
Workspace Manager menus have the syntax:
Menu MenuName
 {
    selection1 [mnemonic] [accelerator] function [argument]
    selection2 [mnemonic] [accelerator] function [argument]
    …
 }
where:
selection—the text or bitmap that appears on the menu. If the text includes spaces, enclose the text in quotation marks. For bitmaps, use the syntax @/path.
mnemonic—a single character that acts as a keyboard shortcut when the menu is displayed. It is specified in the form _character.
accelerator—a keyboard shortcut that is active whether or not the menu is displayed. Accelerators have the syntax modifier<Key> Keyname where modifier is Ctrl , Shift, Alt (Extend char), or Lock. For a list of all possible key names, refer to the keysymdef.h file in your "X11 include" directory.
function—the function to be performed when this selection is made. Refer to the dtwmrc(4) man page for a list of functions.
argument—function arguments. Refer to the dtwmrc(4) man page for more details.
For example, the following menu item labeled Restore normalizes the window. When the menu is displayed, typing "R" will also restore the window. Pressing Extend char F5 will also restore the window.
Restore _R Alt<Key> F5 f.normalize
Note –
For complete information on Workspace Manager menu syntax, see the dtwmrc(4) man page.
To Add a New Menu Item to the Workspace Menu
-
Click the Add Item to Menu control on the Tools subpanel of the Front Panel.
The Add Item to Workspace Menu dialog is displayed.

-
Type a complete path or click Browse and select the path of the file you want the new menu item to run.
The file you point to should normally be available to this host. It should be an executable file or a file of a data type (e.g. Audio or Manpage) registered to the host.
The complete path including filename is displayed in the text box.
-
Click Add to add the file to the menu.
The file is added to the first position in the Workspace Menu. Its default icon (if any) and filename will be used as the icon and text for the menu item.
Note –
To change the menu item's position on the Workspace Menu, see To Modify the Workspace Menu.
To Modify the Workspace Menu
-
Click the Customize Workspace Menu control on the Tools subpanel of the Front Panel.
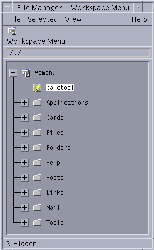
File Manager is displayed showing the configuration folder for the Workspace Menu. Note that the files in this folder represent each menu item, and subfolders represent each sub-menu. By rearranging the contents of the Workspace Menu folder, you rearrange the Workspace Menu.

-
Drag and drop any menu item you wish to move to a new location under this subfolder.
For help using File Manager in Tree View mode, see Solaris Common Desktop Environment: User's Guide.
-
Delete any unwanted menu items by dragging their files to the Trash can on the Front Panel.
-
Rename any menu items you want to rename by editing their file or folder names.
-
When you are satisfied with the changes you have made, choose Update Workspace Menu from the File menu in File Manager and exit File Manager.
The Workspace Menu now reflects the changes you made in the Workspace Menu folder.
To Create a New Workspace (Root) Menu
-
Open the appropriate file for editing:
-
Personal: HomeDirectory/.dt/dtwmrc
-
System-wide: /etc/dt/config/language/sys.dtwmrc
For information on creating these files, see Workspace Manager Configuration Files.
-
-
Create the new menu:
Menu menu_name { … } -
Create or edit the button binding to display the new menu.
If the menu replaces the existing menu, edit the button binding that displays the Workspace menu.
<Btn3Down> root f.menu menu_name
If the menu is an additional menu, create a new mouse button binding. For example, the following button binding displays the menu when Shift-mouse button 3 is pressed over the backdrop:
Shift<Btn3Down> root f.menu menu_name
-
Choose Restart Workspace Manager from the Workspace menu.
To Create a New Window Menu
Note –
The Window menu is built into the Workspace Manager, and ordinarily is not customized. To keep window behavior consistent between applications, you should avoid extensive modification to the Window menu.
-
Open the appropriate file for editing:
-
Personal: HomeDirectory/.dt/dtwmrc
-
System-wide: /etc/dt/config/language/sys.dtwmrc
For information on creating these files, see Workspace Manager Configuration Files.
-
-
Create the new menu:
Menu menu_name { … } -
Use the windowMenu resource to specify the new menu:
Dtwm*windowMenu: menu_name
-
Choose Restart Workspace Manager from the Workspace menu.
- © 2010, Oracle Corporation and/or its affiliates
