 Creating the “Hello world!” template
Before You Begin
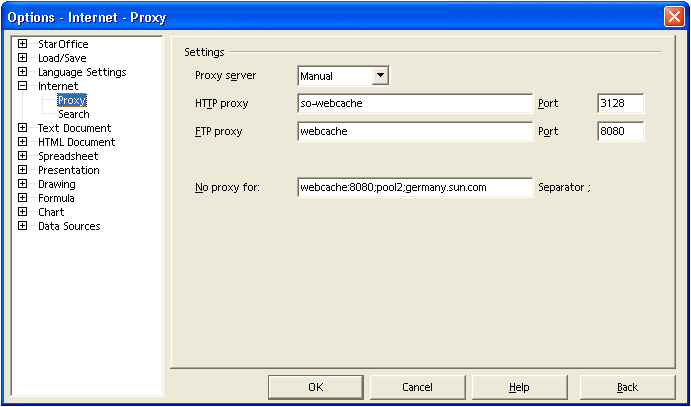
Assume that you want to make the proxy configuration settings of StarOffice available to the Configuration Manager.

The following template provides a first implementation of the GUI:
<?xml version="1.0" encoding="UTF-8"?>
<!DOCTYPE apt:template SYSTEM "policytemplate.dtd">
<apt:template>
  <category apt:name="StarOffice" apt:label="StarOffice">
    <category apt:name="Internet" apt:label="Internet">
      <page apt:name="Proxy" apt:label="Proxy">
        <section apt:name="Settings" apt:label="Settings">
          <property apt:name="ProxyServer" apt:label="Proxy Server"
                    apt:dataPath="org.openoffice.Inet/Settings/ooInetProxyType"
                    oor:type="xs:int">
            <visual apt:type="radioButtons"/>
            <constraints>
              <enumeration oor:value="0" apt:label="None"/>
              <enumeration oor:value="2" apt:label="Manual"/>
            </constraints>
          </property>
          <property apt:name="HTTPProxy" apt:label="HTTP Proxy"
                    apt:dataPath="org.openoffice.Inet/Settings/ooInetHTTPProxyName"
                    oor:type="xs:string"/>
          <property apt:name="HTTPPort" apt:label="HTTP Port"
                    apt:dataPath="org.openoffice.Inet/Settings/ooInetHTTPProxyPort"
                    oor:type="xs:int"/>
          <property apt:name="FTPProxy" apt:label="FTP Proxy"
                    apt:dataPath="org.openoffice.Inet/Settings/ooInetFTPProxyName"
                    oor:type="xs:string"/>
          <property apt:name="FTPPort" apt:label="FTP Port"
                    apt:dataPath="org.openoffice.Inet/Settings/ooInetFTPProxyPort"
                    oor:type="xs:int"/>
          <property apt:name="NoProxyFor" apt:label="No Proxy For"
                    apt:dataPath="org.openoffice.Inet/Settings/ooInetNoProxy"
                    oor:type="xs:string"/>
        </section>
      </page>
    </category>
  </category>
</apt:template>
|
The following steps are necessary to announce the new template to the Configuration Manager:
Steps
-
Login as root to the machine on which you installed the Configuration Manager.
-
Create a directory that is called HelloWorld/templates/StarOffice/Internet/Proxy under/usr/share/webconsole/apoc/packages.
-
Create a file called proxy.xml with the XML template content that was listed previously. Copy the file to the Proxy directory.
-
Grant the user “noaccess” read/execute permission to the Proxy directory.
-
Grant the user "noaccess" read access to the proxy.xml file.
-
Execute /usr/sbin/smreg add -a /usr/share/webconsole/apoc.
-
Restart the webserver with the /usr/sbin/smcwebserver restart command.
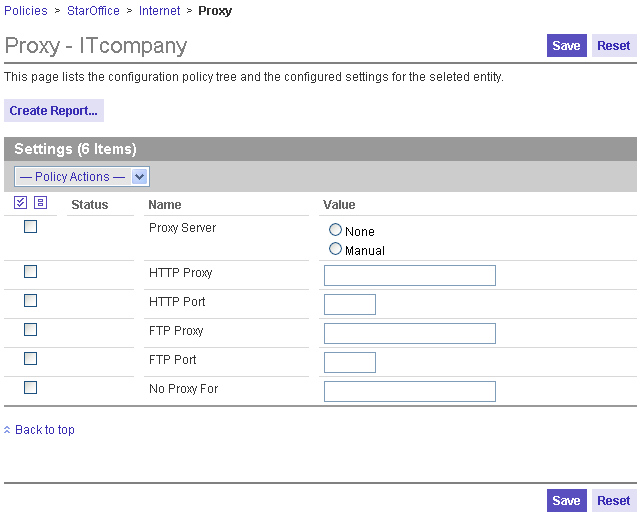
After you log in to the Configuration Manager, you should see a new top-level category that is called "StarOffice". Browsing down that category displays the "Proxy" page that you defined with the template that you created.
Figure 2–1 Proxy page

- © 2010, Oracle Corporation and/or its affiliates
