Configuration Agent Installation
Note –
The installer, as well as the Configuration Agent, requires an installed JavaTM Runtime Environment (JRE) 1.4 or higher. The JRE is not part of the installation. If you are unsure about the installed Java version, execute java -version. This command tells you whether the correct Java version is available and properly configured on your system.
The installer is started by a batch file, setup.bat. This can be found on the Java Desktop System management tools CD. You must start the script as a user with sufficient administrative privileges (local administrator). Otherwise, the installation and startup of the Configuration Agent as new system service will fail.
Start the installer by typing
	setup[-help]
		[-saveState filename][-no]
		[-noconsole][-state filename]
		[-nodisplay]
The following options are recognized by the installer:
|
-help |
Display this help text. |
|
-saveState |
Writes input from an interactive installation session to the specified file. The default file name is statefile.out. |
|
-state |
Uses the specified state file as input for silent installation. Use this option with -noconsole. |
|
-noconsole |
Start the installer without any user interface. Use with -state and to initiate a silent installation. |
|
-nodisplay |
Starts the installer in command line mode without launching the graphical user interface. |
|
-no |
Runs the installer without installing software. This option is useful together with -saveState for preparing a silent installation |
Welcome
After the Configuration Agent Install Wizard has been called, a Welcome page appears. The Welcome page provides you with information regarding the installation process.
Figure 6–1 Configuration Agent, Welcome page
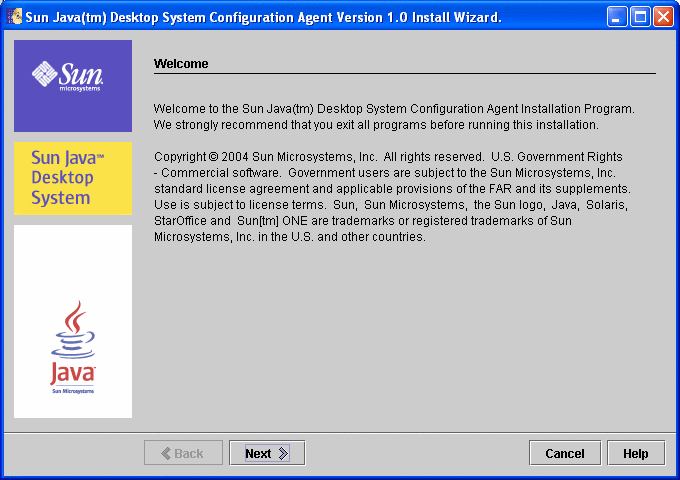
Click the Next button to proceed to the next page in the wizard.
License Agreement
The Software License Agreement page contains licensing information for the Configuration Agent.
Figure 6–2 Configuration Agent, Software License Agreement
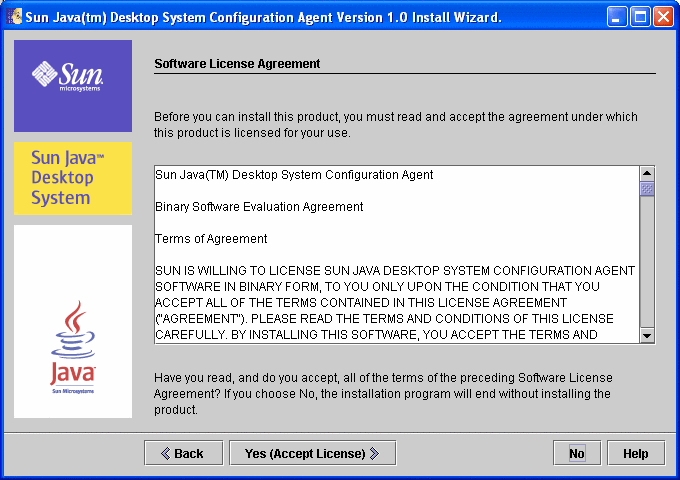
Read the License agreement, and click the Yes (Accept License) button to accept and to continue the installation process.
Installation Type
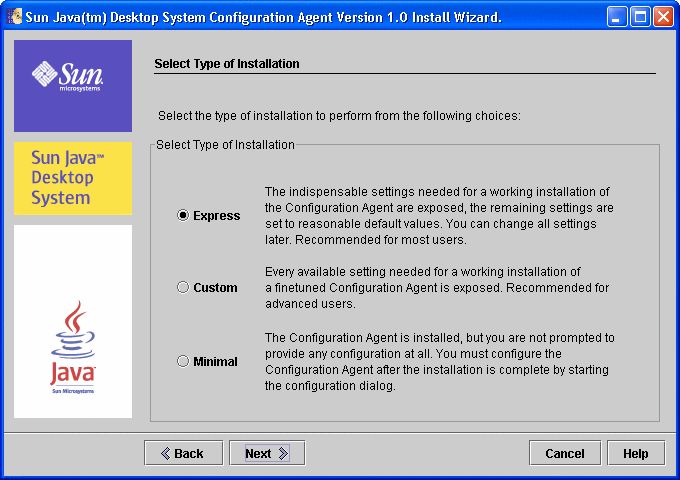
The installer provides three installation types. These types only differ in the number of configuration settings that can be defined during the installation process.
Figure 6–3 Configuration Agent, installation type page
-
Express: The express type is recommended for most users. The installer only exposes the indispensable settings that are needed for a working installation of the Configuration Agent. All remaining settings are set to reasonable defaults.
-
Custom: All available settings for the Configuration Agent are exposed, which allows you to fine-tune the agent's behavior. This type is only recommended for advanced users.
-
Minimal: The Configuration Agent is installed, but you are not prompted to provide any configuration at all. You must configure the Configuration Agent after the installation has been completed by starting the configuration wizard.
After selecting the desired installation type, click Next. Depending on the selected installation type, several configuration settings pages are displayed. The following section provides a description for these settings.
Note –
If you have selected the Express or Minimal options, then not all of the following configuration settings pages are applicable.
Note –
To start the Configuration Agent, some bootstrap information is required, such as the host name and port of the LDAP server. In addition, you can also define several advanced settings, such as the logging level or data directory. All these settings can be specified during the installation process. This information is maintained in a set of properties files, such as policymgr.properties, apocd.properties, os.properties. These files are stored locally in the Program Files\Sun\Apoc\lib directory. You can manually edit these properties files, or you can use the configuration wizard for the Configuration Agent.
Configuration Agent Wizard and Settings Information
This section provides an exact description of all of the configuration settings available for the Configuration Agent.
The configuration wizard offers a graphical user interface that guides you through the necessary settings of the Configuration Agent. For each page of the wizard, a corresponding help screen is available.
Bootstrap Information
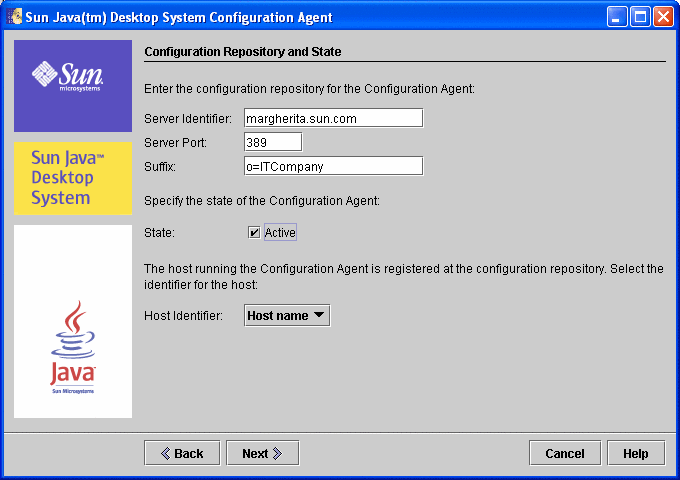
Figure 6–4 Configuration Agent, Configuration Repository
Note –
Associated property file keys are indicated in parentheses, where appropriate.
-
Server Identifier (Server): host name of the LDAP server.
-
Server Port (Port): port number of the LDAP server.
-
Suffix (BaseDn): base DN of the LDAP repository.
-
State: The status of the Configuration Agent. The check box can be used to either activate or deactivate the Configuration Agent. To make use of the configuration repository, the Configuration Agent must be active. The activation automatically includes the necessary registration with the Service Control Manager.
Note –To manually enable or disable the Configuration Agent, log in as Administrator and type the command Program Files\Sun\Apoc\bin\apocd enable or Program Files\Sun\Apoc\bin\apocd disable, respectively.
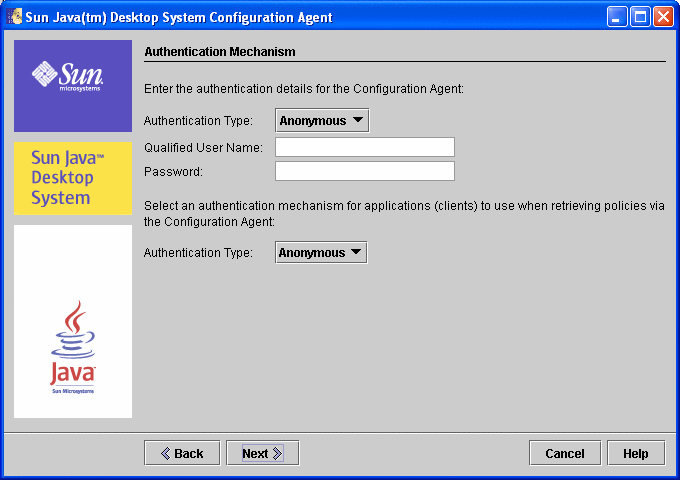
Figure 6–5 Configuration Agent, Authentication Mechanism
-
Host Identifier (HostIdentifier): can be "HostName" or "IPAddress". The identifier must be set to match the contents of the LDAP attribute that is used to identify hosts. This attribute is defined in the mapping files as Host/UniqueIdAttribute.
-
Authentication Type for the Configuration Agent: can be "Anonymous" or "Simple". If "Anonymous" is selected, the Qualified User Name and Password fields are automatically disabled.
-
Qualified User Name (AuthDn): full DN of a user with read and search access rights on the repository.
Note –If anonymous access is enabled in the directory, this setting can be left blank.
-
Password (Password): password of a registered LDAP user
Note –If anonymous access is enabled in the directory, this setting can be left blank.
-
Authentication Type for applications (AuthType): can be “Anonymous” or “GSSAPI”, depending on how the LDAP server authenticates users.
Port Settings
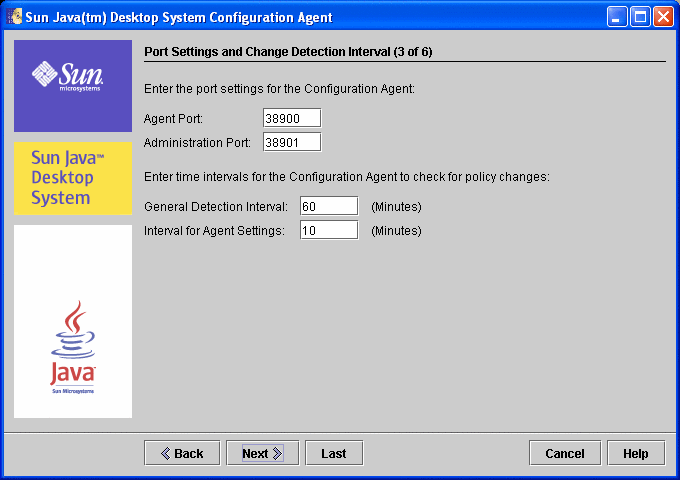
The Configuration Agent uses two ports:
-
Agent Port (DaemonPort): used by the agent to communicate with client applications (default is 38900).
-
Administration Port (DaemonAdminPort): used by the agent controller program, apocd.exe, when communicating with the agent (default is 38901).
Figure 6–6 Configuration Agent, Port Settings
Change Detection Interval
The Configuration Agent periodically checks for any changes in the configuration data using the following two intervals:
-
General Detection Interval (ChangeDetectionInterval): interval in minutes between the change detection cycles for the desktop application's (client's) configuration data.
Note –Specifying -1 turns off change detection.
-
Interval for Agent Settings (DaemonChangeDetectionInterval): interval in minutes between the change detection cycles for the agent-specific configuration settings.
Note –Specifying -1 turns off change detection.
You can use the general detection interval to tune the propagation of remote configuration data changes to client side applications. The value provided for this setting is the maximum length of time in minutes that elapses before remotely made changes are reflected in the client applications.
Smaller values result in increased Configuration Agent and LDAP server activity. As a result, use caution when you adjust the value of the settings. For example, in an initial deployment phase, you can set the value to one minute so that you can easily test the impact of remote configuration on client applications. After you complete the testing, return this setting to the initial value.
Operational Settings
Figure 6–7 Configuration Agent, Data Directory
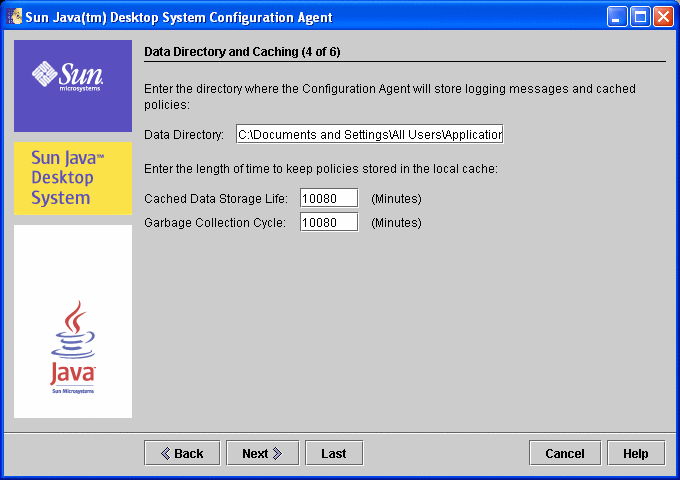
The following settings can be configured:
-
Data Directory (DataDir): the directory used to store runtime data.
-
Cached Data Storage Life (TimeToLive): interval in minutes that non-offline configuration data remains in the local database.
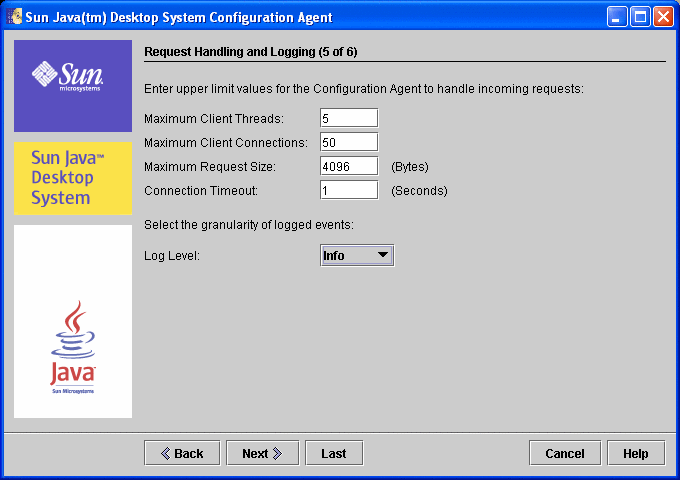
Figure 6–8 Configuration Agent, Request Handling and Logging
-
Garbage Collection Cycle (GarbageCollectionInterval): interval in minutes between the garbage collection cycles in the local configuration database.
-
Maximum Client Threads (MaxClientThreads): maximum number of client requests that can be processed simultaneously.
-
Maximum Client Connections (MaxClientConnections): maximum number of client connections.
-
Maximum Request Size (MaxRequestSize): maximum size of client requests.
-
Connection Timeout (ConnectTimeout): denotes the allowed interval of the LDAP server to answer a connection request. The default is one second.
-
Log Level (LogLevel): level of detail in the agent log files. The logging level is consistent with the Java Logger levels. In order of decreasing severity, these levels are:
-
OFF
-
SEVERE
-
WARNING
-
INFO
-
CONFIG
-
FINE
-
FINER
-
FINEST
-
ALL
-
Note –
Most of the operational settings, with the exception of the Data Directory and Connection Timeout settings, can also be maintained centrally through corresponding policies stored in the LDAP server. If you want to use this feature, do not adapt the corresponding settings by means of the wizard. Instead, use the Configuration Agent policies within the Configuration Manager to centrally specify operational settings.
Agent Settings Summary
With the exception of "Data Directory" and "Connection Timeout", operational settings that have been stored on the LDAP server by means of the Configuration Manager take effect automatically at the next change detection cycle for the agent configuration (see DaemonChangeDetectionInterval).
Figure 6–9 Configuration Agent, Summary Page
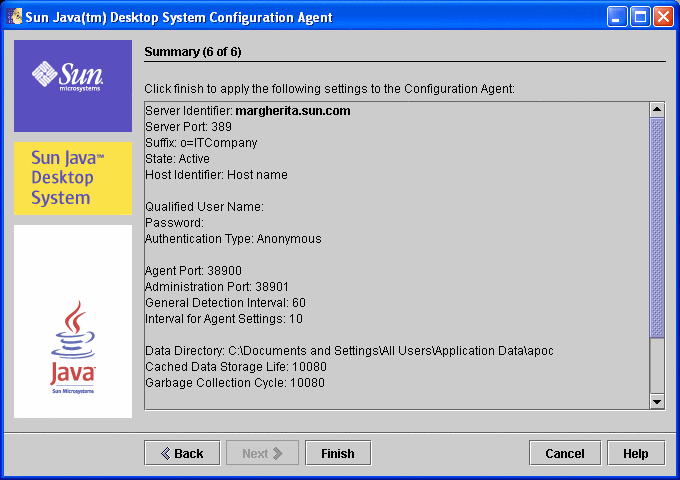
All other settings changed locally require a reload or restart of the Configuration Agent. The reload or restart is performed automatically if you use the configuration wizard.
Note –
To manually restart the Configuration Agent, ensure that no related client applications are running, log in as Administrator, and type the command Program Files\Sun\Apoc\bin\apocd restart. Alternatively, you can start the “Service Controller”, available in the Control Panel under Administrative Tools. Select Configuration Agent from the list of available services and click Restart.
Ready To Install
The Ready to Install page shows you what items for the Configuration Agent are to be installed.
Figure 6–10 Configuration Agent, ready to install page
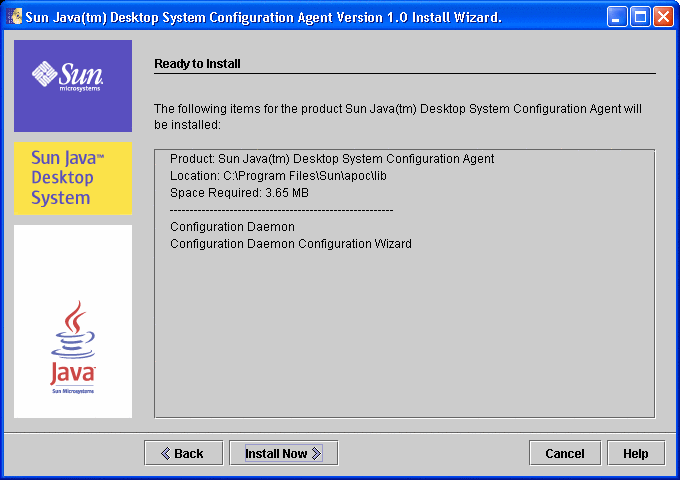
At this point, no changes have yet been made on your system. The actual installation starts when you click the Install Now button.
Installation Summary
The Installation Summary page of the wizard shows the status of the installed items. Click the Details button next to the corresponding item to provide more information about that item.
Figure 6–11 Configuration Agent, installation summary page
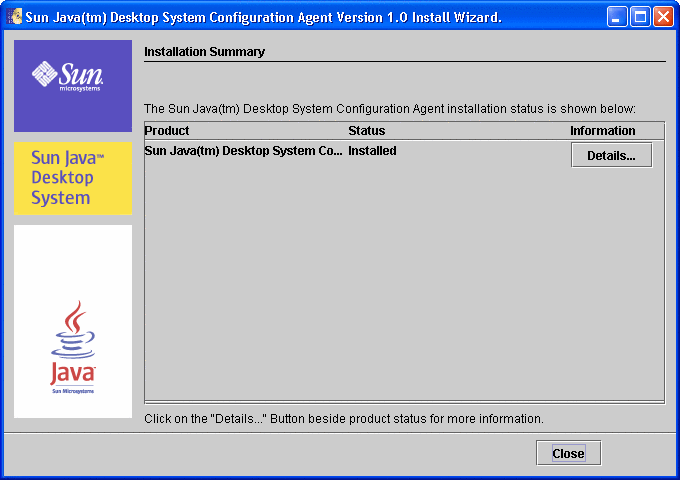
The installer stores the Configuration Agent binaries in your default program files directory (usually C:\Program Files) under Sun\apoc. The installer also automatically creates a new Java Desktop System folder in the Start–All Programs–Sun menu. This folder contains two shortcuts that allow you to further configure or to uninstall the Configuration Agent.
- © 2010, Oracle Corporation and/or its affiliates
