|
| |
| Sun Java Enterprise System 2004Q2 Installation Guide | |
Chapter 8
Upgrading from Java Enterprise System 2003Q4This chapter provides the procedures to upgrade component products from the Java Enterprise System 2003Q4 release for the Solaris operating system to the Java Enterprise System 2004Q2 release for the Solaris operating system. For procedures to upgrade from releases earlier than those contained inJava Enterprise System 2003Q4, see Upgrading Components from Versions Predating Java Enterprise System.
This chapter contains the following sections:
Preparing for UpgradesIn preparing to upgrade your servers, note the following:
- Prior to upgrading your product(s), read the Java Enterprise System 2004Q2 Release Notes at http://docs.sun.com/doc/817-5503 and the release notes for each product to be upgraded.
- Find the patches you need at the SunSolve web site:
http://sunsolve.sun.com/pub-cgi/show.pl?target=patches/patch-access
- Backup all data prior to upgrading.
- Do not run Java Enterprise System 2004Q2 and any pre-Java Enterprise System 2004Q2 component products on the same system.
- All components installed in a single system, must be upgraded to the same Java Enterprise System 2004Q2 level.
- Upgrade shared components before the other Java Enterprise System component products (see Upgrading Shared Components).
- To see a listing of Java Enterprise System 2003Q4 component products and their revisions see Component Products.
- Apply the latest Solaris patch clusters appropriate to your system (see Applying Patch Clusters). In particular, apply the Solaris 8 recommended patch cluster and the J2SE Solaris 8 recommended patch cluster.
- If you have a Sun Cluster installation you may need to apply: Sun Cluster 3.1 patch info doc for Solaris 8 users or Sun Cluster 3.1 Patch Info Doc for Solaris 9 users.
Product Dependencies
Many component products depend on other products to be upgraded before they are upgraded. See Determining Your Upgrade Needs for information necessary to list or diagram the chain of dependencies that determines your upgrade process.
The following list the products in the order that they should be upgraded. Find the products appropriate to your situation and upgrade them in this order.
- Sun Cluster (See Sun Cluster Upgrade Information)
- Shared Components (See Upgrading Shared Components)
- Administration Server (See Administration Server Upgrade Information)
- Directory Server (See Directory Server Upgrade Information)
- Directory Proxy Server (See Directory Proxy Server Upgrade Information)
- Web Server (See Web Server Upgrade Information)
- Message Queue (See Message Queue Upgrade Information)
- Application Server (See Application Server Upgrade Information)
- Identity Server (See Identity Server Upgrade Information
- Messaging Server (See Messaging Server Upgrade Information)
- Calendar Server (See Calendar Server Upgrade Information)
- Portal Server (See Portal Server Upgrade Information)
- Instant Messaging (See Instant Messaging Upgrade Information)
- Mobile Access Mobile Access Upgrade Information
- Sun Cluster agents (See Sun Cluster Upgrade Information)
Upgrading Shared ComponentsAll component products except Sun Cluster require that the Java Enterprise System 2004Q2 shared components be updated. This section details these procedures in the following sections:
Applying Patch Clusters
To upgrade the shared components there are four shared component clusters which you will need to apply depending on which version of Solaris you are running. They are:
Patch Contents lists the contents of each patch cluster.
To Apply Shared Components Patch Clusters
- To obtain the shared component cluster go to SunSolve and download it; see:
http://sunsolve.sun.com/pub-cgi/show.pl?target=patches/patch-access
- Become root by running su and entering the super-user password.
- Read the README which will contain important instructions and other last minute information about the patch.
- Run the install_cluster script which will install all the appropriate patches.
The README contains the specific instructions for installing the patch.
Upgrading J2SE Packages
This section contains the following procedures:
To Determine Your J2SE Version
- Become root by running su and entering the super-user password.
- Determine if you need to install a new version of J2SE or reuse an existing installation of J2SE.
Determine the version of J2SE installed in the default location of your system by entering:
# /usr/jdk/entsys-j2se/bin/java -fullversion
Note
If the version is equal to or greater than 1.4.2_04 and less than 1.5, then you may reuse the existing installation of J2SE in support of Java Enterprise System 2004Q2. If this is the case, then follow the procedures in To Set the J2SE Symbolic Link to shutdown necessary services, reset a symbolic link and restart the services respectively.
If the version is less than 1.4.2_04, perform the steps in:
To Obtain J2SE 1.4.2
To Determine Where to Install the J2SE Packages
- Inspect the symbolic link /usr/jdk/entsys-j2se to determine the location of J2SE as used by Java Enterprise System as follows:
# ls -l /usr/jdk/entsys-j2se
If the link points to the location /usr/j2se, then you need to upgrade the copy of J2SE installed under /usr/j2se, the default installation location for J2SE 1.4 on Solaris. If the link points to /usr/jdk/.j2se1.4.1_06 or similar, then you have the option of either installing J2SE 1.4.2 under /usr/jdk or upgrading the installation of J2SE installed in the default install location of /usr/j2se.
To Install the J2SE Packages
- Shutdown Java Enterprise System services that depend on J2SE.
- Install the J2SE Packages contained in the Java Enterprise System 2004Q2 distribution.
The new version of J2SE that has been certified with Java Enterprise System 2004Q2 components is located under the following directory in the Java Enterprise System 2004Q2 distribution or 1.4.2 download:
Solaris_arch/Product/shared_components/Packages
The packages named SUNWj3* are the packages that make up J2SE.
Based on the results of To Determine Where to Install the J2SE Packages, follow the instructions in one of the following two sections:
- To upgrade Version Installed Under /usr/j2se
- Set your system to single user mode.
- Remove the existing packages:
pkgrm SUNWj3dmo SUNWj3man SUNWj3dev SUNWj3rt
- Add the packages for the new version of J2SE:
From within the directory containing the new version of J2SE in the Java Enterprise System 2004Q2 distribution or 1.4.2 download, execute the following command:
pkgadd -d . SUNWj3rt SUNWj3cfg SUNWj3dev SUNWj3man SUNWj3dmo SUNWj3dvx SUNWj3jmp SUNWj3rtx
The packages SUNWj3dvx and SUNWj3rtx are required only for 64-bit support while the package SUNWj3jmp is required only for Japanese man page support.
- To install a new version under /usr/jdk
Installing an additional instance of J2SE packages is more involved than upgrading the installation of J2SE installed under the default location, /usr/j2se.
- Create an installation administration file to specify the non-default installation location of J2SE:
# cp /var/sadm/install/admin/default /tmp/admin-file
Edit the file /tmp/admin-file and change the following line from:
basedir=default
to:
basedir=/usr/jdk/.j2se1.4.2_04
All other settings within this file may remain intact.
For more information on the use of an installation administration file to install packages in non-default locations, see the pkgadd(1) and admin(4) man pages for information on installing the SDK in a non-default location.
- Using the customized installation administration file, add the packages for the new version of J2SE:
From within the directory containing the new version of J2SE in the Java Enterprise System 2004Q2 distribution or 1.4.2 download, execute the following command:
pkgadd -a /tmp/admin-file -d . SUNWj3rt SUNWj3cfg SUNWj3dev SUNWj3man SUNWj3dmo SUNWj3dvx SUNWj3jmp SUNWj3rtx
The packages SUNWj3dvx and SUNWj3rtx are required only for 64-bit support while the package SUNWj3jmp is required only for Japanese man page support.
- Add a symbolic link to represent the JAVA_HOME location of the newly installed J2SE by entering:
# ln -s /usr/jdk/.j2se1.4.2_04/j2se /usr/jdk/j2se1.4.2_04
Note the leading “.” in the first argument: “.j2se1.4.2_04”
To Set the J2SE Symbolic Link
- Shutdown Java Enterprise System services that depend on J2SE.
- Reset the /usr/jdk/entsys-j2se symbolic link to point to the new J2SE installation.
If you upgraded the version of J2SE installed under /usr/j2se, then reset the symbolic link as follows:
# rm /usr/jdk/entsys-j2se
# ln -s /usr/j2se /usr/jdk/entsys-j2seIf you installed the new version of J2SE in the non-default location, then reset the symbolic link as follows:
# rm /usr/jdk/entsys-j2se
# ln -s /usr/jdk/j2se1.4.2_04 /usr/jdk/entsys-j2se- Start Java Enterprise System services that depend on J2SE.
To Upgrade Supplemental Files
- Acquire and load the Supplementary files for upgrading Sun Java Enterprise System from 2003Q4 to 2004Q2 for Application Server and Message Queue. For an evaluation copy go to:
If you already have an account with SunSolve go to:
- Follow the instructions in the README file to install these Supplementary files.
Patch Contents
Table 8-1 through Table 8-4 list the shared component cluster contents and descriptions.
Administration Server Upgrade InformationYou upgrade Administration Server by applying patches, and synchronizing settings with the configuration directory server. This section contains:
To Apply Administration Server Patches
- Obtain the patches for your platform and installed server component products.
Required patches for SPARC� platforms include:
- Sun Java Enterprise System 2004Q2 Recommended Patch Cluster for the Solaris™ operating system; (see Upgrading Shared Components)
- Administration Server (see Administration Server Upgrade Information)
- Calendar Server (see Calendar Server Upgrade Information)
- Directory Proxy Server (see Directory Proxy Server Upgrade Information)
- Directory Server (see Directory Server Upgrade Information)
- Messaging Server (see Messaging Server Upgrade Information)
You may download patches from http://sunsolve.sun.com/pub-cgi/show.pl?target=patches/patch-access.
- Log in as or become superuser (root).
- Stop running servers in the following order:
- Calendar Server
- Messaging Server
- Directory Proxy Server
- Directory Server
- Administration Server
Refer to Starting and Stopping Component Products for instructions on starting and stopping servers.
- Apply the Recommended Patch Cluster for your platform using the patchadd(1M) command.
- Apply the patches listed in Step 1 for all servers installed, even if those servers are not configured, in the following order using the patchadd(1M) command.
- Administration Server
- Directory Server (follow product specific instructions in Directory Server Upgrade Information)
- Directory Proxy Server (follow product specific instructions in Directory Proxy Server Upgrade Information)
Note
If you use Identity Server in association with Messaging Server and / or Calendar Server, please upgrade Identity Server (see Identity Server Upgrade Information) and Communications Services User Management Utility (this is upgraded with Upgrading Shared Components and configured in To Upgrade the User Management Utility before progressing.
- Messaging Server (follow product specific instructions in Messaging Server Upgrade Information)
- Calendar Server (follow product specific instructions in Calendar Server Upgrade Information)
- Restart the servers in the same order as for Step 5.
Note
To restart the Directory Server that shipped with Java Enterprise System enter:
directoryserver -d 5.2 start
- If Administration Server is configured, synchronize the upgraded Administration Server settings with those stored in the configuration directory server using the mpsadmserver(1M) command.
# /usr/sbin/mpsadmserver sync-cds
The configuration directory server must be available for this step to complete properly.
To Remove Administration Server Patches
Remove patches on all servers you installed in To Apply Administration Server Patches by:
- If Administration Server is configured, return to the pre-patch settings stored in the configuration directory using the mpsadmserver(1M) command.
# /usr/sbin/mpsadmserver sync-cds 5.2
Notice the final 5.2. The configuration directory server must be available for this step to complete properly.
- Stop all running servers in the following order:
- Back out server patches in the same order as for Step 2 using the patchrm(1M) command. Patches applied for each of these servers must be removed.
- Calendar Server; (follow product specific instructions in To Remove Calendar Server Patches)
- Messaging Server (follow product specific instructions in To Remove Messaging Server Patches)
- Directory Proxy Server: (follow product specific instructions in To Remove Directory Proxy Server Patches)
- Directory Server: (follow product specific instructions in To Remove Directory Server Patches)
- Administration Server: (follow product specific instructions in To Remove Administration Server Patches)
- Restart the servers in the following order:
To Troubleshoot Administration Server
- If after applying the patches, you still see a Sun ONE-branded console, rather than a console with the Sun Java System brand, verify that you effectively synchronized with the configuration directory server (mpsadmserver sync-cds).
- If backing out the patches did not work, typically this is because you did not synchronize settings for the upgraded Administration Server with the configuration directory server before you tried to back out patches. Try the entire process again, starting from To Apply Administration Server Patches.
Application Server Upgrade InformationYou upgrade Application Server by applying patches, and synchronizing settings with the configuration directory server. This section contains the following:
For information about upgrading web container software, refer to the following web container documentation:
To upgrade from Application Server 7, Update 1 to Application Server 7, Update 3, follow these steps:
To Upgrade Supplemental Files
- Acquire and load the Supplementary files for upgrading Sun Java Enterprise System from 2003Q4 to 2004Q2 for Application Server and Message Queue (see To Upgrade Supplemental Files)
- Follow the instructions in the README file to install these Supplementary files.
To Apply Application Server Patches
Note
Message Queue must be upgraded prior to upgrading Application Server 7, Update 1 (see Message Queue Upgrade Information).
- Log in as or become superuser (root).
- Stop all running instances of the Application Server by entering:
app_svr_base/bin/ asadmin stop-appserv
- Upgrade all Java Enterprise System shared components (see Upgrading Shared Components.)
- Apply the following Application Server patches using patchadd(1M):
- Restart the Application Server instances.
To Remove Application Server Patches
If you decide to remove the Application Server patches, perform the following steps:
- Stop all running instances of the Application Server by entering:
/asadmin stop-appserv/
- Become root:
su root
When prompted, type your root password.
- Remove the appropriate Application Server patches added in To Apply Application Server Patches using patchrm(1M).
- Restart the Application Server instances:
app_svr_base/bin/asadmin start-appserv
Calendar Server Upgrade InformationUpgrading Calendar Server involves backing up data, upgrading other Java Enterprise System components and applying the appropriate patches. This section includes:
To Upgrade Non-Cluster Deployments
- Log in as or become superuser (root).
- Stop the Calendar Server:
cal_svr_base/cal/sbin/stop-cal
- Backup Calendar Server database, configuration file (ics.conf) and other files you have customized. This includes files in the database, configuration and UI xsl and html files.
Default locations for these directories are:
- Upgrade all the Java Enterprise System components on the server where you are upgrading Calendar Server. Calendar Server relies on:
- Shared components - NSPR, NSS, SASL, ICU, LDAPCSDK (see Upgrading Shared Components)
- Administration Server (see Administration Server Upgrade Information)
- Directory Server (see Directory Server Upgrade Information)
- Identity Server (see Identity Server Upgrade Information)
- Communications Services User Management Utility (this is upgraded with Upgrading Shared Components and configured in To Upgrade the User Management Utility)
- Messaging Server (see Messaging Server Upgrade Information)
- Apply the following Calendar Server patches using patchadd(1M).
Table 8-6 Calendar Server Patches
Functional Area to Patch
Patch ID Solaris SPARC
Patch ID Solaris x86
Calendar Server core
116577-09
116578-09
Localization patch
117010-08
117011-08
- Start the Calendar Server:
cal_svr_base/cal/sbin/start-cal
To Upgrade Cluster Deployments
- Stop the cluster services:
cal_svr_base/cal/sbin/stop-cal
- To find Cluster nodes containing Calendar Server enter the following:
# pkginfo | grep -i sunwics5
- Follow the procedure in To Upgrade Non-Cluster Deployments on each node where the Calendar Server is installed.
To Upgrade the User Management Utility
Calendar Server requires that you use the User Management Utility (commadmin) to provision users, groups, domains, and resources.
After you apply the patch to upgrade the User Management Utility (see Upgrading Shared Components), you must take the steps described in To Upgrade the User Management Utility and To Use commadmin with Schema 2 Compatibility Mode.
To Remove Calendar Server Patches
If you decide to remove the Java Enterprise System 2004Q2 patches (116577-09/117010-08 and 116578-09/117011-08), perform the following steps:
- Stop the Calendar Server:
cal_svr_base/cal/sbin/stop-cal
- Backup the calendar database. The default database directory is:
/var/opt/SUNWics5/csdb
- Remove the appropriate Calendar Server Patches added in Step 5.
Remove the shared component patches installed in Step 4 in this order:
- Messaging Server (see Messaging Server Upgrade Information)
- Communications Services User Management Utility (see To Remove the commadmin Patch)
- Identity Server (see Identity Server Upgrade Information)
- Directory Server (see Directory Server Upgrade Information)
- Shared components - NSPR, NSS, SASL, ICU, LDAPCSDK (see Upgrading Shared Components)
Make sure that all the products are running at Java Enterprise System 2003Q4 levels.
- Replace SSL certificates from the backup created in Step 3.
- To activate the database backed up in Step 3:
Directory Server Upgrade InformationYou upgrade Directory Server by applying patches, and synchronizing settings with the configuration directory server.
Notes
Directory Server belongs to a group of products sharing the same Administration Server. You must patch these products at the same time.
Upgrading Directory Server by applying patches only works for Directory Server installed on a Solaris system with SUNWds* packages.
During the patch upgrade process, some but not all instance-specific scripts under ServerRoot/slapd-serverID/ are backed up under ServerRoot/slapd-serverID/upgrade/bak_patch2/, and then regenerated to reflect changes made during the upgrade. If patches are backed out, the backed up scripts are restored.
Patching upgrades the SSL certificate database. If you subsequently decide to back out the patches and you have changed the content of the certificate database, you must manually reapply the changes after backing out the patches.
Directory Server cannot start in secure mode when you back out patches after having changed the server certificate. You can, however, turn off secure mode, restart Directory Server, reinstall the server certificate, and then enable SSL mode.
Refer to the Sun Java System Directory Server 5 2004Q2 Administration Guide at http://docs.sun.com/doc/817-5221 for instructions.
Rolling upgrade for Directory Server as a Sun Cluster data service is not supported.
To Apply Directory Server Patches
- Follow the instructions for applying patches in Administration Server Upgrade Information. Instructions are also included in the Administration Server patch README file.
Note
You must follow these instructions and apply Administration Server patches even if you have never explicitly selected Administration Server for installation.
You may obtain patches from http://sunsolve.sun.com/pub-cgi/show.pl?target=patches/patch-access.
- If Directory Server is configured, synchronize the upgraded Directory Server settings with those stored in the configuration directory server using the directoryserver(1M) command.
# /usr/sbin/directoryserver -u 5.2 sync-cds
The configuration directory server must be available for this step to complete properly.
To Correct the Schema
- Remove the nsSchemaCSN attribute from 99user.ldif and 60iplanet-calendar.ldif files.
- Rename the schema_push.pl script of the ldap instance (under server_root/slapd-instance) to schema_push.pl.ref.
- Copy the template file, i-e template-schema_push.pl, located in server_root/bin/slapd/admin/scripts to server_root/slapd-instance and rename it into schema_push.pl.
- Edit the new schema_push.pl file:
- Change the mode of the schema_push.pl to add the execute mode
- Force the schema replication by running:
server_root/schema_push.pl.
- To verify that the file is correct check that the nsSchemaCSN attribute has been added to 99user.ldif file
To Upgrade Cluster Configurations
Use the following procedures to apply and, if necessary, to remove patches when running Directory Server as a data service in a cluster.
- Stop each Directory Server instance and the associated Administration Server. For example, with one instance:
/usr/sbin/directoryserver stop
/usr/sbin/directoryserver stop-admin- Make the current cluster node the active node by entering:
scswitch -z -g ldap-group -h this-node-name
- Apply the upgrade patches on this node as described in To Apply Directory Server Patches.
Here, patches are located in /var/spool/patch, /export/backout is where backout data is stored, and patch-nbr-list is a whitespace separated list of patch numbers. Java Enterprise System is stopped while patches are applied.
- Make another cluster node the active node:
scswitch -z -g ldap-group -h another-node-name
- Restart each Directory Server instance and the associated Administration Server. For example, with one instance:
/usr/sbin/directoryserver -u 5.2 start
/usr/sbin/directoryserver start-admin- If Directory Server is configured, synchronize the updated Directory Server with the configuration directory server using directoryserver(1M). Enter the following on the active node only:
/usr/sbin/directoryserver -u 5.2 sync-cds
/usr/sbin/mpsadmserver sync-cdsIf the configuration directory server is not on the local system, it must be available for this step to complete properly.
- If you want to upgrade from HAStorage to HAStoragePlus, See Upgrading From HAStorage to HAStoragePlus
To Remove Directory Server Patches
- If Directory Server is configured, return to the pre-patch settings stored in the configuration directory using the directoryserver(1M) command.
# /usr/sbin/directoryserver -u 5.2 sync-cds 5.2
Notice the final 5.2. The configuration directory server must be available for this step to complete properly.
- Follow the instructions for removing patches in To Remove Administration Server Patches. Instructions are also included in the Administration Server patch README file.
- Make sure the directoryserver(1M) command applies to 5.2 by default:
# /usr/sbin/directoryserver -d 5.2
To Troubleshoot Directory Server
- If after applying the patches and setting the directoryserver(1M) command to apply to 5.2 by default (directoryserver -d 5.2), you still see a Sun ONE-branded console, rather than a console with the Sun Java System brand, verify that you effectively synchronized with the configuration directory server (directoryserver sync-cds).
- If backing out the patches did not work, typically this is because you did not synchronize settings for the upgraded Directory Server with the configuration directory server before you tried to back out patches. Try the entire process again, starting from To Apply Directory Proxy Server Patches.
Upgrading From HAStorage to HAStoragePlus
When running Directory Server as a Sun Cluster data service you might wish to upgrade to HAStoragePlus. This section contains the following topics:
The SUNW.HAStoragePlus resource type synchronizes actions between HA storage and data services, making locally mounted file systems highly available within a cluster. This feature permits higher performance when a disk-intensive data service such as Directory Server undergoes fail over, because the file system access fails over with the service.
Why Use HAStoragePlus
HAStoragePlus can be used with any file system residing in a global device group, but it also provides failover file service in addition to the global file service. Unlike a globally mounted file service, failover file service allows access from only one cluster node at any point in time. It also allows access only from nodes physically connected to the underlying storage device. As with a global file service, when Directory Server switches or fails over from an old node to a new one, HAStoragePlus ensures the file system is unmounted from the old node and remounted on the new node. HAStoragePlus with the failover file service also bypasses the global file system service layer completely, allowing higher performance. It can also work with any file system type supported by the operating system, including types not supported by the global file system service.
Refer to SUNW.HAStoragePlus(5) for background information, and to the Sun Cluster 3.1 4/04 product documentation at http://docs.sun.com/coll/1124.1 for further instructions on setting up a SUNW.HAStoragePlus resource type for new resources.
Performing the Upgrade
This section explains how to upgrade if you have used Directory Server with SUNW.HAStorage and now want to benefit from SUNW.HAStoragePlus. The steps described here replace use of a global file system service with that of a failover file system service. In summary, you modify /etc/vfstab and change the cluster configuration such that the server resource groups depend on HAStoragePlus.
The following procedures reference a ds-resource-group containing a logical hostname resource (lhn-res), a Directory Server resource (ds-res), an Administration Server resource (as-res), and a HAStorage resource (has-res) managing the global file system service. Upon completion, the HAStorage resource is replaced by a HAStoragePlus resource (hasp-res) managing the failover file system service Directory Server uses. Perform all procedures listed below in order to enable HAStoragePlus.
To Disable Dependencies on the HAStorage Resource
- Take the Directory Server resource group off line.
# scswitch -F -g ds-resource-group
- Disable and remove the Directory Server resource from the resource group.
# scswitch -n -j ds-res
# scswitch -r -j ds-res- Disable and remove the Administration Server resource from the resource group.
# scswitch -n -j as-res
# scswitch -r -j as-res- Disable and remove the HAStorage resource from the resource group.
# scswitch -n -j has-res
# scswitch -r -j has-resTo Update the File System Configuration
Do not mount the file system at this point. Proceed to To Prepare the HAStoragePlus Resource.
To Prepare the HAStoragePlus Resource
- Register and add the HAStoragePlus resource to the resource group.
# scrgadm -a -t SUNW.HAStoragePlus
# scrgadm -a -j hasp-res -g ds-resource-group -t SUNW.HAStoragePlus \
-x FilesystemMountPoints=volume-mount-pointHere volume-mount-point identifies the disk volume where Directory Server stores data.
- Enable the HAStoragePlus resource.
# scswitch -e -j hasp-res
To Enable Dependencies on the HAStoragePlus Resource
- Bring the Directory Server resource group on line.
# scswitch -Z -g ds-resource-group
- Recreate the Directory Server resource with a dependency on hasp-res.
# scrgadm -a -j ds-res -g ds-resource-group -t SUNW.dsldap \
-y Network_resources_used=logical-host-name \
-y Port_list=port-number/tcp \
-x Confdir_list=ServerRoot/slapd-serverID \
-y Resource_dependencies=hasp-res- Enable the Directory Server resource.
# scswitch -e -j ds-res
- Recreate the Administration Server resource with a dependency on hasp-res.
# scrgadm -a -j as-res -g ds-resource-group -t SUNW.mps \
-y Network_resources_used=logical-host-name \
-y Port_list=port-number/tcp \
-x Confdir_list=ServerRoot \
-y Resource_dependencies=hasp-res- Enable the Administration Server resource.
# scswitch -e -j as-res
At this point, the servers use HAStoragePlus which mounts and unmounts the file system as necessary.
Directory Proxy Server Upgrade InformationYou upgrade Directory Proxy Server by applying patches, and synchronizing settings with the configuration directory server.
This section describes preparation and a procedure for updating Directory Proxy Server 5.2 to Directory Proxy Server 5 2004Q2. It contains:
To Apply Directory Proxy Server Patches
- Follow the instructions for applying patches in Administration Server Upgrade Information. Instructions are also included in the Administration Server patch README file.
You may obtain patches from http://sunsolve.sun.com/pub-cgi/show.pl?target=patches/patch-access.
- If Directory Proxy Server is configured and did not synchronize settings with the configuration server when patches are applied, manually synchronize upgraded Directory Proxy Server settings with those stored in the configuration directory server.
# AS_BASEDIR/usr/sadm/mps/admin/v5.2/bin/tcl8.2/tclsh
# AS_BASEDIR/usr/sadm/mps/admin/v5.2/bin/bin/dps/install/script/sync-dps-cds.tcl \
-cid AS_BASEDIR/usr/sadm/mps/admin/v5.2 -serverroot ServerRootWhere:
- AS_BASEDIR is / by default, and thus may be left out.
- The -cid option takes a full path, cid_path, such that the program can assert that the following directory exists:
cid_path/bin/dps/install/script
- The -serverroot option takes the full path to an installed and configured Administration Server. The script validates that the following files exist:
ServerRoot/admin-serv/config/adm.conf
ServerRoot/admin-serv/config/jvm12.conf
The configuration directory server must be available for this step to complete properly.
To Remove Directory Proxy Server Patches
- If Directory Proxy Server is configured, return to the pre-patch settings stored in the configuration directory.
# AS_BASEDIR/usr/sadm/mps/admin/v5.2/bin/tcl8.2/tclsh
# AS_BASEDIR/usr/sadm/mps/admin/v5.2/bin/bin/dps/install/script/sync-dps-cds.tcl \
-cid AS_BASEDIR/usr/sadm/mps/admin/v5.2 -serverroot ServerRoot -v5.2Notice the trailing -v5.2 option. Where:
- AS_BASEDIR is / by default, and thus may be left out.
- The -cid option takes a full path, cid_path, such that the program can assert that the following directory exists:
cid_path/bin/dps/install/script
- The -serverroot option takes the full path to an installed and configured Administration Server. The script validates that the following files exist:
ServerRoot/admin-serv/config/adm.conf
ServerRoot/admin-serv/config/jvm12.conf
The configuration directory server must be available for this step to complete properly.
- Follow the instructions for removing patches included in the Administration Server patch README file.
To Troubleshoot Directory Proxy Server
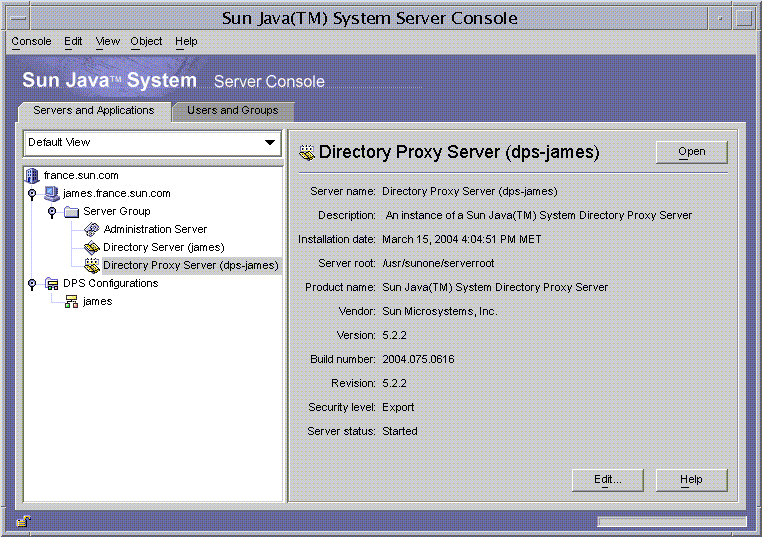
- After upgrading to Directory Proxy Server 5 2004Q2, starting the console.
You should see the console shown in Figure 8-1.
Figure 8-1 Directory Proxy Server Console
- If after applying the patches, you still see a Sun ONE-branded console, rather than a console with the Sun Java System brand, verify that you effectively synchronized with the configuration directory server.
If backing out the patches did not work, typically this is because you did not synchronize settings for the upgraded Directory Proxy Server with the configuration directory server before you tried to back out patches.
- Try the entire process again, starting from To Apply Directory Proxy Server Patches.
Identity Server Upgrade InformationThis section includes the following information about upgrading an instance of Identity Server 6.1:
Note
Perform the steps in To Correct the Schema before proceeding with Identity Server upgrade.
Backing up Web Container Customized Files
Before you upgrade, back up any web container customized files related to Identity Server 6.1, including:
It is recommend that you make a list of your customized configuration so you can redo them after you upgrade and then verify that they work correctly.
You must provide the same encryption key used when installing Identity Server 6.1. This key is located in the am.encryption.pwd property in the file:
id_svr_base/lib/AMConfig.properties
Refer to the following for additional details prior to upgrading Identity Server:
Upgrading Web Container Software
Identity Server 6 2004Q2 supports Web Server 6.1 SP 2 or Application Server 7 Update 3 as a web container. If you are using an older version, you must upgrade the web container software before you can upgrade to Identity Server 6 2004Q2.
For information about upgrading web container software, refer to the respective web container documentation:
- For Web Server 6.1 SP 2 see Web Server Upgrade Information
- For Application Server 7 Update 3, see Application Server Upgrade Information.
Also, if you saved any customization files under Backing up Web Container Customized Files, you will need to redo the customizations after you upgrade the web container.
To Verify That the Application Server Instance is Running
- Change directory to the Application Server installation directory (default is /opt/SUNWappserver7) and enter the following:
cd /opt/SUNWappserver7
asadmin list-instances
asadmin>list-instances
admin-server <running>
server1 <running>
asadmin>If a non-default instance was used then output will be different.
- If necessary, start the Application Server instance domain:
cd /opt/SUNWappserver7/bin
asadmin> start-domain --domain domain-name
asadmin>start-domain --domain domain-name
Instance domain-name:admin-server started
Instance domain-name:server1 started
Domain domain-name Started.Use the appropriate domain name. This defaults to domain1 unless otherwise changed.
- To see all available domains enter:
asadmin> list-domains
domain1 [/var/opt/SUNWappserver7/domains/domain1]
asadmin>Running the Pre-Upgrade Script
The Identity Server 6 2004Q2 pre-upgrade script (pre61to62upgrade) is part of the Sun Java Enterprise System and is available in the following directory:
JavaEnterpriseSystem_base/Solaris_sparc/Product/identity_srv/Tools
where JavaEnterpriseSystem_base is the directory where you uncompressed the archive.
The pre-upgrade script performs these functions:
- Backs up Identity Server 6.1 by running the am2bak script
- Removes the Identity Server 6.1 packages (but not Directory Server or web container packages) and then updates the /var/sadm/install/productregistry file to reflect that the packages have been removed
- Writes the Sun_Java_System_Identity_Server_upgrade_log.timestamp log file to the /var/sadm/install/logs directory
Before executing the pre-upgrade script, the following servers must be running:
To Run the Pre-Upgrade Script
- Log in as or become superuser (root).
- Verify that Directory Server is running. For example:
# ps -ef | grep slapd
If Directory Server is not running, start it. For example:
# cd /var/opt/mps/serverroot/slapd-instance-name
# ./start-slapd- Move to the directory where the pre-upgrade script exists and then run the script. For example:
# cd JavaEnterpriseSystem_base/Solaris_sparc/Product/identity_srv/Tools
# ./pre61to62upgrade- When you are prompted by the script, enter the following information:
- Directory Server fully qualified host name. For example: ds.example.com
- Directory Server port number. Default is 389.
- Distinguished name (DN) and password of the top-level Identity Server administrator. For example: uid=amAdmin,ou=People,dc=example,dc=com
- Directory where the script should back up the Identity Server 6.1 files. For example: /opt/is_backup
- Certificate directory of the web container. For example: /opt/SUNWwbsvr/alias
The pre-upgrade script displays its status as it runs. Be sure to allow the script to finish completely. If you stop the script before it has finished, the results will be unpredictable.
After the script finishes, you are ready to install Identity Server 6 2004Q2.
Installing Identity Server
To install Identity Server 6 2004Q2, you must run the Sun Java Enterprise System installer.
Before you run the installer, use the Identity Server Worksheets to record necessary information. Also, when the installer asks “Is Directory Server provisioned with user data?”, answer “yes”.
Running the Post-Upgrade Script
The Identity Server post-upgrade script (Upgrade61DitTo62) is available in the following directory after you install Identity Server 6 2004Q2:
/IdentityServer_base/SUNWam/migration/61to62/scripts
where IdentityServer_base is the Identity Server 6 2004Q2 base installation directory. The default base installation directory is /opt.
The post-upgrade script performs these functions:
To run the post-upgrade script, Directory Server must be running. During the script, you will be asked to restart Directory Server before the script can continue. At the end, you will also be asked to restart both Directory Server and the web container for the changes to take effect.
To Run the Identity Server Post-Upgrade Script
- Log in as or become superuser (root).
- Verify that Directory Server is running. For example:
# ps -ef | grep slapd
If Directory Server is not running, start it. For example:
cd /var/opt/mps/serverroot/slapd-instance-name
./start-slapd
- Run the post-upgrade script. For example:
cd /IdentityServer_base/SUNWam/migration/61to62/scripts
./Upgrade61DitTo62
where IdentityServer_base is the Identity Server 6 2004Q2 base installation directory.
Note
If the script fails with an object class violation perform the procedures at To Correct the Schema and restart the Directory Server.
- When you are prompted by the script, provide the following information:
- Directory Server fully qualified host name–For example: ds.example.com
- Directory Server port number–Default is 389.
- Distinguished name (DN) and password of the Directory Manager
- Distinguished name (DN) and password of the top-level Identity Server administrator–For example: uid=amAdmin,ou=People,dc=example,dc=com
- When you are prompted by the script, restart Directory Server. The script pauses for you to perform the restart.
- After you restart Directory Server, return to the script and press Enter to continue. After the script has finished, it displays the following message:
YOU MUST RESTART THE DIRECTORY AND WEB SERVERS FOR THE UPGRADE CHANGES TO TAKE EFFECT.
- Restart Directory Server and the web container.
After Directory Server and the web container are running, you are ready to verify that the upgrade was successful.
Verifying the Upgrade
If you customized your Identity Server 6.1 installation, you must manually redo the customizations in your new Identity Server 6 2004Q2 installation.
Here are several ways to verify that the upgrade was successful:
where host-name.domain-name:port is the fully qualified host name and port of the web container you are using.
When the Identity Server login page appears, log in as amadmin. Click the “Service Configuration” tab. If the new Identity Server 6 2004Q2 services such as “Discovery Service” and “Liberty and Personal Profile Service” are available, the upgrade of Identity Server on the specific web container should be successful.
Upgrading Multiple Instances of Identity Server
This section describes how to upgrade multiple instances of Identity Server 6.1 running on different hosts that share the same Directory Server.
Identity Server 6.1 and Identity Server 6 2004Q2 servers installed on different hosts can run concurrently against the same shared Directory Server.
To Upgrade Multiple Instances of Identity Server
- Log in as or become superuser (root).
- Stop all Identity Server 6.1 instances that access the Directory Server. For example:
# cd /IdentityServer_base/SUNWam/bin
# ./amserver stopwhere IdentityServer_base is the Identity Server 6.1 base installation directory.
Stopping all instances prevents Identity Server from making changes to the Directory Server while you are performing the upgrade.
- Start the instance you want to upgrade. For example:
# ./amserver start
- Upgrade the Identity Server instance you started in Step 3. See:
During the upgrade of the first instance, the post-upgrade script (Upgrade61DitTo62) upgrades the Identity Server schema to Identity Server 6 2004Q2. During subsequent upgrades of other instances, however, the post-upgrade script detects that the Directory Server has already been upgraded and does not try to upgrade it again.
- Restart the instance you just upgraded.
Repeat Step 3 through Step 5 for each Identity Server 6.1 instance on a different host that you want to upgrade.
- If there are any Identity Server 6.1 instances you did not upgrade, restart those instances. For information about the co-existence of Identity Server 6.1 and Identity Server 6 2004Q2 see the Sun Java System Identity Server 2004Q2 Migration Guide at http://docs.sun.com/doc/817-5708.
To Use Portal Server Mobile Access
To use Java System Portal Server, Mobile Access 6 2004Q2, change the Identity Server Client Detection global attributes as follows:
- Access the Identity Server 6 2004Q2 console using the following URL:
http://host-name.domain-name:port/amconsole
where host-name.domain-name:port is the fully qualified host name and port of the web container you are using.
- When the Identity Server login page appears, log in as amadmin.
- On the console, click the Service Configuration tab.
The console displays the Service Configuration options in the navigation frame.
- In the navigation frame under Service Configuration, click Client Detection.
- For Client Detection, set the following items in the data frame:
- Click Save.
To Upgrade the Identity Server SDK Only
To upgrade an Identity Server 2003Q4 (6.1) SDK only installation, you must uninstall the 2003Q4 version and then re-install the 2004Q2 version. To upgrade an Identity Server SDK only installation:
- Back up your Identity Server 2003Q4 configuration files, including the AMConfig.properties and serverconfig.xml files. (The upgrade process will not affect your user data.)
- Uninstall the Identity Server 2003Q4 SDK by following the instructions in Chapter 10, "Uninstalling Software."
- Install the Identity Server 2004Q2 SDK by following the instructions in Installing Software Using the Graphical Interface.
- Incorporate the configuration changes you saved in Step 1 into the new Identity Server 2004Q2 configuration files.
Instant Messaging Upgrade InformationYou upgrade Instant Messaging by applying patches, and synchronizing settings with the configuration directory server.
This section includes the following information about upgrading an instance of Instant Messaging:
To Apply Instant Messaging Patches
- Log in as or become superuser (root).
- Stop the Instant Messaging service (if the server component is installed) by entering:
inst_msg_base/sbin/imadmin stop
- Backup files data files, configuration, and customized client files.
Default locations for these directories are as follows:
- Apply following Instant Messaging patches using patchadd(1M):
Table 8-8 Instant Messaging Patches
Functional Area to Patch
Patch ID Solaris SPARC
Patch ID Solaris x86
Instant Messaging core
115732-09
116645-09
Localization
116936-06
116937-06
- Restart the Instant Messaging service (if the server component is installed).
To Remove Instant Messaging Patches
If you decide to remove the Instant Messaging patches, perform the following steps:
- Stop Instant Messaging.
- Backup files data files, configuration, and customized client files.
Default locations for these directories are as follows:
- Become root:
su root
When prompted, type your root password.
- Remove the appropriate Instant Messaging patches added in Step 4 using patchrm(1M).
Message Queue Upgrade InformationThis section contains procedures for upgrading to Message Queue 3.5 SP1 from the previous version. It contains the following topics:
To Upgrade Supplemental Files
- Acquire and load the Supplementary files for upgrading Sun Java Enterprise System from 2003Q4 to 2004Q2 for Application Server and Message Queue (see To Upgrade Supplemental Files)
- Follow the instructions in the README file to install these Supplementary files.
To Upgrade Message Queue on Solaris
You do not need to uninstall the previous version—it will be over-written. The following instructions explain how to install the Message Queue product on Solaris.
- Obtain the software either via product distribution download or off the CD.
- Log in as or become superuser (root).
- Shut down any existing Message Queue brokers by entering:
imqcmd shutdown bkr -u name -p password [-b hostName:port]
- To upgrade the Message Queue shipped with Java Enterprise System 2003Q4 to the Message Queue shipped with Java Enterprise System 2004Q2, run the mqupgrade script:
# cd /cdrom/cdrom0/Solaris_arch/Product/message_queue/Tools
# ./mqupgradeThe above example finds the command on the product CD. to execute the command from your download location:
# cd /unzipped location/Solaris_arch/Product/message_queue/Tools
# ./mqupgrade
Note
mqupgrade will first ask if you want to install any shared components first. If you have not already upgraded shared components answer y. If you have already upgraded shared components answer n.
The script creates a log file in the following directory:
/var/sadm/install/logs/Message_Queue_upgrade_date.log
Note
Message Queue upgrade preserves all configuration data and any state maintained by the Message Queue brokers.
- Exit the root shell.
To Check the Message Queue Installation
To check that the expected version of Message Queue is running on your system, enter the command:
imqbrokerd -version
The output to this command specifies the version of the JDK and Message Queue that are installed on your system.
Messaging Server Upgrade InformationThis section contains procedures for upgrading to Messaging Server 6 2004Q2 from the previous Java Enterprise System 2003Q4 version. It contains the following topics:
Prerequisites
Prior to performing the Messaging Server 6 2004Q2 upgrade ensure that the following steps are taken:
- Stop the Messaging Server.
- Upgrade all Java Enterprise System components on the server where you are upgrading Messaging Server. In particular, the Java Enterprise System components that Messaging Server may rely on. The list includes:
- Shared components, in particular: NSPR (SUNWpr), NSS (SUNWtls), SASL (SUNWsasl), ICU (SUNWicu), LDAPCSDK (SUNWldk), and JSS (SUNWjss) (see Upgrading Shared Components)
- Administration Server (see Administration Server Upgrade Information)
- Directory Server (see Directory Server Upgrade Information)
- Identity Server (see Identity Server Upgrade Information)
- Web Server (see Web Server Upgrade Information)
- Application Server (see Application Server Upgrade Information)
- Communications Services User Management Utility (this is upgraded with Upgrading Shared Components and configured in To Upgrade the User Management Utility)
To Upgrade Non-Cluster Deployments
- Log in as or become superuser (root).
- Apply the Messaging Server patches using patchadd(1M). The three patches are listed below.
- Generate the new candidate configuration files using the following program:
msg_svr_base/sbin/patch-config
- Apply the new configuration files, either manually or using the following program:
msg_svr_base/sbin/install-newconfig
- Apply the ldif files under msg_svr_base/lib/patch. Be sure to use the ldapmodify command that comes with the Messaging Server or Directory Server.
- Execute the following command to create a compile configuration if desired:
msg_svr_base/sbin/imsimta chbuild
msg_svr_base/sbin/imsimta clbuild -image_file=IMTA_COMMAND_DATA IMTA_BIN:pmdf.cld
msg_svr_base/sbin/imsimta cnbuild
- Start the Messaging Server with:
msg_svr_base/sbin/start-msg
To Upgrade Cluster Deployments
If you have two or more instances of Messaging Server in a clustered environment, use a rolling upgrade strategy, one server at a time, to keep most of the cluster available. First you upgrade one Messaging Server on one machine. The Messaging Server upgrade includes upgrading the mboxlist database to a higher version (for that Messaging Server on that machine).
To install in cluster environments:
- Install Messaging Server 6 2004Q2 on the standby node.
- Configure it to use the configuration data of primary node.
- Failover to the standby node.
- Remove the primary node from the cluster.
- Upgrade the primary node using patchadd (see Step 2.)
- Put the primary node back into the cluster.
- Failover the configuration and data from the standby node back to the primary node.
- Run patch-config to generate new candidate upgraded configuration files.
- Examine the new candidate upgraded configuration files manually.
- Schedule downtime for the primary node configuration and data.
During downtime:
- Stop the services for the primary node.
- Install the new confide files, e.g. you can use the install-unconfined command.
- Run the commands.
msg_svr_base/sbin/imsimta chbuild
msg_svr_base/sbin/imsimta clbuild -image_file=IMTA_COMMAND_DATA IMTA_BIN:pmdf.cld
msg_svr_base/sbin/imsimta cnbuild
- Restart the services.
To Upgrade the User Management Utility
Messaging Server and Calendar Server require that you use the User Management Utility (commadmin) to provision users, groups, domains, and resources.
After you apply the patch Sun ONE commcli core to upgrade the User Management Utility (see Upgrading Shared Components), you must take the following manual steps:
- Run the User Management Utility configuration program, config-iscli. For instructions on running the config-iscli program, see the Sun Java System Communications Services User Management Utility Administration Guide (http://docs.sun.com/doc/817-5703).
- Obtain ACIs to properly restrict the privileges of the domain administrator.
Take the following steps:
- Add the commcli.mod.ldif file to the LDAP directory. This file is located in the following path:
opt/SUNWcomm/install/patch/patchnumber-rev_number/commcli.mod.ldif
where patchnumber-rev_number is the number and latest revision number of the patch.
To Use commadmin with Schema 2 Compatibility Mode
To enable the User Management Utility (commadmin) to work on an LDAP directory in Schema 2 compatibility mode, you must take additional manual steps, summarized below.
- For detailed instructions in how to carry out these steps, see “User Management Utility” in the “Known Issues and Limitations” section of the Sun Java System Messaging Server Release Notes (http://docs.sun.com/doc/817-6363).
Summary of manual steps:
- Apply several ACIs to the Organization Tree root suffix and DC Tree root suffix.
- Set the com.iplanet.am.domaincomponent property in the AMConfig.properties file to your DC Tree root suffix.
- Enable Identity Server to use compatibility mode by opening the Identity Server Console and checking the Domain Component Tree Enabled check box.
- Add the inetdomain object class to all DC Tree nodes in your directory.
- Restart the Web container.
To Remove Messaging Server Patches
- Stop the Messaging Server with the stop-msg command.
- Disable the watcher daemon by running the configutil command, as follows:
configutil -o local.watcher.enable -v no
- Remove the message store database environment files by using the stored -r command.
If this command fails to remove the files, use the stored -R command. This action forces the removal of the files.
- Enable the watcher daemon as follows:
configutil -o local.watcher.enable -v yes
- Remove the log files under the mboxlist directory. For example:
rm -f /var/opt/SUNWmsgsr/store/mboxlist/log.*
- Remove the Messaging Server 6 2004Q2 patches by running the patchrm patch id command.
- Manually restore the backed-up configuration files as required. Pre-upgrade configuration files are stored under:
msg_svr_base/install/patch/patchnumber/save
patchnumber is the Messaging Server core patch.
- Run the imsimta cnbuild command, as follows:
msg_svr_base/sbin/imsimta cnbuild
- Start Messaging Server with the start-msg command, as follows:
msg_svr_base/sbin/start-msg
To Remove the commadmin Patch
If you need to back out the commadmin patch, apply the commcli.revert.ldif file, located in the following path:
opt/SUNWcomm/install/patch/116585-rev_number/commcli.revert.ldif
where rev_number is the latest revision number of the patch.
Mobile Access Upgrade InformationMobile Access 6.2 shipped as a point product intended to augment Java Enterprise System 2003Q4 installations of Identity Server and Portal Server. Mobile Access functionality is now a standard feature of Java Enterprise System 2004Q2. Mobile enablement of Identity Server and Portal Server is now standard.
Use this section to migrate from Java Enterprise System 2003Q4, with or without Mobile Access 6.2 installed, to an Java Enterprise System 2004Q2 installation. This section contains:
Migration Scenarios and Strategies
Java Enterprise System 2003Q4 only permitted installation of Identity Server and Portal Server on the same machine, so these comments only apply to that scenario. These instructions do not encompass the notion of creating a separated Identity Server and Portal Server installation as a result of the upgrade from Java Enterprise System 2003Q4 to Java Enterprise System 2004Q2. Separated installations of Identity Server and Portal Server must be approached as clean installs.
Note
Prior to beginning the upgrade process, take care to save all your customized files related to their Mobile Access 6.2 installation (if any).
Migrating Customized Environments
This scenario encompasses those installations for which Identity Server and Portal Server from Java Enterprise System 2003Q4 were installed, and to which was applied an installation of the Mobile Access 6.2 point product.
To Upgrade Systems With Mobile Access 6.2
- Run the Mobile Access 6.2 uninstaller (uninstallmap) in the same base directory as Portal Server (/opt by default). Make sure the “Clean relevant Portal Server information from Identity Server” check box is not checked.
- Remove Mobile Access 6.2, by running the uninstaller that was generated when Mobile Access was installed. It is located in the installation directory chosen at install time under /opt. Also, run the following commands to clean the Mobile Access directories and files:
- Upgrade Identity Server (refer to Identity Server Upgrade Information).
- Upgrade Portal Server (refer to Portal Server Upgrade Information).
- Run Java Enterprise System 2004Q2 Mobile Access updater.
To Upgrade Systems Without Mobile Access 6.2
This scenario encompasses those installations for which Identity Server and Portal Server from Java Enterprise System 2003Q4 were installed, and to which the Mobile Access 6.2 point product was not applied. These steps must be performed in order that future versions of Java Enterprise System may upgrade Identity Server and Portal Server correctly.
- Upgrade Identity Server (refer to Identity Server Upgrade Information).
- Upgrade Portal Server (refer to Portal Server Upgrade Information).
- Run Java Enterprise System Mobile Access installer.
Differences Between Mobile Access 6.2 and Mobile Access for Java Enterprise System 2004Q2
There are several differences between Mobile Access 6.2 and Mobile Access for Java Enterprise System 2004Q2 that may require manual intervention to properly migrate certain customizations from the old to the new environment.
Configuration Files
Unlike Java Enterprise System 2003Q4, Java Enterprise System 2004Q2 permits the installation of Identity Server and Portal Server on separate machines. While Mobile Access functionality is largely driven by information stored in an LDAP directory, a few features require configuration via standard flat files.
In Java Enterprise System 2003Q4, this configuration information was stored in:
/etc/opt/SUNWps/MAP/MAPConfig.properties
The ability to separate Identity Server and Portal Server installations in Java Enterprise System 2004Q2 requires that this file be re-factored into the following two files
No new configuration properties related to Mobile Access have been introduced in Java Enterprise System 2004Q2, but for reference, the properties are now distributed between the two configuration files in the following way:
/etc/opt/SUNWma/config.properties
The properties in this file pertain to mobile enablement common to both Identity Server and Portal Server installations. The properties contained in this file are:
/etc/opt/SUNWps/MAConfig.properties
The properties in this file pertain to mobile enablement within Portal Server installations. The properties contained in this file are:
Portal Desktop Types
Mobile Access 6.2 added two additional desktop types: “MAP” and “sampleMAP”. These desktop types were reflected in the following file hierarchies:
/etc/opt/SUNWps/desktop/MAP
/etc/opt/SUNWps/desktop/sampleMAP
Portal Server Mobile Access for Java Enterprise System 2004Q2 has migrated the “MAP” desktop into the “default” desktop and has migrated the “sampleMAP” desktop into the “sampleportal” desktop and has eliminated the “MAP” and “sampleMAP” desktop types.
If you have customized either the “MAP” or “sampleMAP” desktops you will need to migrate those changes into the new Java Enterprise System 2004Q2 “default” and “sampleportal” desktops.
If you have defined their own desktop types you will need to add the custom desktop types back via the Identity Server administration console, following a Java Enterprise System 2003Q4 to Java Enterprise System 2004Q2 upgrade.
Client Data
Mobile Access 6.2 and Mobile Access for Java Enterprise System 2004Q2 implement different directory schemas for the storage of client data.
The upgrade process removes the Java Enterprise System 2003Q4 client data from the directory and replaces it with an updated set of client data. Prior to upgrading to Java Enterprise System 2004Q2, customers who have defined their own client data or have modified existing client data should make note of those additions or modifications and be prepared to re-apply them via the Identity Server console following the Java Enterprise System 2004Q2 upgrade.
Portal Server Upgrade InformationThis section contains procedures for upgrading to Portal Server 2004Q2 from the previous Java Enterprise System version. It contains the following topics:
Accessing Patches for Upgrading Portal Server
Upgrading Portal Server is done using patches. Download the patches listed in the following table from SunSolve. Use the revisions shown or later.
Backing up Web Container Customized Files
Before you upgrade, back up any web container customized files related to Portal Server 6.2, including:
It is recommend that you make a list of your customizations so you can redo them after you upgrade and then verify that they work correctly.
The following directories should be backed up:
Upgrading the Sun Web Container Software
The Java Enterprise System 2004Q2 release requires that the Identity Server instance be run on Sun’s Web Server or Application Server (such as Web Server 6.1 SP2 or Application Server 7 Update 3) on the same system. If you are using an older version, you must upgrade the web container software before you can upgrade to Java Enterprise System 2004Q2 release.
For information about upgrading Sun’s Web Server or Application Server software, refer to the respective web container documentation:
Also, if you saved any customization files under Backing up Web Container Customized Files, you will need to redo the customizations after you upgrade the web container.
Upgrading Identity Server
Portal Server upgrade has a dependency on Identity Server. Prior to upgrading Portal Server, upgrade all systems running Identity Server to the Java Enterprise System 2004Q2 version.
Refer to the Identity Server Upgrade Information for more a more detailed description of the Identity Server upgrade.
To Enable Client Detection
In order to enable client detection, change the Identity Server Client Detection global attributes as follows:
- Access the Identity Server 2004Q2 console using the following URL:
http://host-name.domain-name:port/amconsole
where host-name.domain-name:port is the fully qualified host name and port of the web container you are using.
- When the Identity Server login page appears, log in as amadmin.
- On the console, click the Service Configuration tab.
The console displays the Service Configuration options in the navigation frame.
- In the navigation frame under Service Configuration, click Client Detection.
- Click Save.
Using Third-Party Web Containers
The Java Enterprise System 2004Q2 release only supports WebLogic 8.1 SP2 or WebSphere 5.1 web containers running on a separate system using the Identity Server SDK.
To Use Third-Party Web Containers
- Uninstall Identity Server 6.1 on the WebLogic 6.1 SP4 or WebSphere 4.0.5 node while preserving the data stored in the configuration Directory Server.
- Run the appropriate vendor upgrade script for:
- Run the Identity Server 2004Q2 pre-upgrade script on the WebLogic 8.1 SP2 or WebSphere 5.1 node.
- Install Identity Server, Directory Server, and either Web Server or Application Server on a separate system.
When asked “Is Directory Server provisioned with user data?”, answer yes.
- Install the Identity Server SDK on the WebLogic 8.1 SP2 or WebSphere 5.1 node.
When asked “Is Directory Server provisioned with user data?”, answer yes.
- Upgrade Portal Server on the WebLogic or WebSphere nodes.
Upgrading Portal Server
This section contains procedures for upgrading Portal Server. It also contains upgrade procedures for products associated with Portal Server. Follow the procedures in the following sections as appropriate:
To Upgrade Portal Server
- Log in as root.
- To remove Mobile Access 6.2, run the uninstaller that was generated when Mobile Access was installed. It is located in the installation directory chosen at install time under /opt. Also, run the following commands to clean the Mobile Access directories and files:
- Run the following commands to install the patches:
> patchadd 116736-20
> patchadd 116749-20Patch 116749-20 is needed if Secure Remote Access is installed. Patches 116736-20 and 116749-20 are intended for a Solaris SPARC system (refer to Portal Server 2004Q2 Patches for patch information for a Solaris x86 system).
- Run the following commands to upgrade the Portal Server (with /opt/SUNWps as the default installation directory):
> cd /opt/SUNWps/lib
> ./upgradePS
> ./upgradeSRAThe upgradeSRA script is needed if Secure Remote Access is installed. These scripts will prompt you for passwords.
- Follow these steps to upgrade Mobile Access support:
To Upgrade the Gateway
Run the following command:
> patchadd 116738-19
Patch 116738-19 is intended for a Solaris SPARC system (refer to Portal Server 2004Q2 Patches for patch information for a Solaris x86 system).
To Upgrade the Rewriter Proxy
Run the following command:
> patchadd 116742-19
Patch 116742-19 is intended for a Solaris SPARC system (refer to Portal Server 2004Q2 Patches for patch information for a Solaris x86 system).
To Upgrade the Netlet Proxy
Run the following command:
> patchadd 116740-19
Patch 116740-19 is intended for a Solaris SPARC system (refer to Portal Server 2004Q2 Patches for patch information for a Solaris x86 system).
To Upgrade the Localization
Run the following command:
> patchadd 117012-05
Patch 117012-05 is optional depending on localization settings for a Solaris SPARC system (refer to Portal Server 2004Q2 Patches for patch information for a Solaris x86 system).
Verifying the Upgrade
If you customized your Identity Server 6.1 installation used with your Sun One Portal Server 6.2 software, you must manually redo the customizations in your new Identity Server 2004Q2 installation used with your Portal Server 6 2004Q2 software.
Here are several ways to verify that the upgrade was successful:
where host-name.domain-name:port is the fully qualified host name and port of the web container you are using.
When the Identity Server login page appears, log in as amadmin. Click the Service Configuration tab. If the new Portal Server 6 2004Q2 services such as Remote Portlets (WSRP) are available, the upgrade of Portal Server on the specific web container should be successful.
Sun Cluster Upgrade InformationThis section provides an upgrade overview of Sun Cluster 3.1 4/04 from the version that shipped with Java Enterprise System 2003Q4. This section contains:
Note
For complete upgrade instructions, see the Chapter 5 “Upgrading Sun Cluster Software,” of the Sun Cluster Software Installation Guide for Solaris OS at http://docs.sun.com/doc/817-4229.
Upgrade Requirements and Restrictions
Observe the following requirements and restrictions when you upgrade to Sun Cluster 3.1 4/04 software:
You must upgrade all software to a version that is supported by Sun Cluster 3.1 4/04 software. For example, if a data service is supported on Sun Cluster 3.0 software but is not supported on Sun Cluster 3.1 4/04 software, you must upgrade that data service to the version of that data service that is supported on Sun Cluster 3.1 4/04 software. If the related application of that data service is not supported on Sun Cluster 3.1 4/04 software, you must also upgrade that application to a supported release.
The scinstall upgrade utility only upgrades those data services that are provided with Sun Cluster 3.1 4/04 software. You must manually upgrade any custom or third-party data services.
Sun Cluster 3.1 4/04 software supports:
Sun Cluster 3.1 4/04 software does not support:
- Any downgrade of Sun Cluster software.
- Upgrade between architectures.
- The Live Upgrade method to upgrade Solaris software in a Sun Cluster configuration.
Note
Sun Cluster 3.1 4/04 does not require the installation of the shared component patch bundle described in Upgrading Shared Components.
Choosing a Sun Cluster Upgrade Method
Choose one of the following methods to upgrade your cluster software.
Nonrolling Upgrade
In a nonrolling upgrade, you shut down the cluster before you upgrade the cluster nodes. You return the cluster to production after all nodes are fully upgraded. You must use the nonrolling-upgrade method if one or more of the following conditions apply:
Rolling Upgrade
In a rolling upgrade, you upgrade one node of the cluster at a time. The cluster remains in production with services running on the other nodes. You can use the rolling-upgrade method only if all of the following conditions apply:
If your cluster configuration meets the requirements to perform a rolling upgrade, you can still choose to perform a nonrolling upgrade instead.
For overview information about planning your Sun Cluster configuration, see Chapter 1, “Planning the Sun Cluster Configuration” of the Sun Cluster Software Installation Guide for Solaris OS at http://docs.sun.com/doc/817-4229.
Web Server Upgrade InformationThis section contains procedures for upgrading to Web Server SP2 from the previous Java Enterprise System 2003Q4 version. It contains the following topics:
For further Web Server information, refer to the following documentation:
To Upgrade Web Server
- Login as superuser (root).
- Stop all running instances of Web Server and the Administration Server by entering:
web_svr_base/https-instancename/stop
web_svr_base/https-admserv/stopDefault location for web_svr_base is /opt/SUNWwbsvr.
- Upgrade all shared components needed for the Java Enterprise System 2004Q2. (See Upgrading Shared Components.)
- Apply the following patches using patchadd(1M).
Table 8-13 Web Server SP2 Patches
Functional Area to Patch
Patch ID Solaris Sparc
Patch ID Solaris x86
Web Server core (SUNWwbsvr)
116648-05
116649-05
Web Server language packs
117514-02
117515-02
- Restart Web Server.
To Remove Web Server Patches
If you decide to remove the Application Server patches, perform the following steps:
- Stop all running instances of the Web Server SP2.
- Become root:
su root
When prompted, type your root password.
- Remove the appropriate Web Server SP2 patches added in To Upgrade Web Server using patchrm(1M).
- Restart the Web Server SP2 instances.
Java Enterprise System 2004Q2 Compatibility InformationA new release of the Sun Java™ Enterprise System software strives for compatibility with the previous release. However, there are always some differences in the compatibility level of the two releases. This section discusses the issues that might impact your deployment when you upgrade from Java Enterprise System 2003Q4 to Java Enterprise System 2004Q2.
This section addresses the following topics:
For information and instructions on upgrading, refer to the “Upgrading from Java Enterprise System 2003Q4” chapter in the Java Enterprise System Installation Guide (http://docs.sun.com/doc/817-5760).
For detailed platform and third party requirements, refer to the Java Enterprise System Release Notes (http://docs.sun.com/doc/817-5503) and the Java Enterprise System Installation Guide (http://docs.sun.com/doc/817-5760).
Data Preservation
Data is defined as the information you store in Java Enterprise System. For example, a user entry in Directory Server is regarded as data. Preservation is the act of retaining the stored data from one release to the next. In other words, the data will be the same after you upgrade as it was before you upgraded.
When you upgrade to Java Enterprise System 2004Q2, the data from Java Enterprise System 2003Q4 is preserved, with the following exceptions:
- Calendar Server and Messaging Server. The schema has been changed to take advantage of Identity Server. If you are planning to migrate from LDAP Schema 1 to LDAP Schema 2 (for example, to implement the new Communications Express interface), any custom provisioning tools you are using will be affected. For information, refer to the Sun Java System Communications Express Schema Migration Guide (http://docs.sun.com/doc/817-5701).
- Directory Server. The schema has been updated to incorporate minor changes. These changes are automatically upgraded.
- Identity Server. The schema has been changed for the following: the Policy Service PluginConfig data has been changed to incorporate the new policy plugins, AuthenticatedUsers, WebServiceClients and LEAuthLevelCondition. In addition, the data of new services and attributes are also added.
- Portal Server. Desktop sample JavaServer Pages (JSP) files have been updated. Users should not edit these JSP files. However, if the JSP files have been edited, the changes will need to be incorporate into any updated JSP files. User-modified files are saved in the patch backout database, or in the global backup that users are requested to make before upgrading Portal Server.
For instructions on upgrading component products and protecting your data, refer to the “Upgrading from Java Enterprise System 2003Q4” chapter in the Java Enterprise System Installation Guide (http://docs.sun.com/doc/817-5760).
Note
If you use the uninstaller, much configuration data is lost. For details, refer to Appendix G in the Java Enterprise System Installation Guide (http://docs.sun.com/doc/817-5760).
Configuration Preservation
Configuration is defined as the options and preferences that you have configured for Java Enterprise System and its component products. Configuration settings are typically stored in configuration files and are accessible from an Administration Console.
Note
If you use the uninstaller, much configuration data is lost. For details, refer to Appendix G in the Java Enterprise System Installation Guide (http://docs.sun.com/doc/817-5760).
When you upgrade to Java Enterprise System 2004Q2, the configuration from Java Enterprise System 2003Q4 is preserved, with the following exceptions:
- Directory Server and Directory Proxy Server. Minor changes are taken into account by auto upgrade of the server's configuration during installation.
- Identity Server. Configuration is not preserved. The AMConfig.properties file is replaced by a new version of this file. If you want to incorporate configuration changes from the old file, it is saved in the backup directory as AMConfig.properties.bak
- Messaging Server. There are some highly recommended configuration changes which are highlighted during the upgrade process.
API Compatibility
An Application Program Interface (API) is a publicly documented interface that developers use to extend functionality when building applications. In some situations, API changes are required so that the API will conform to publicly-available specifications and standards, or to correct API behavior.
Applications that have relied on component product APIs from the Java Enterprise System 2003Q4 release will run unchanged and without recompilation with Java Enterprise System 2004Q2 component product APIs, with the following exceptions:
For information on administered object attributes, see Chapter 4 and Appendix A of the Sun Java System Message Queue Java Client Developer’s Guide (http://docs.sun.com/doc/817-6026).
Protocol Compatibility
Java Enterprise System components frequently make use of functional protocols. For example, Messaging Serverr supports the IMAP protocol which is widely used for communications with email clients.
When you upgrade to Java Enterprise System 2004Q2, the Java Enterprise System 2003Q4 protocols are maintained, with the following exceptions:
Command-Line Interfaces
Publicly documented command-line interfaces are frequently used for administrative purposes from a shell or prompt.
When you upgrade to Java Enterprise System 2004Q2, the command-line interfaces from Java Enterprise System 2003Q4 are preserved, with the following exceptions:
- Identity Server. The amserver-create command is no longer available to create multiple Identity Server instances. You must use the underlying web container functionality to create multiple instances. For more information, refer to the Sun Java System Identity Server Administration Guide (http://docs.sun.com/doc/817-5709)
- Message Queue. Scripts that start Java clients and which set administered object attribute values using command-line options are compatible with Java Enterprise System 2004Q2. However, if they are to use the new administered object attributes, they will need to be rewritten.
For information on administered object attributes, see Chapter 4 and Appendix A of the Sun Java System Message Queue Java Client Developer’s Guide (http://docs.sun.com/doc/817-6026).
- Portal Server and Portal Server Secure Remote Access. The only situation that applies is when an existing co-located Portal Server-Identity Server deployment is reinstalled with Portal Server and Identity Server no longer co-located on the same machine. In this case, a few additional arguments are required by the deploy and multi-instance command-line interfaces. If these arguments are not supplied, the command-line interfaces will interactively prompt for them.
For more information, refer to the Sun Java System Portal Server Administration Guide (http://docs.sun.com/doc/817-5324).
Log File Compatibility
Component products use log files to report various situations, such as status or errors. Log file compatibility refers to the data structures, messages and locations that are provided from one release to the next.
When you upgrade to Java Enterprise System 2004Q2, the log files from Java Enterprise System 2003Q4 are preserved, with the following exceptions:
Architectural Considerations
Some types of architectural changes might require you to consider restructuring your deployment.
When you upgrade to Java Enterprise System 2004Q2, the following architectural changes to release 2003Q4 might impact your deployment:
- Identity Server and Portal Server. In the 2004Q2 release, Portal Server and Identity Server can be installed on different machines.
- For Application Server and Web Server—If you install Portal Server and Identity Server on different machines, the Identity Server SDK needs to be installed on the same machine that Portal Server is installed on.
- For IBM WebSphere or BEA WebLogic—Portal Server and Identity Server must be installed on different machines.
Deprecated and End-of-Feature Items
Deprecating or ending a feature refers to the process whereby an existing feature is removed from a product. To give you time to make adjustments for the change, the following events occur:
Features Removed in This Release
The following previously deprecated or end-of-feature items have been removed in this release:
- Identity Server. The amserver -create command is removed. Creating multiple Identity Server instances is now done using the underlying web container. For more information, refer to the Sun Java System Identity Server Administration Guide (http://docs.sun.com/doc/817-5709).
Previously Deprecated or Ended Features
The following previously deprecated or end-of-feature items are scheduled for removal in a future release:
- Message Queue. Message Queue client support for all releases of J2SE 1.3 will be dropped. J2SE 1.4 will continue to be supported. Sever broker properties have been deprecated. For details, refer to the Compatibility Issues section in the Sun Java System Message Queue Release Notes (http://docs.sun.com/doc/817-6022).
- Messaging Server. For information on the deprecated features, refer to the Deprecated Features section in the Sun Java System Messaging Server Release Notes (http://docs.sun.com/doc/817-6363).
Refer to the release notes for the various component products for additional information.
New Deprecation Announcements
- Application Server PE. Application Server PE will not be included in future versions of Java Enterprise System. Equivalent functionality is available with Application Server SE.
- Message Queue. Message Queue client support for all releases of J2SE 1.3 will be dropped. J2SE 1.4 will continue to be supported. Sever broker properties have been deprecated. For details, refer to the Compatibility Issues section in the Sun Java System Message Queue Release Notes (http://docs.sun.com/doc/817-6022).
The following features will be removed in the first release of calendar year 2006:
Refer to the Deprecated Features section in the Sun Java System Messaging Server Release Notes (http://docs.sun.com/doc/817-6363) for additional information.
Performance
Java Enterprise System strives to perform at or above the same level as the previous release. Under load, this release performs above or within approximately 95% of the previous release. We test extensively across many different scenarios at both the Java Enterprise System level and individual component level. However, your precise deployment and the applications that you have built to work with Java Enterprise System might have different results.