| Skip Navigation Links | |
| Exit Print View | |

|
Sun Fire X4640 Server Installation Guide Sun Fire X4640 Server Documentation Library |
| Skip Navigation Links | |
| Exit Print View | |

|
Sun Fire X4640 Server Installation Guide Sun Fire X4640 Server Documentation Library |
About This Documentation (PDF and HTML)
Sun Fire X4640 Server Front and Back Panel Features and Components
Sun Fire X4640 Server Front Panel Features and Components
Sun Fire X4640 Server Back Panel Features and Components
Installing the Server Hardware
Contents of the Box and Optional Documentation Media Kit
How to Remove Components to Reduce Weight
How to Install the Express Slide Rails Onto the Server and the Rack
How to Insert the Server Into the Rack
How to Verify Slide-Rail Operation
Installing the Cable Management Arm (CMA)
How to Verify Cable Management Arm (CMA) Operation
How to Remove the Cable Management Arm (CMA)
Removing the Server From the Rack
How to Remove the Server From the Rack
How to Apply Standby Power for Initial Service Processor Configuration
How to Power On All Server Components
Getting Service for Your Server
How to Find the Server's Serial Number
Sun Fire X4640 Server Specifications
Physical Specifications For the Sun Fire X4640 Server
Power Specifications For the Sun Fire X4640 Server
Communicating With the ILOM and the System Console
About ILOM SP IP Addresses and the ILOM Interfaces
Connecting to the System Console
Setting Up Your Operating System
Configuring the Preinstalled Solaris OS
(Optional) How to Redirect the Console Output to the Video Port
How to Connect to the Server Using a Serial Capture Program
Before You Begin
Note - Do not run cables from another server through the CMA. Use one CMA per server.
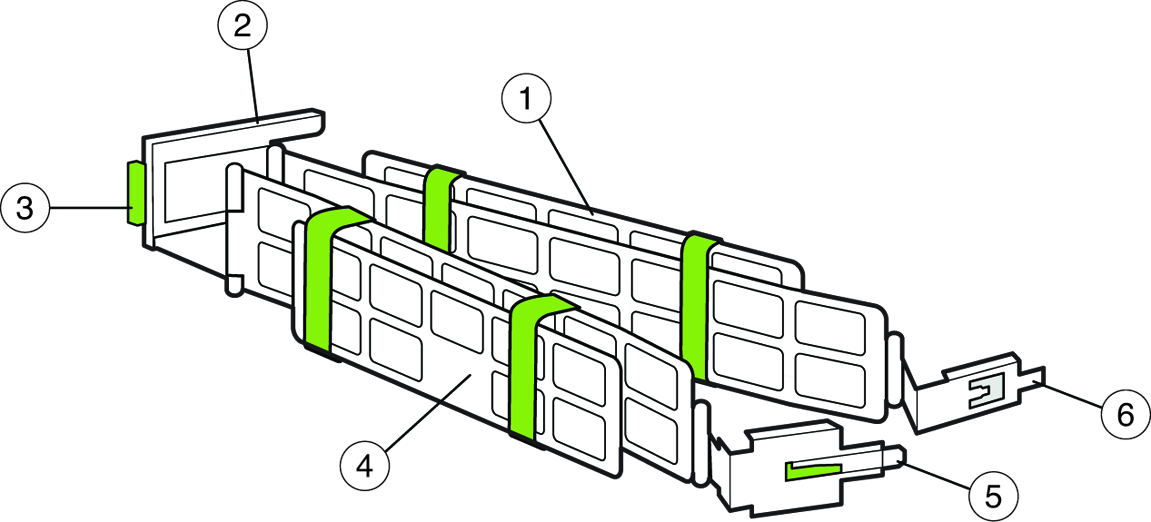
The CMA comes with the 4U Express Rail Rackmounting Kit card that contains illustrations that you should refer to during this procedure.
This procedure assumes that you have installed the server into the rack. See How to Insert the Server Into the Rack.
Note - References to “left” or “right” in this procedure assume that you are facing the rear of the equipment rack.

| ||||||||||||||
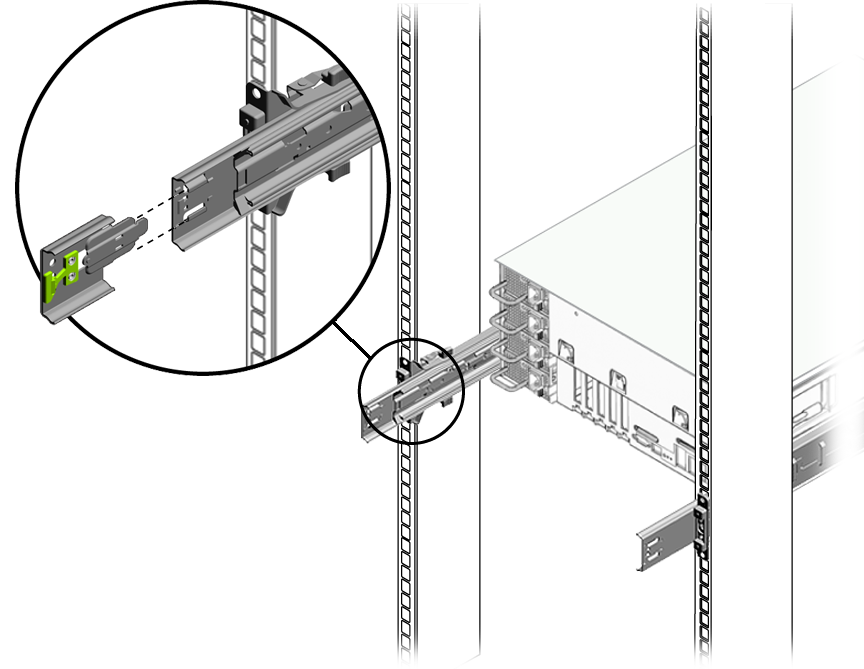
Push on the extension's metal clip (labeled PUSH) as you slide the extension into the left slide rail.

Note - Insert the inner latch into the mounting bracket part of the slide rail, which extends about 5 inches (approximately 12.5 centimeters) from the server itself.
Next Steps