Running csconfigurator.sh
You can run the configuration program from a graphical user interface (GUI), or from the command line.
If you run the program remotely, you must set your DISPLAY environment variable properly and allow X-Windows connections from the server to display on your computer. For example, to use the xhost utility, execute the following command on your computer:
xhost +
This section contains the following topics:
 To Run the Configuration Program from the Command Line
-
Login as or become superuser (root).
-
Change to the /opt/SUNWics5/cal/sbin directory.
-
Run the script using the options chosen from the following table:
For example, to run the configuration script in command-line mode without saving the inputs to a state file.
./csconfigurator.sh -nodisplay
The command-line version asks for the same information and in the same order as the GUI. Default values are indicated in square brackets, []. To accept a default value, press Enter on your keyboard.
Note –For the text of the information contained in the various questions presented by the script, see the text in the GUI panels shown in the sections that follow.
 To Run the Configuration Program from the GUI
-
Login as or become superuser (root).
-
Change to the /opt/SUNWics5/cal/sbin directory.
-
Issue this command:
./csconfigurator.sh
The configuration program displays the following series of panels:
 Caution –
 The configuration program only configures a single domain. If you plan to use multiple domains (virtual domains, hosted domains), you need to add the domains using the Delegated Administrator command-line utility.
Welcome Panel
Figure 3–1 Calendar Server Configuration Program Welcome Panel
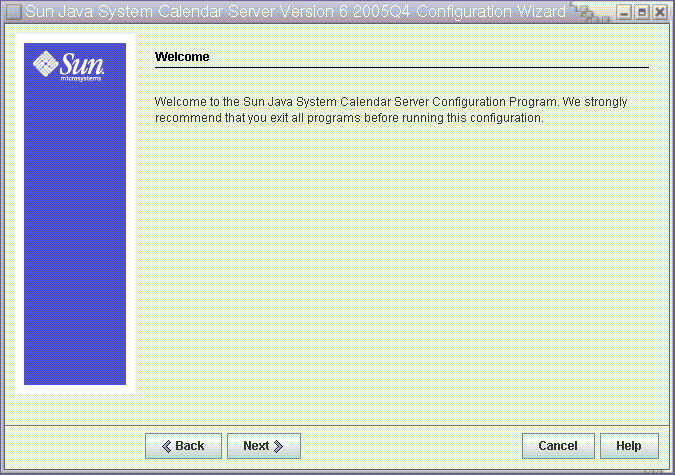
Click Next to continue or Cancel to exit.
Administration, User Preferences and Authentication Panel
Figure 3–2 Administration, User Preferences and Authentication Configuration Panel
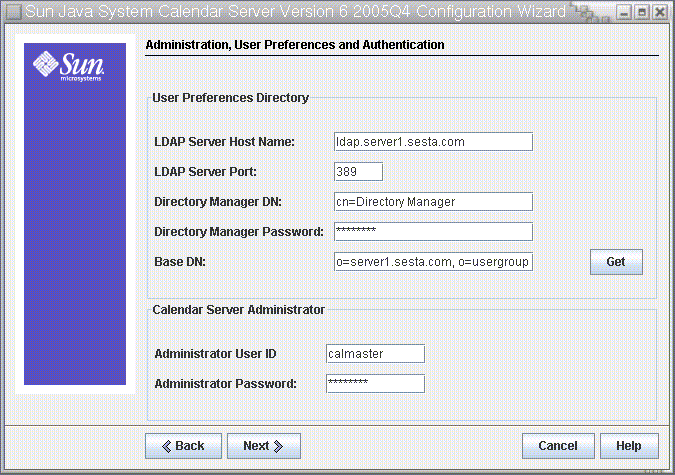
User Preferences Directory Options
- LDAP Server Host Name
-
Host name of the LDAP directory server you are using for user authentication. Default: current host
- LDAP Server Port
-
Port number that the LDAP server listens on. Default: 389
- Directory Manager DN
-
User name that can make changes in the directory server schema. Default: cn=Directory Manager
- Directory Manager Password
-
Password of the Directory Manager. Default: None
- Base DN
-
Entry in the LDAP directory used as the starting point from which searches will occur. Default: o=currentdomain.
This can be modified to fit your deployment needs. To retrieve the root suffix created by comm_dssetup.pl, click Get. The baseDN obtained this way is only a suggestion created from the current settings. Whatever you use for the baseDN, it must be consistent with the LDAP content.
Note –Before you click Get, you must enter the Directory Manager DN and password to authenticate to the directory server.
Calendar Server Administrator Options
- Administrator User ID
-
User ID of the Calendar Server Administrator; must be a user in the above LDAP directory server. Default: calmaster
- Administrator Password
-
Password of the Calendar Server Administrator. Default: None
Click Next to continue, Back to return to the previous panel, or Cancel to exit.
Email and Email Alarms Panel
Figure 3–3 Email and Email Alarms Configuration Panel
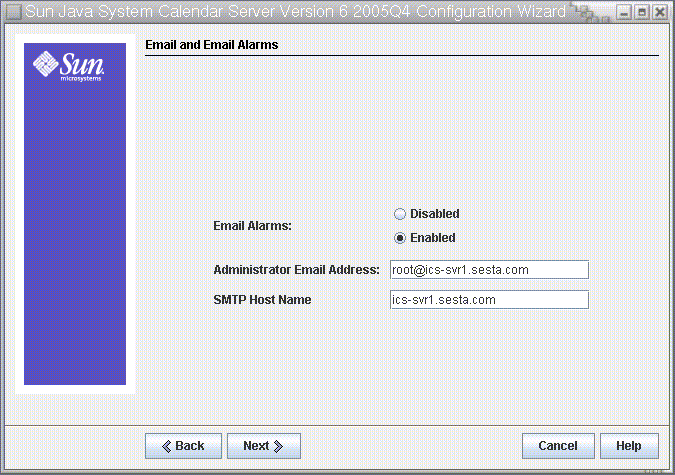
- Email Alarms
-
Specifies whether Calendar Server should send an email alarm message to a Calendar Server administrator in case a server problem occurs. Default: Enabled
- Administrator Email Address
-
Email address of the Calendar Server Administrator who will receive the email alarm messages. Default: None
- SMTP Host Name
-
Host name of the SMTP server where email alarm messages should be sent. Default: current host.
Click Next to continue, Back to return to the previous panel, or Cancel to exit.
Runtime Configuration Panel
Figure 3–4 Runtime Configuration Panel
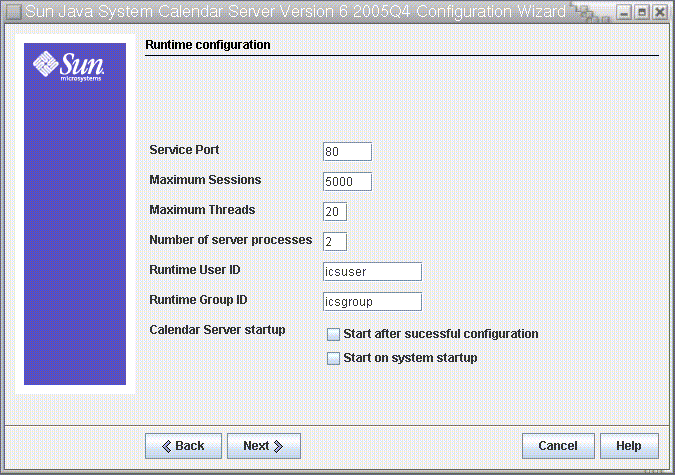
- Service Port
-
Port number that Calendar Server listens on to provide Web (HTTP) access to users. Default: 80.
- Maximum Sessions
-
Maximum number of concurrent Calendar Server sessions. Default: 5000
- Maximum Threads
-
Maximum number of concurrent Calendar Server threads. Default: 20
- Number of Server Processes
-
Maximum number of Calendar Server processes to run on the server. Default: Number of CPU's on the server where you are installing Calendar Server.
- Runtime User ID
-
UNIX user name under which Calendar Server will run. This name should not be root. If the account does not exist, the configuration program will create it. Default: icsuser
- Runtime Group ID
-
UNIX group under which Calendar Server will run. If the group does not exist, the configuration program will create it. Default: icsgroup
- Calendar Server Startup Options
-
Select one or both options by clicking in the check box.
-
Start after successful installation
Specifies whether to start Calendar Server automatically after a successful installation. Default: checked
-
Start on system startup
Specifies whether to start Calendar Server automatically after a system startup. Default: checked
-
Click Next to continue, Back to return to the previous panel, or Cancel to exit.
Select Directories Panel
Accept the default directories on this panel. While you are allowed to choose the store configuration and data files directories, it is not advised.
Figure 3–5 Select Directories Configuration Panel
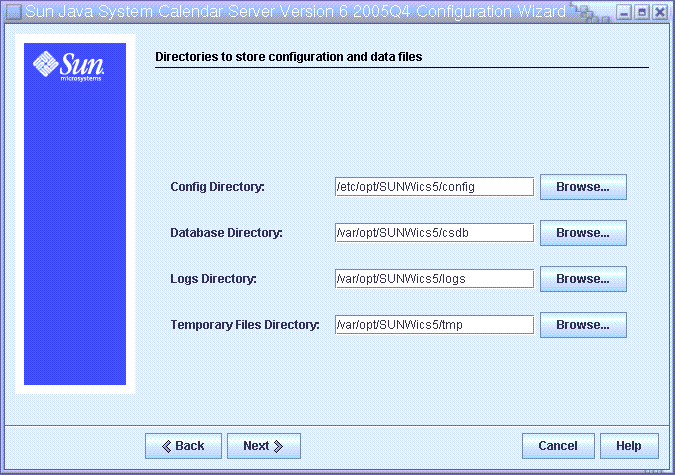
- Config Directory
-
Directory where the configuration file (ics.conf) is stored.
- Database Directory
-
Directory where Calendar Server should create and store the calendar database files. Default: /var/opt/SUNWics5/csdb
- Logs Directory
-
Directory where Calendar Server writes log files. Default: /var/opt/SUNWics5/logs
- Temporary Files Directory
-
Directory where the Calendar Server writes temporary files. Default: /var/opt/SUNWics5/tmp
Then, Click Next to continue, Back to return to the previous panel, or Cancel to exit.
Archive and Hot Backup Configuration Panel
This panel allows you to select both automatic backup types, or either one of the two, or none. Select or deselect the boxes appropriately. Using both archive backups and hot backups is strongly recommended.
Tip –
Prevent the catastrophic loss of all your database copies due to an equipment failure. Keep your automatic backup copies on a disk or disk system other than the one where your live databases reside.
For information on automatic backups, see Chapter 10, Configuring Automatic Backups (csstored).
Figure 3–6 Archive and hot backup Configuration Panel
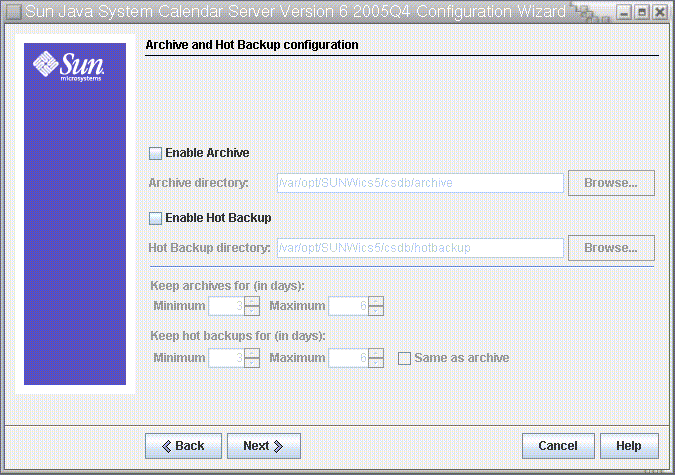
- Enable Archive
-
When this box is checked (default), csstored will take a snapshot of your calendar databases every 24 hours. At the end of the day, it stores the transaction log files for that day with the snapshot in the archive backup directory.
- Archive Directory
-
Choose the backup directory by clicking Browse, or accept the default.
- Enable Hot Backup
-
When this box is checked (default), csstored takes a snapshot of your calendar databases every 24 hours, but applies the transaction logs to the snapshot at a set interval (default is two minutes), thus ensuring a nearly complete duplicate of your live database.
- Hot Backup Directory
-
Choose the backup directory by clicking Browse, or accept the default.
- Keep Archives for (in days)
-
Click the up or down arrows in the Minimum and Maximum fields to select range of days of archival backups to keep in the backup directory.
- Keep Hot Backups for (in days)
-
Click the up or down arrows in the Minimum and Maximum fields to select the range of days of hot backups to keep in the directory.
The number of copies actually stored at any one time depends on the size of the files and the size of the directory. When either the size limits, set in the ics.conf file, or maximum number of copies exceeds the limit, the oldest copies are purged down to the minimum number specified on this configuration panel.
Click Next to continue, Back to return to the previous panel, or Cancel to quit the configuration program.
Ready to Configure Panel
Up to now the panels have been gathering data needed for the configuration and performing some validity checking. You can go back and redo the configuration information at this point, or start the configuration.
Figure 3–7 Ready to Configure Panel
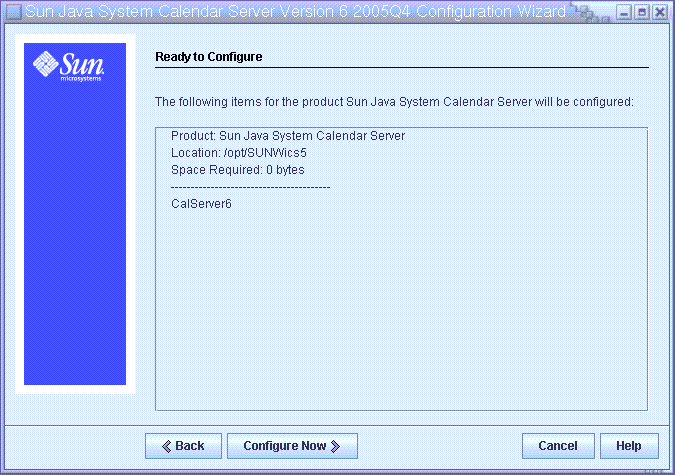
Click Configure Now to configure Calendar Server, Back to return to the previous panel, or Cancel to exit.
Configuration Summary Panel
Figure 3–8 Configuration Summary Panel
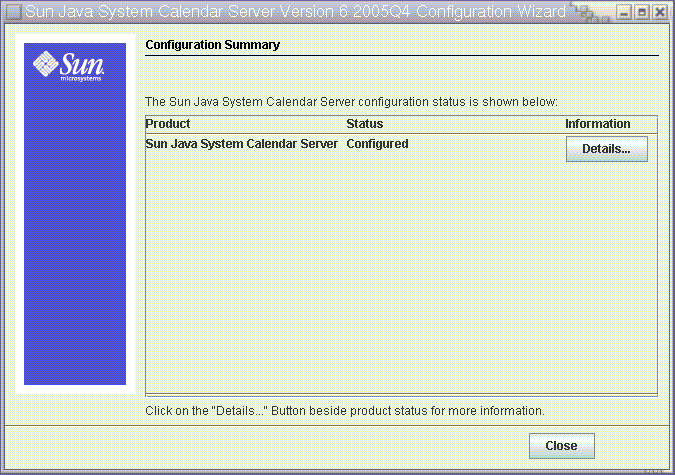
Click Details to view the details of the configuration log or Close to exit the configuration program.
- © 2010, Oracle Corporation and/or its affiliates
