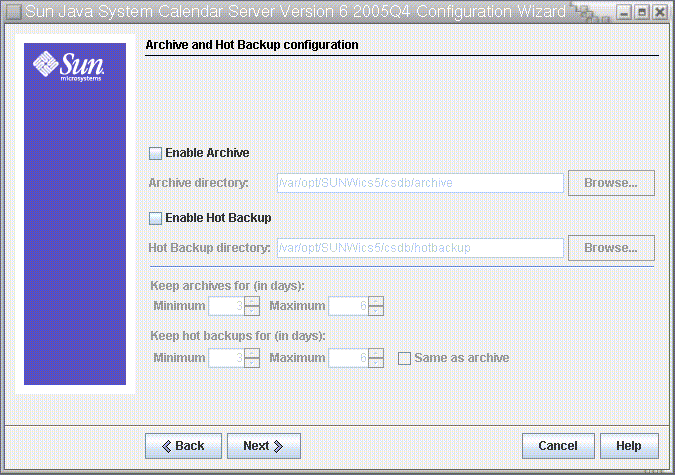
Archive and Hot Backup Configuration Panel
This panel allows you to select both automatic backup types, or either one of the two, or none. Select or deselect the boxes appropriately. Using both archive backups and hot backups is strongly recommended.
Tip –
Prevent the catastrophic loss of all your database copies due to an equipment failure. Keep your automatic backup copies on a disk or disk system other than the one where your live databases reside.
For information on automatic backups, see Chapter 10, Configuring Automatic Backups (csstored).
Figure 3–6 Archive and hot backup Configuration Panel

- Enable Archive
-
When this box is checked (default), csstored will take a snapshot of your calendar databases every 24 hours. At the end of the day, it stores the transaction log files for that day with the snapshot in the archive backup directory.
- Archive Directory
-
Choose the backup directory by clicking Browse, or accept the default.
- Enable Hot Backup
-
When this box is checked (default), csstored takes a snapshot of your calendar databases every 24 hours, but applies the transaction logs to the snapshot at a set interval (default is two minutes), thus ensuring a nearly complete duplicate of your live database.
- Hot Backup Directory
-
Choose the backup directory by clicking Browse, or accept the default.
- Keep Archives for (in days)
-
Click the up or down arrows in the Minimum and Maximum fields to select range of days of archival backups to keep in the backup directory.
- Keep Hot Backups for (in days)
-
Click the up or down arrows in the Minimum and Maximum fields to select the range of days of hot backups to keep in the directory.
The number of copies actually stored at any one time depends on the size of the files and the size of the directory. When either the size limits, set in the ics.conf file, or maximum number of copies exceeds the limit, the oldest copies are purged down to the minimum number specified on this configuration panel.
Click Next to continue, Back to return to the previous panel, or Cancel to quit the configuration program.
- © 2010, Oracle Corporation and/or its affiliates
