Setting Up and Configuring the Fedlet
This section describes the high-level tasks to setup the Fedlet at the Service Provider. For more detailed instructions, see the README file contained in the Fedlet.zip and Fedlet-unconfigured.zip files.
Technical Requirements
-
Any J2EE-complaint server on which to deploy the Fedlet
-
JDK 1.5 or higher
Obtaining and Deploying the OpenSSO Fedlet Bundle
You can choose one of two methods for obtaining and deploying the Fedlet Bundle.
If OpenSSO is deployed as an Identity Provider, then use the OpenSSO Enterprise console to create the Fedlet bundle. In this scenario, using the console is the faster and easier method because the Identity Provider follows the same workflow to integrate with any Service Provider.
If multiple Identity Providers exist in the Service Provider circle of trust, and not all Identity Providers use OpenSSO Enterprise, then use the Fedlet Demo. The Fedlet Demo contains a sample JSP is packaged in the fedlet.war. The fedlet.war file emulates the Service Provider web application. Using the fedlet.war file makes it easy to demonstrate a simple JSP receiving the SAMLv2 POST from the Identity Provider.
To Use the OpenSSO Enterprise Console to Create the Fedlet bundle
In the OpenSSO Enterprise console, navigate through a taskflow and provide the following:
-
Name of the Service Provider
-
Destination URL of the Service Provider that will include the Fedlet
-
The circle of trust in which to place the Service Provider
At the end of the taskflow, a Fedlet.zip bundle is automatically created. The bundle consists of the fedlet.war file and a README file that contains instructions for deploying the Fedlet. Follow the instructions to deploy the Fedlet.
To Use the Pre-Built Fedlet
As the Service Provider, download the opensso_enterprise_80.zip file. Then follow the instructions in the README file contained in the Fedlet-unconfigured.zip file to deploy and configure the Fedlet. The Fedlet-unconfigured.zip file is bundled into the opensso_enterprise_80.zip.
 To Set Up the Workflow-based Fedlet
-
Install and Configure OpenSSO Enterprise on the Identity Provider.
-
On the Identity Provider, navigate through the Workflow on the OpenSSO Enterprise console to create the Fedlet.zip file.
The Fedlet.zip file contains:
-
README.txt: A text file that contains instructions for deploying the fedlet.war and for integrating the Fedlet into an existing application.
-
fedlet.war: The Fedlet ready-to-deploy WAR file.
-
-
Send the Fedlet.zip file to the Service Provider.
-
Deploy and configure the fedlet.war file, on the Service Provider.
-
Verify that the Fedlet was successfully installed.
-
Access the index.jsp file on the Fedlet deployment.
-
Click the link to create the Fedlet configuration automatically.
-
Follow the two links in the page to test the following use-cases :
-
(Fedlet) Service Provider-initiated single sign-on
-
Identity Provider-initiated single sign-on through the hyperlinks present on the page.
-
 To Use the Pre-Built Fedlet
-
Download the Fedlet-unconfigured.zip.
Fedlet-unconfigured.zip is contained in the opensso_enterprise_80.zip distribution. The Fedlet-unconfigured.zip file contains:
-
fedlet.war
The Fedlet ready-to-deploy WAR file
-
conf
A directory containing the Fedlet metadata template, circle of trust template, and various configuration files
-
README.txt
A text file that provides instructions for using the \conf files to configure the Fedlet
-
-
Extract the Fedlet-unconfigured.zip file.
Follow the instructions in the README file to set local configuration files for the Fedlet.
-
Send tag-swapped Service Provider metadata files to the Identity Provider, and request the Identity Provider metadata files from the Identity Provider.
-
Verify that the Fedlet is successfully installed.
Access the index.jsp file on the Fedlet deployment, and test the following use-cases : Fedlet (SP)-initiated SSO IDP-initiated SSO through the hyperlinks present on the page.
-
(Fedlet) Service Provider-initiated single sign-on
-
Identity Provider-initiated single sign-on through the hyperlinks present on the page
-
 To Use the Fedlet with Multiple Identity Providers
-
The Service Provider installs and configures the Fedlet and sets up the Fedlet with one Identity Provider.
Install and configure the Fedlet using instructions in either To Set Up the Workflow-based Fedlet or To Use the Pre-Built Fedlet.
-
To use a second Identity Provider with the Fedlet, the Service Provider requests the Identity Provider metadata files from the second Identity Provider.
-
Update the Fedlet configuration directory with the Identity Provider metadata files, and update the Fedlet's configuration with the Identity Provider entity ID.
-
The second Identity Provider registers the Fedlet in its configuration.
-
To add more Identity Providers to the Fedlet, repeat steps 2 through 4.
-
Access the index.jsp file on the Fedlet deployment where you are presented a list of registered multiple Identity Providers. Choose an Identity Provider.
-
For the selected Identity Provider, you are presented the option to test the following use cases through the hyperlinks on the page:
-
Fedlet Service Provider-initiated single sign-on
-
Identity Provider-initiated single sign-on
-
-
The README file included in the Fedlet.zipand the Fedlet-unconfigured.zip contains instructions for setting up the Fedlet with multiple Identity Providers.
 To Use the Fedlet with an Identity Discovery
Service
-
The Service Provider configures the Fedlet with multiple Identity Providers.
See “Using the Fedlet with Multiple Identity Providers.”
-
Deploy and configure an Identity Provider Discovery Service.
-
Set the SAML2 Reader and Writer Service URLs on each of the configured Identity Providers.
-
Set the SAML2 Reader and Writer Service URLs in the Fedlet configuration.
-
Access the index.jsp file on the Fedlet deployment where you will be presented with a list of the registered multiple Identity Providers. Choose your preferred Identity Provider.
-
You will be directed to your selected Identity Provider for login.
A cookie _saml_idp that identifies your preferred Identity Provider will be written by your browser.
-
From this point on, you can elect to use the Identity Provider Discovery service after you access the index.jsp on the Fedlet deployment.
-
The Identity provider Discovery Service will remember your preferred Identity Provider and will automatically redirect you to that Identity Provider for login.
-
The README file included in the Fedlet.zip and the Fedlet-unconfigured.zip contains instructions on how to set up the Fedlet with an Identity Provider Discovery Service.
Embedding the Fedlet into Service Provider Applications
The README file contained in the Fedlet.zip and the Fedlet-unconfigured.zip files provides instructions for integrating the Fedlet demo into the Service Provider application. You need to embed all the properties/jars/JSPs/images and so forth in the demo fedlet.war into your existing application WAR. Merge the fedlet.war with your existing application WAR. The Fedlet provides a default Assertion Consumer endpoint named fedletSampleApp.jsp to process the SAMLv2 Assertion from the Identity Provider.
Use one of the following approaches to embed the Fedlet into the Service Provider applications:
-
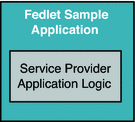
Use fedletSampleApp.jsp as the endpoint on Fedlet side, and modify fedletSampleApp.jsp to add the Service Provider application logic.

-
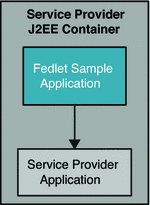
Use fedletSampleApp.jsp as the endpoint on Fedlet side, and modify fedletSampleApp.jsp to forward the request to the Service Provider application URL.

-
Create a new endpoint, for example servlet.jsp URL, on the Fedlet side to replace the fedletSampleApp.jsp or to embed the Fedlet into the Service Provider application. You can copy some of the code in the fedletSampleApp.jsp to the new endpoint code. Details of the actual code you can transfer are described in the README file.

- © 2010, Oracle Corporation and/or its affiliates
