 To Download the Updates Using Update Tool
-
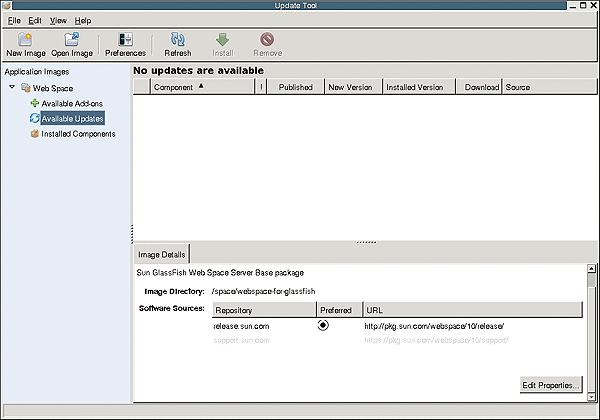
Start Update Tool by changing to the webspace-dir/bin directory and typing updatetool.
-
Expand Web Space under the Application Images pane, and click Available Updates.
Figure 2–1 Update Tool

-
Click the Edit Properties button.
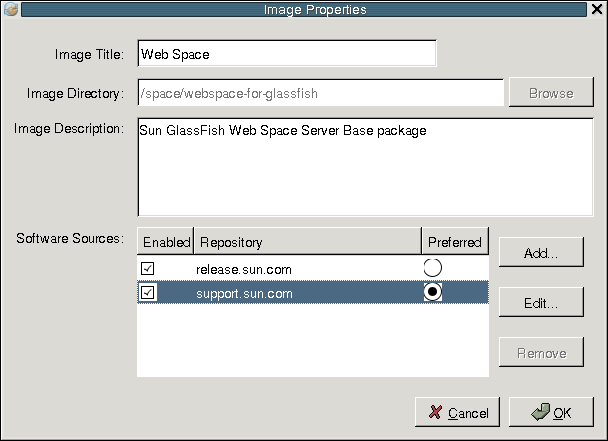
The Image Properties window is displayed.
-
Select the option support.sun.com repository, and choose Preferred.
The Repository Properties window appears.
-
Provide the appropriate repository URL provided by Sun support, and click OK.
The support.sun.com repository is highlighted.
Figure 2–2 Selecting the support.sun.com repository

-
Click OK again to enable the support.sun.com repository.
The Update Tool main window is displayed.
-
Expand Web Space under the Application Images pane, and select Available Add-ons.
-
Select the Web Space for GlassFish V2 component, and click install.
-
Restart the GlassFish server.
cd <glassfish_dir>/bin
./asadmin stop-domain
./asadmin start-domain
-
Change to the webspace_dir/webspace/application directory.
-
Run the ant install-gfv2.xml script to regenerate and redeploy the Web Space Server WAR files.
ant -f install-gfv2.xml
-
Restart the GlassFish server.
cd <glassfish_dir>/bin
./asadmin start-domain
- © 2010, Oracle Corporation and/or its affiliates
