Document Library Data Migration
Document Library Data Migration is a new feature added with Sun GlassFish Web Space Server 10.0 Update 5. You get this feature by default, as you install Web Space Server 10.0 Update 5 from the Update Tool. For the instructions to install updates from the Update Tool, see Installing Updates from the Update Tool.
By default, Web Space Server stores Document Library data in File System, which is not a standard repository. Generally, Java Content Repository (JCR) is preferred in a production environment. Web Space Server 10.0 Update 5 offers the Document Library Data Migration, which makes it possible to migrate Document Library data from File System to JCR and conversely.
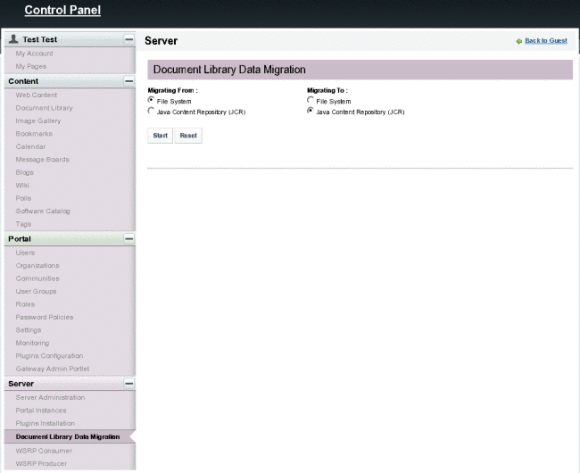
You can access the Document Library Data Migration feature from the Control Panel.
Figure 6–1 The Document Library Data Migration Feature

 To Start Document Library Data Migration
After installing Web Space Server 10.0 Update 5 perform the following instructions.
-
Navigate to Control Panel from the Welcome menu.
-
Select Document Library Data Migration under Server.
You can migrate data from File System to JCR or from JCR to File System. If you select File System under Migrating From then Java Content Repository (JCR) under Migrating To is selected automatically and the same is true with the order reversed. Since by default the Document Library data is stored in File System, the data needs to be migrated from File System to JCR.
-
After selecting File System under Migrating From (this is the default selection), click Start.
If there are no documents in the Document Library, it displays an error message. Make sure that you have uploaded some documents to Document Library, before clicking Start to start data migration.
The screen shows the list of Communities and Organizations, where each of them contain at least one folder in its Document Library. The list is organized by the Portal Instances configured, and displays the Company Id of each of the Portal instances. There is a progress bar associated with each Community or Organization that indicates the progress of data migration, after clicking the Continue button.
Figure 6–2 Starting Document Library Data migration

-
Click Continue for starting data migration.
You can click Cancel to cancel the data migration operation.
Figure 6–3 Migrating Document Library Data

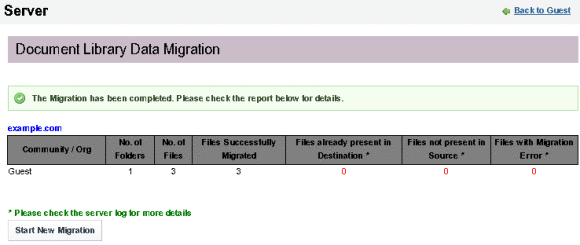
After the data migration is complete, a message is displayed. You can see from which Community or Organization the data is migrated, and the number of folders and files migrated.
-
Click Start New Migration to start a new data migration.
- © 2010, Oracle Corporation and/or its affiliates
